Privilege Management
Privilege management begins with discovering and consolidating endpoints along with installed applications and enforcing a smooth privilege elevation workflow for the users once their admin privileges are revoked.
Step 1: Onboarding Endpoints
To start managing privileges on endpoints, you need to add all the required endpoints to the database. Currently, Securden can help you manage privileges on Windows endpoints and servers along with Mac and Linux devices.
Navigate to the Computers section in the web-interface to complete this step.
Adding Windows Domain Joined Devices
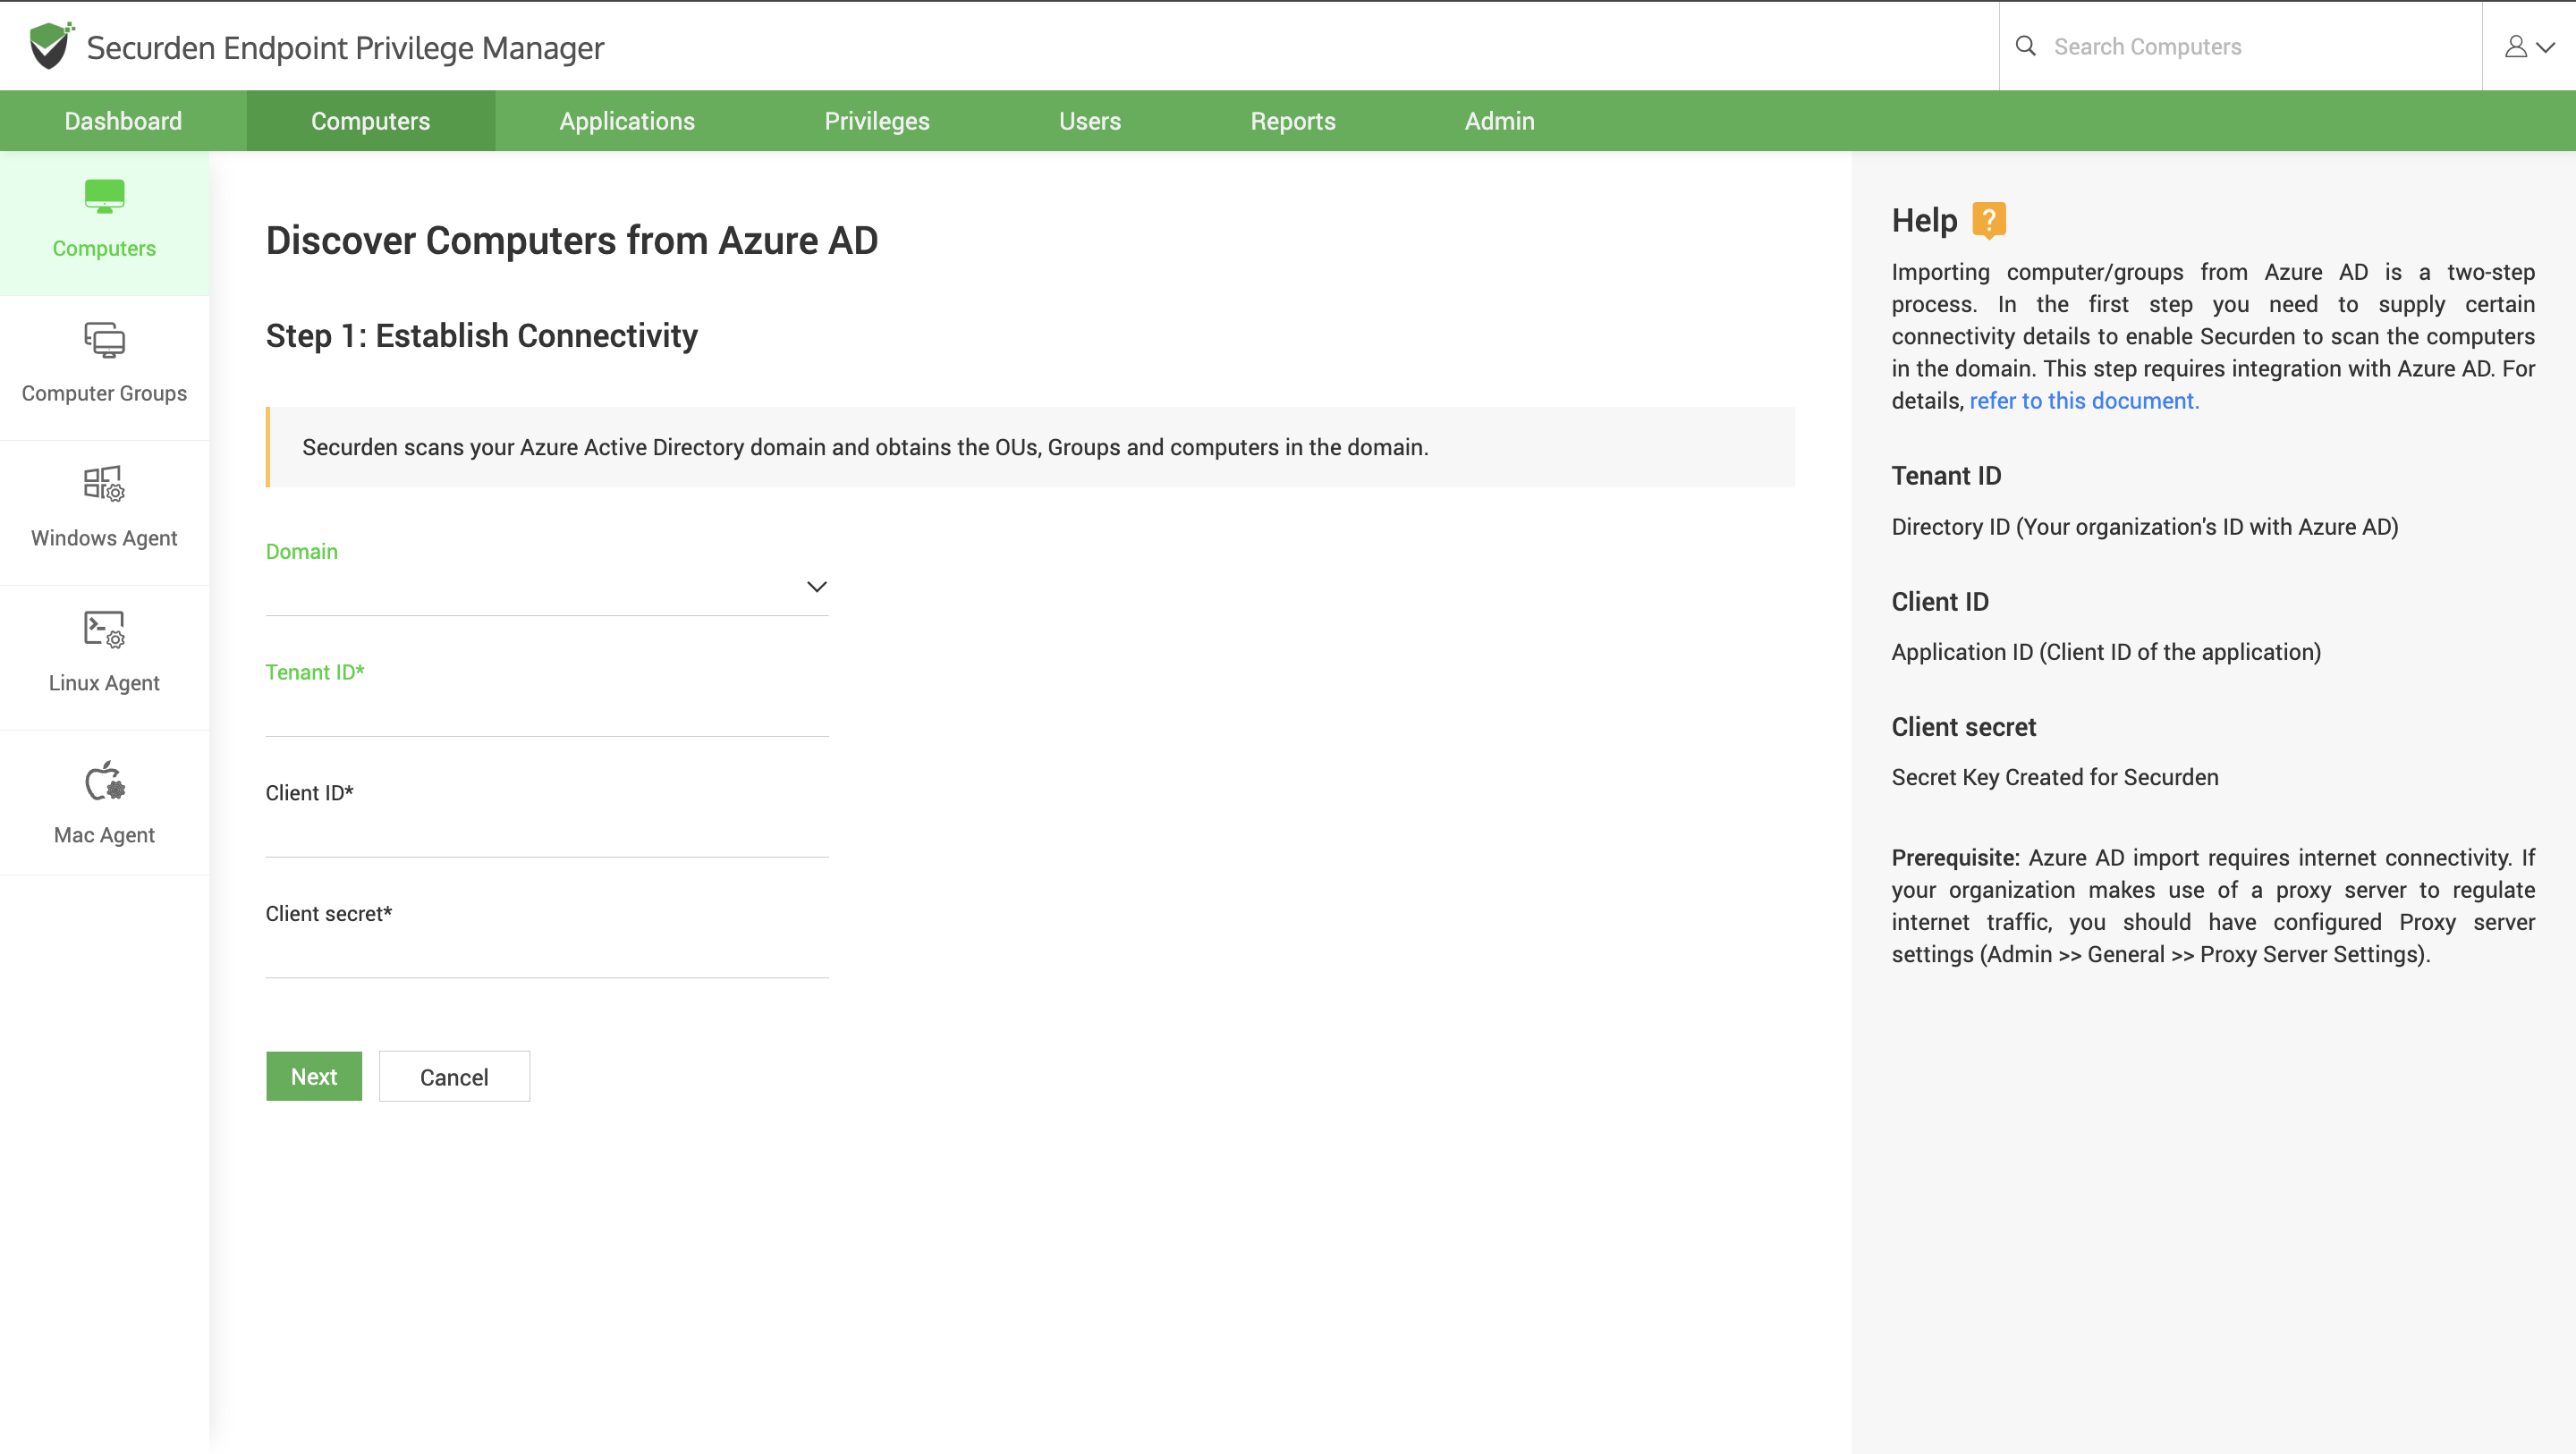
You can onboard your Windows devices from the Active Directory domain or from Entra ID domain (Entra ID (Azure AD)). Securden readily integrates with Azure and Active Directory domains to import the required domain joined computers and computer groups to the EPM database.
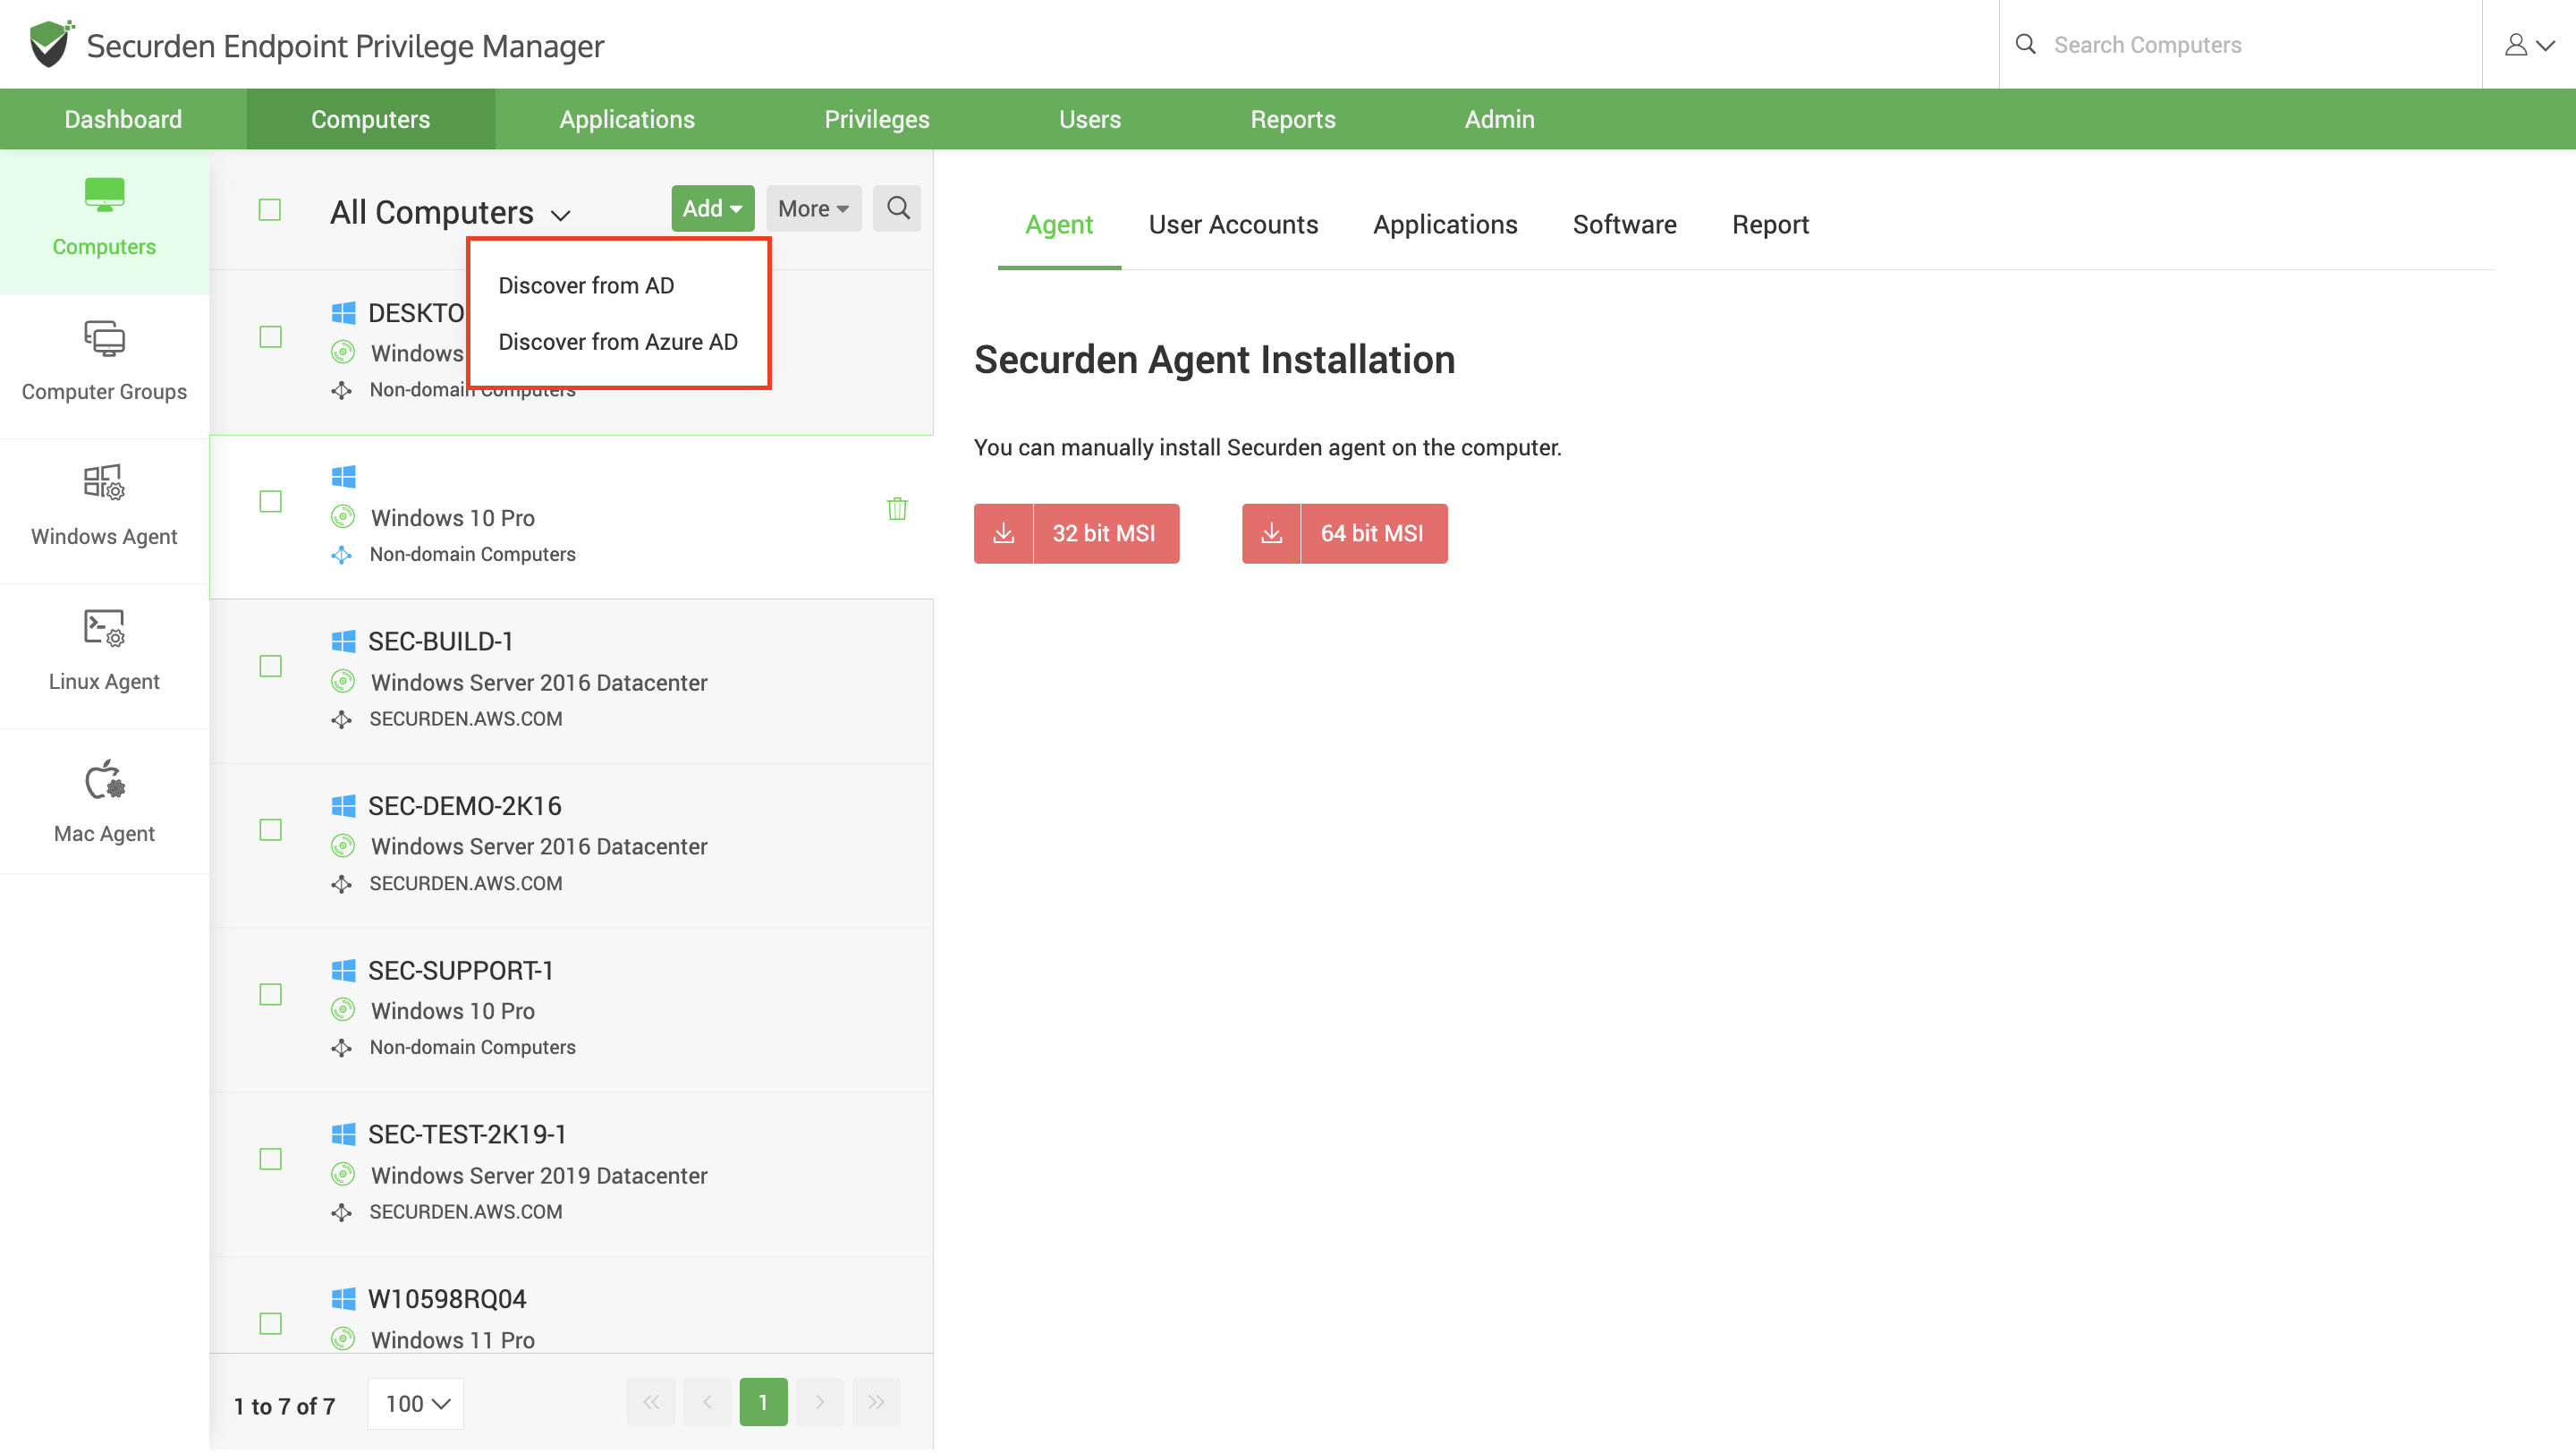
This device discovery process can be executed at any point in time.
Managing Hybrid AD (Azure + AD) Environments
While managing hybrid environments, the devices are often registered to the AD and synchronized with Entra ID (Azure). While onboarding endpoints from hybrid environments, importing through Azure (Entra ID) integration is preferred and enough.
Privilege management scenarios on AD domain devices will automatically be handled seamlessly.
Adding Windows - Standalone Devices
To onboard standalone devices, you need to straight away install the agents manually on the required devices. The agents are programmed to contact the central server automatically once installed. The device will automatically be onboarded once the contact between the agent and server is established.
Adding Mac and Linux Devices
You need to manually deploy the agent on devices running Mac and Linux endpoints to onboard them to the database. Once the agents are installed, the device will automatically be onboarded, and its details stored in the central database.
The steps involved in deploying agents on endpoints are explained in the subsequent sections.
Create Computer Groups
You can discover computer groups from Entra ID (Azure AD) and Active Directory. The discovered computer groups are listed under Computer >> Computer Groups section.

Computer Groups can also be created manually by picking up any number of individuals computers already discovered.
Configure Periodic Sync of Endpoints and Servers
You can create a scheduled task to keep the computers in Securden in synchronization with those in the AD. Computers imported from specific OUs and Groups can be periodically synchronized. When computers get added to or removed from the OUs/Groups in AD, the changes get reflected here in Securden. Synchronization can be configured only at the Computer Groups level in Securden.
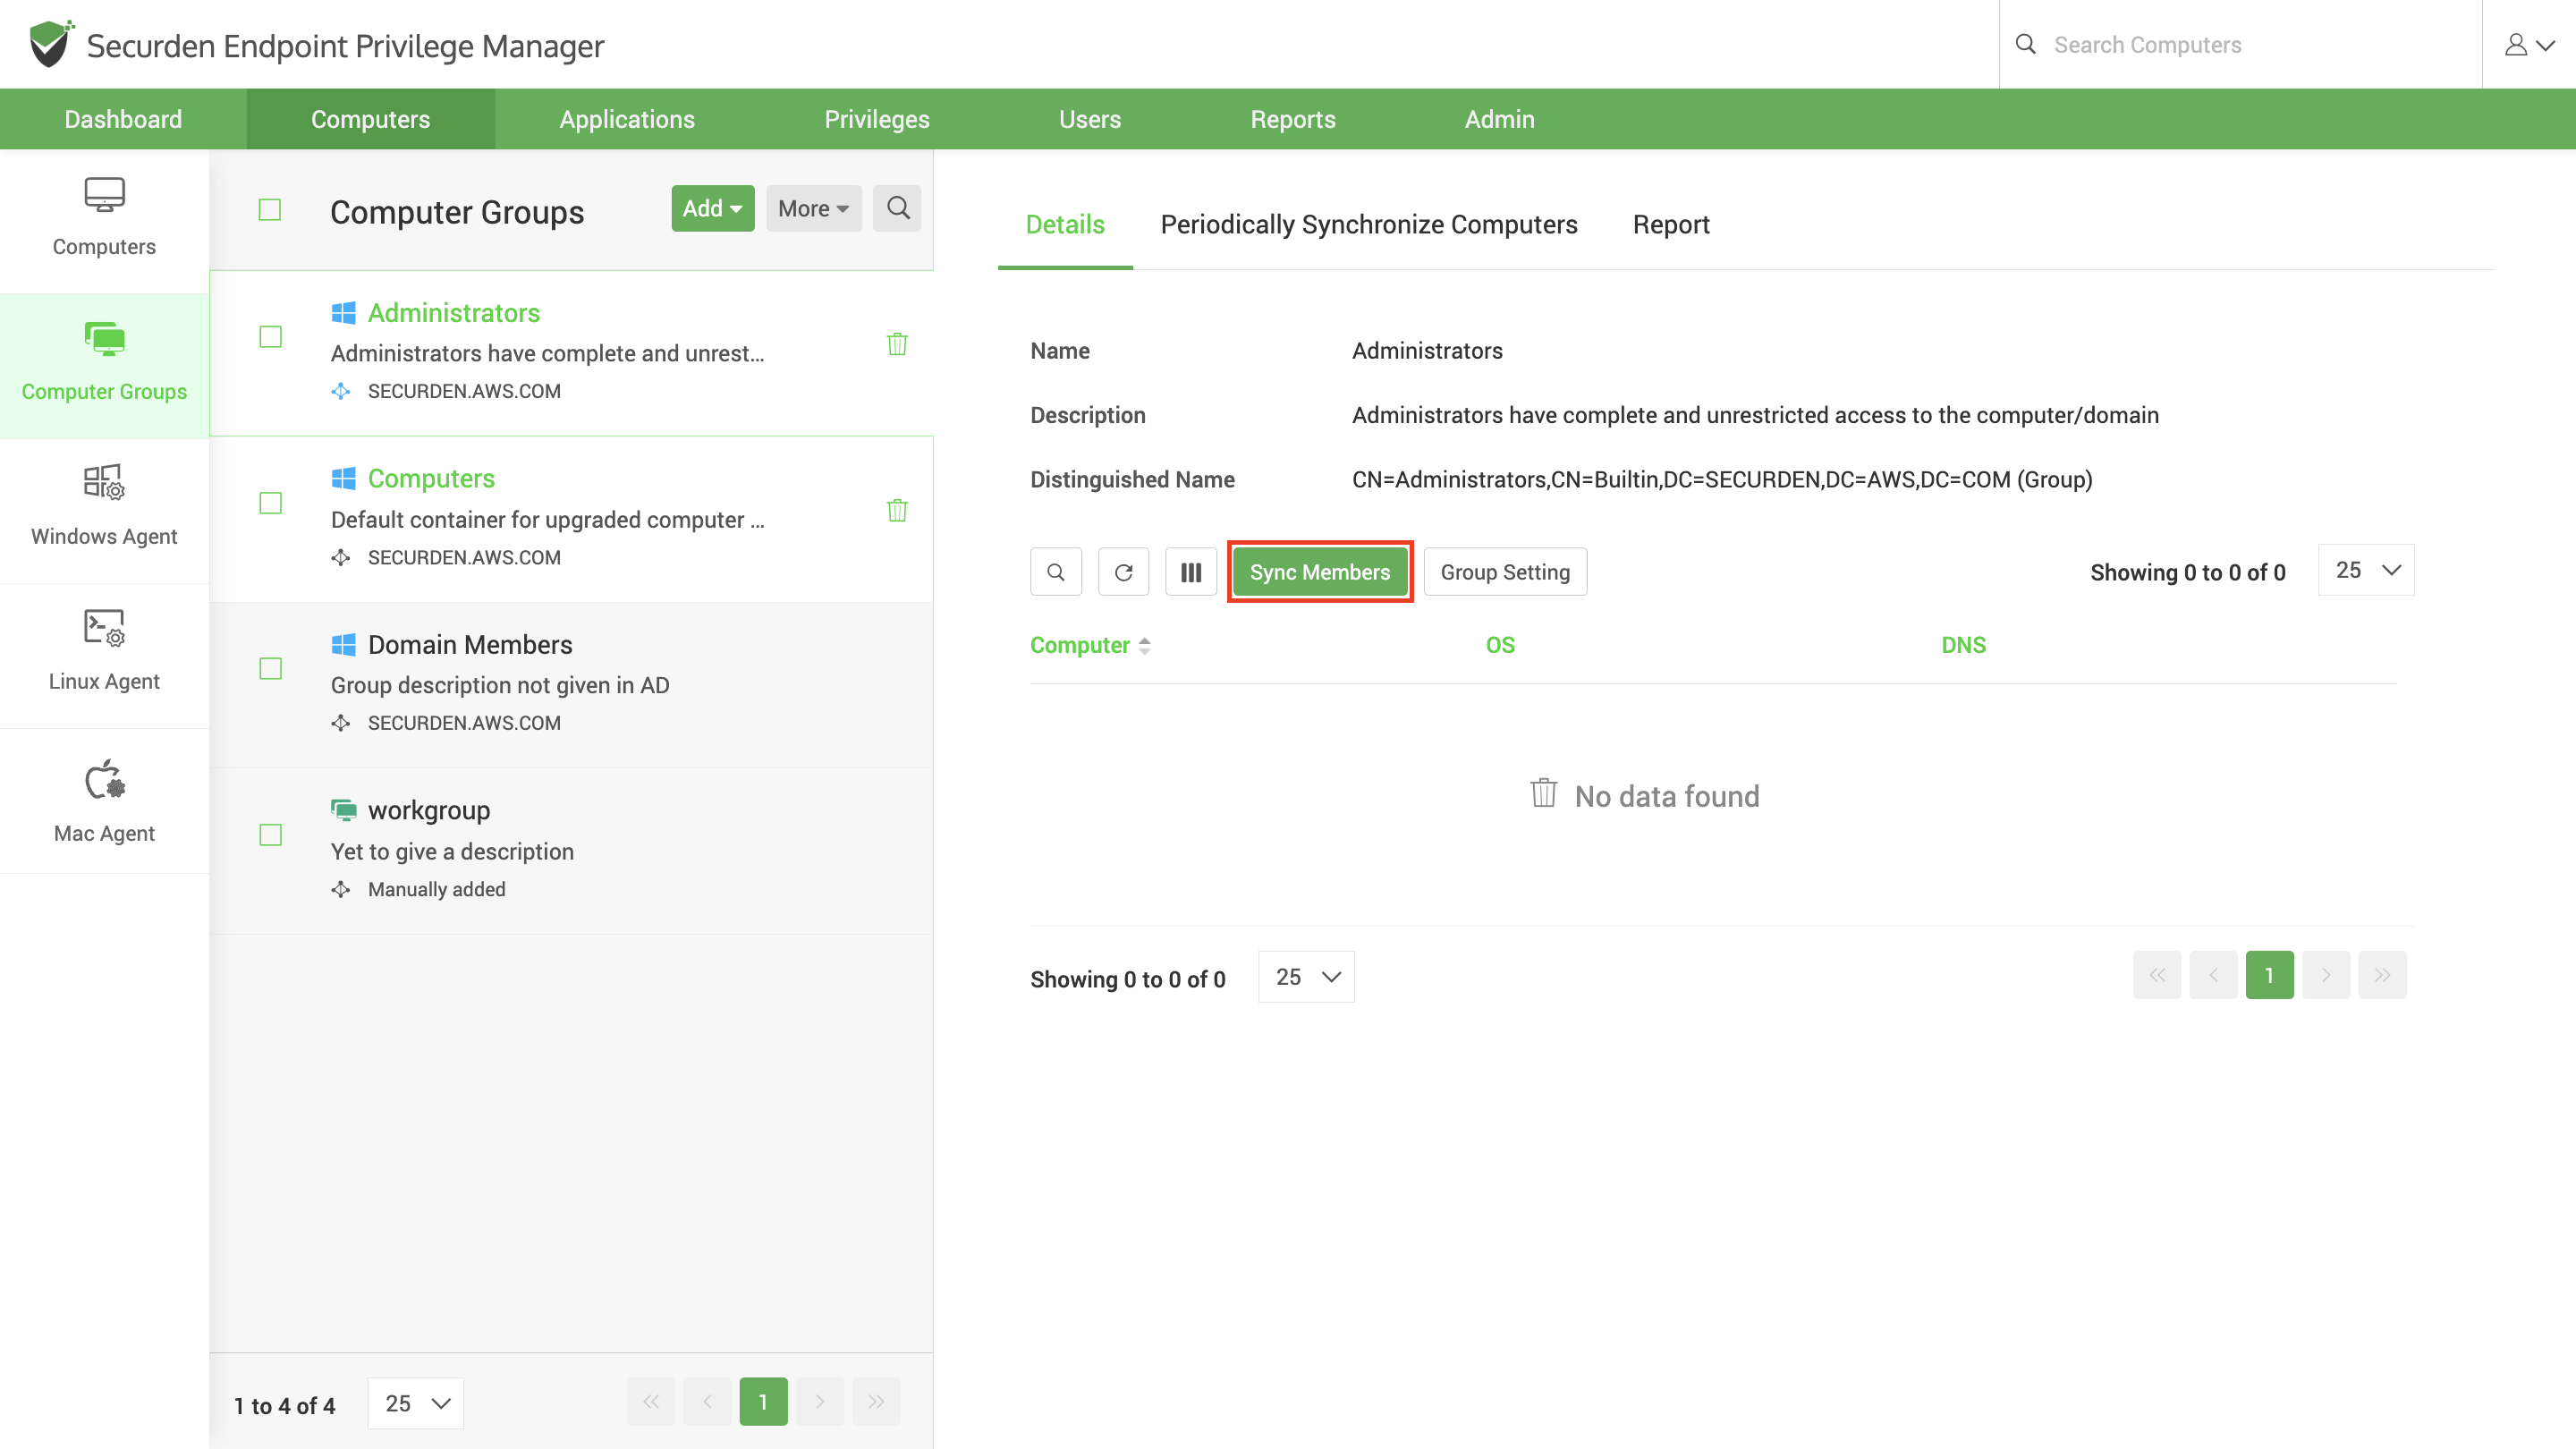
Navigate to Computer Groups >> Select the required group and in the RHS click Periodically Synchronize Computers and create the schedule.
Step 2: Deploying Agents
To carry out the privilege elevation task, you need to deploy Securden agents on servers and endpoints. The agent takes care of elevating applications, commands and processes for standard users for the pre-approved period.
Securden agents can be deployed in three ways:
-
Download and install the agent manually on the required devices.
-
Deploy in bulk on many endpoints/servers using group policy objects and tools like SCCM, and PDQ.
-
Directly from the GUI on each endpoint/server.
Download and Install the Securden Agent Directly
A) Deploying the agent on Windows devices
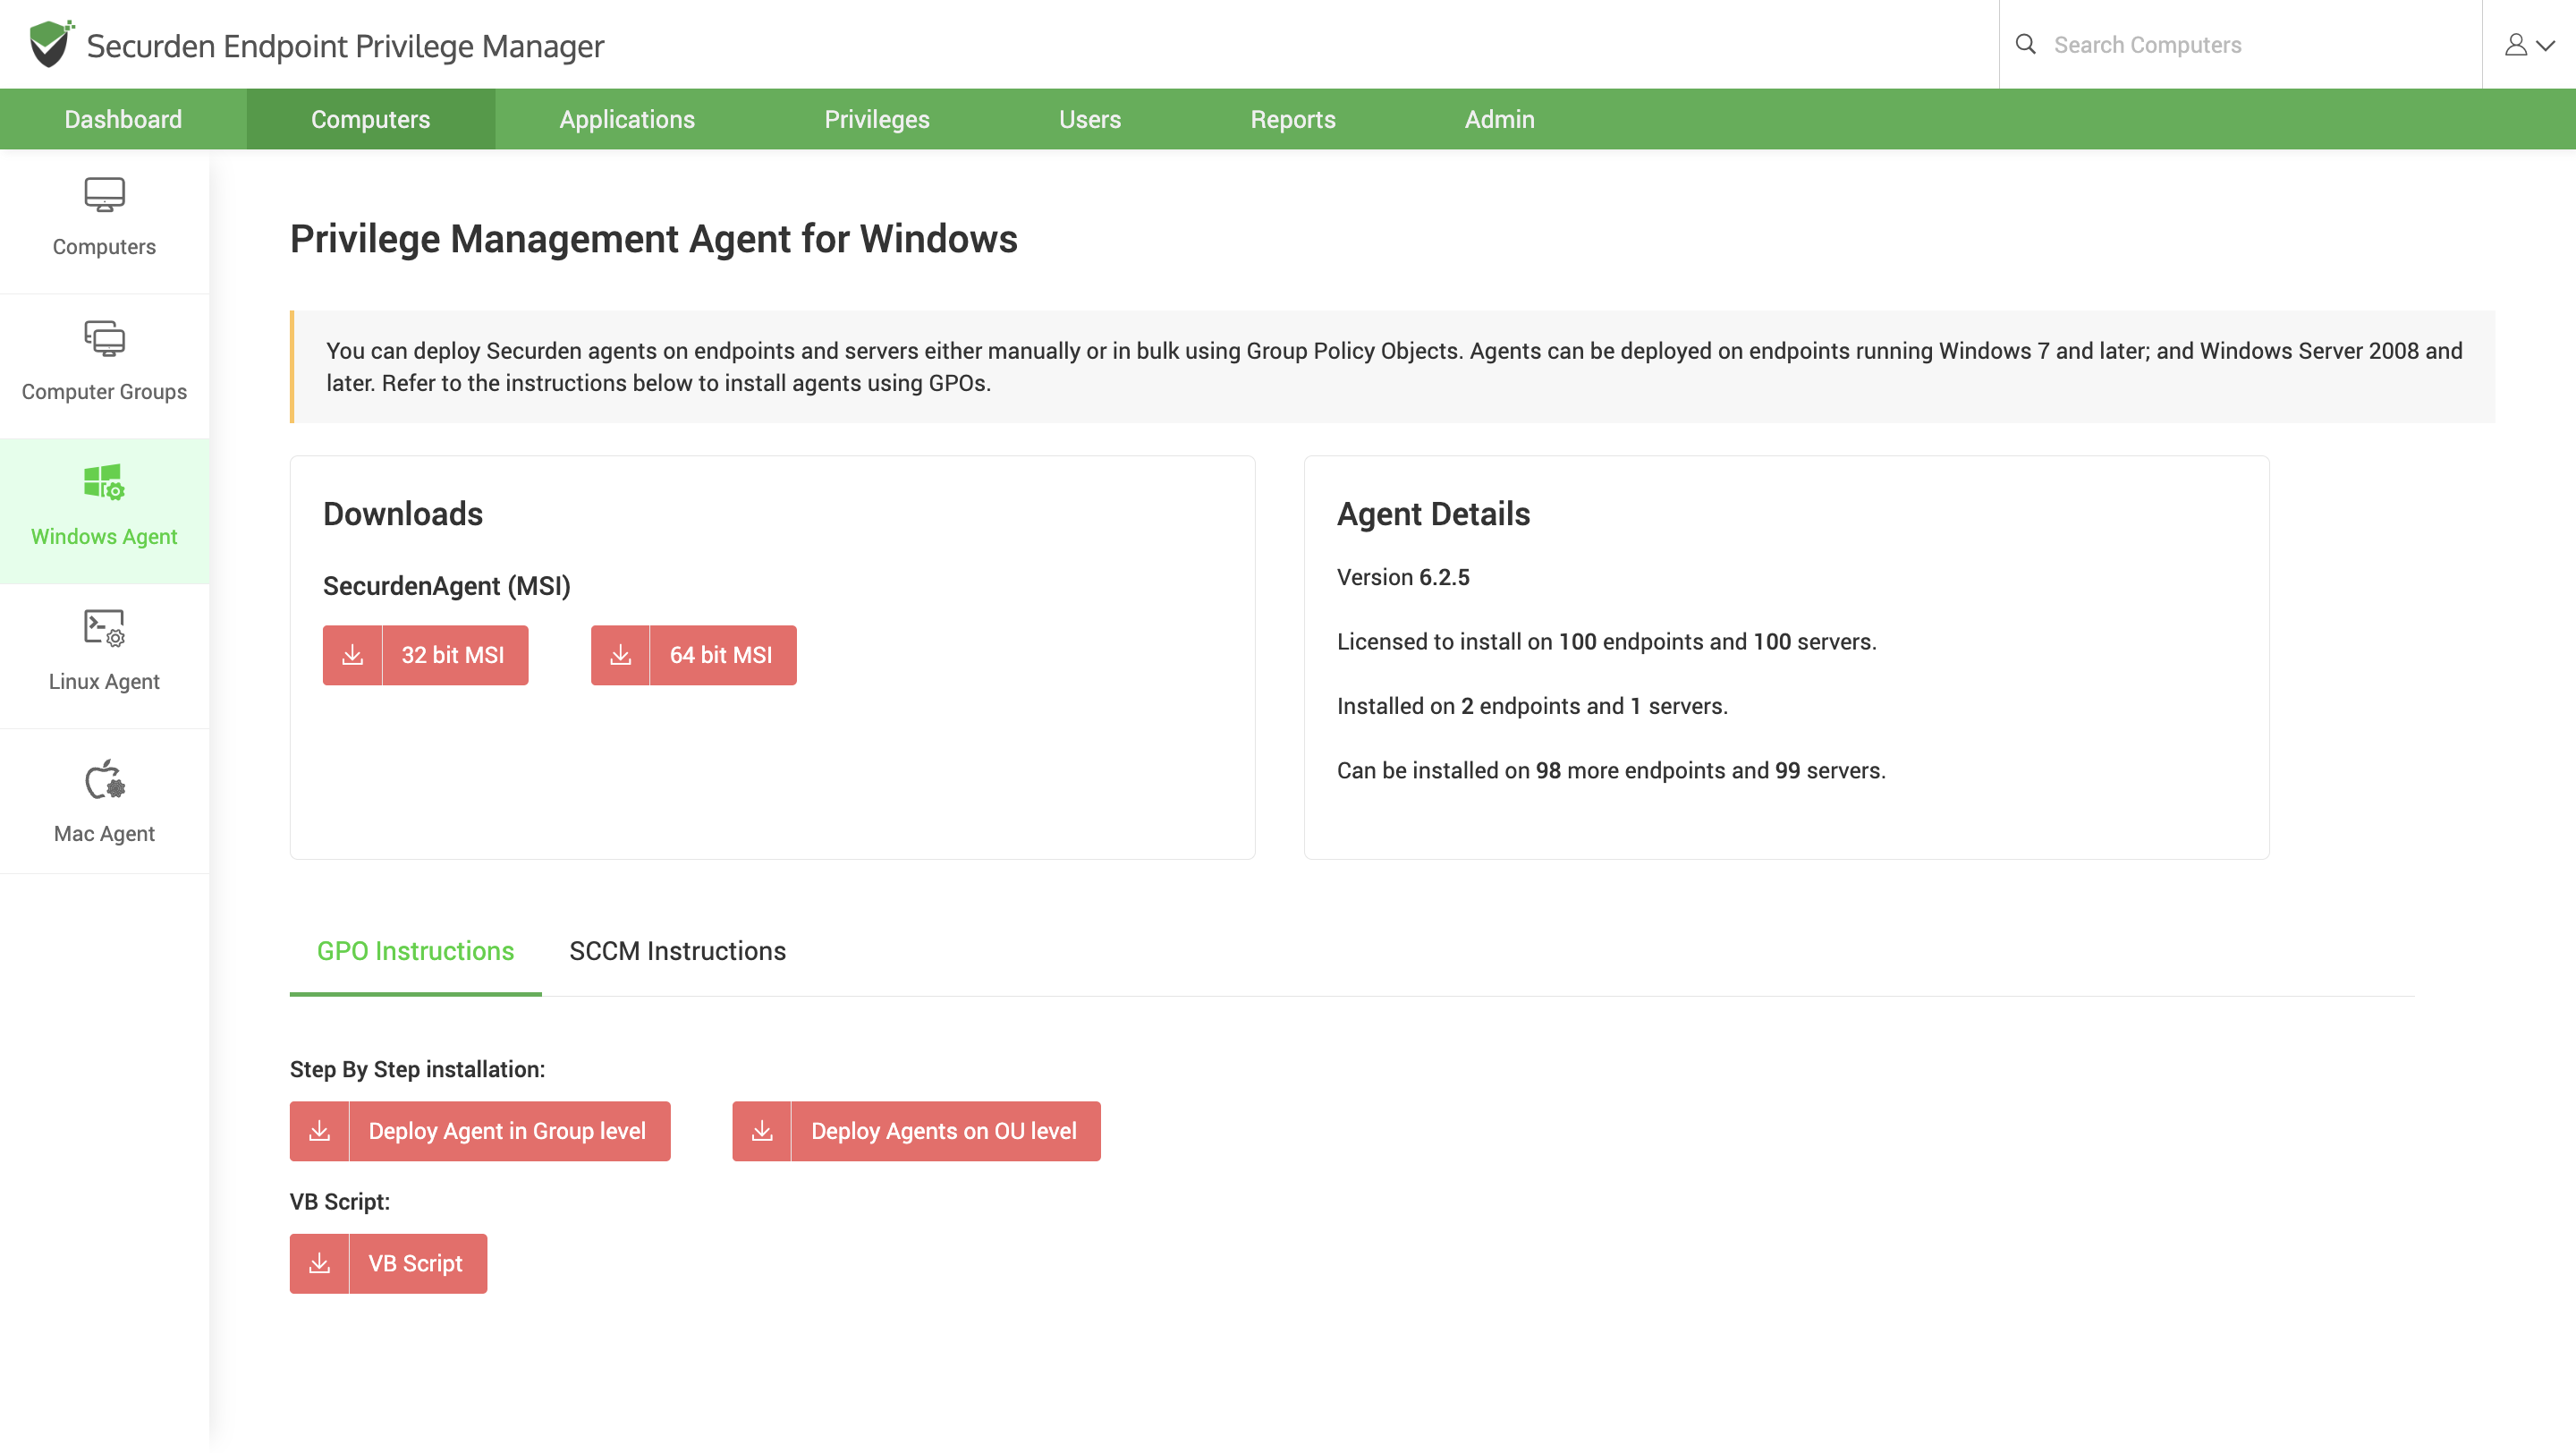
The most straightforward way to deploy the agent is to manually download the setup file and install the agent on the required devices directly. This method is recommended for initial testing and for smaller deployments only.
Navigate to Computers tab and go to Windows Agent page. Under the Downloads section, you can find the setup file which you can download and install on the device.
Once installed, the agent will try to communicate with the central server. Hence, network connectivity between the endpoint and the central server should be stable.
B) Deploying the agents on Linux and Mac devices
To deploy the Securden Agent on your Linux and Mac devices, you need to manually download and install the agent on the required endpoints.
Note
Bulk deployment and remote deployment methods are not supported for Mac and Linux devices yet.
The agent files for Linux (Zip File) and Mac (pkg file) are available in the Computers >> Linux Agent and Computers >> Mac Agent sections respectively. The installation steps are explained in the corresponding sections in the interface.
Bulk Deployment through Group Policy Objects (Windows)
You can also deploy agents in bulk through Group Policy Objects. Navigate to Computers >> Securden Agents section in the GUI. Detailed instructions to install through GPO are given in the GUI itself.
Deploying from the GUI (Domain Joined Windows Devices)
The list of endpoints and servers discovered by Securden is displayed in the GUI. Navigate to Computers and select the required computer. In the RHS, select Agent.
You will find the link for agent installation in that section. You can also track the agent installation status from here. In addition, whenever required, you can reinstall the agents.
Step 3: Testing On-demand Privilege Elevation
Once the agents are deployed on the endpoints, you can test the request based on-demand privilege elevation mechanism on endpoints with a standard user account (without local admin privileges).
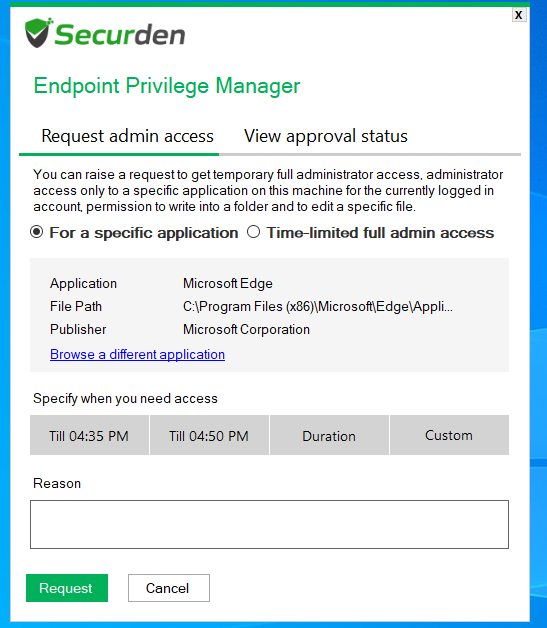
A) Requesting Time Limited Full Administrator Access
a. After logging in using a standard user account on a device, open the Securden Agent’s tray icon and click on Request Admin Privileges.
![]()
b. Specify the start and proposed end time of the admin session along with the reason before submitting the request.
B) Requesting Privilege Elevation for Specific Applications
a. On Windows devices, right click on any application and select Run as Administrator (or) Run with Securden Privilege.
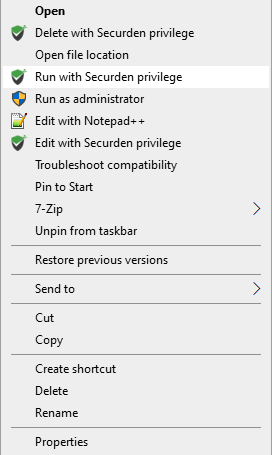
b. Specify the start and end time of elevated access along with the reason for privilege elevation before submitting the request.
C) Managing the Requests from the Web Interface
-
Go to the Admin section in the web interface and navigate to Privilege Elevation Requests. Here, you can view and manage the requests placed on the endpoints.
-
You can evaluate the requests and choose whether to approve or reject them. You also have the option to accept the request on the user’s terms or define a new time duration for privilege elevation.
Note
We recommend removing administrator rights across the organization only after creating control policies to avoid any sort of chaos.
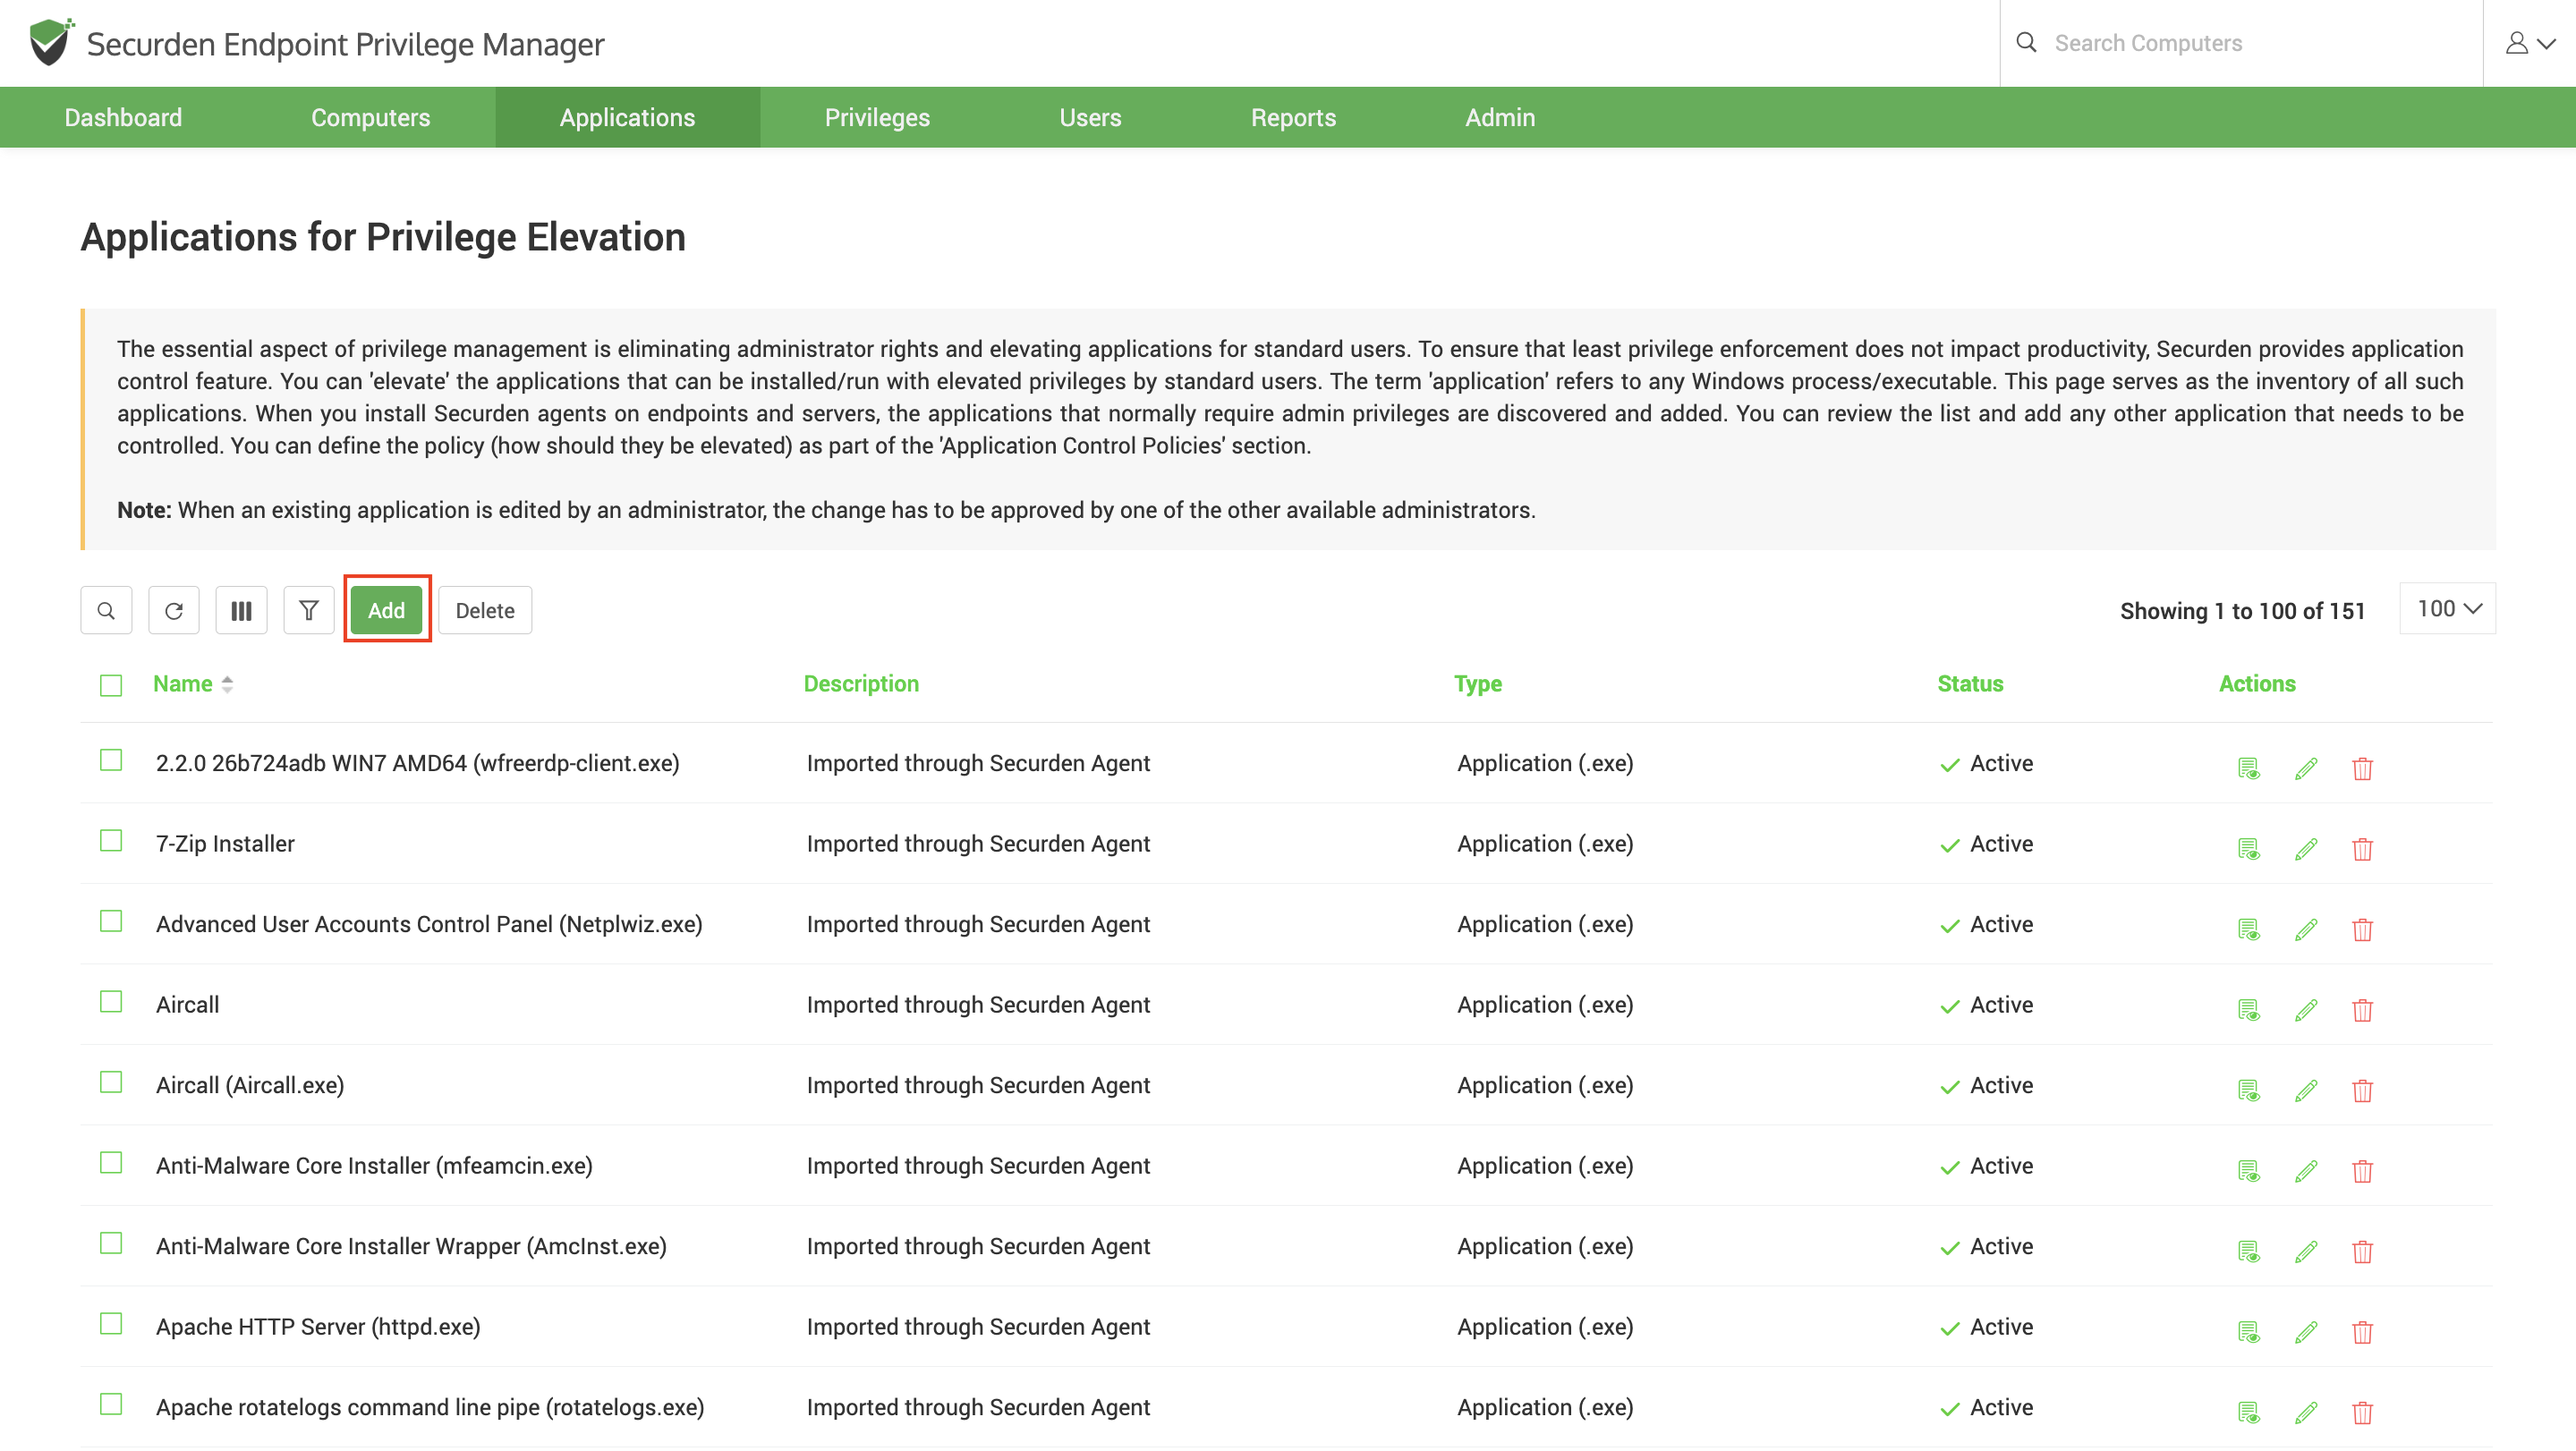
Step 4: Application Control - Add Applications (Windows Devices)
The essential aspect of privilege management is eliminating the administrator rights without impact productivity, individual applications need to be elevated on a need basis.
The application control provision of Securden EPM helps with elevating specific applications for users. The term 'application' refers to any Windows process/executable/script.
Default Applications and Application Groups
Securden comes preloaded with a set of applications tagged as default applications.
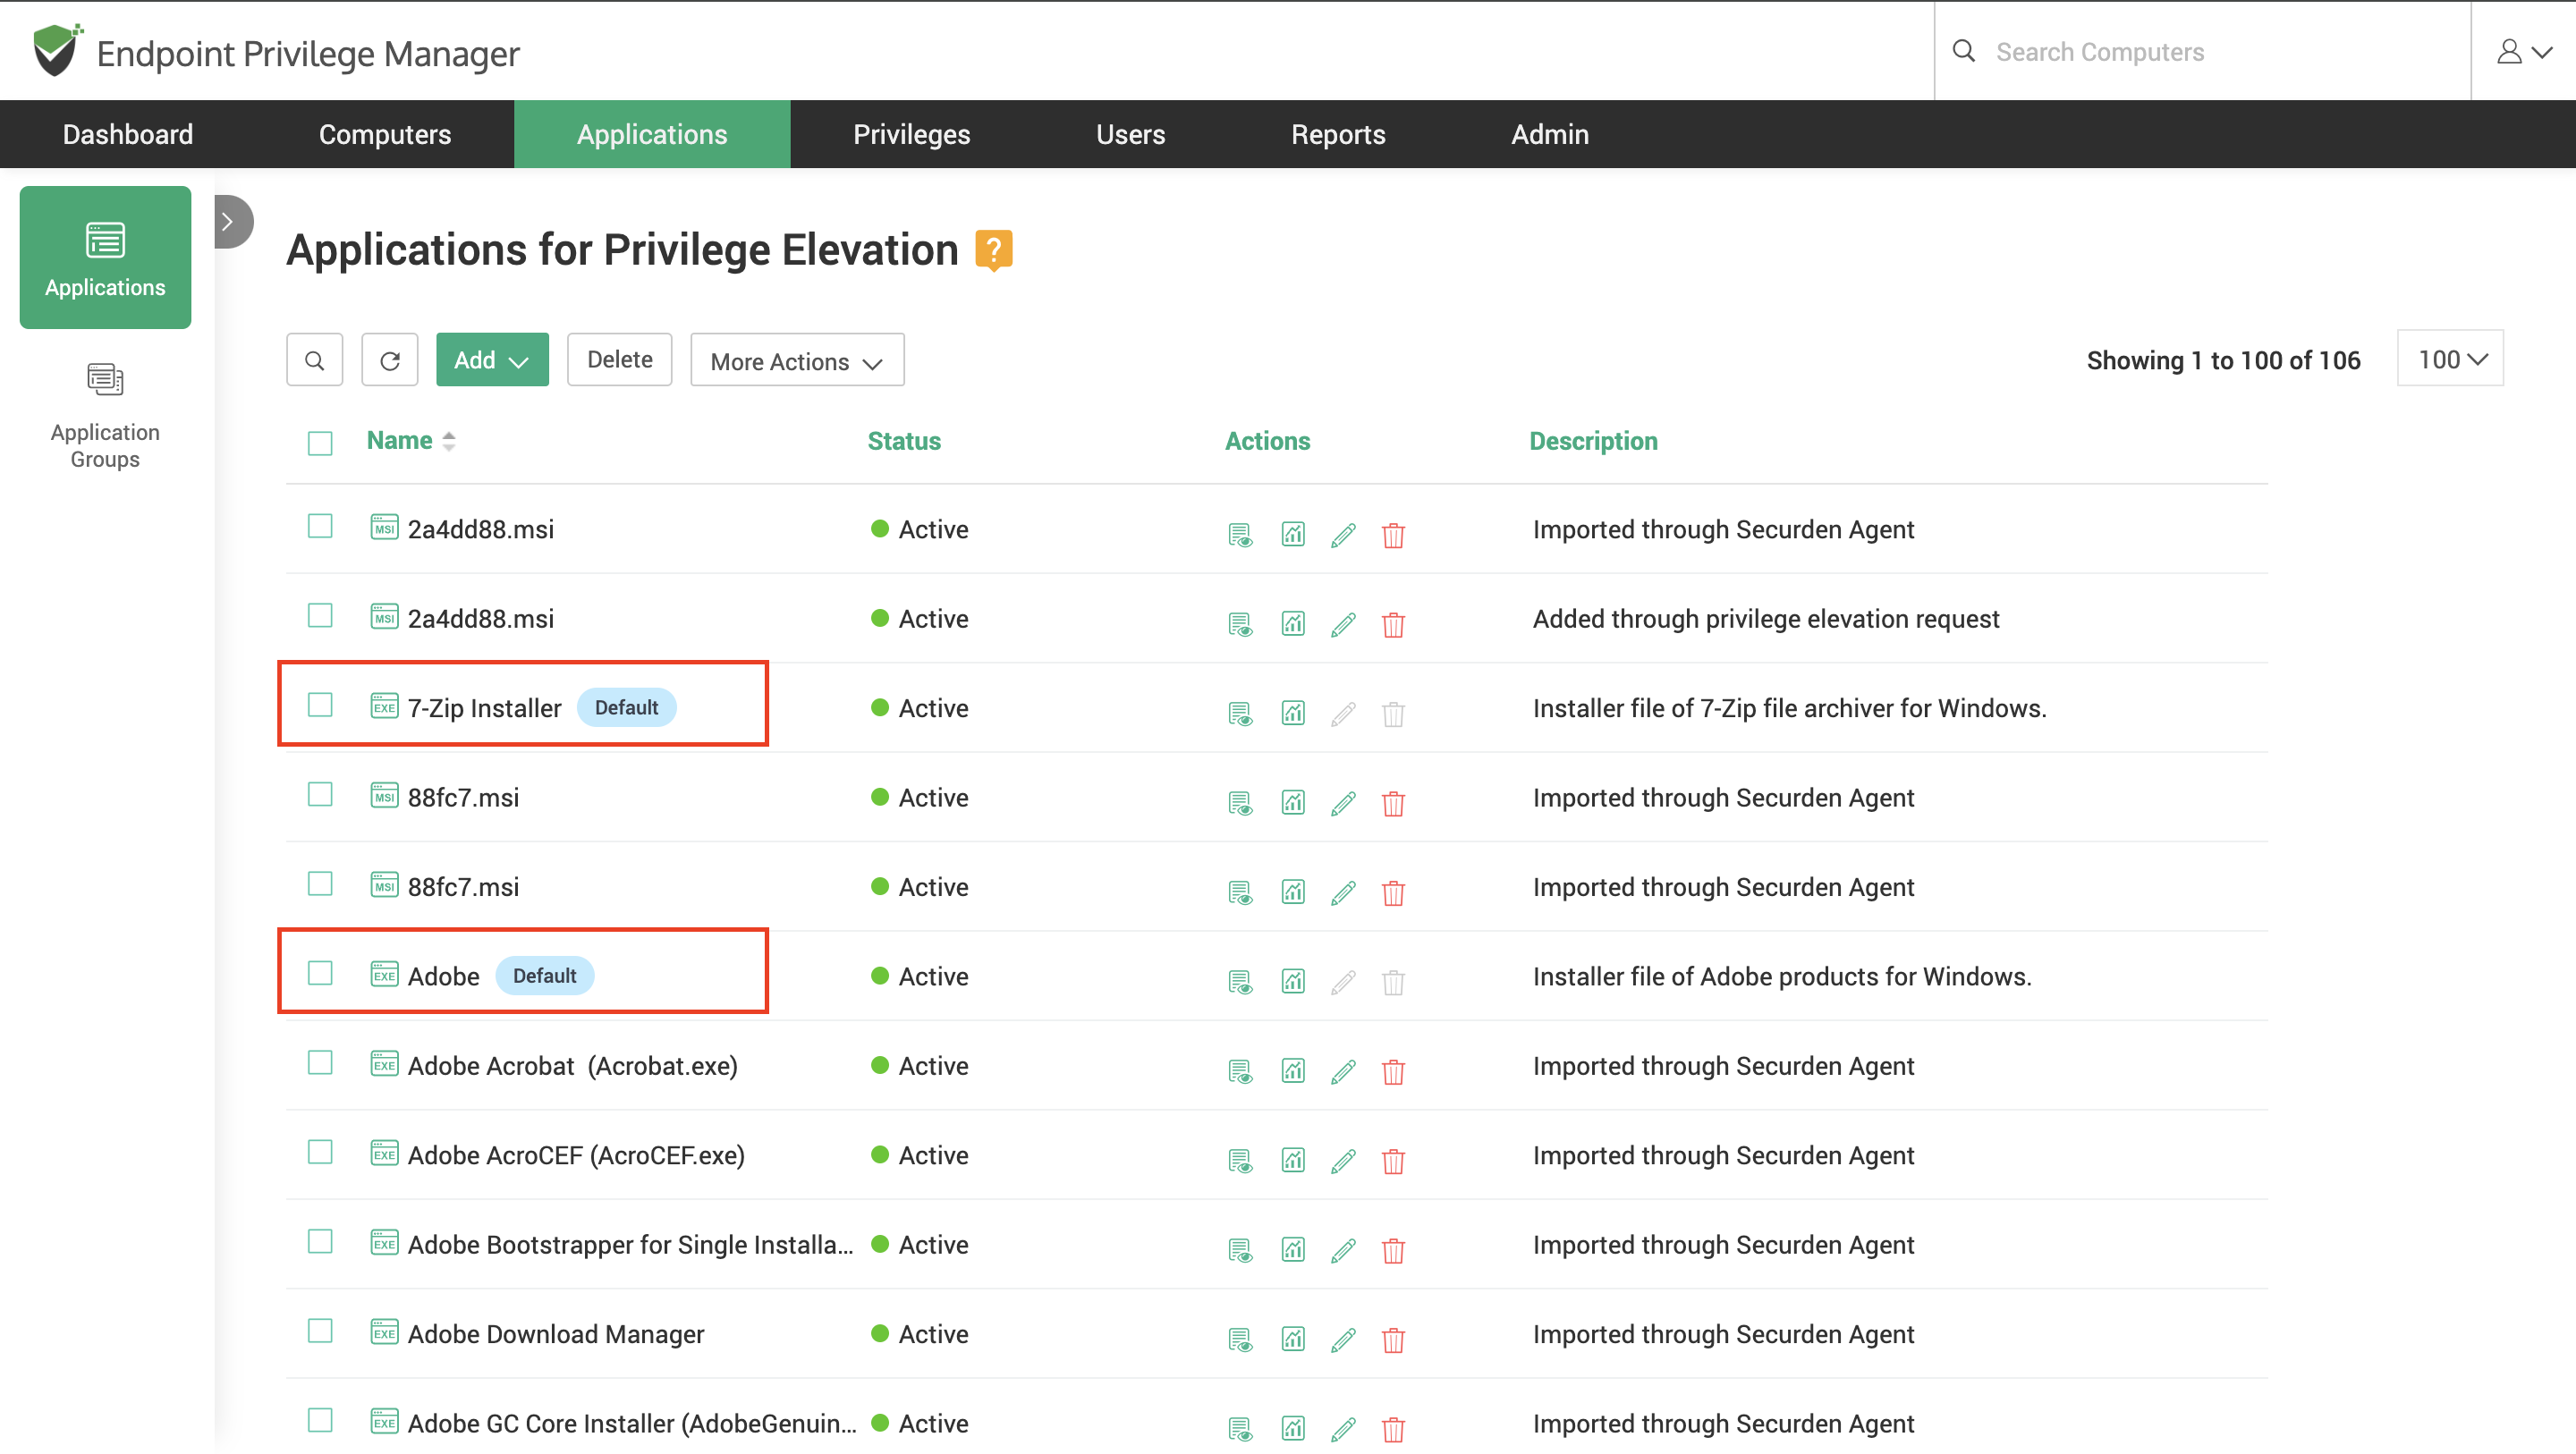
These default applications are also added to default groups for better organization. If your organization is using any of these applications, you can simply use these applications in policy creation and continue with privilege elevation.
There are two ways in which new applications can be added to the repository:
1) Discovery and automatic addition of applications
2) Manual addition of applications
Automatic Discovery of Applications
When you install Securden agents on endpoints and servers, the agents automatically start discovering the applications running at that time on the computers and add them to the applications inventory. However, the discovery process is not instant; applications are discovered over time.
Typically, it takes about a couple of weeks to complete the process. This is because the agent discovers and adds only the applications and processes that require elevated privileges and not all processes/applications unnecessarily.
It is possible to run the agent in learning mode as long as desired. In learning mode, the agent will monitor the user activity and track the applications and processes being run with elevated privileges. This data can be used to craft control policies in the future. The agent mode can be switched between Learning and Operating modes at any time.
Adding Applications Manually
While automatic discovery takes time, if you want to instantly add applications, you can manually add them. To add applications, navigate to the Applications section in the GUI.
Basically, you need to specify the type of application (exe/msi/msc etc.) and the attributes that would help Securden identify the application. The attributes could be digital signatures, actual file path, original file name and hash value of files. You may provide any number of attributes as desired.
Adding Control Panel Items using CLSID
In Windows devices, control panel items (.cpl files) can only be used by users with admin privileges, and they are easily identified by their CLSID. To add control panel items to Securden for privilege management, you need to add it manually by selecting CLSID from the application type dropdown.
Creating Application Groups
You can create application groups in Securden and add relevant applications to the groups, provided they are already available in the Securden application repository.

You can use these groups to form application control policies either by creating a new one or adding the required application group to an existing policy.
Step 5: Define Application Control Policies
After adding applications, you need to define policies for a seamless, on-demand elevation of applications for standard users. This is basically specifying the list of applications that are to be elevated for specific users on specific computers using specific privileges.
Additionally, you can specify the level of privilege with which the elevation takes place. The options are
-
Local Admin Privileges – App gets elevated with all permissions associated with local administrators.
-
Domain Admin Privileges - App gets elevated with all permissions associated with domain administrators.
-
System Privileges - App gets elevated with system privileges.
-
Allowlist – The users can only use the applications included in the allowlist. Access to all other applications will be denied.
-
Blocklist – The users cannot open the applications included in the blocklist. All other applications can be run according to their user privilege.
Note
Application allowlisting and blocklisting does not elevate the application privilege.
For example, you can create a policy elevating the Netplwiz application with ‘Local Admin’ rights and associate it with computers in 'Department A' for 'User X' and 'User group Y. 'Netplwiz will be elevated with local admin privileges for User X and all users of the group Y on the computers in Department A.
Application control policies created here are to be associated with the required computers and users or user groups. To add application control policies, navigate to Privileges >> Application Policies section in the GUI.
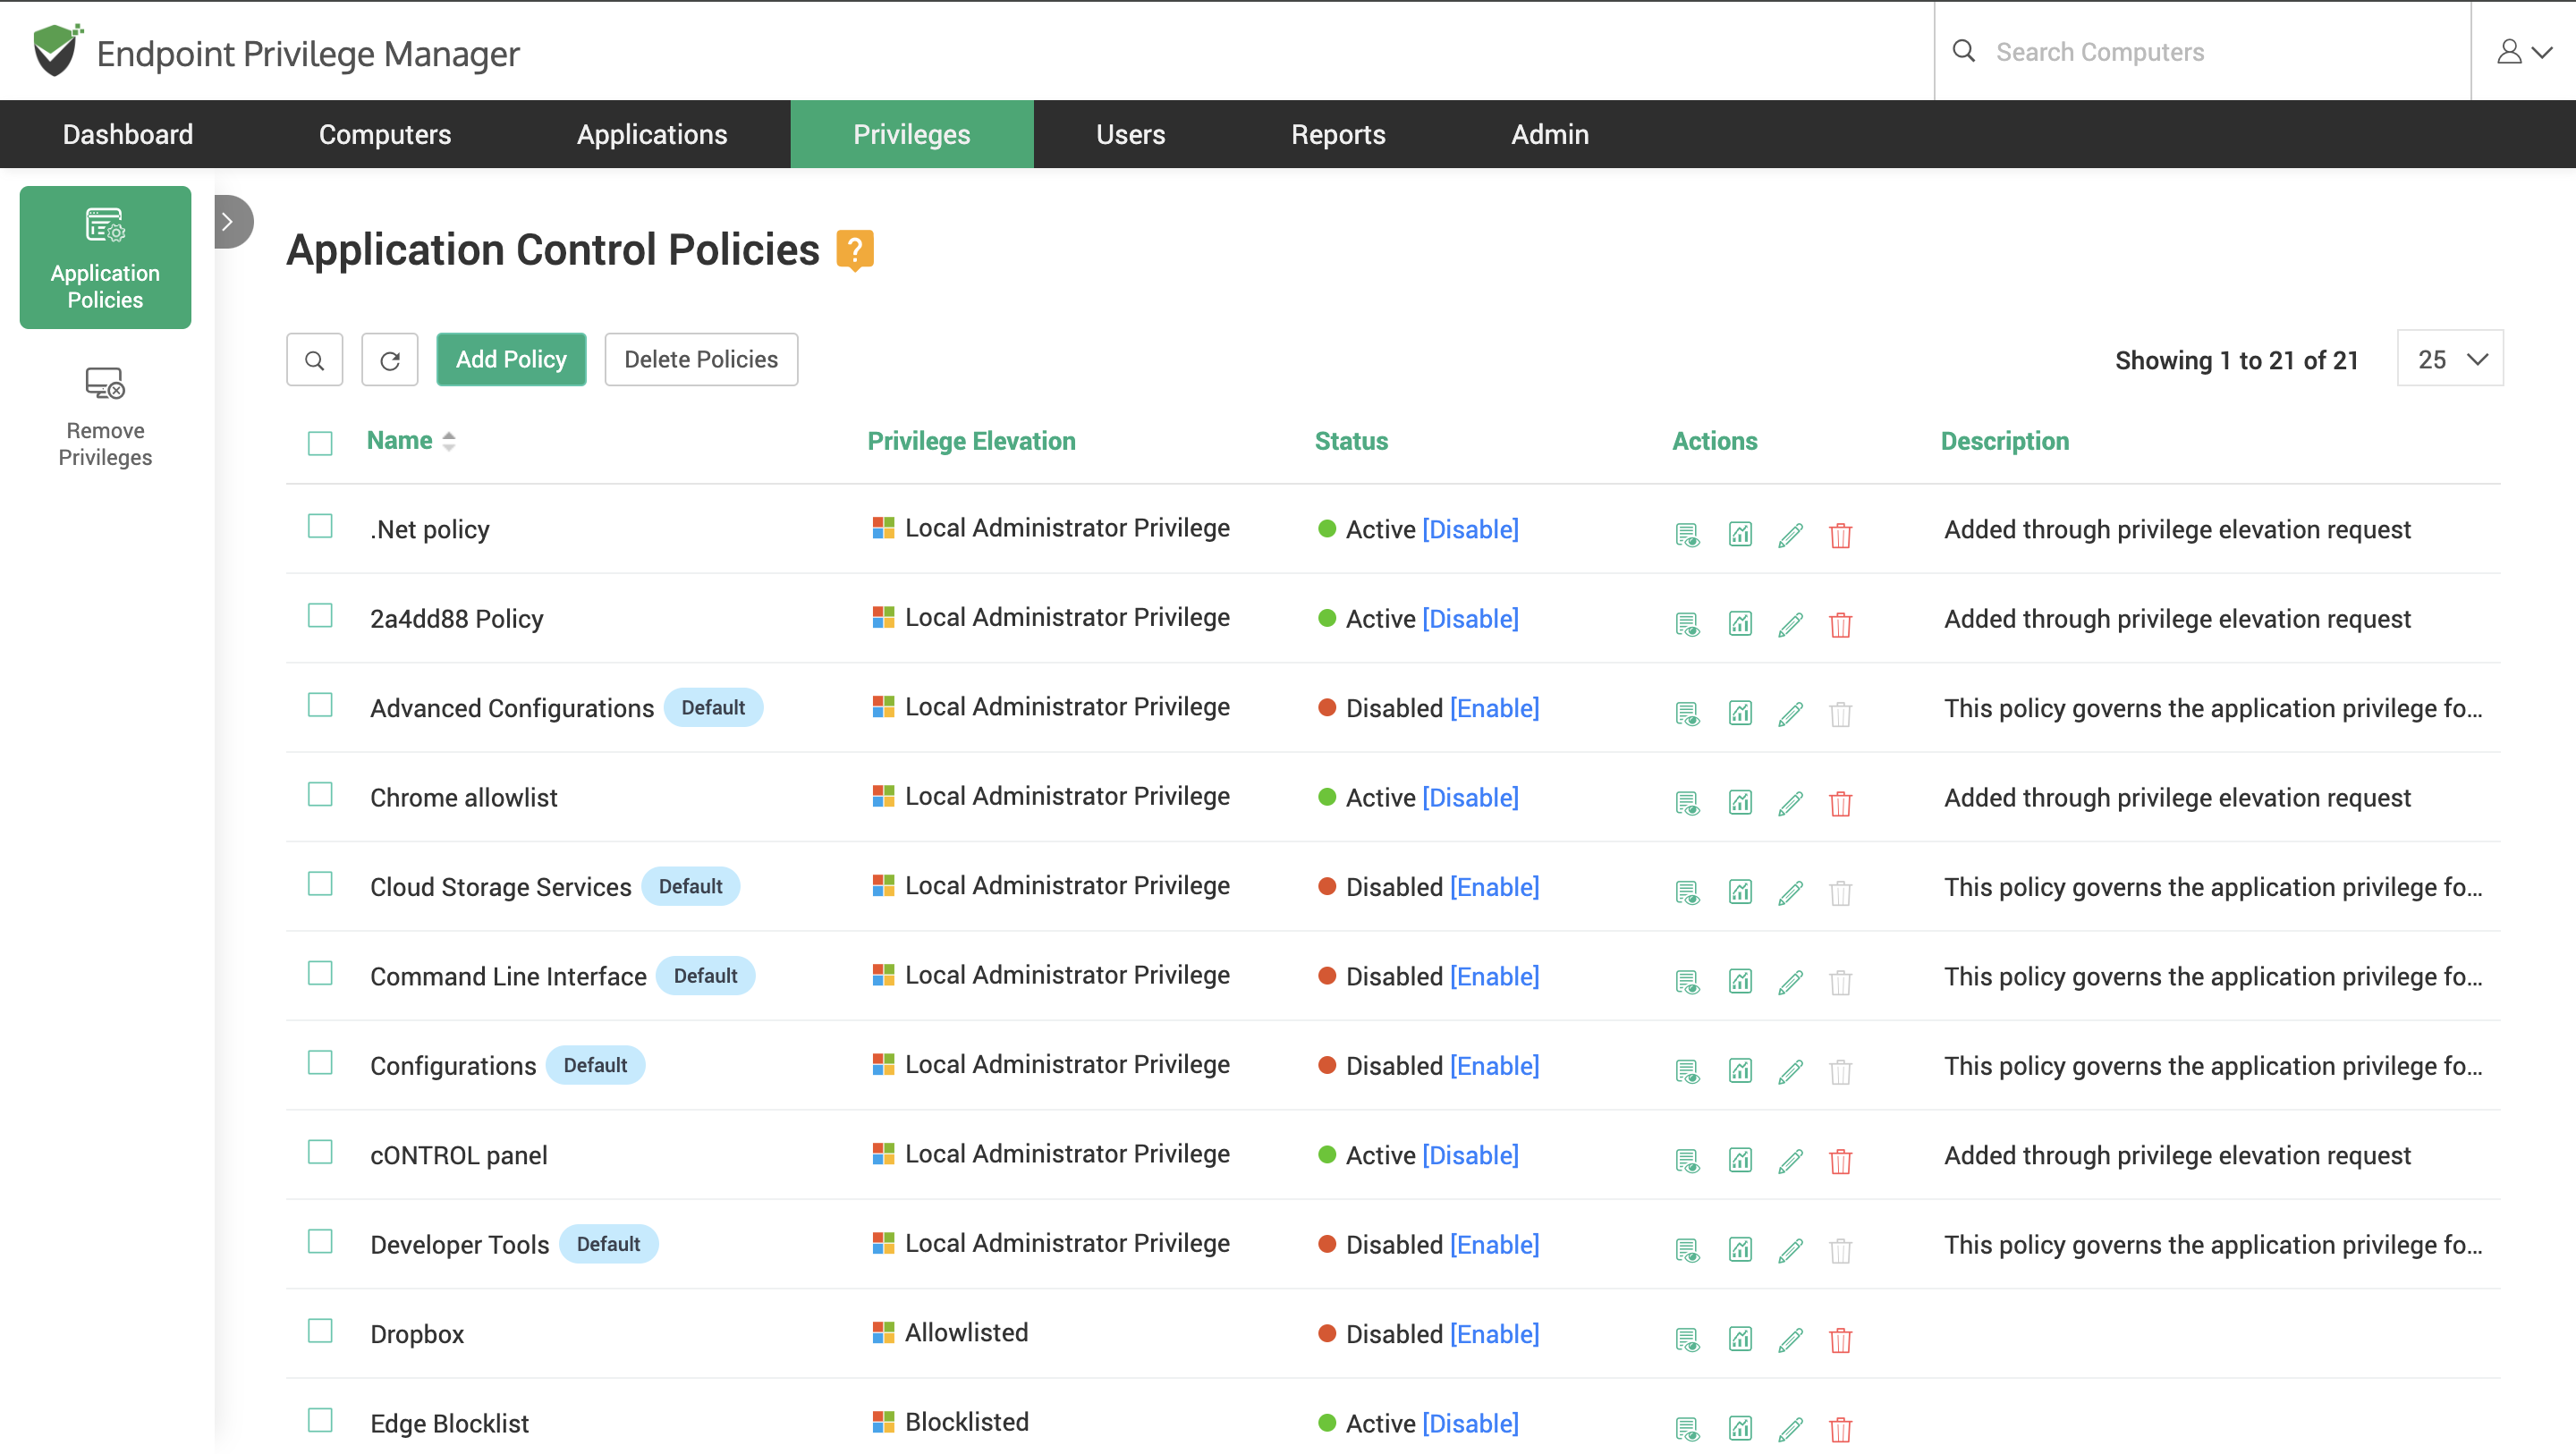
Note
When two application control policies are applicable for the same app, user, and endpoint, then the policy in effect will be based on the policy precedence rules explained in the help section of the interface. To view the precedence rules, navigate to Privileges >> Application Policies >> Add Policy and select the required option from the drop-down.
Important
For security reasons, the application control policy created by one administrator will have to be approved by any one of the other available administrators. Securden sends notifications to the approvers, who can review applications and approve/reject the request. Until the policy gets approval, it will not take effect.
Apart from application control policies that are used to manage application access and associated privileges, you can configure automatic approval policies and technician access policies.
Automatic Approval Policies
When users need to elevate applications that are not included in any control policy, they must place a request which must be approved/rejected by an authorized administrator/approver.
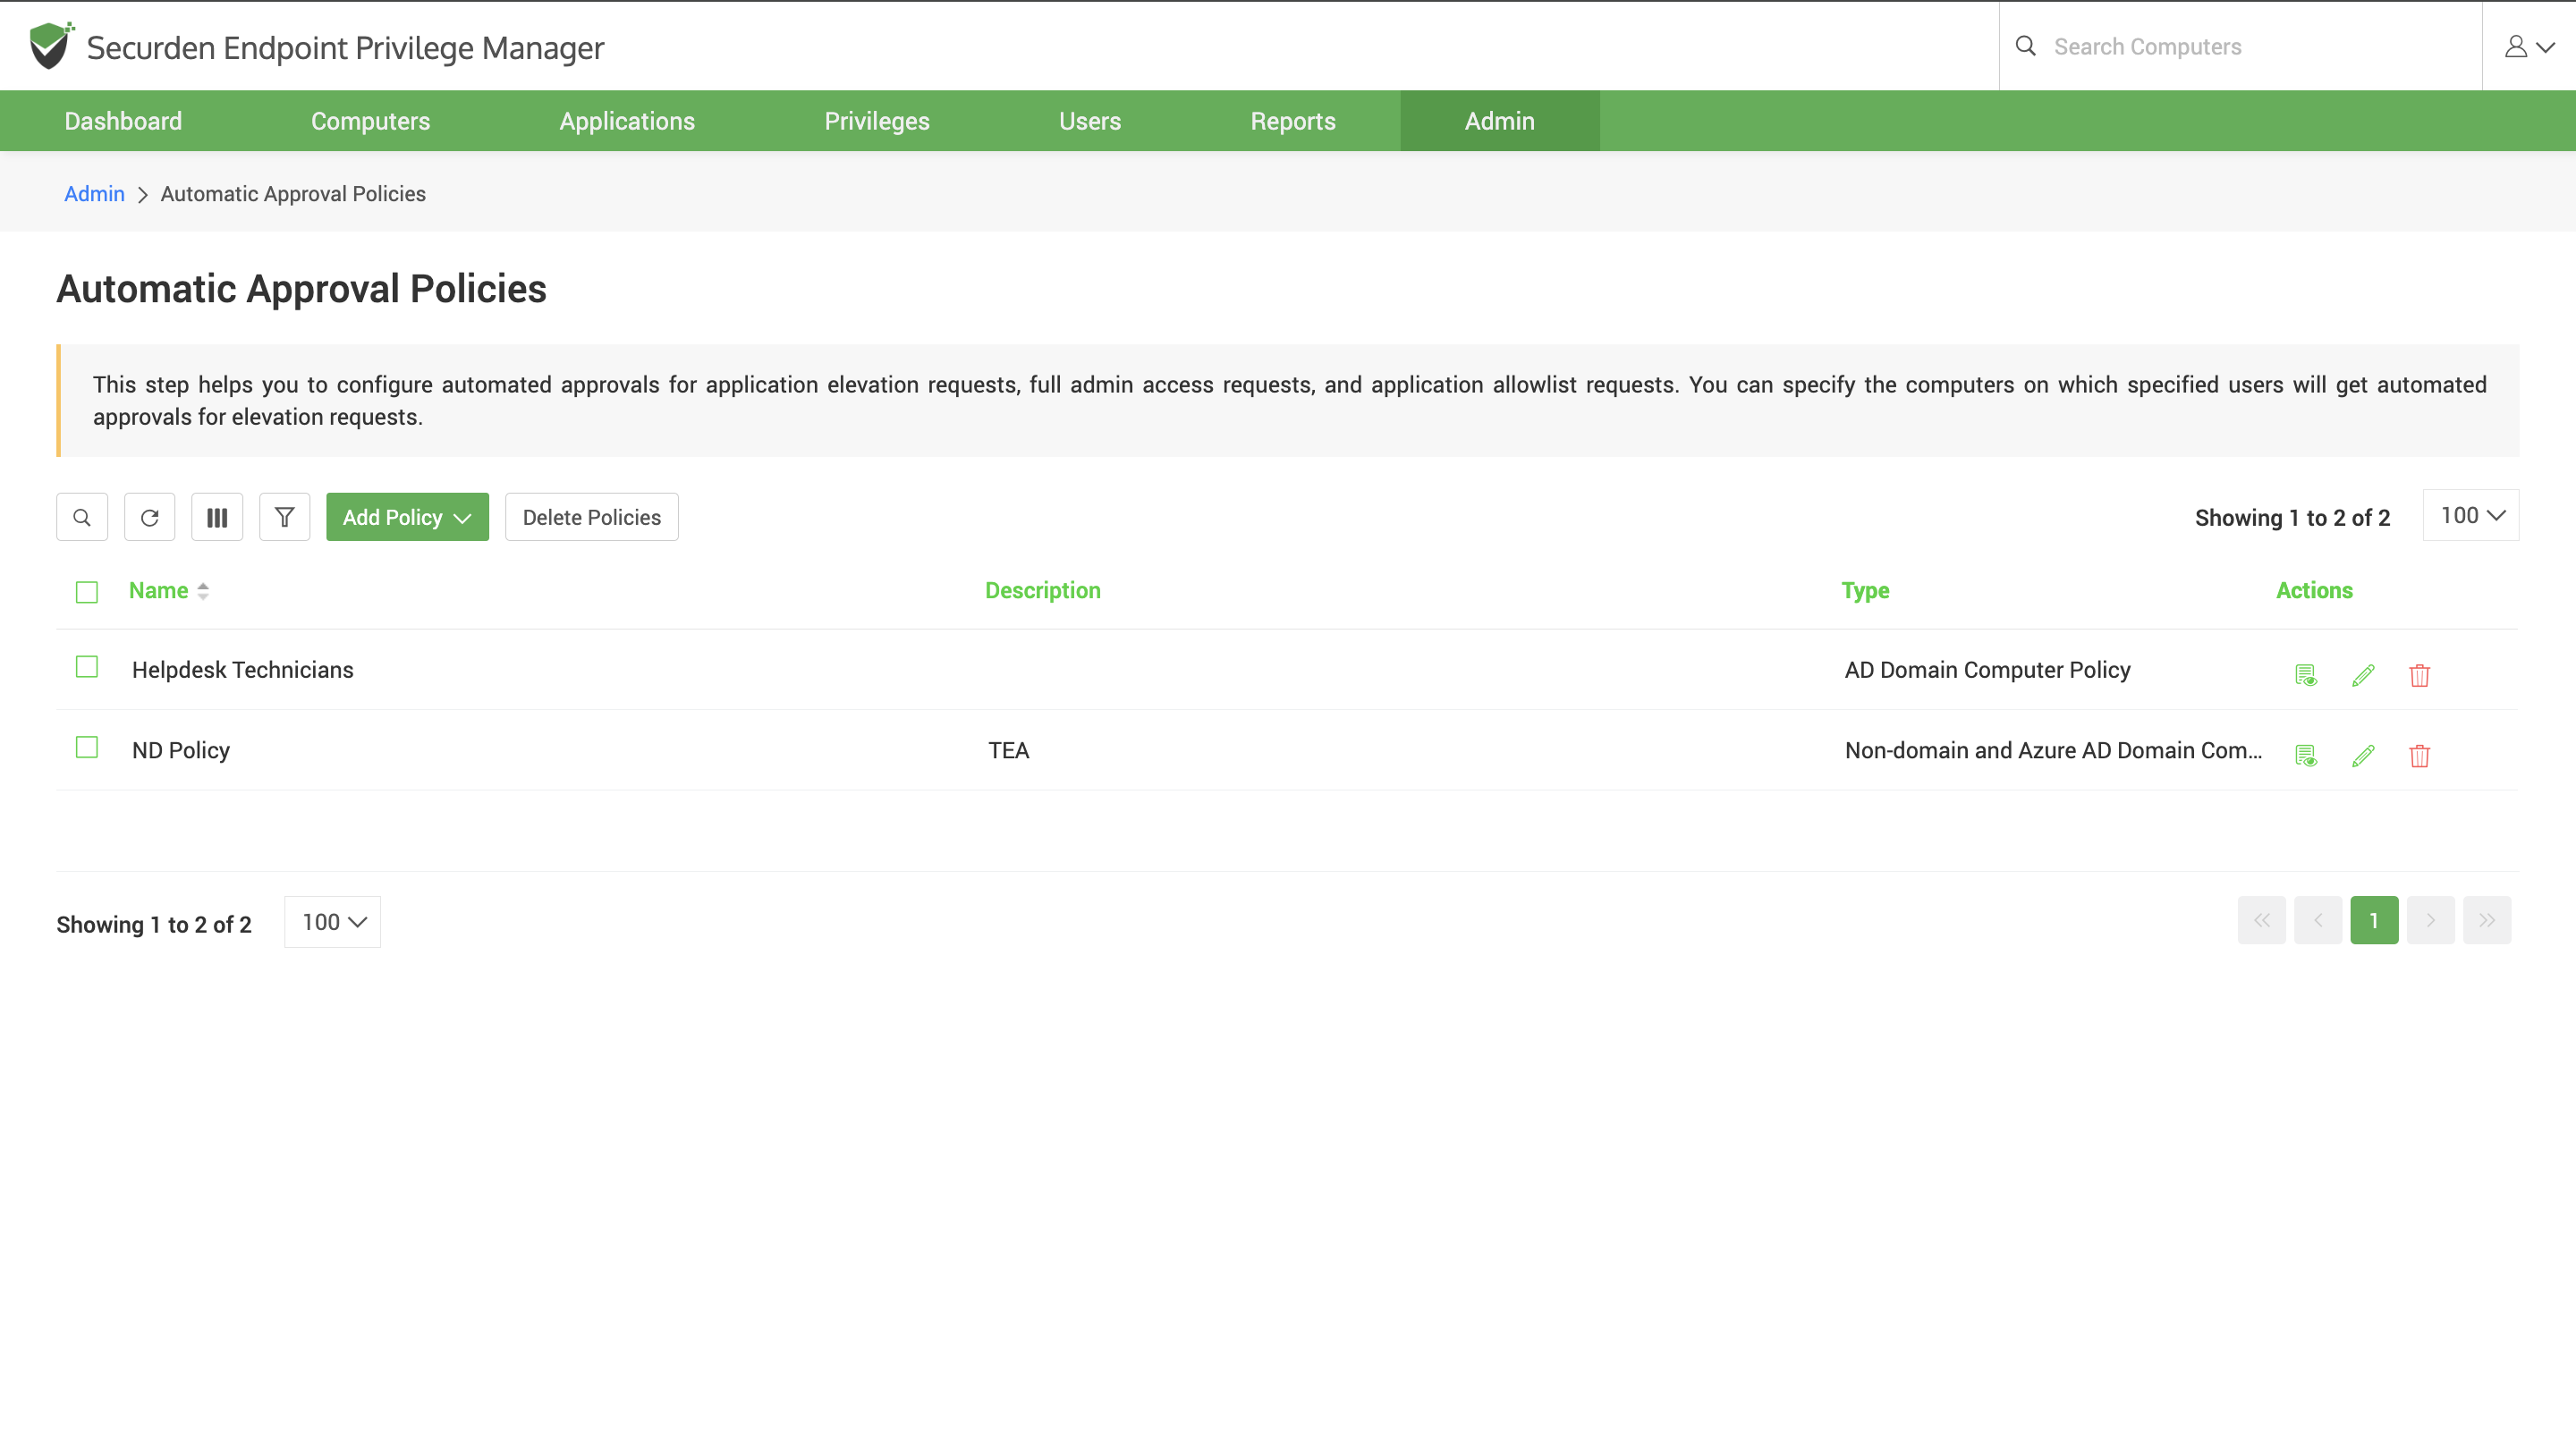
This is explained in the subsequent sections. However, using automatic approval policies, you can configure Securden to auto-approve privilege elevation requests based on set conditions. You can configure Securden to auto-approve requests that are raised by specific users on specific endpoints.
Technician Access Policies
Technicians such as IT helpdesk members and administrators often require admin privileges to install and upgrade applications, troubleshoot, and perform general administrative tasks on user machines. You can configure technician access policies
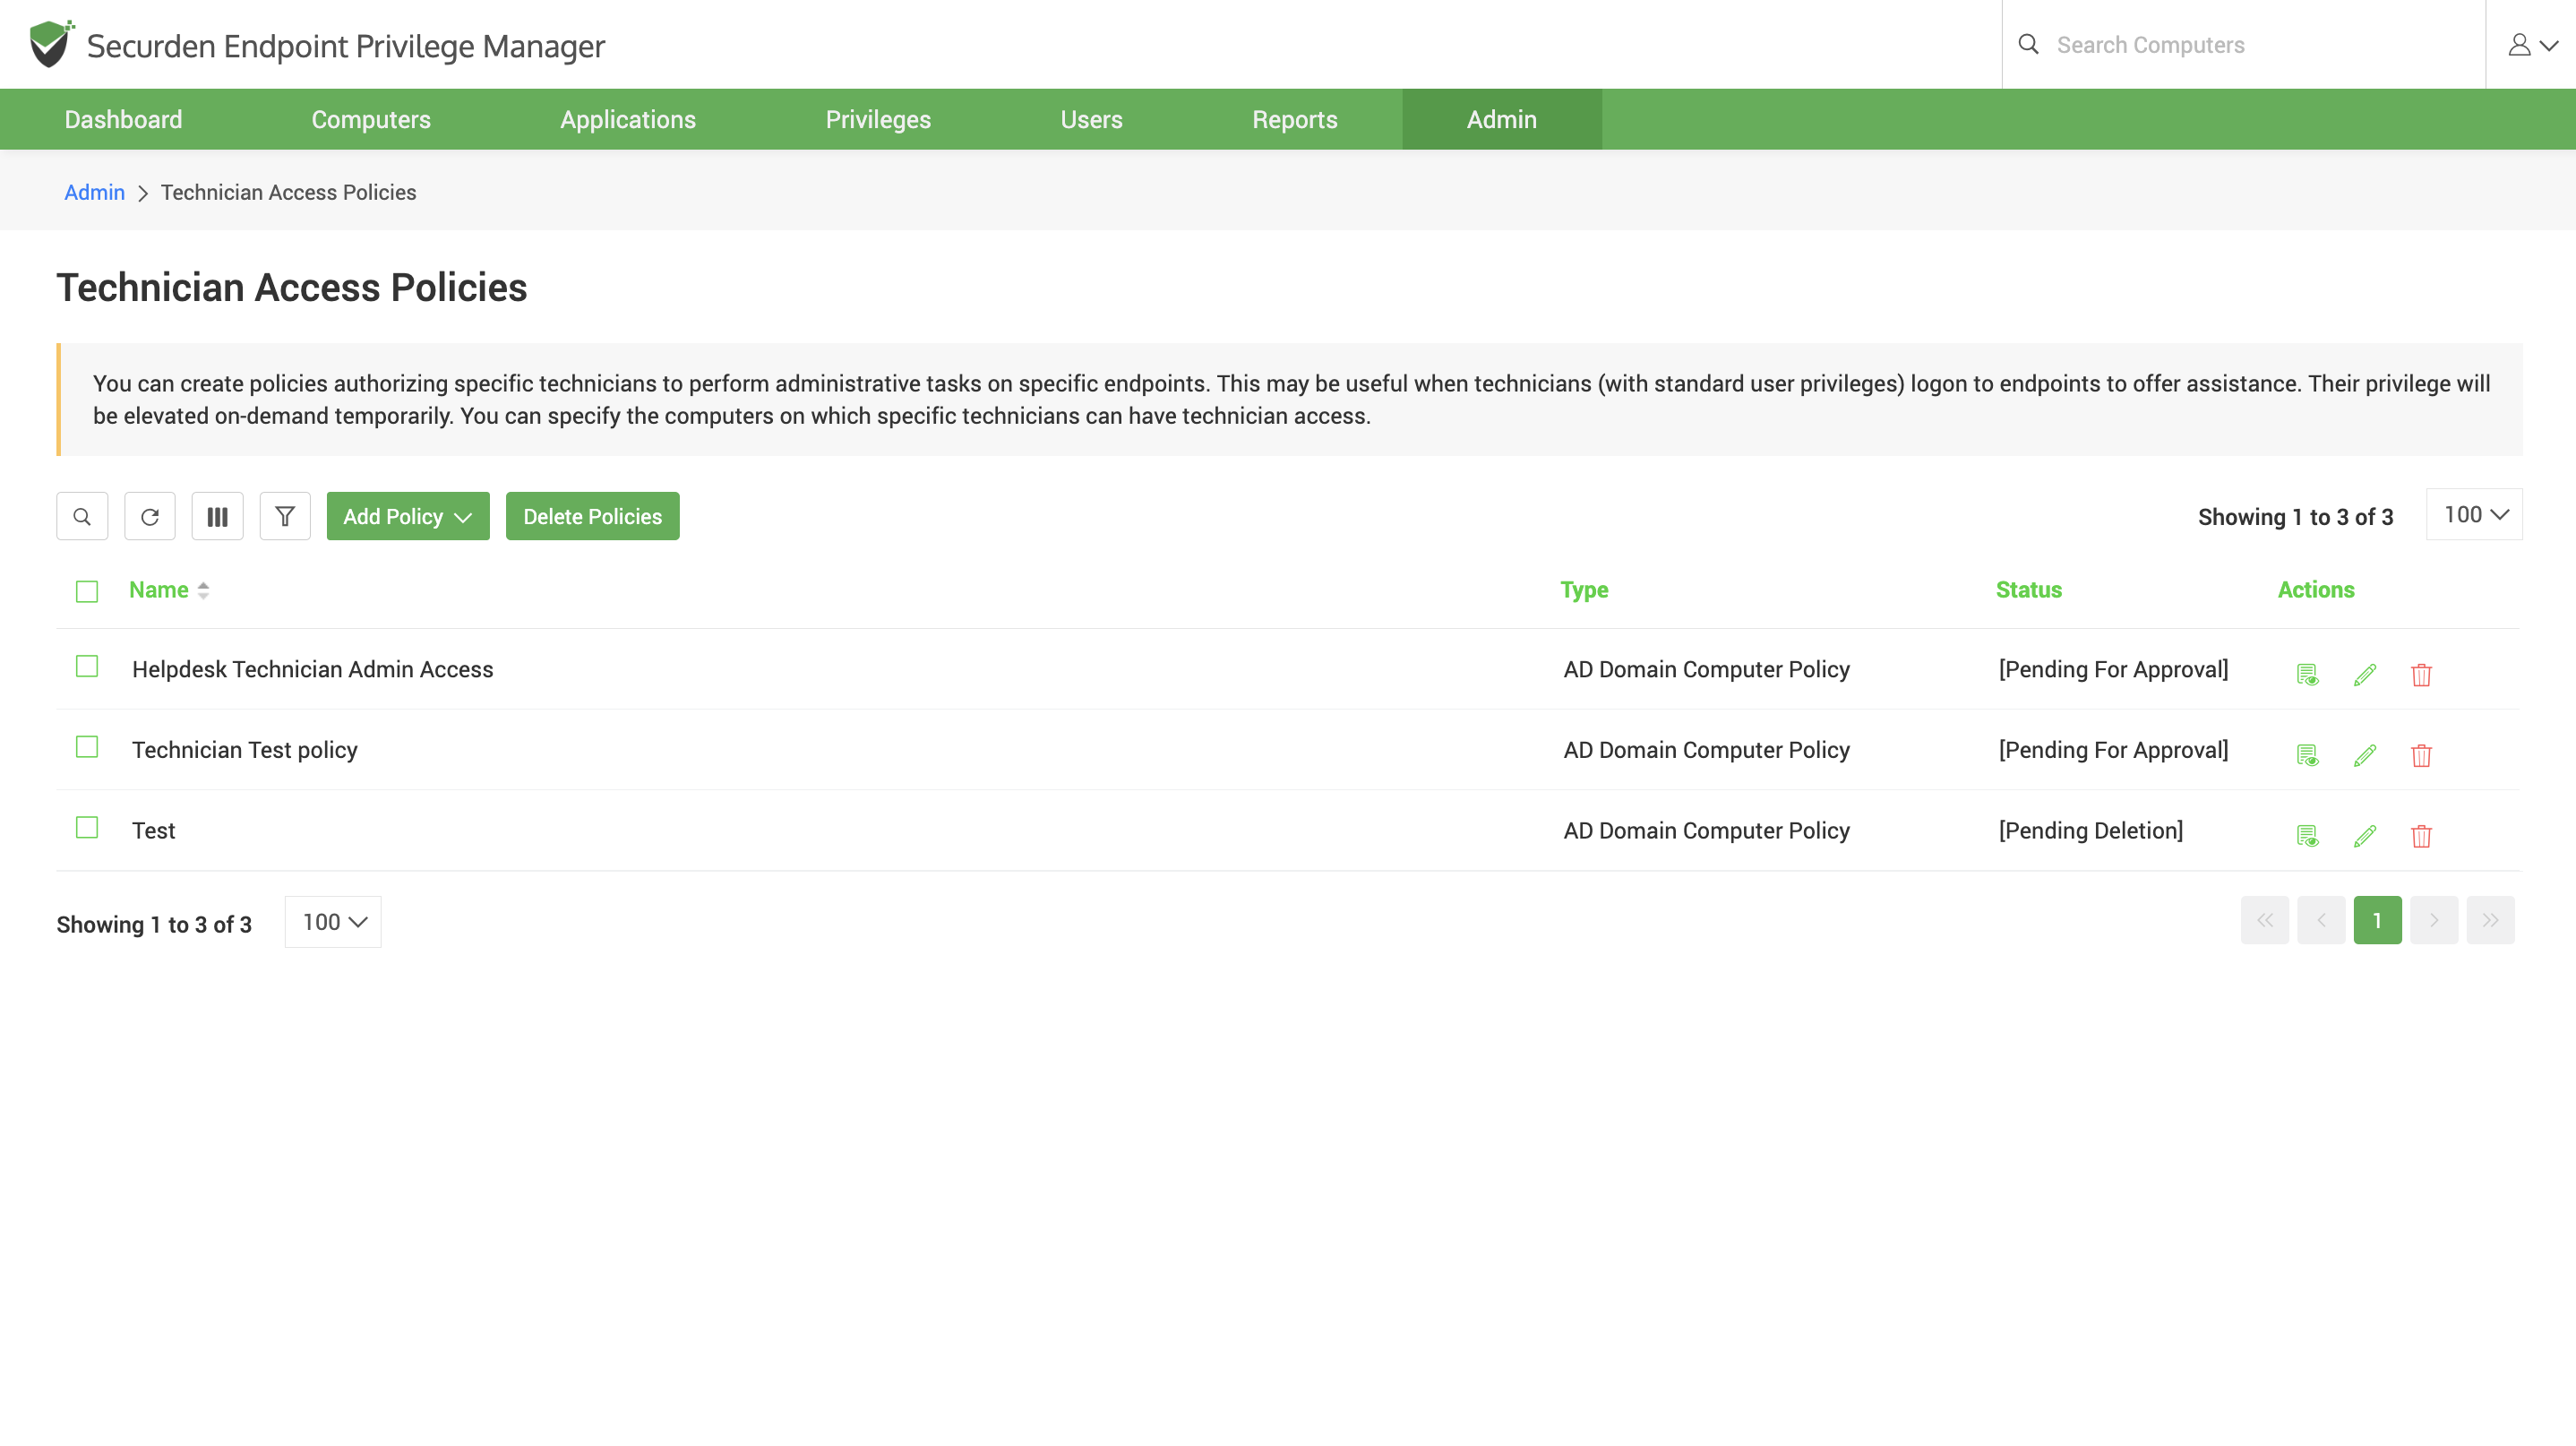
The IT technicians can start technician access from the Securden Agent’s tray icon and perform their tasks.
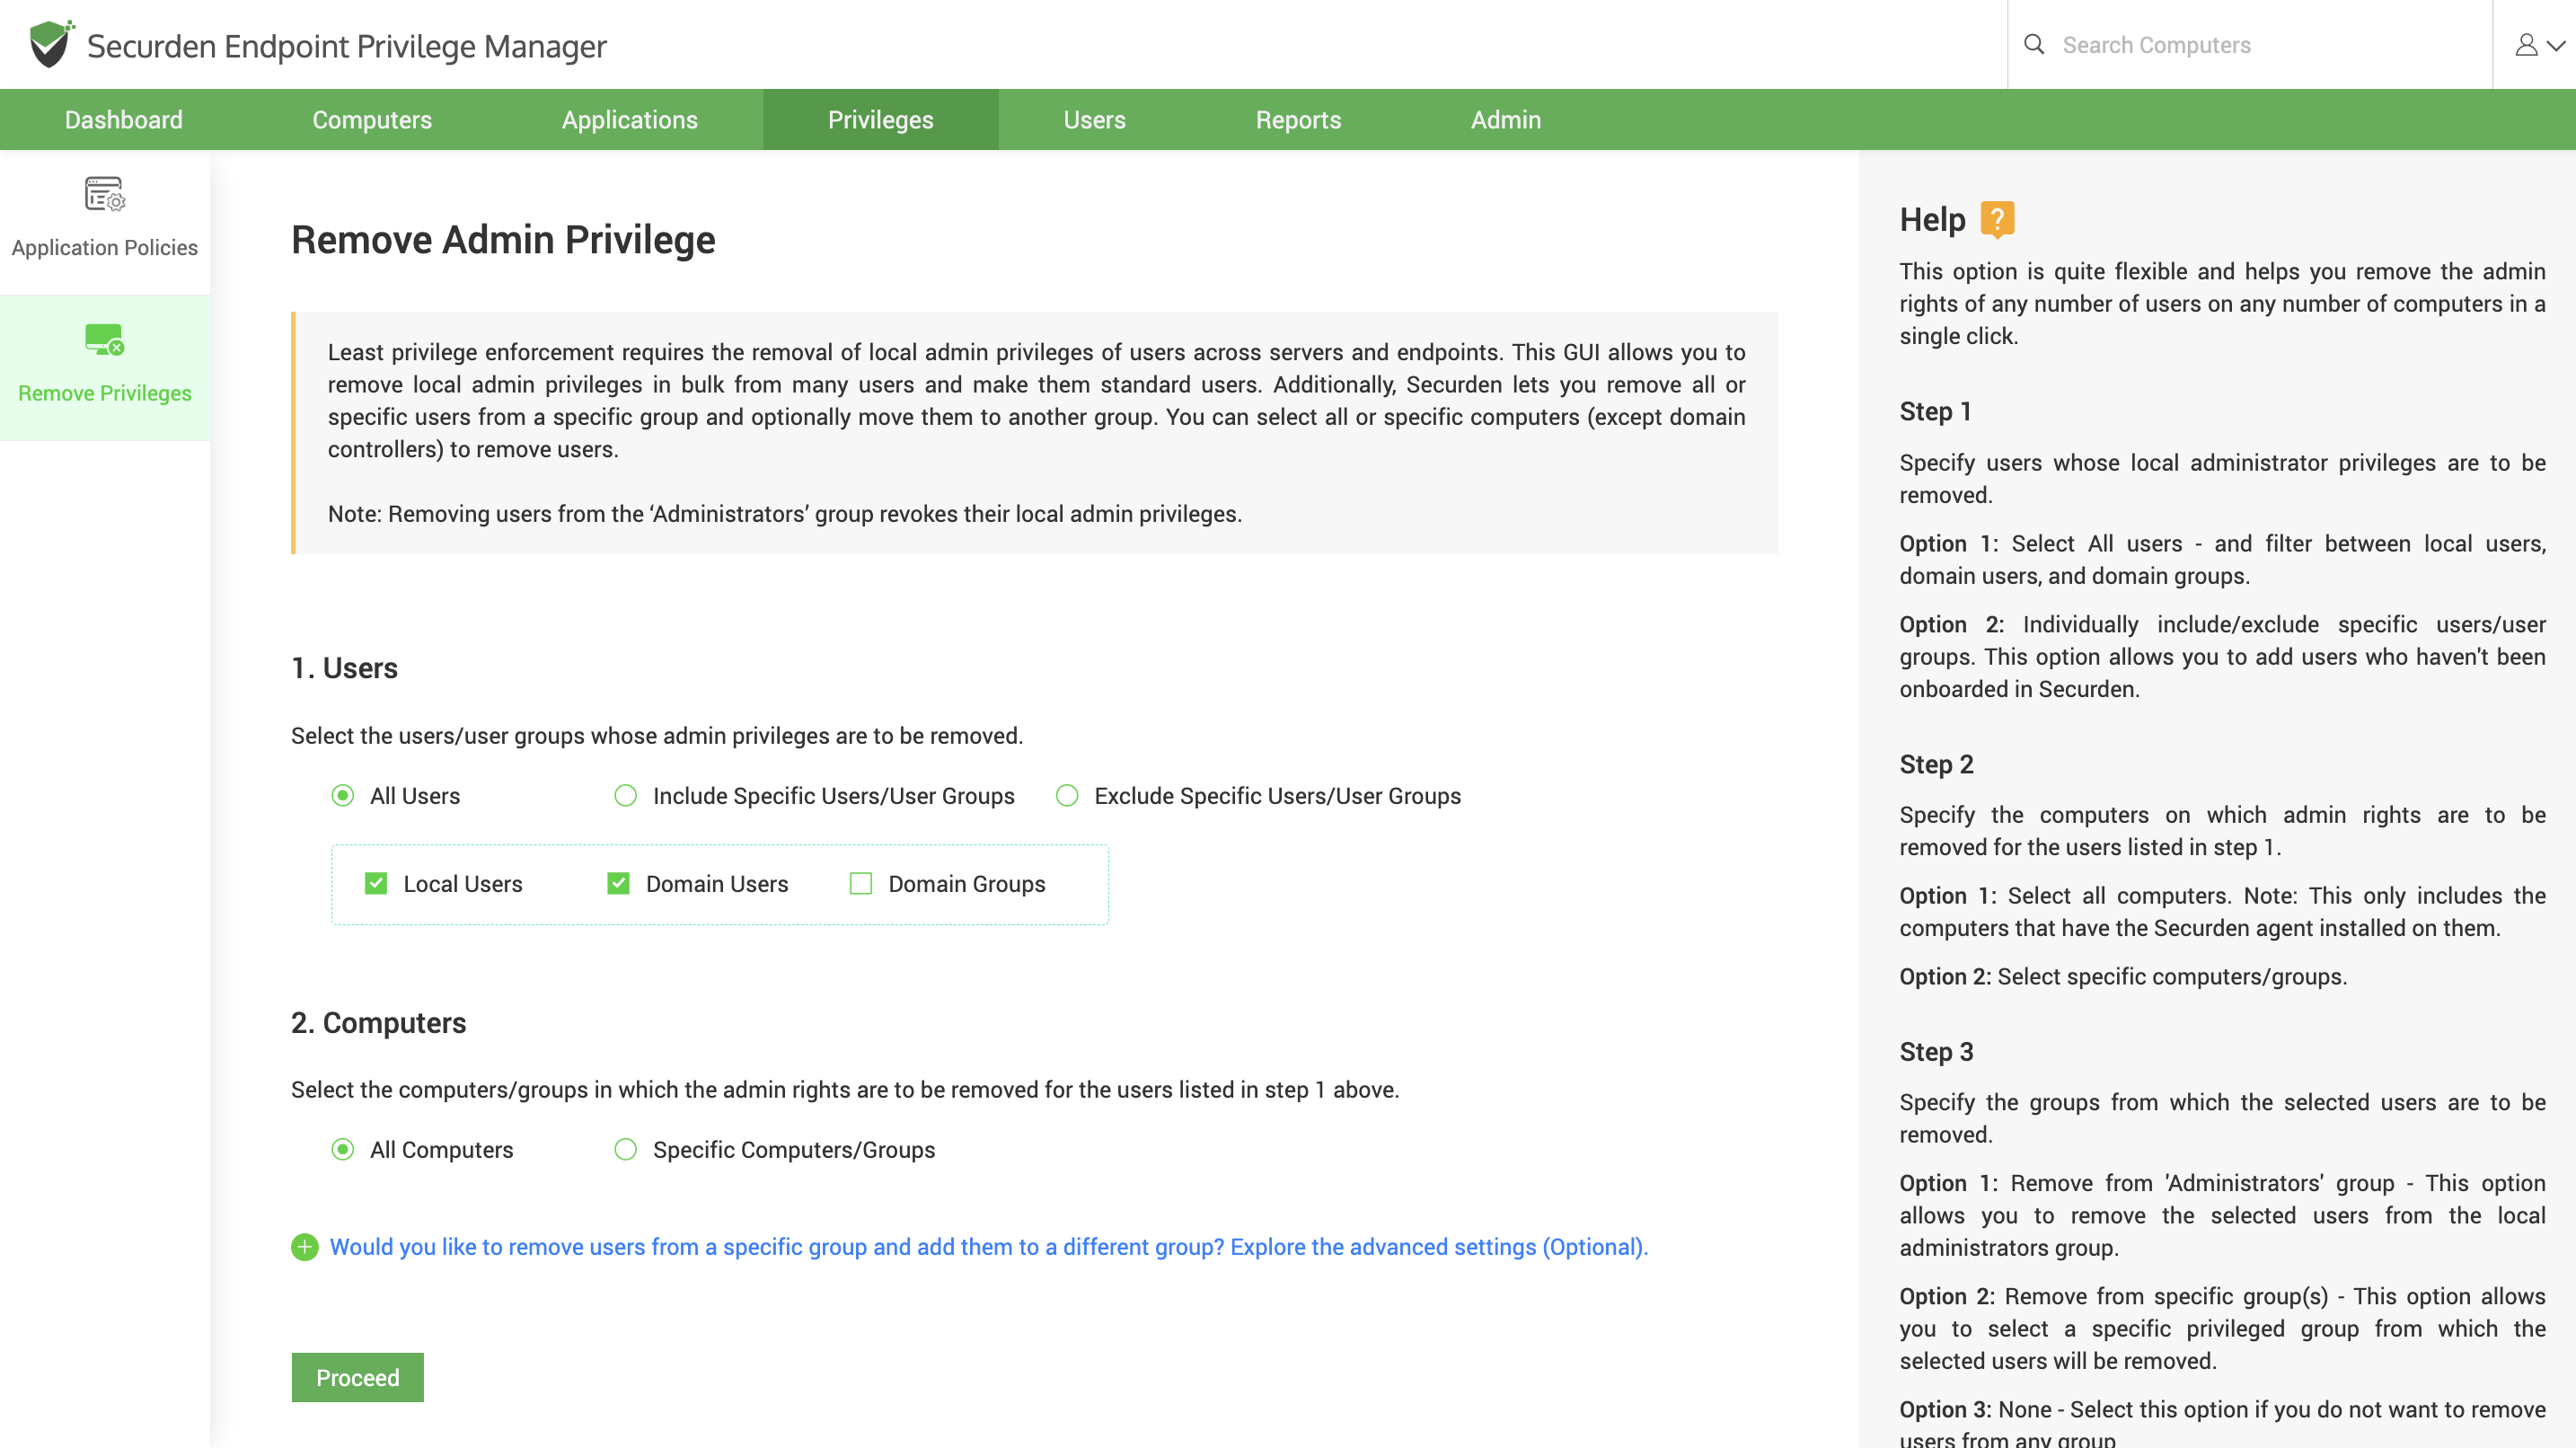
Step 6: Remove Admin Privileges
To achieve least privilege controls, you may remove local admin privileges in bulk from many accounts. You can remove admin privileges for all or any specific accounts in all or any specific computers (except domain controllers) from Securden GUI itself.
Active Directory accounts and local accounts from domain members can be removed. Navigate to Privileges >> Remove Privileges in the GUI to perform this step.
(Alternatively, if you are comfortable doing this via Group Policy Objects (GPO), you may do so. This GUI is only to simplify the process).
Once the above steps are completed, users on endpoints will no longer have admin rights. When needed, the applications will be elevated for standard users as per the control policy. Users will be able to perform operations on endpoints or servers without any hassles. They need not login to Securden for this purpose.
Note
If the configuration to enforce multi-factor authentication during privilege elevation is enabled, then the users will be required to go through the authentication steps at time of privilege elevation.