User Management
User management includes onboarding, offboarding, managing user roles, managing user groups, and enforcing MFA for end users from the centralized admin console.
Step 1: Onboarding Users
You need to add your team members to Securden to manage their privileges on endpoints and to enforce privilege elevation policies. You have various options using which you can onboard your users to Securden.
Adding Domain Users to Securden
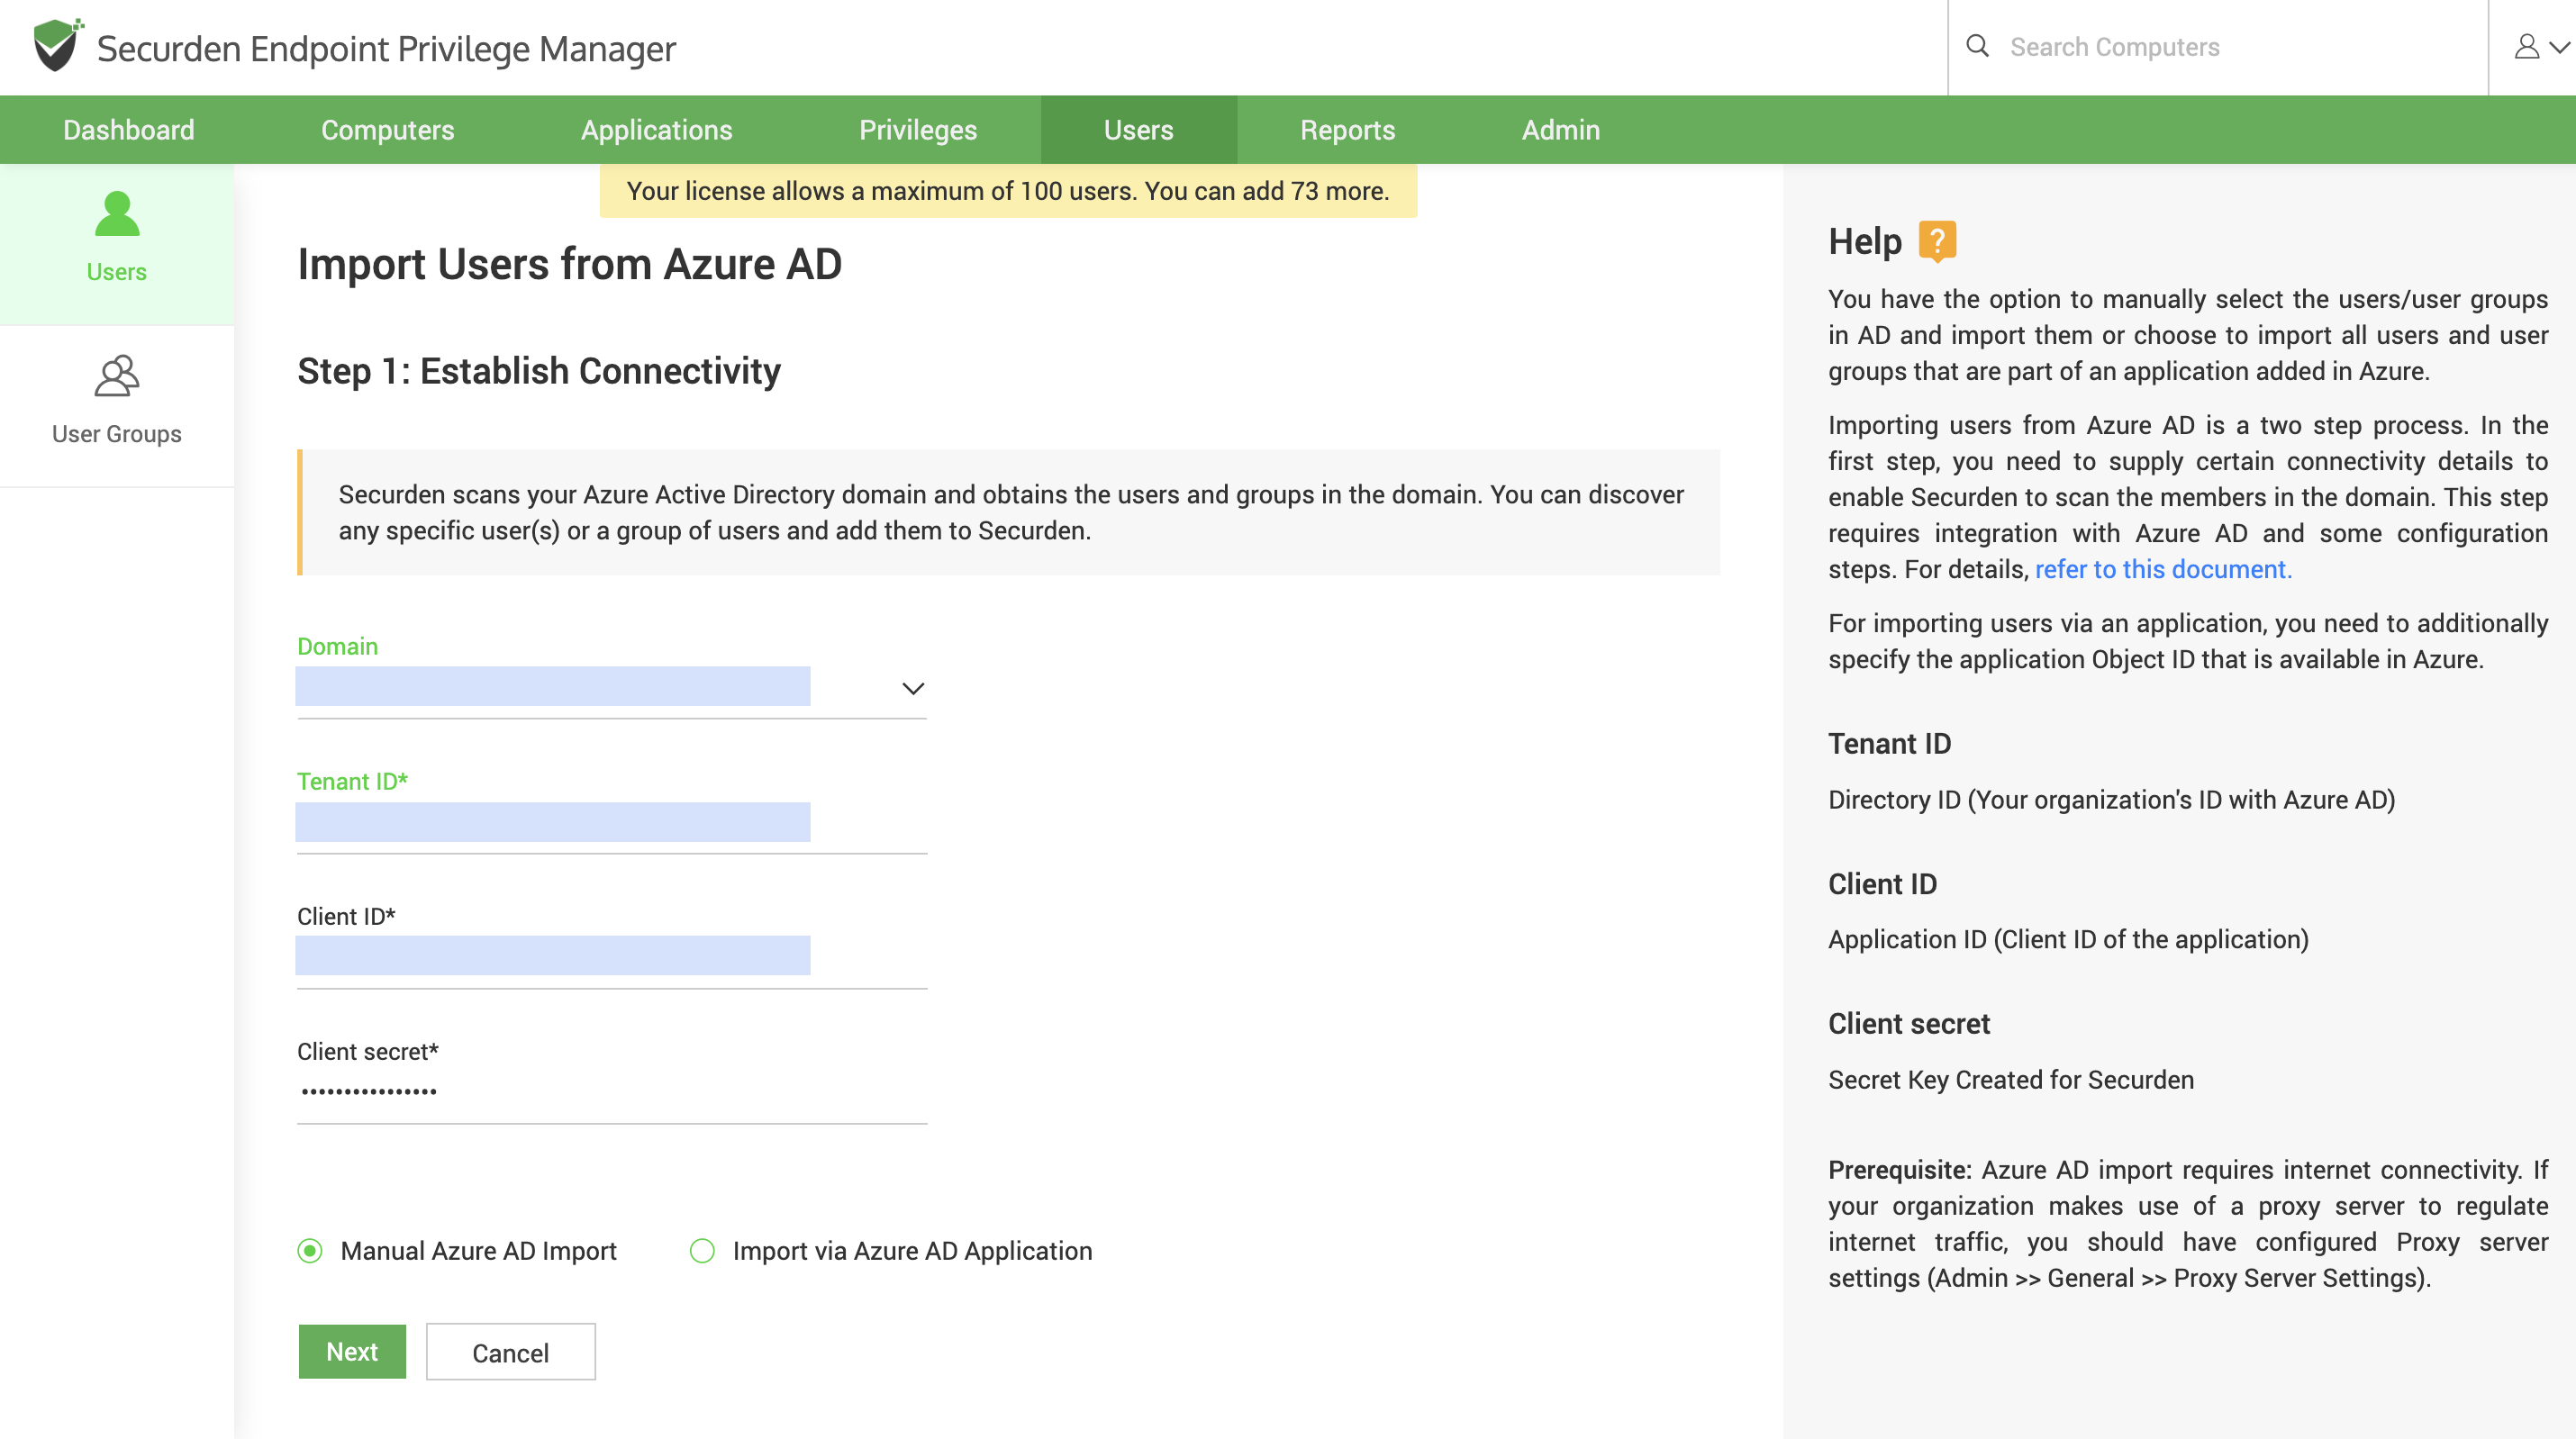
Usually, user identities in Windows environments are managed using Active Directory, Azure (Entra ID), or a hybrid of both. They can be easily imported into Securden through integration with Active Directory and Azure (Entra ID). Provisions to import entire OUs, groups, and individual users from AD and Azure are available.
Navigate to Users >> Add >> Import from AD (or) Import from Azure to import the required users.
Note
When importing users from AD, you have the option to import them with specific roles. You can find more information about user roles in step 2 below. By default, the role User will be assigned for all users imported from AD. You can specify the default role with which users are to be imported through the setting in Admin >> Customization >> Configurations >> Defaults Selection section.
Importing Users from Hybrid Environments (AD + Azure)
In hybrid environments, users are managed using both on-premises AD and cloud hosted Azure instances. When the same users exist in both the on-premises AD and Azure, then it is enough to import the user from Azure alone. It is not necessary or recommended to import the users from AD. If the AD domain is configured with Securden, then the corresponding user details will automatically be synchronized.
Adding Non-domain Users
Users who are not a part of AD or Azure can be imported from a File or Added manually. Navigate to Users >> Add to explore the available options. These users cannot be added to application control policies. However, they can log in to the web server to perform operations in the web interface.
Local user accounts will be automatically imported when the agents are deployed on their endpoints. These user accounts can be associated with policies for privilege management purposes.
Step 2: Assign Roles (in Securden) for Users
There are four user roles in Securden with privileges as explained below:
- Administrator - Can set up and manage the application, perform all operations including user management.
- Approver – Can approve privilege elevation requests raised by other users.
- User – End users do not have any specific privilege in the application. End users need not normally log in to the application regularly. They need to access the web-interface only to raise requests for getting time-limited admin privileges. However, they need to login to the web interface to set up TOTP based MFA options if applicable.
- Auditor - Can view the reports and audit trails generated in the application.
Note
The user role discussed here pertains only to the permissions within the web interface. The privileges of the user accounts on their machines/domain are not affected by changes made here.
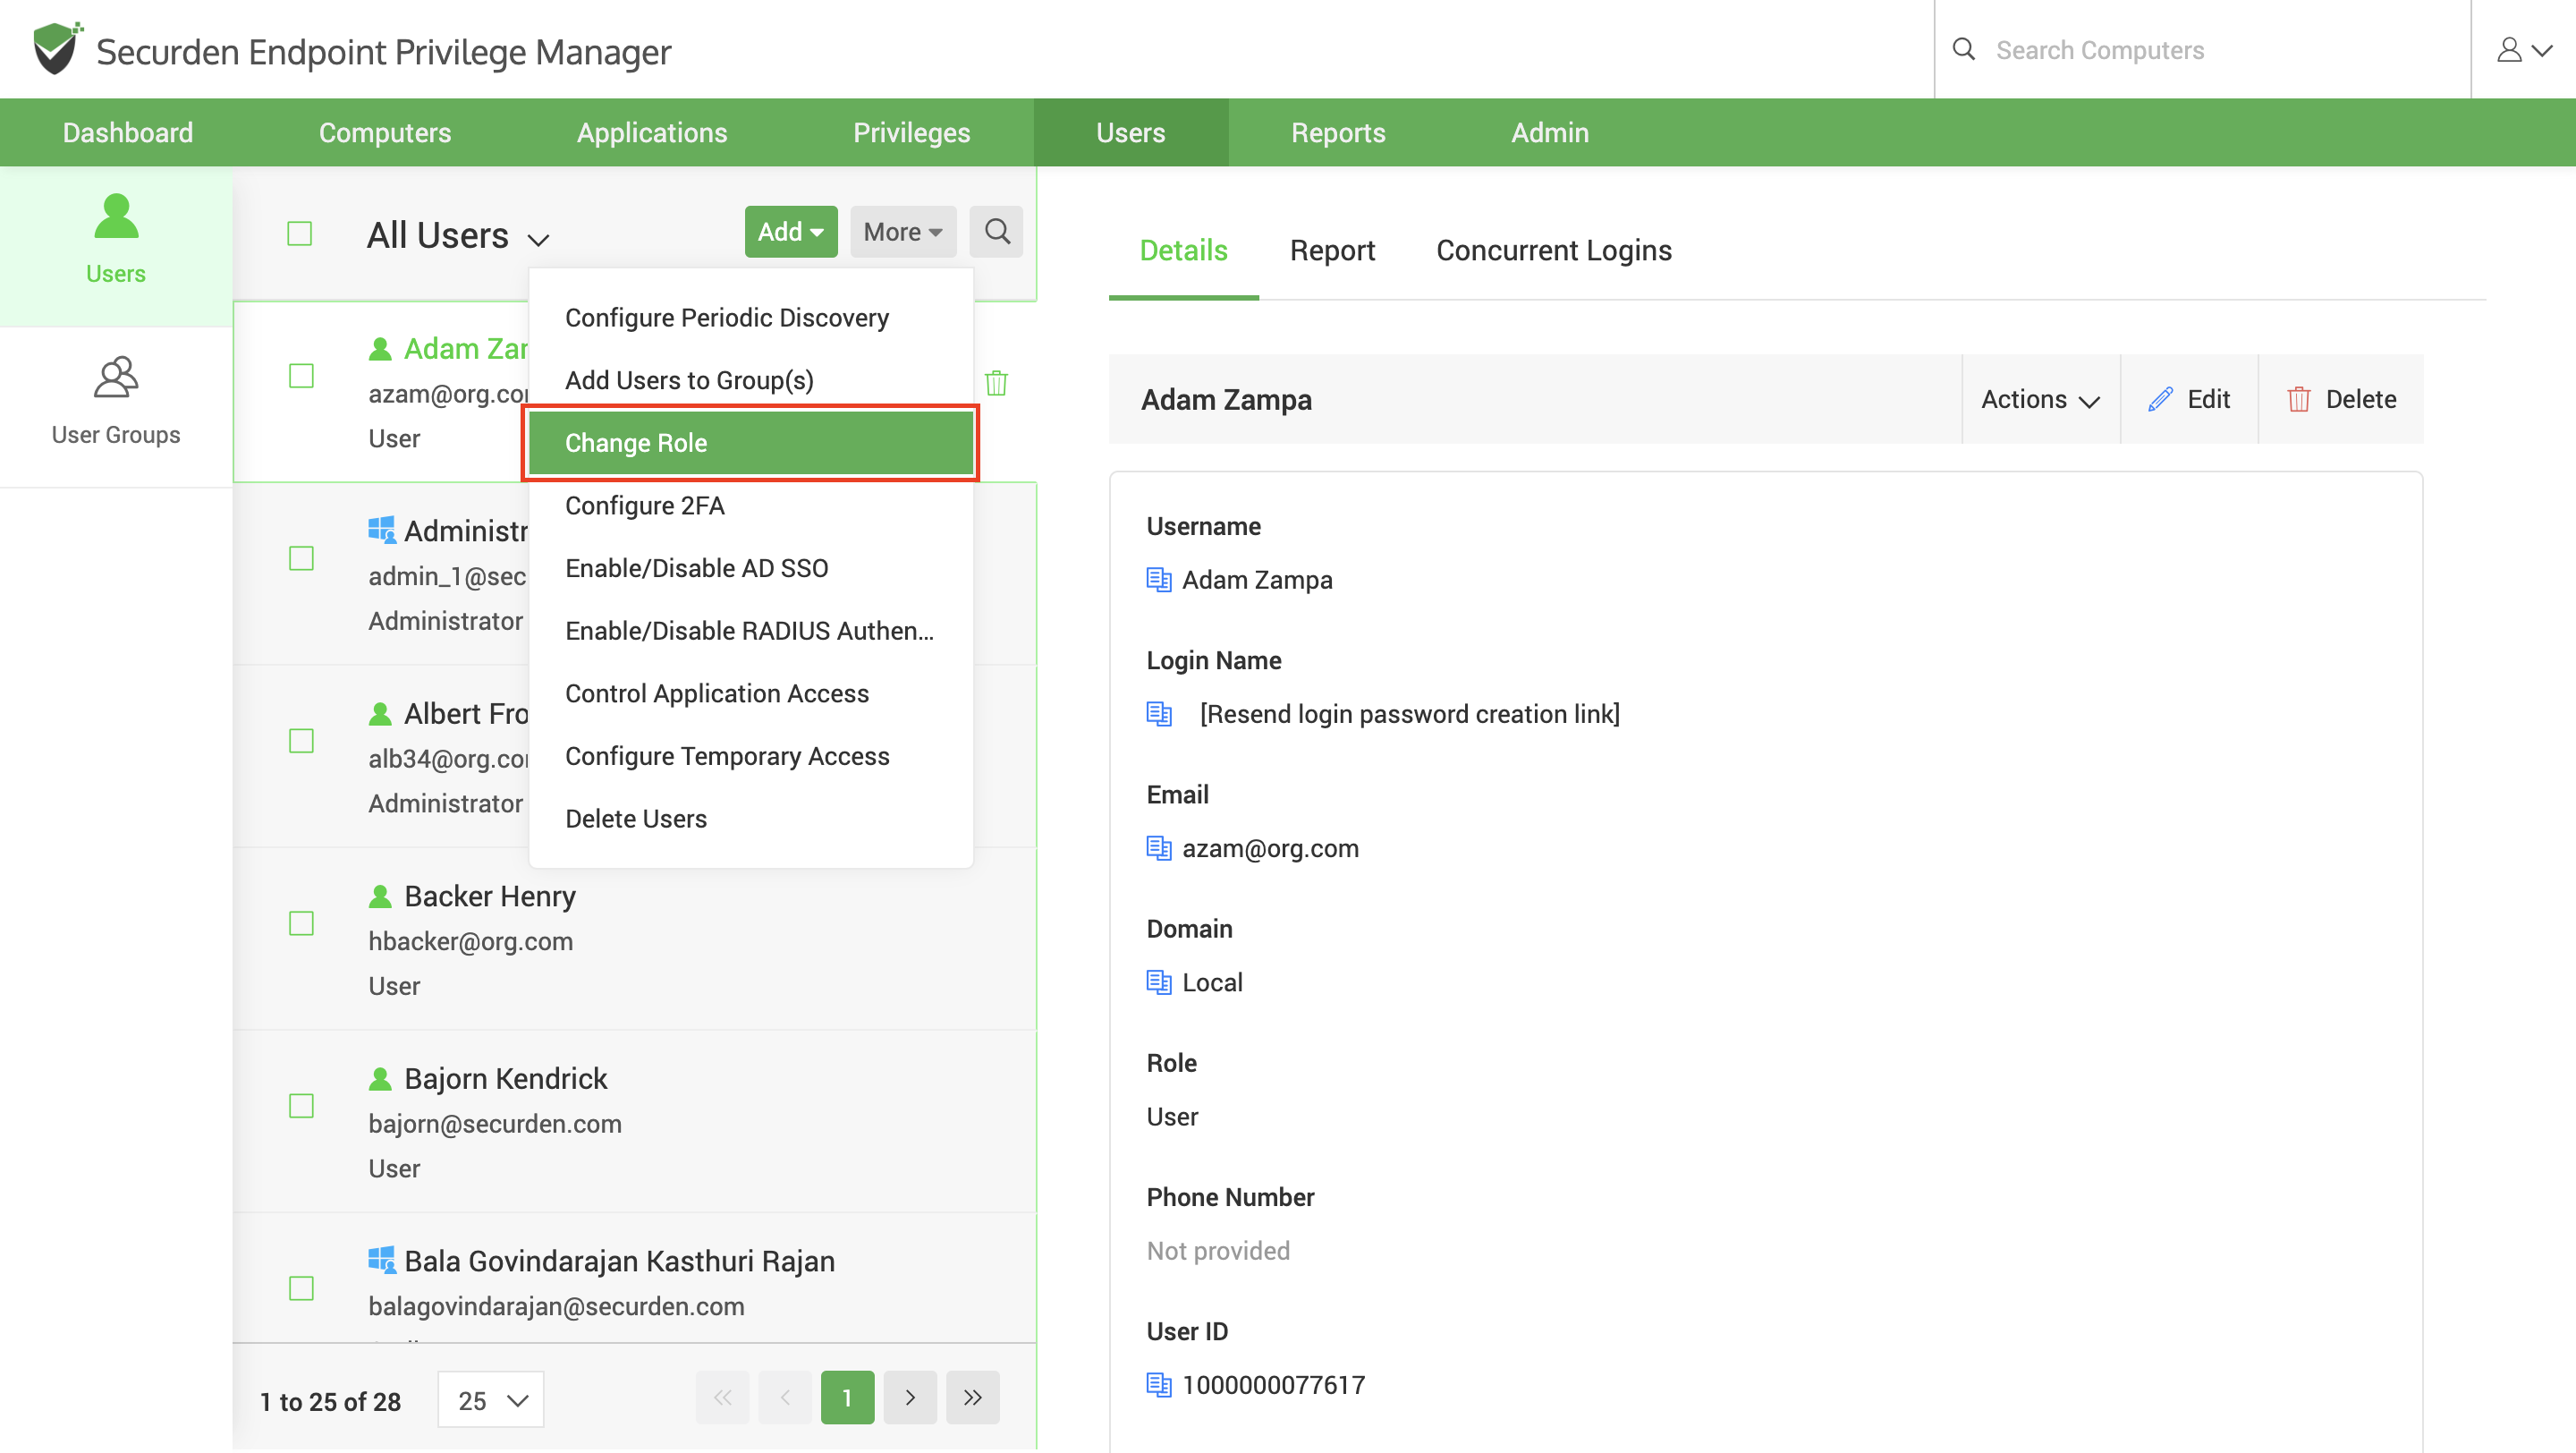
By default, the users imported from Active Directory will have the role Users within the web interface. You can edit and assign appropriate roles for users in bulk or individually for each user. To change the role of users in bulk, navigate to the Users section in the GUI and select the required users. Then click Change Role option under More Actions.

Alternatively, use the Edit option to change the role of users individually.
Step 3: Create User Groups
You can organize the users in your organization as groups in Securden for efficient administration. You can even maintain the same team structure as in your organization.
You can define various access permissions at the group level so that when a new member joins the organization, by placing the member at the right group, the member can inherit the access permissions automatically. There are two ways to create user groups - you can import groups directly from AD/Azure or add groups manually.
Navigate to Users >> Groups >> Add in the GUI to perform this step.
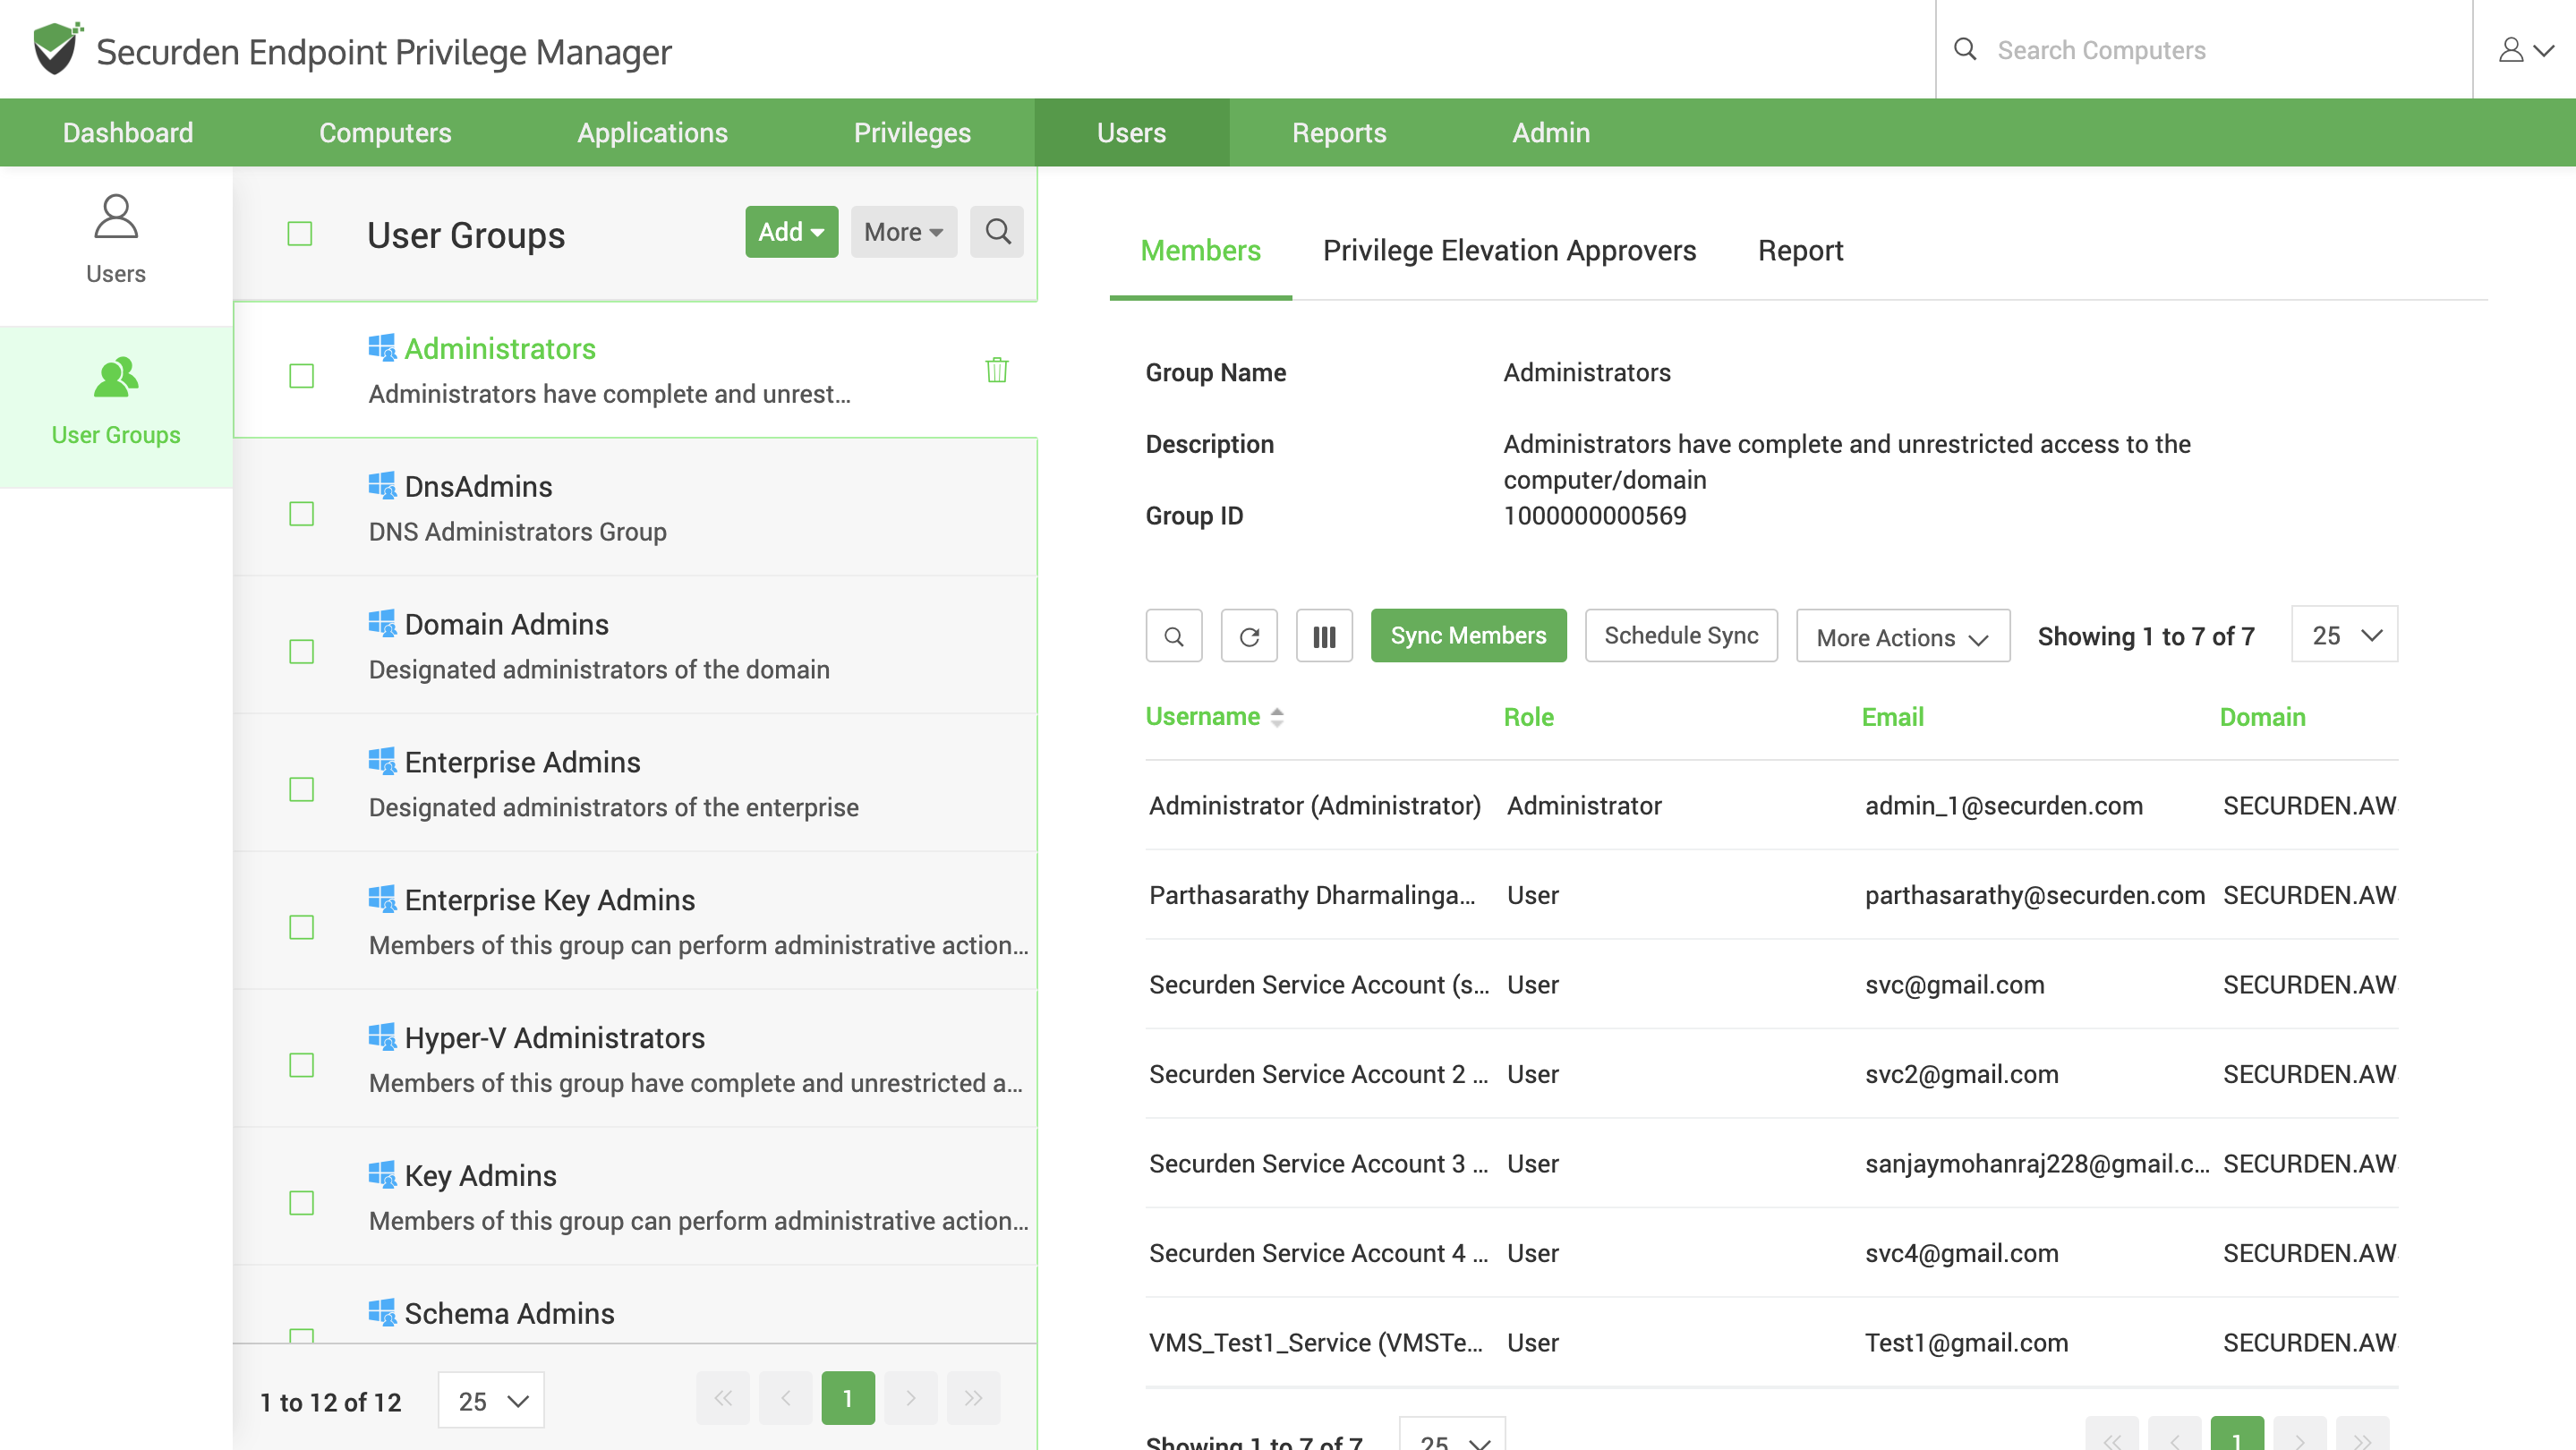
Configure Periodic Synchronization of Groups
You can create a scheduled task to keep the members of a group in synchronization with those of AD/Azure. When new members get added to or removed from the group in AD/Azure, the changes get reflected in Securden too.
Navigate to Users >> User Groups >> Select the required group >> Members >> Schedule Sync section in the GUI to perform this step.
Step 4: Configure Multi Factor Authentication
For enhanced security, you can enforce a second layer of authentication for your users to access the Securden web-interface. Users will have to authenticate through two successive stages. It is strongly recommended to activate Multi-Factor Authentication (MFA).
At present, Securden supports one time password through email, any TOTP authenticator such as Google Authenticator and Microsoft Authenticator, any RADIUS-compliant MFA mechanism, and YubiKey as the second factor.
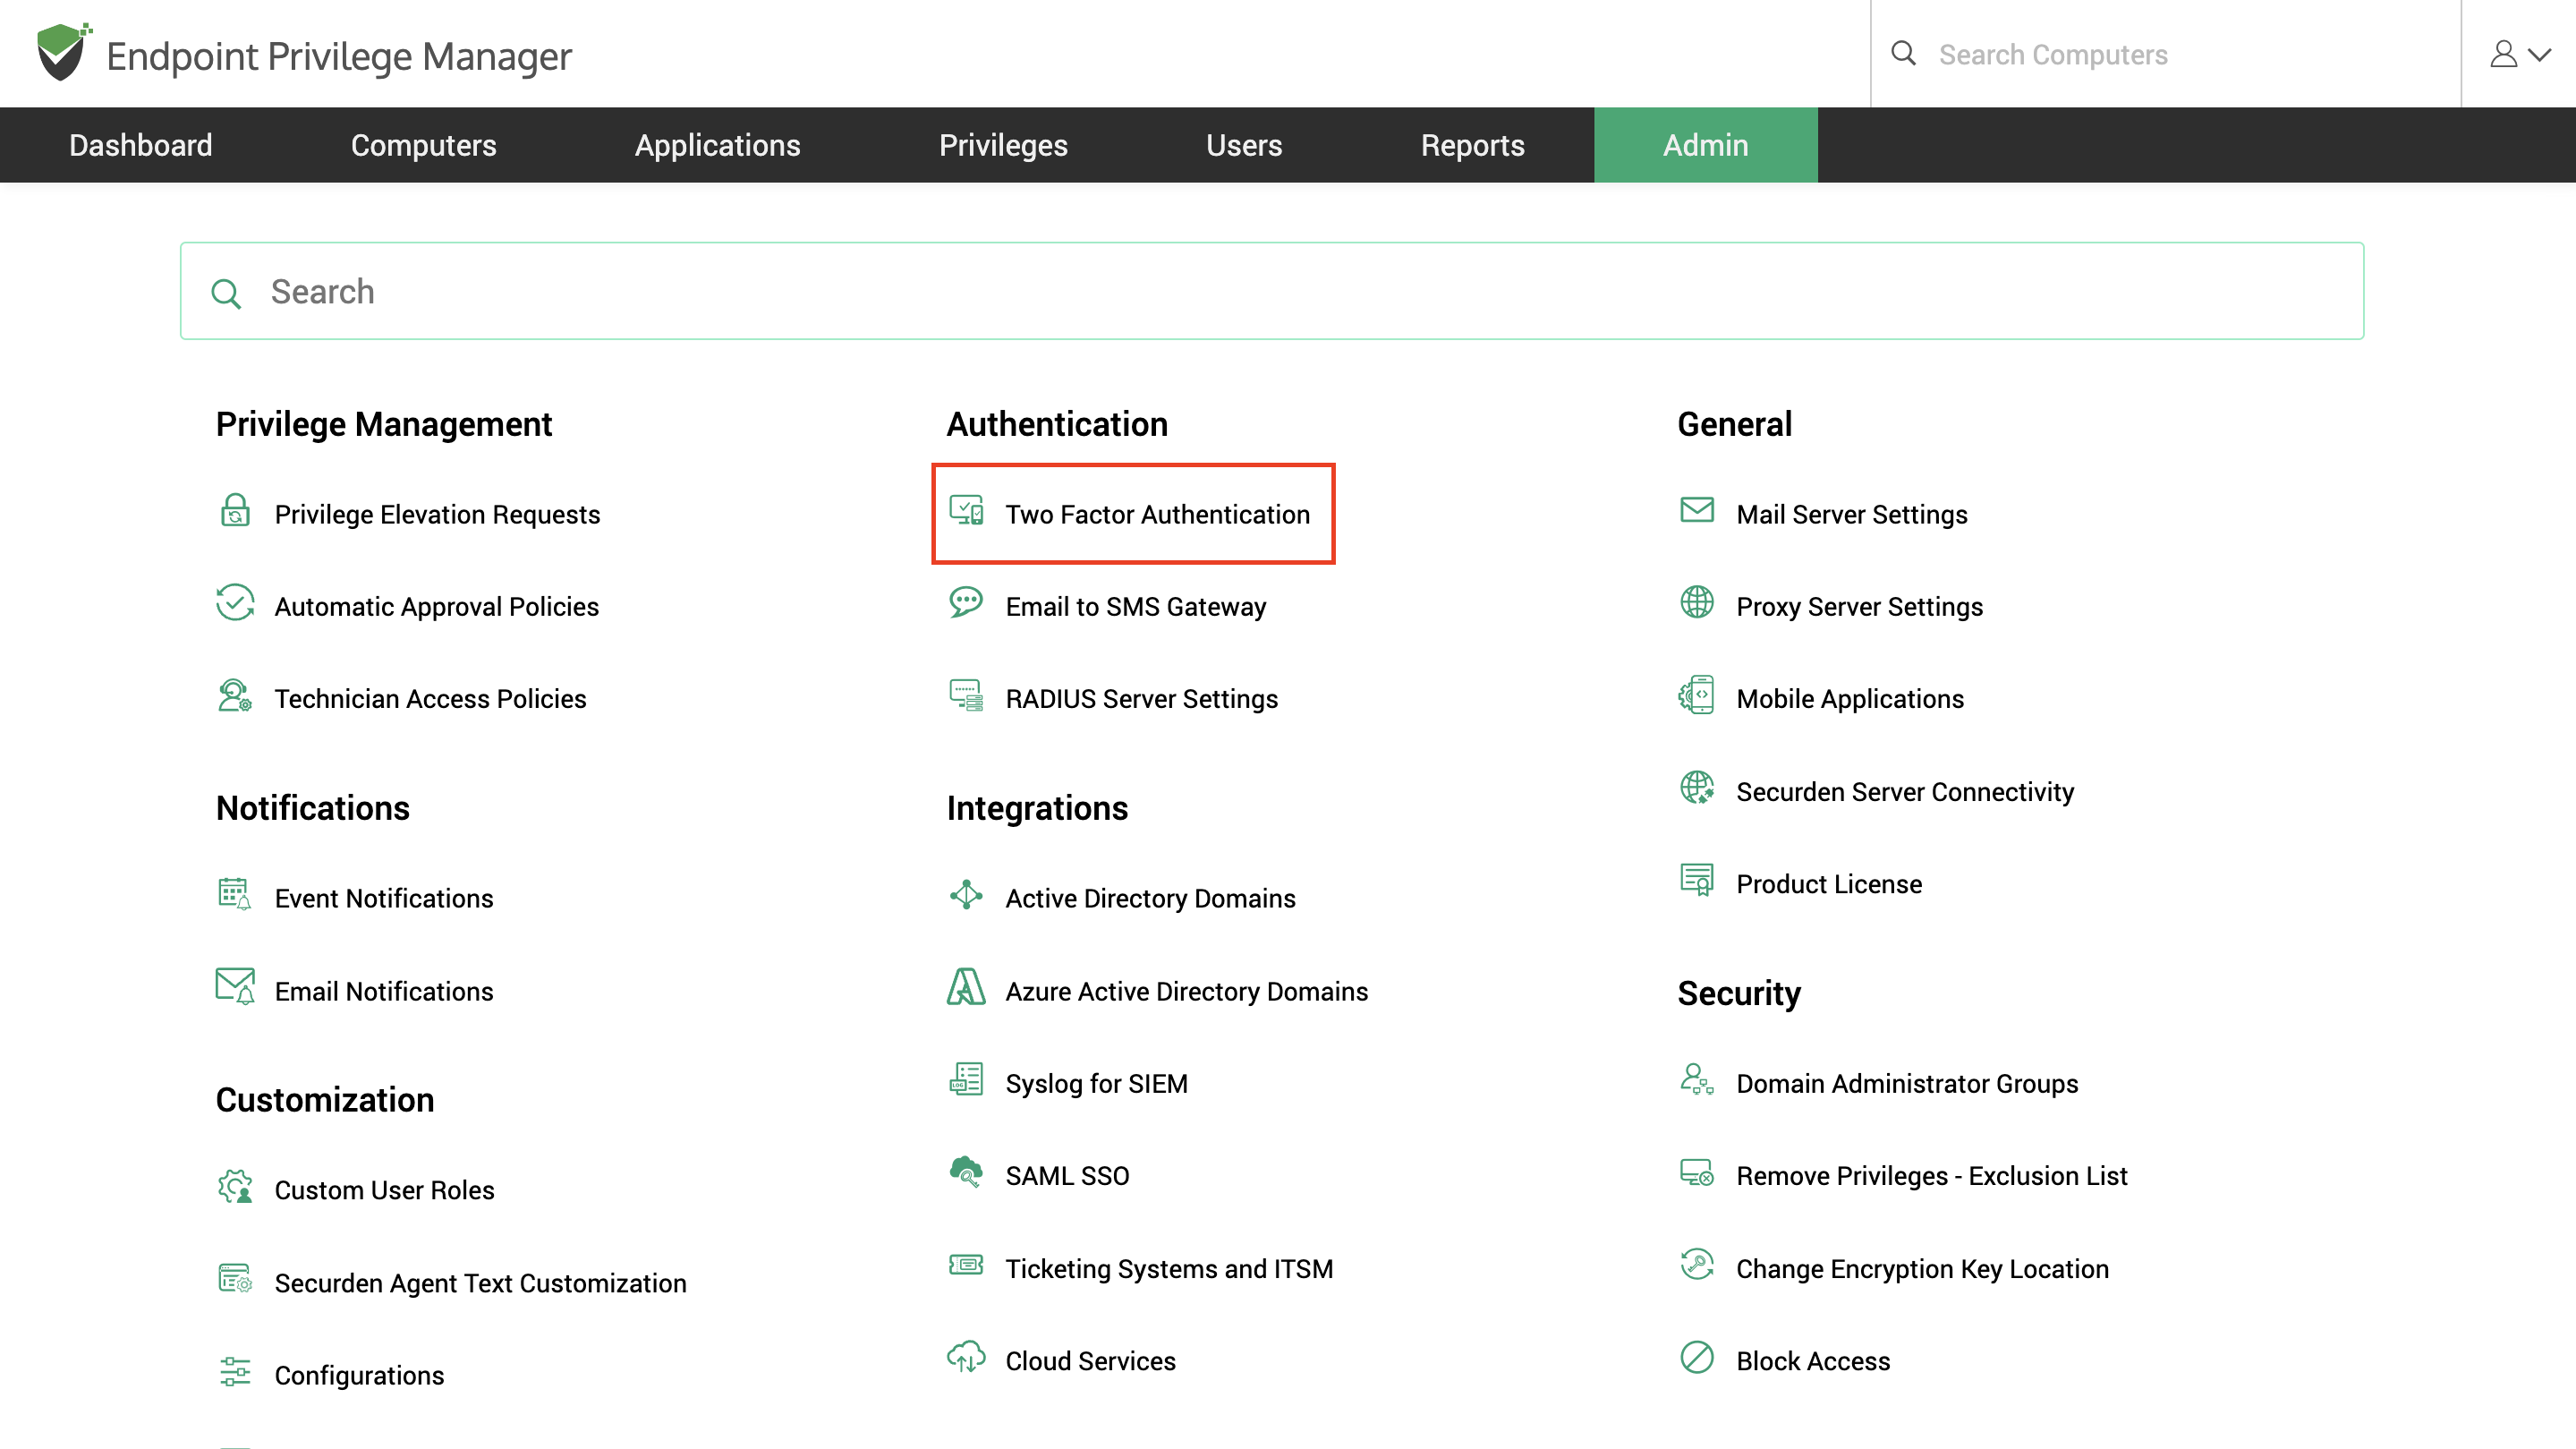
Navigate to Admin >> Security >> Two Factor Authentication in the GUI to perform this step.
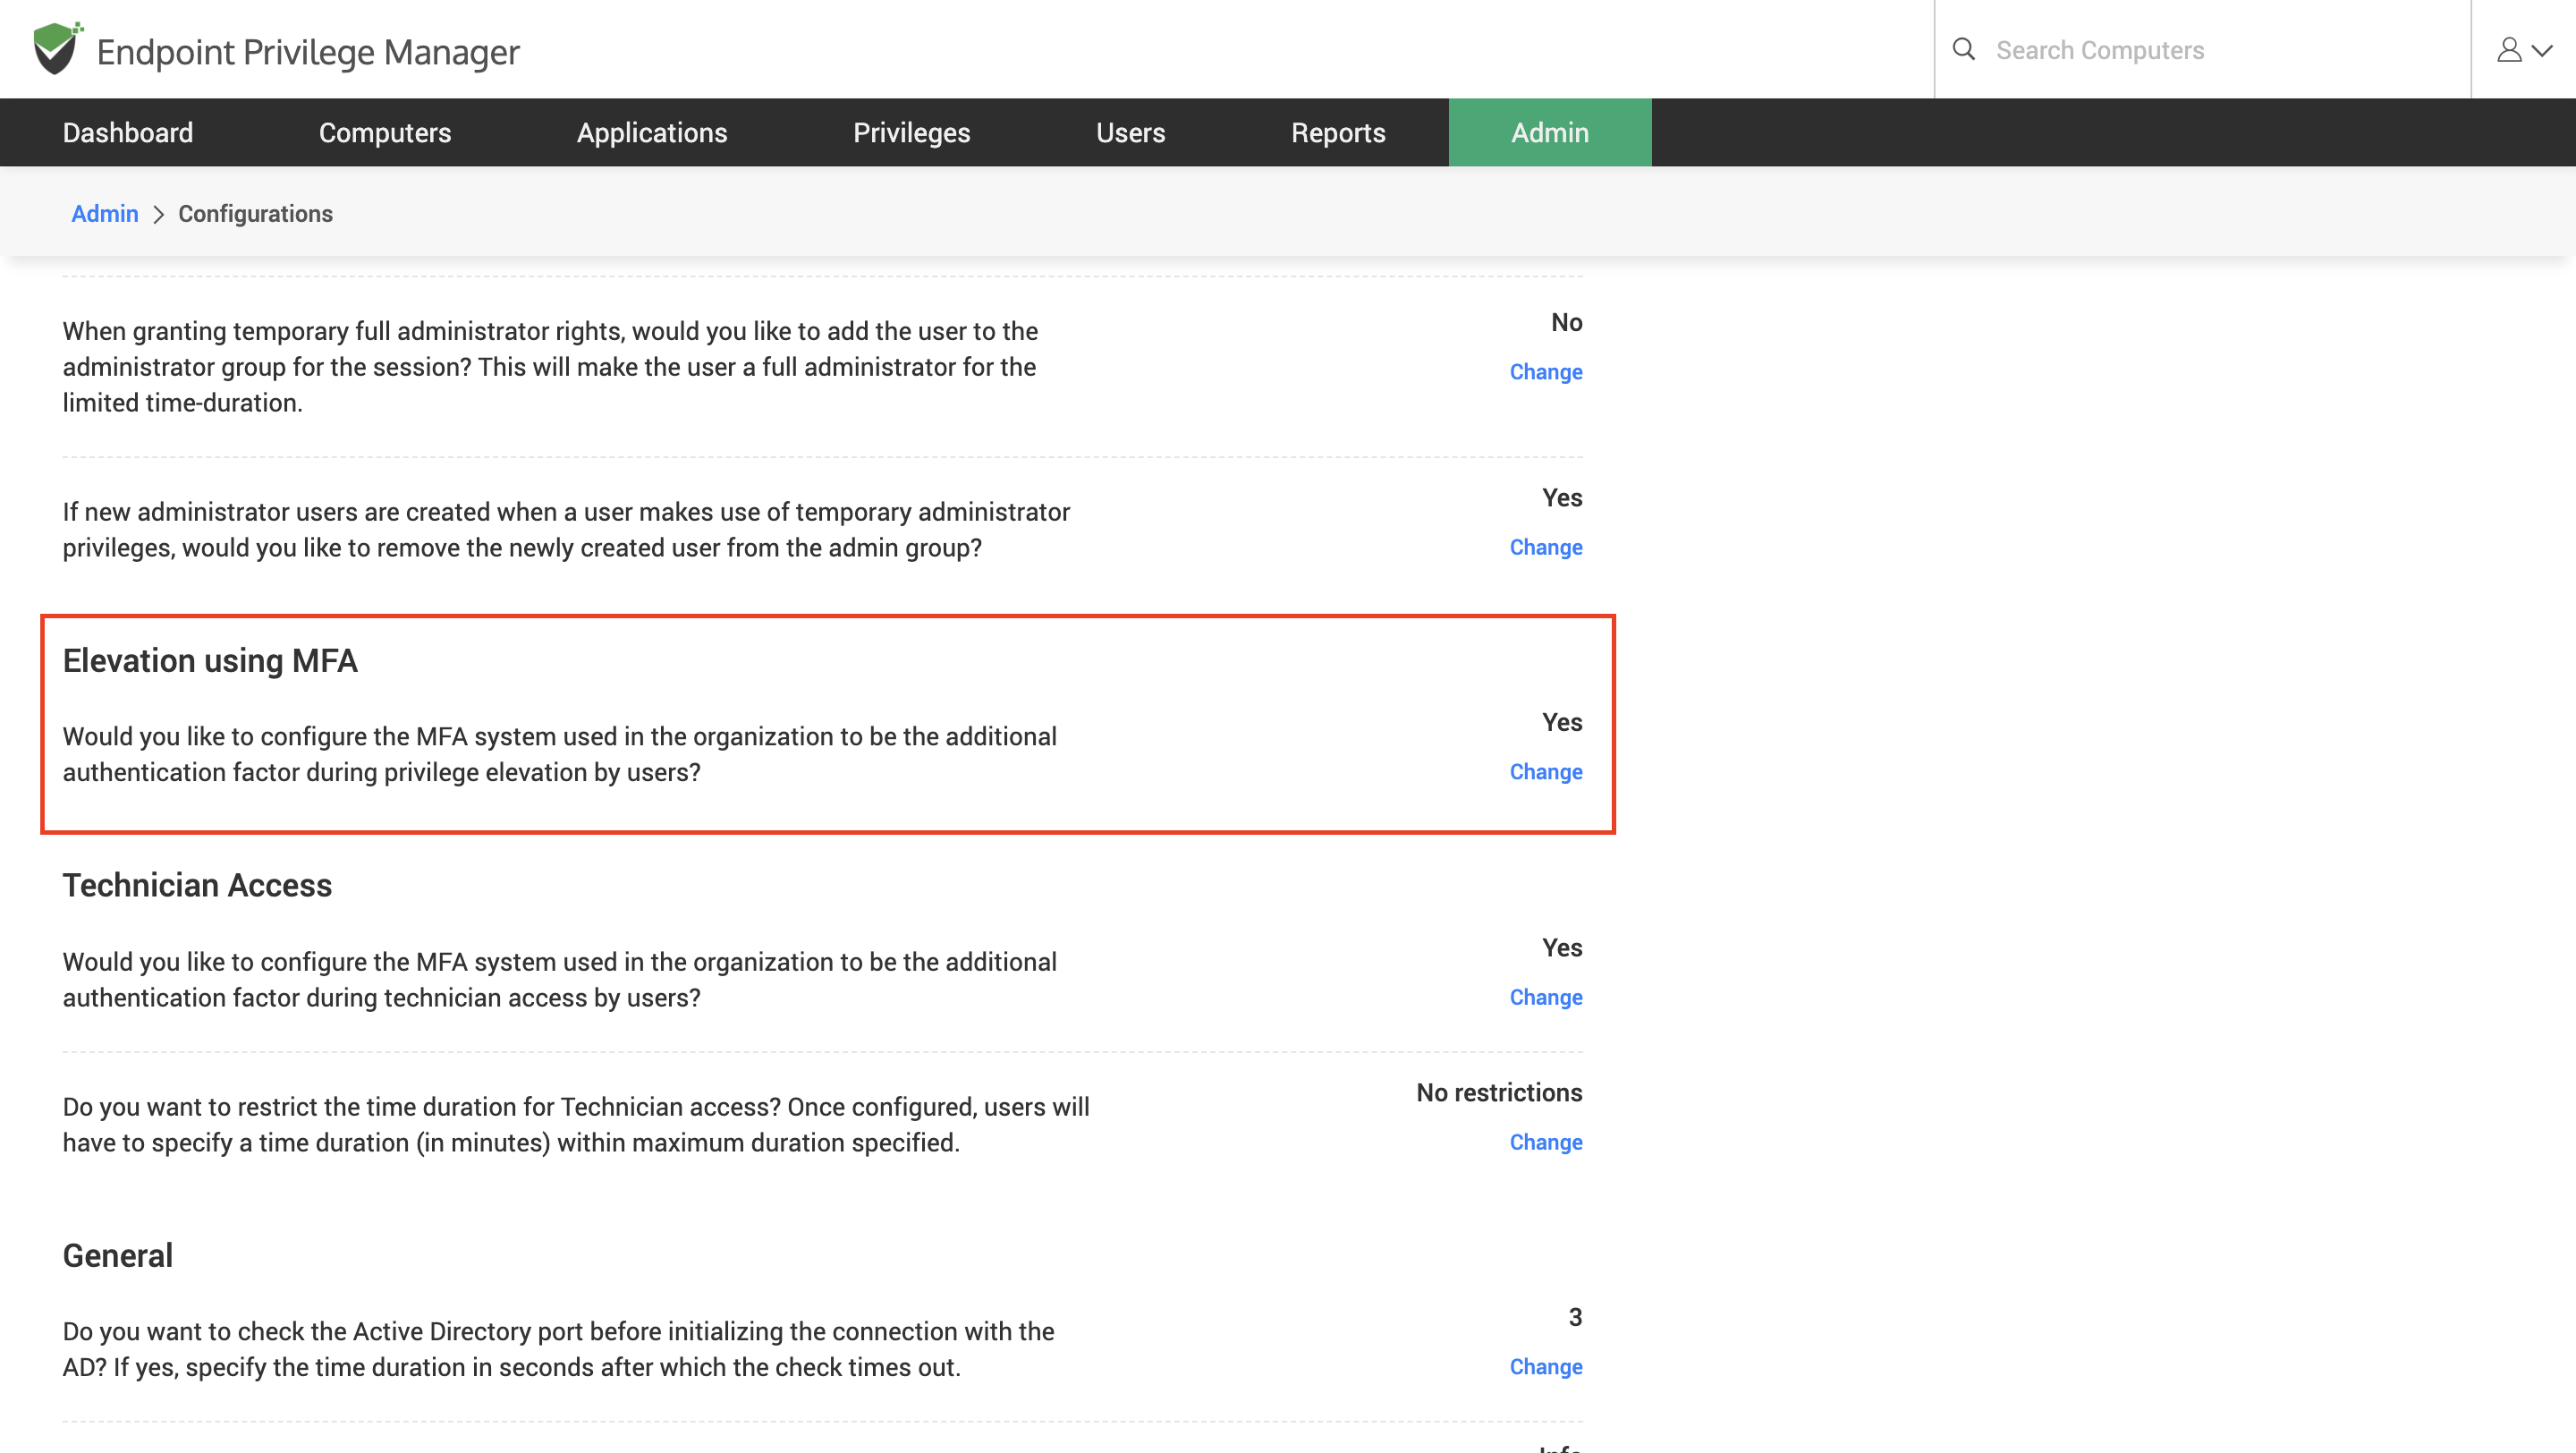
In addition to enforcing MFA for logging in to the web-interface, Securden supports enforcing a two-step authentication at the time of privilege elevation. The MFA step can also be enforced when the users are elevating an app or starting a temporary administrator session.
Navigate to Admin >> General >> Configurations >> Elevation Using MFA to enforce MFA for elevating application privilege.