Remote connections to SQL Server Management Studio (SSMS)
This document provides a detailed explanation of the options available for clients/end users to launch remote connections to the SQL Server Management Studio (SSMS) application via Securden. There are two methods through which this can be done:
- Installing the SSMS application on all end-user machines.
- Configuring a remote gateway and installing the SSMS application on the remote gateway
1. Installing the SQL Server Management Studio (SSMS) application on all end-user machines
This approach calls for the installation of the SQL Server Management Studio (SSMS) application on all the required end-user machines. Once that’s done, an SQL server account needs to be added in Securden Unified PAM and should be shared with end users launching remote connection to the SSMS application.
Refer here for detailed instructions on adding accounts in Securden Unified PAM.
After the SQL Server account is added to Securden Unified PAM and the SSMS application is installed on end-user devices, end users can log in to Securden and establish remote connections to the SSMS application via the Securden interface.
2. Configuring a remote gateway and installing the SSMS application on the remote gateway
This approach allows users to deploy a remote gateway server and subsequently install the SQL server management studio (SSMS) application on the remote gateway server (that connects to the required SQL servers) rather than performing multiple separate installations on all the required end-user machines.
To enable end users launch remote connections to the SSMS application via this approach, you must first configure the remote gateway, followed by installing the Securden Session Manager (which manages remote connections and session recording) on a server within the internal network. Once this is done, you have to install the SSMS application on the remote gateway server.
Listed below are the steps you need to follow to configure the remote gateway server:
- Create a remote gateway in Securden
- Deploy Securden Session Manager
- Associate devices with the remote gateway
- Associate domains with the remote gateway
To know the detailed steps on creating a remote gateway, refer here.
Once the remote gateway is configured, you need to deploy the Securden Session Manager (SSM) to launch remote sessions and record them. The step-by-step procedures on server configuration for Securden Session Manager are explained in the attached pdf.
Securden Session Manager (SSM) acts as a lightweight tool on the machine that is identified to serve as the gateway. You need to choose the machine first and then deploy the SSM package.
Prerequisite: The server in which you want to deploy SSM should have already been discovered/added to Securden (in your case, it is the SQL server device). In the interface, you can only choose from the already available accounts. If the server has not yet been added to Securden, add/discover and then follow the step below.
To deploy SSM, navigate to Admin >> Remote Sessions and Recordings >> Remote Gateway and select the required gateway.
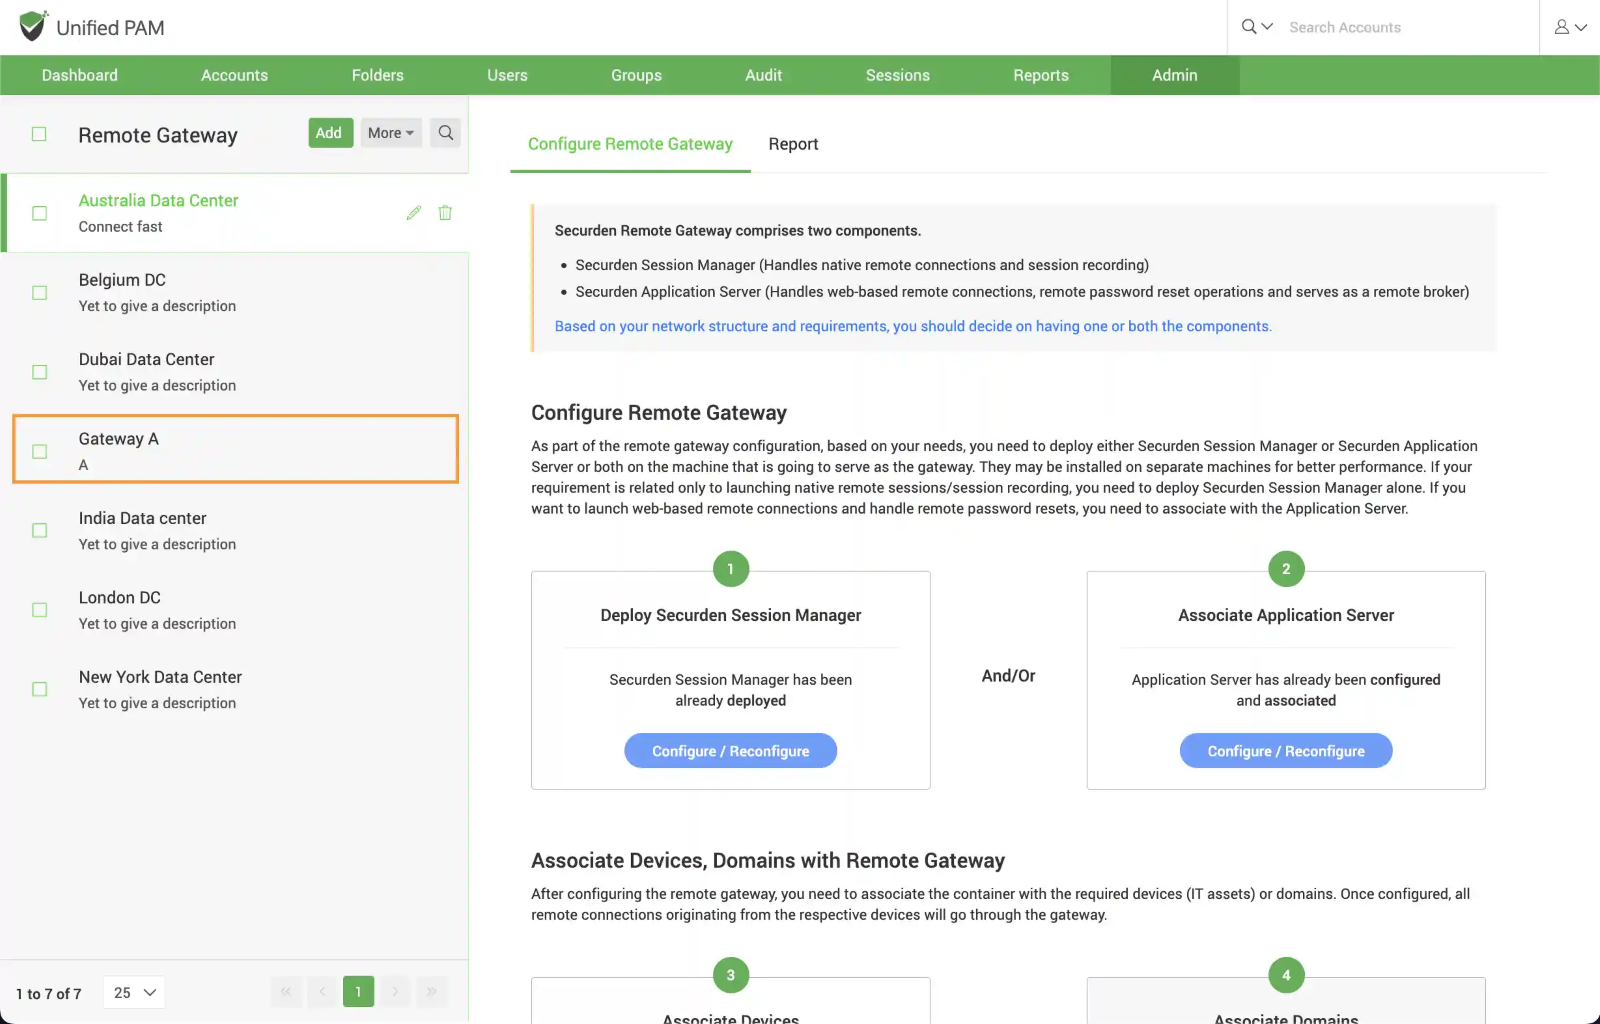
In the RHS, you will see the GUI consisting of the steps to Deploy Securden Session Manager.
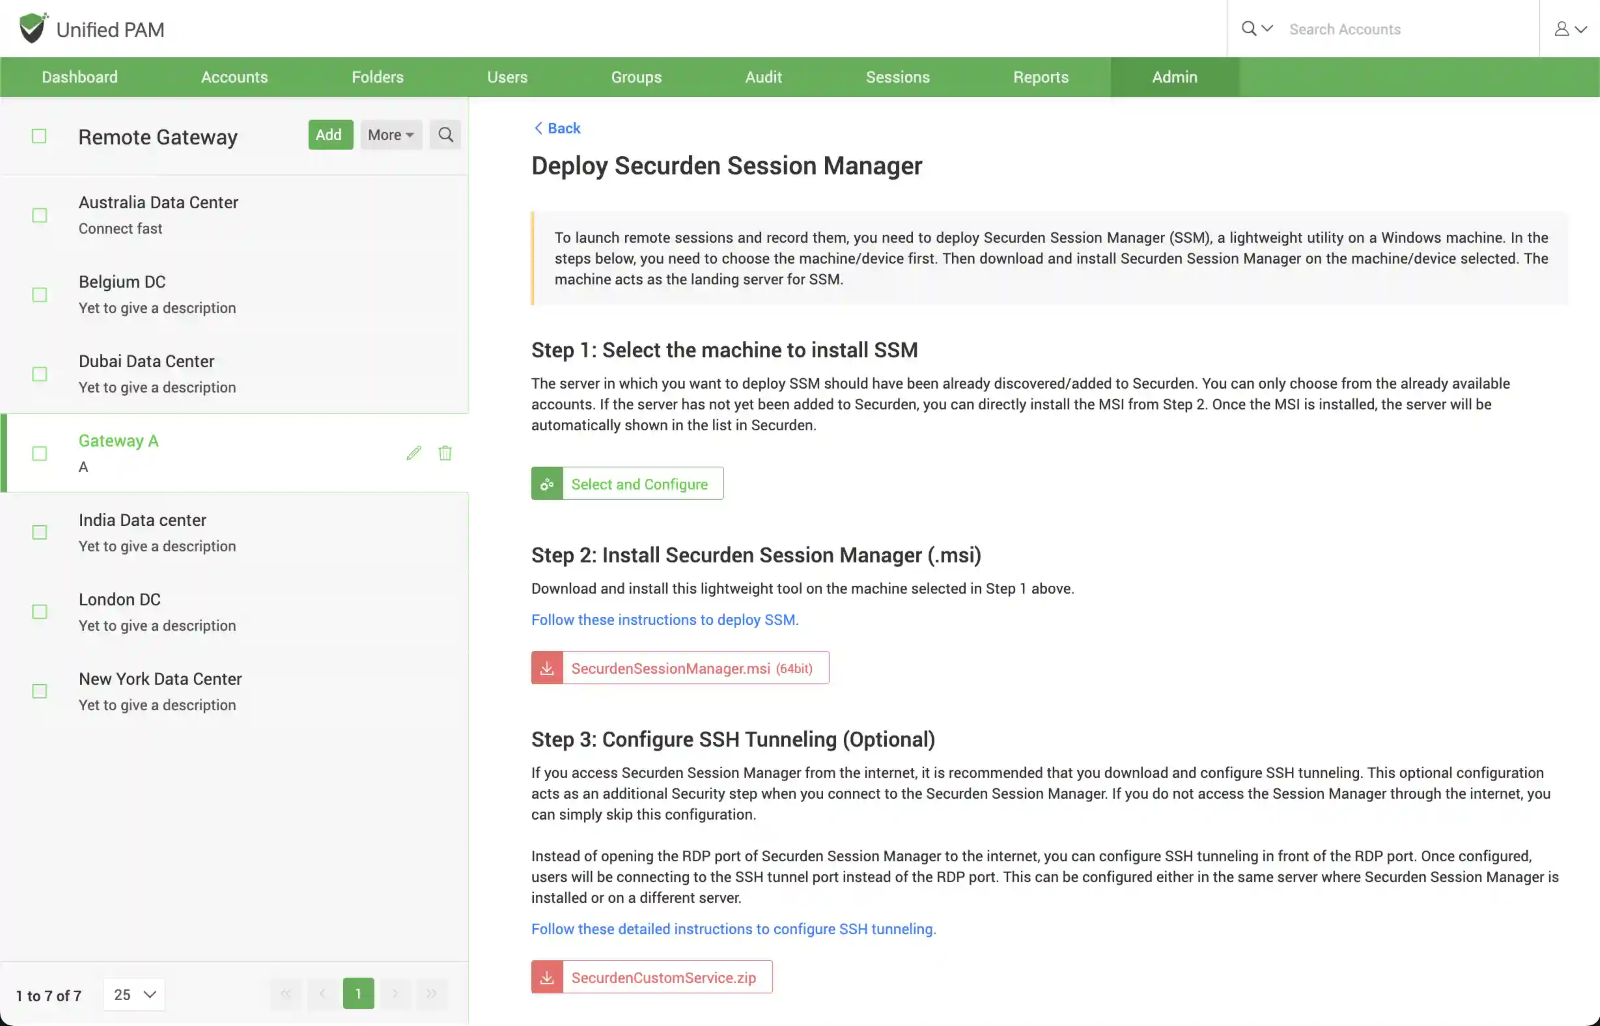
In the GUI that opens, you need to perform the following actions:
- Select the machine in which you will be deploying SSM
- Download the SSM package and deploy it on the machine selected. Select the machine to install SSM
- (Optional) Configure SSH tunneling
1: Select the machine in which you will be deploying SSM
In this step, you need to select a machine where you would like to install the Securden Session Manager. In addition, you need to specify an account using which connections are to be established with the machine.
Pre-requisite: The machine/server in which you want to deploy SSM should have been already discovered/added to Securden. You will only be able to select from the machines/servers that are listed in the drop-down. The machine where the SSM needs to be deployed should be part of the domain and must have Remote Desktop Services (RDS) enabled. The client must ensure that an RDS Client Access License (CAL) is required to establish connections in this manner.
If you are not able to discover or add a server, you can directly install the MSI from Step 2. Once the MSI is installed, the server will be automatically shown in the list in Securden and you can select it here.
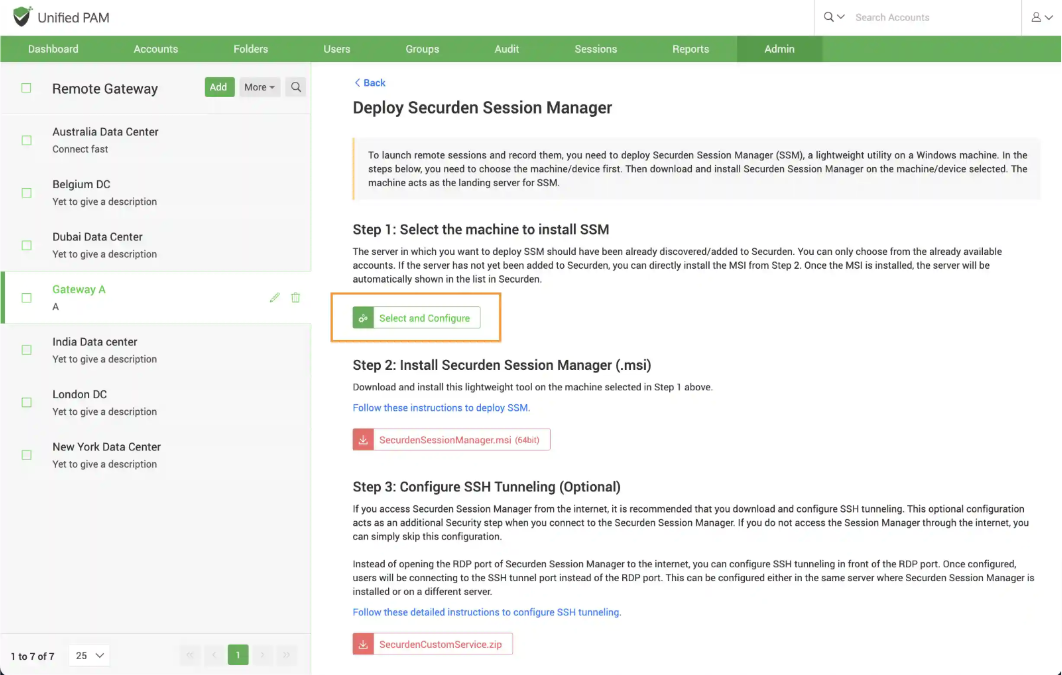
To select the machine where SSM should be deployed, click “Select and Configure” as shown in the screenshot below.
In the GUI that opens up, you need to select a machine discovered and added to Securden. Once you select the intended machine, you need to enter its IP address or DNS to enable Securden to connect to the device.
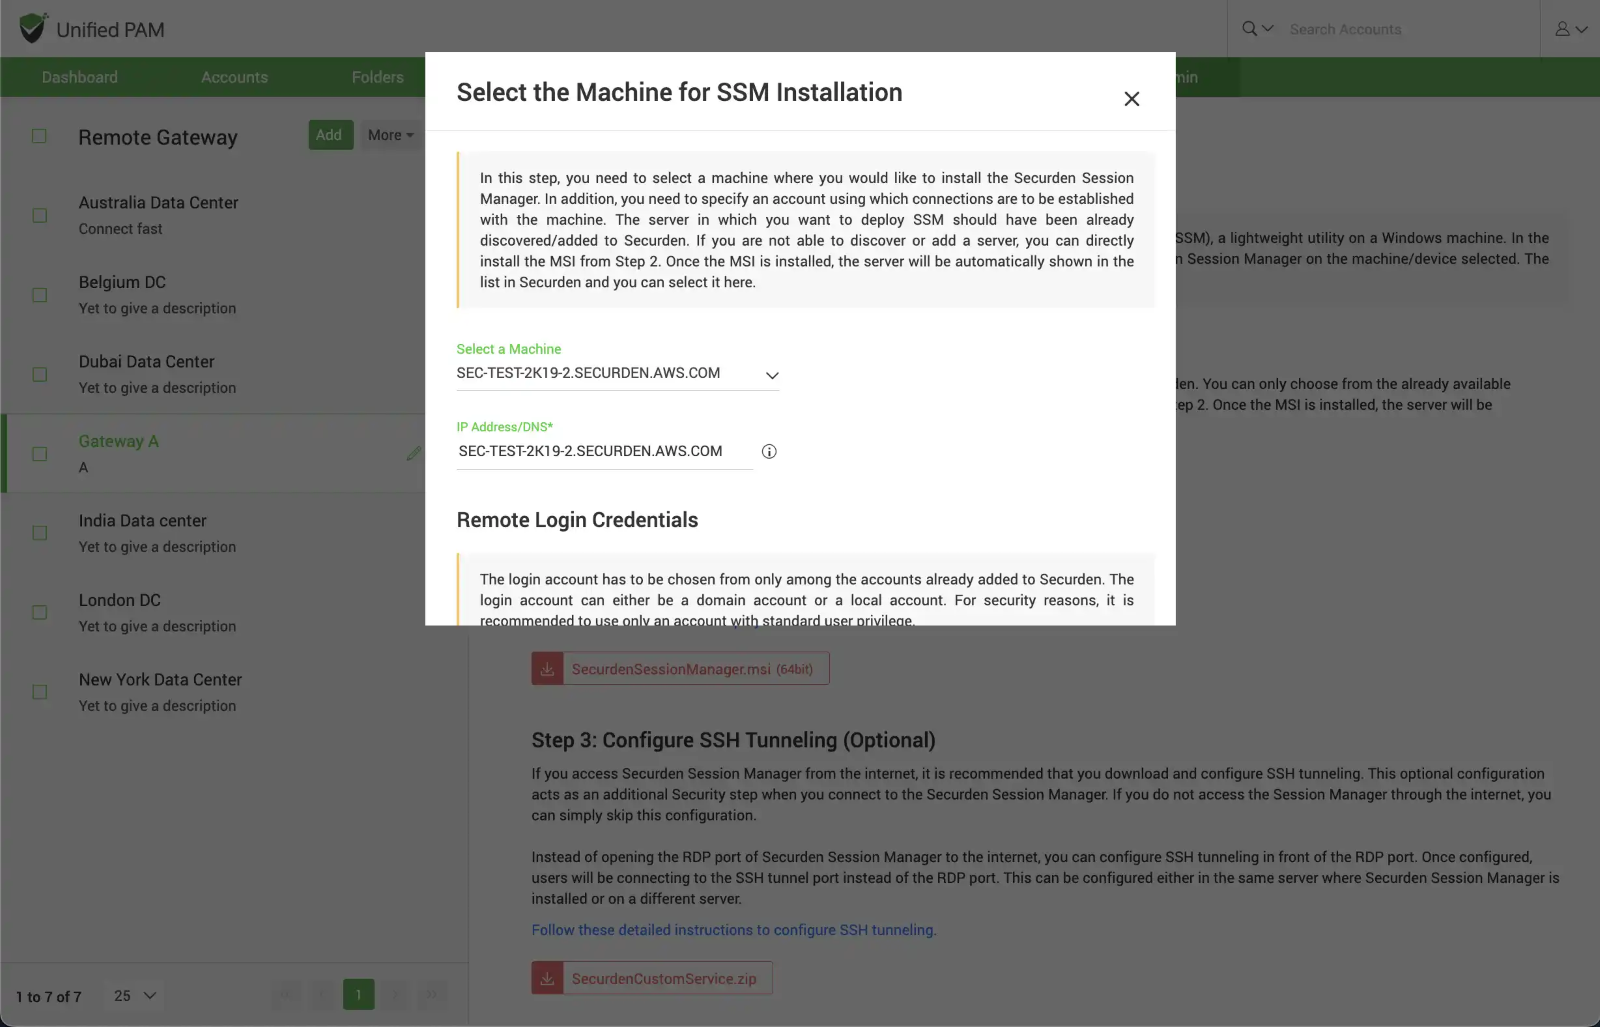
Input remote login credentials - In addition to the IP address, you need to specify an account using which connections are to be established with the machine.
Typically, when a user tries to launch a remote connection with a target resource, Securden first logs into the machine where SSM is installed using the login account selected here. From there, it connects to the target machine using the target machine's credentials.
The remote login account has to be chosen from only among the accounts already added to Securden. The login account can either be a domain account or a local account.
Note
For security reasons, it is recommended to use only an account with standard user privilege.
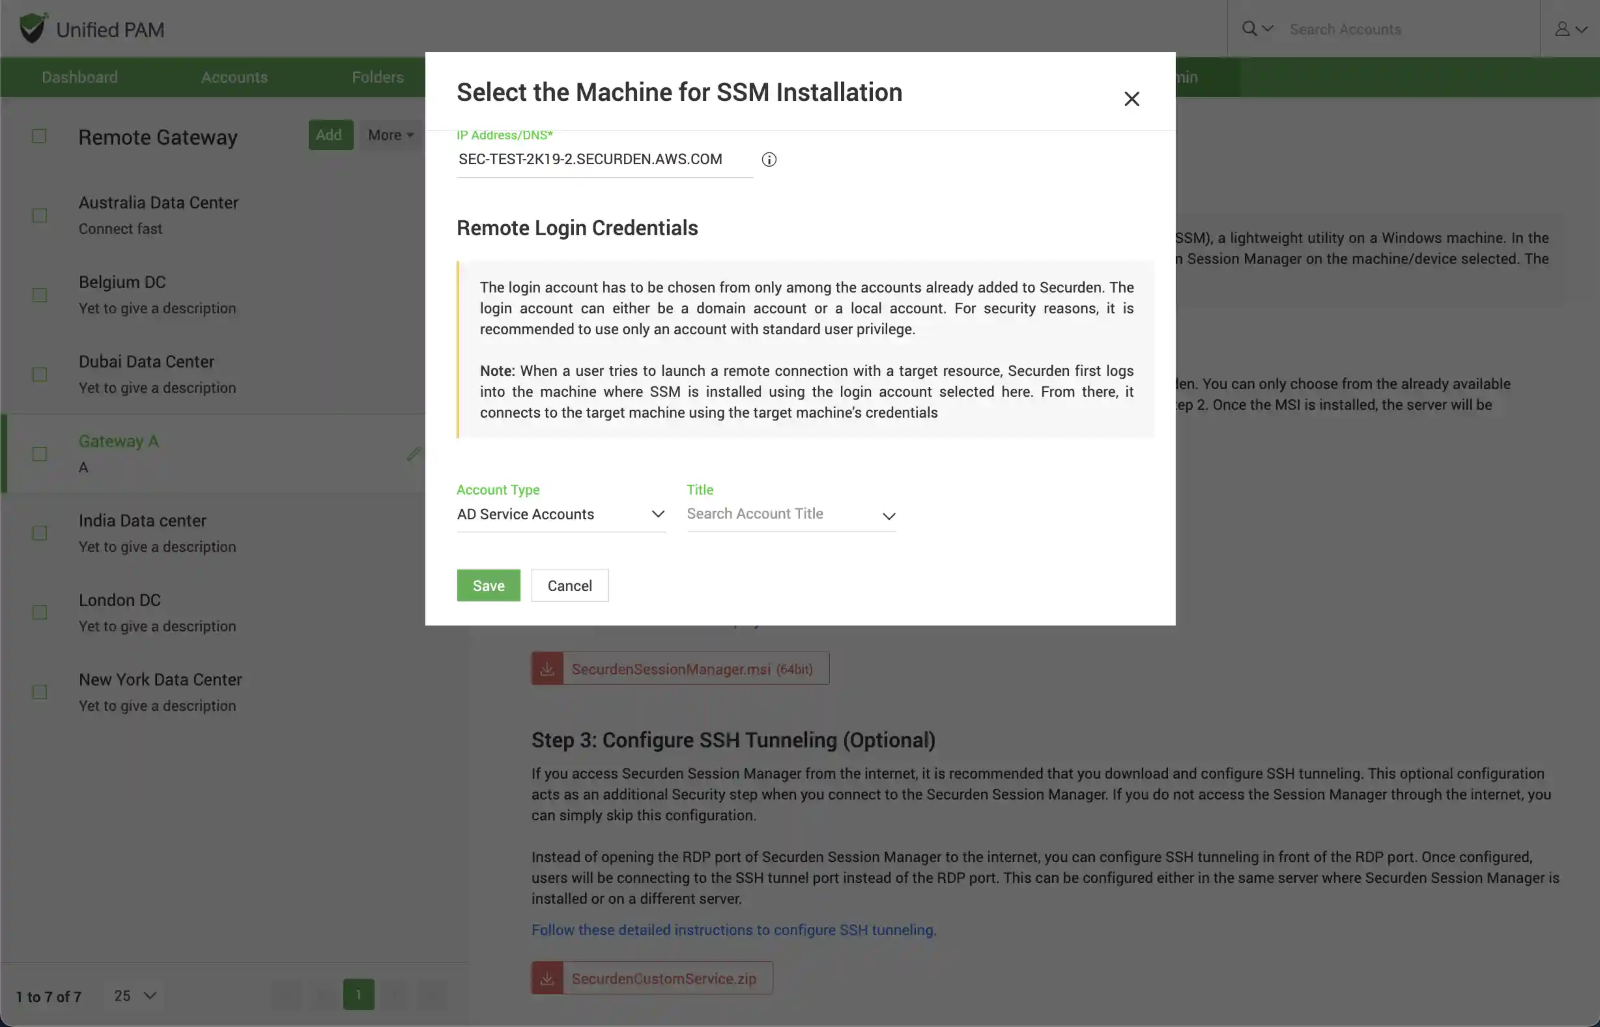
You need to select the Account Type, the Account title for the required account and click “Save”.
2: Install the Securden Session Manager (.msi)
After completing Step 1, you are ready to install the SSM package on the machine identified above. Download the .msi package from the GUI and follow the instructions given in the document link provided in the interface.
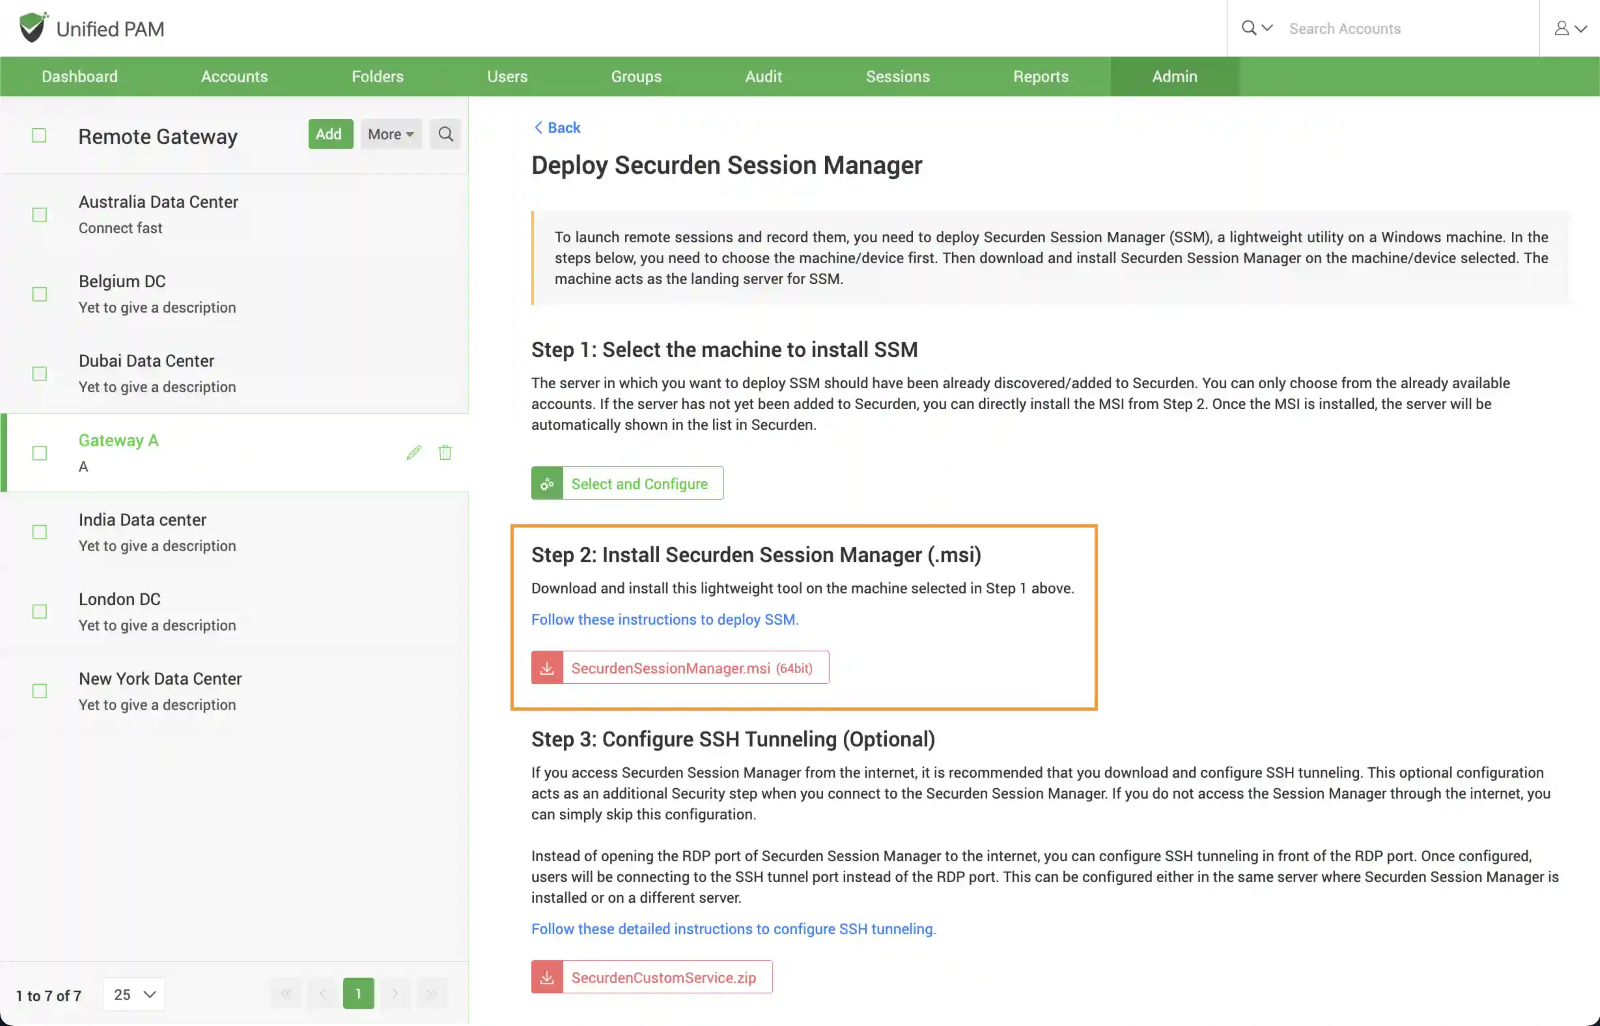
3: Configure SSH Tunneling (Optional)
If you do not access the Session Manager through the internet, you can simply skip this configuration.
If you access Securden Session Manager from the internet, it is recommended that you download and configure SSH tunneling. This optional configuration acts as an additional Security step when you connect to the Securden Session Manager.

Instead of opening the RDP port (3389) of Securden Session Manager to the internet, you can configure SSH tunneling in front of the RDP port. Once configured, users will be connecting to the SSH tunnel port instead of the RDP port. This can be configured either in the same server where Securden Session Manager is installed or on a different server.
Follow the detailed instructions available on the GUI to configure SSH tunnelling.
Install SSMS application in the configured remote gateway
After the remote gateway and SSM are installed on a machine or server, SQL Server Management Studio (SSMS) must be installed on the appropriate machine or server. This allows users to launch connections to the SSMS application through the remote gateway.
Note: If the account used to launch connections to the SSMS application is a domain account, you do not need to associate the device with the remote gateway. Instead, simply associate the domain itself.
Summary: You need to create an entity called the remote gateway in Securden, deploy the Securden Session Manager and then associate the gateways with the required devices/domains in Securden.
