How to Configure Two-factor Authentication for EPM Users?
Securden integrates with MFA solution providers such as Microsoft Authenticator, Google Authenticator, YubiKeys, and all RADIUS-based two-factor authentication systems. Securden also provides native two-factor authentication through Mail OTP and SMS-based OTP.
You can enable multiple MFA methods from the list of options. You can enforce MFA for specific users and groups. Securden also supports MFA for privilege elevation.
This is a three-step process:
- Activate two-factor authentication
- Select the required MFA method
- Select the enforcement method
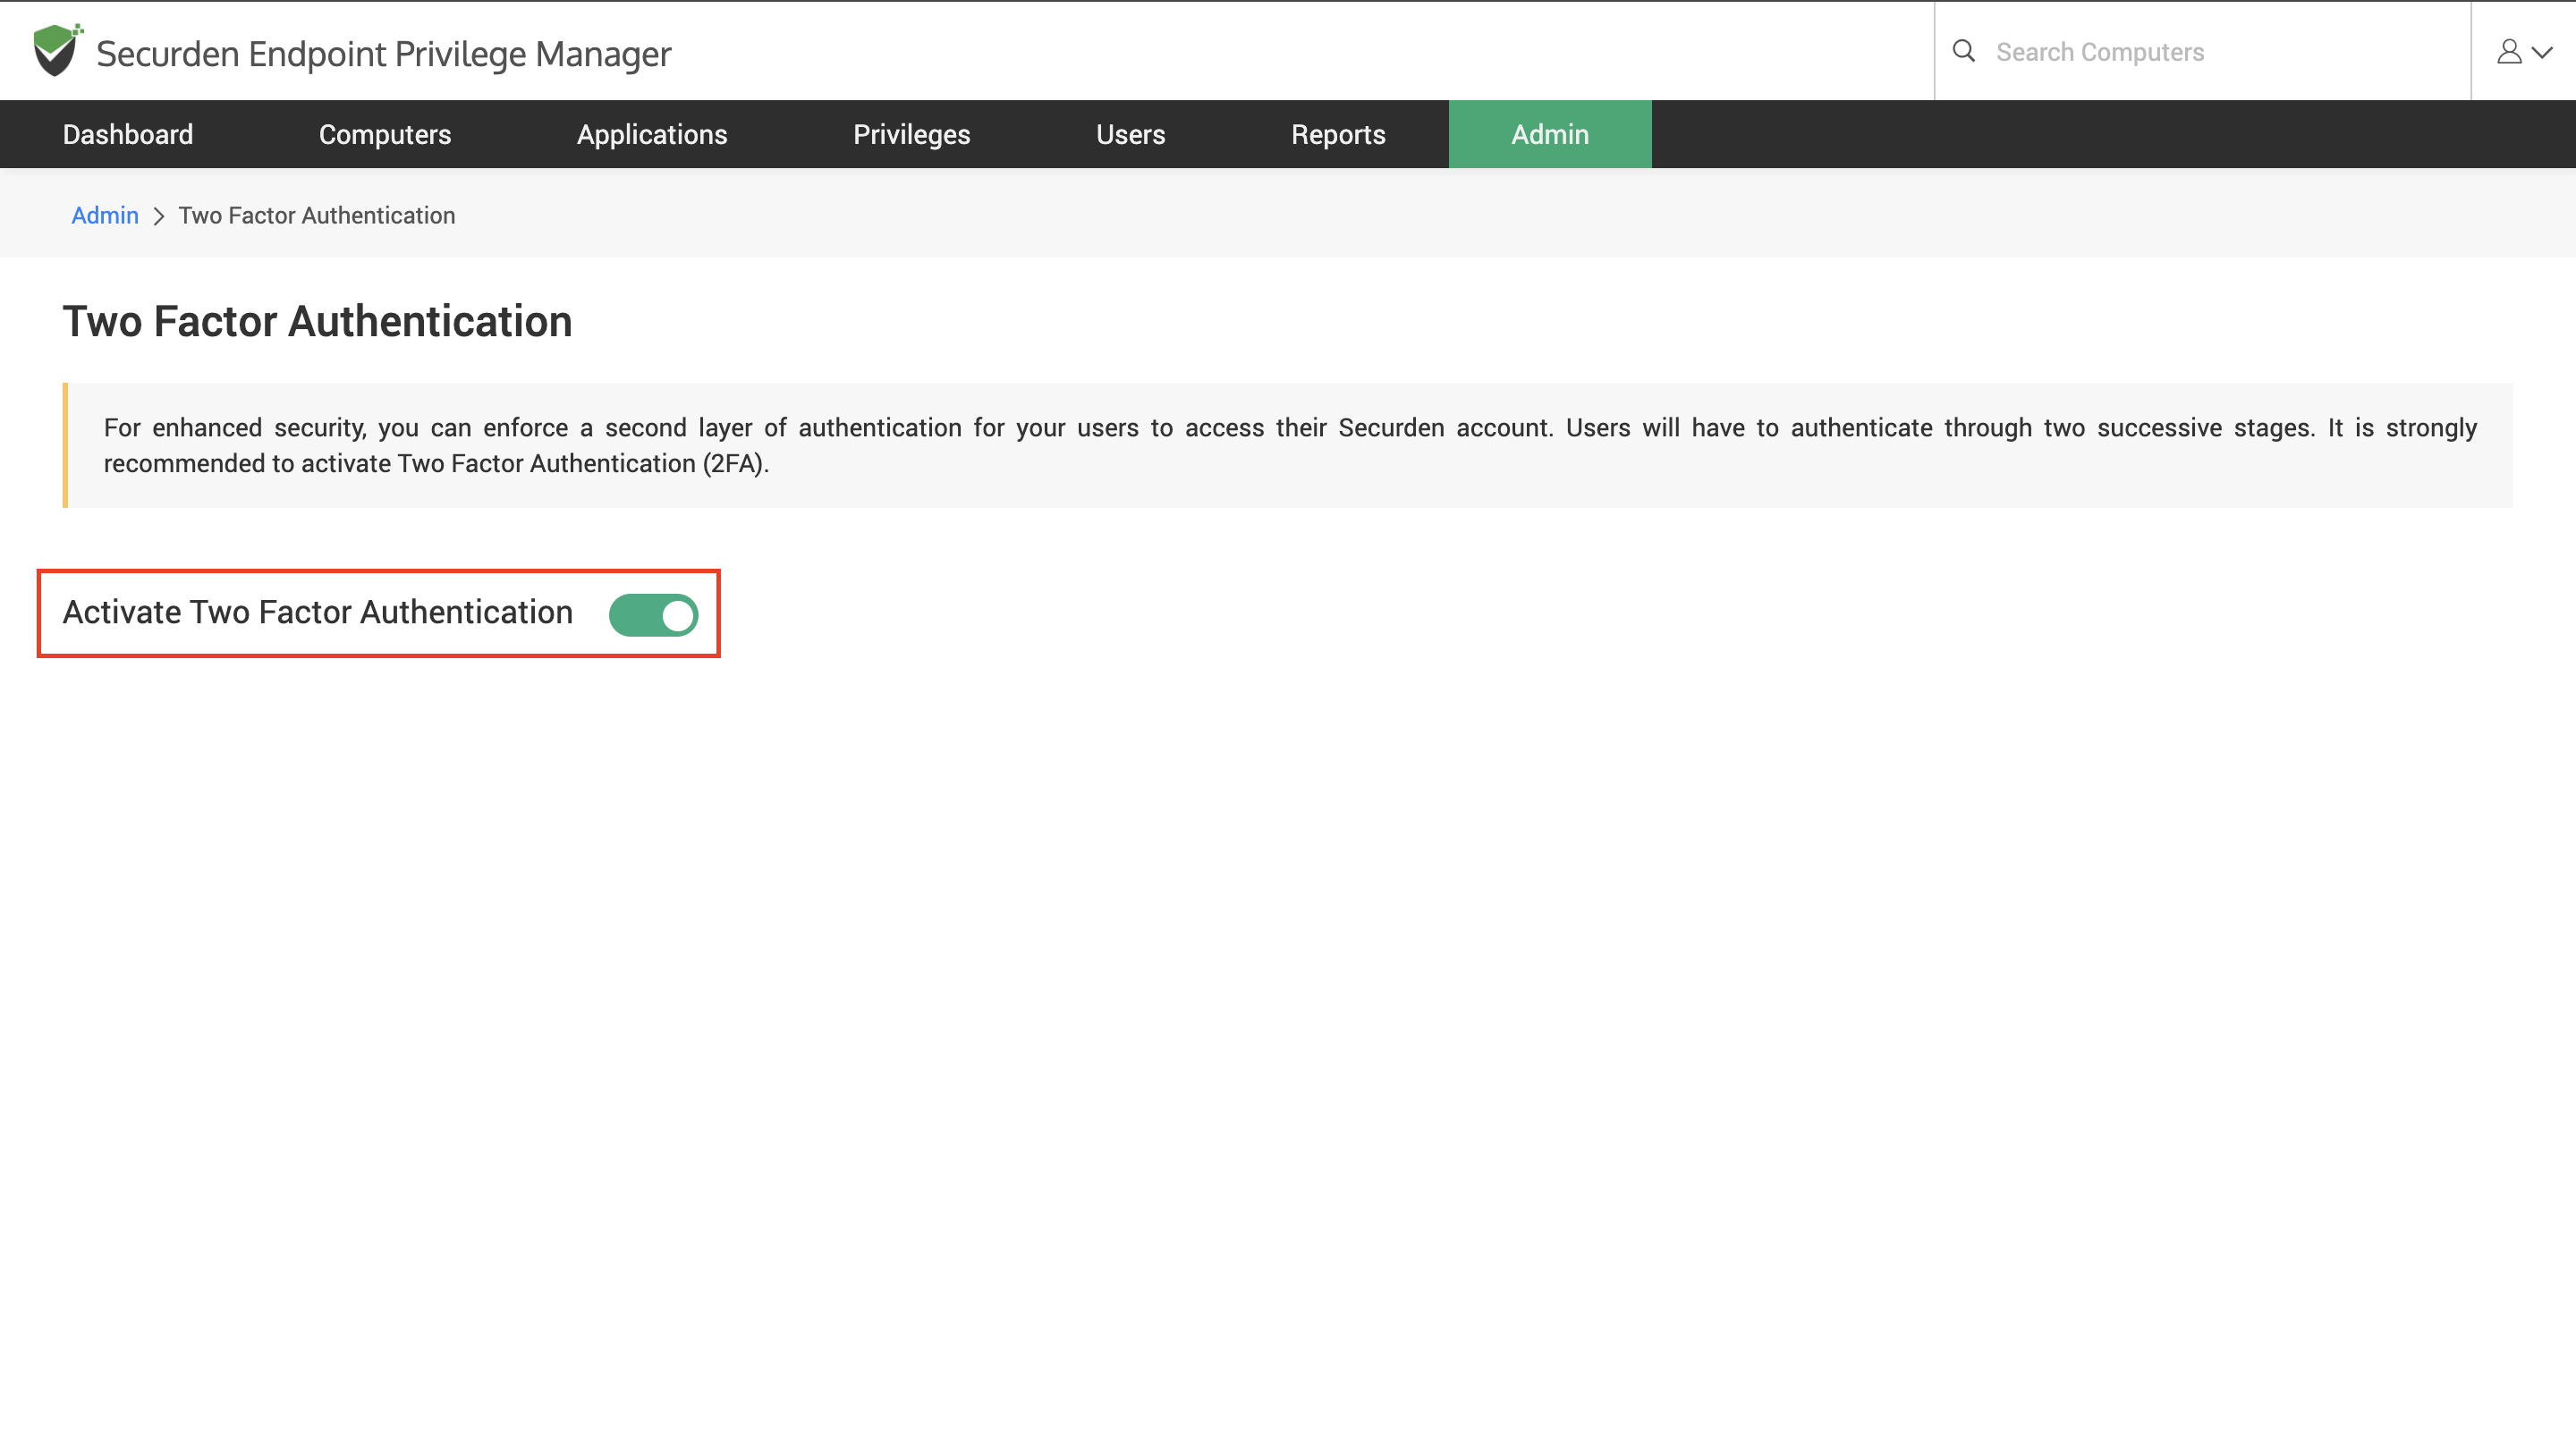
How to Activate Multi-factor Authentication?
1) Navigate to: Admin ➝ Authentication ➝ Two Factor Authentication and enable the toggle button named Activate Two Factor Authentication.
Select the Required MFA Options
The next step is to select the required TFA option from the various supported options.
At present, Securden supports the following MFA options:
-
Mail OTP
Securden generates a one-time password to be used as the second authentication factor and sends it to the registered email address of the respective user. -
Google/Microsoft/TOTP Authenticator
You can use any time-based one-time password (TOTP) authenticator app on your phone such as Google Authenticator, Microsoft Authenticator, or any TOTP-based authenticator.
If you are using any other TOTP authenticator, you may edit the TOTP Identifier and give it an appropriate name. -
RADIUS Authentication
You can integrate the RADIUS server or any RADIUS-compliant two-factor authentication system like OneSpan, Digipass, RSA SecurID, etc., for second-factor authentication. -
Email to SMS Gateway
If you are already using an Email to SMS gateway solution, you can integrate it with Securden to send OTPs to users through SMS. -
YubiKey Authentication
If you want to use a YubiKey hardware authentication device, you can configure it with Securden and use it as a second factor.
The RADIUS Authentication, YubiKey, and Email to SMS Gateway options need to be configured before they can be used. The steps involved are discussed below.
How to Configure RADIUS Authentication?
You can integrate a RADIUS server or any RADIUS-compliant two-factor authentication system like OneSpan Digipass, RSA SecurID, Swivel Secure, etc., for second-factor authentication. You need to configure RADIUS server details for the integration to take effect.
To configure the RADIUS server, navigate to Admin ➝ Authentication ➝ RADIUS Server Settings

In the GUI, you need to enter the following details:
-
Identifier
Name of the RADIUS-compliant authentication mechanism you are trying to integrate.
The name entered here will appear on the Securden login screen. -
Server Name
The hostname or IP address of the RADIUS server.
You can specify multiple hostnames or IP addresses as a redundancy measure.
Securden will try to connect to them sequentially until a successful connection is established. -
Server Secret
The secret key that RADIUS clients use to access the RADIUS server. -
Authentication Retries
The maximum number of times Securden should attempt to authenticate with the RADIUS server. -
Authentication Protocol
Select the authentication method from the list of supported protocols:
PAP,CHAP,MS-CHAP,MS-CHAPv2. -
Authentication Port
Enter the RADIUS server port (default is1812). -
User Login Format
The specific format in which the user should enter the login name.
This format will be sent to the RADIUS server for authentication.
You can select a predefined format or add a new one. -
Authentication Timeout (in seconds)
The maximum time after which the authentication attempt times out.
After entering all the required details, click Save.
You can then test the RADIUS authentication setup.
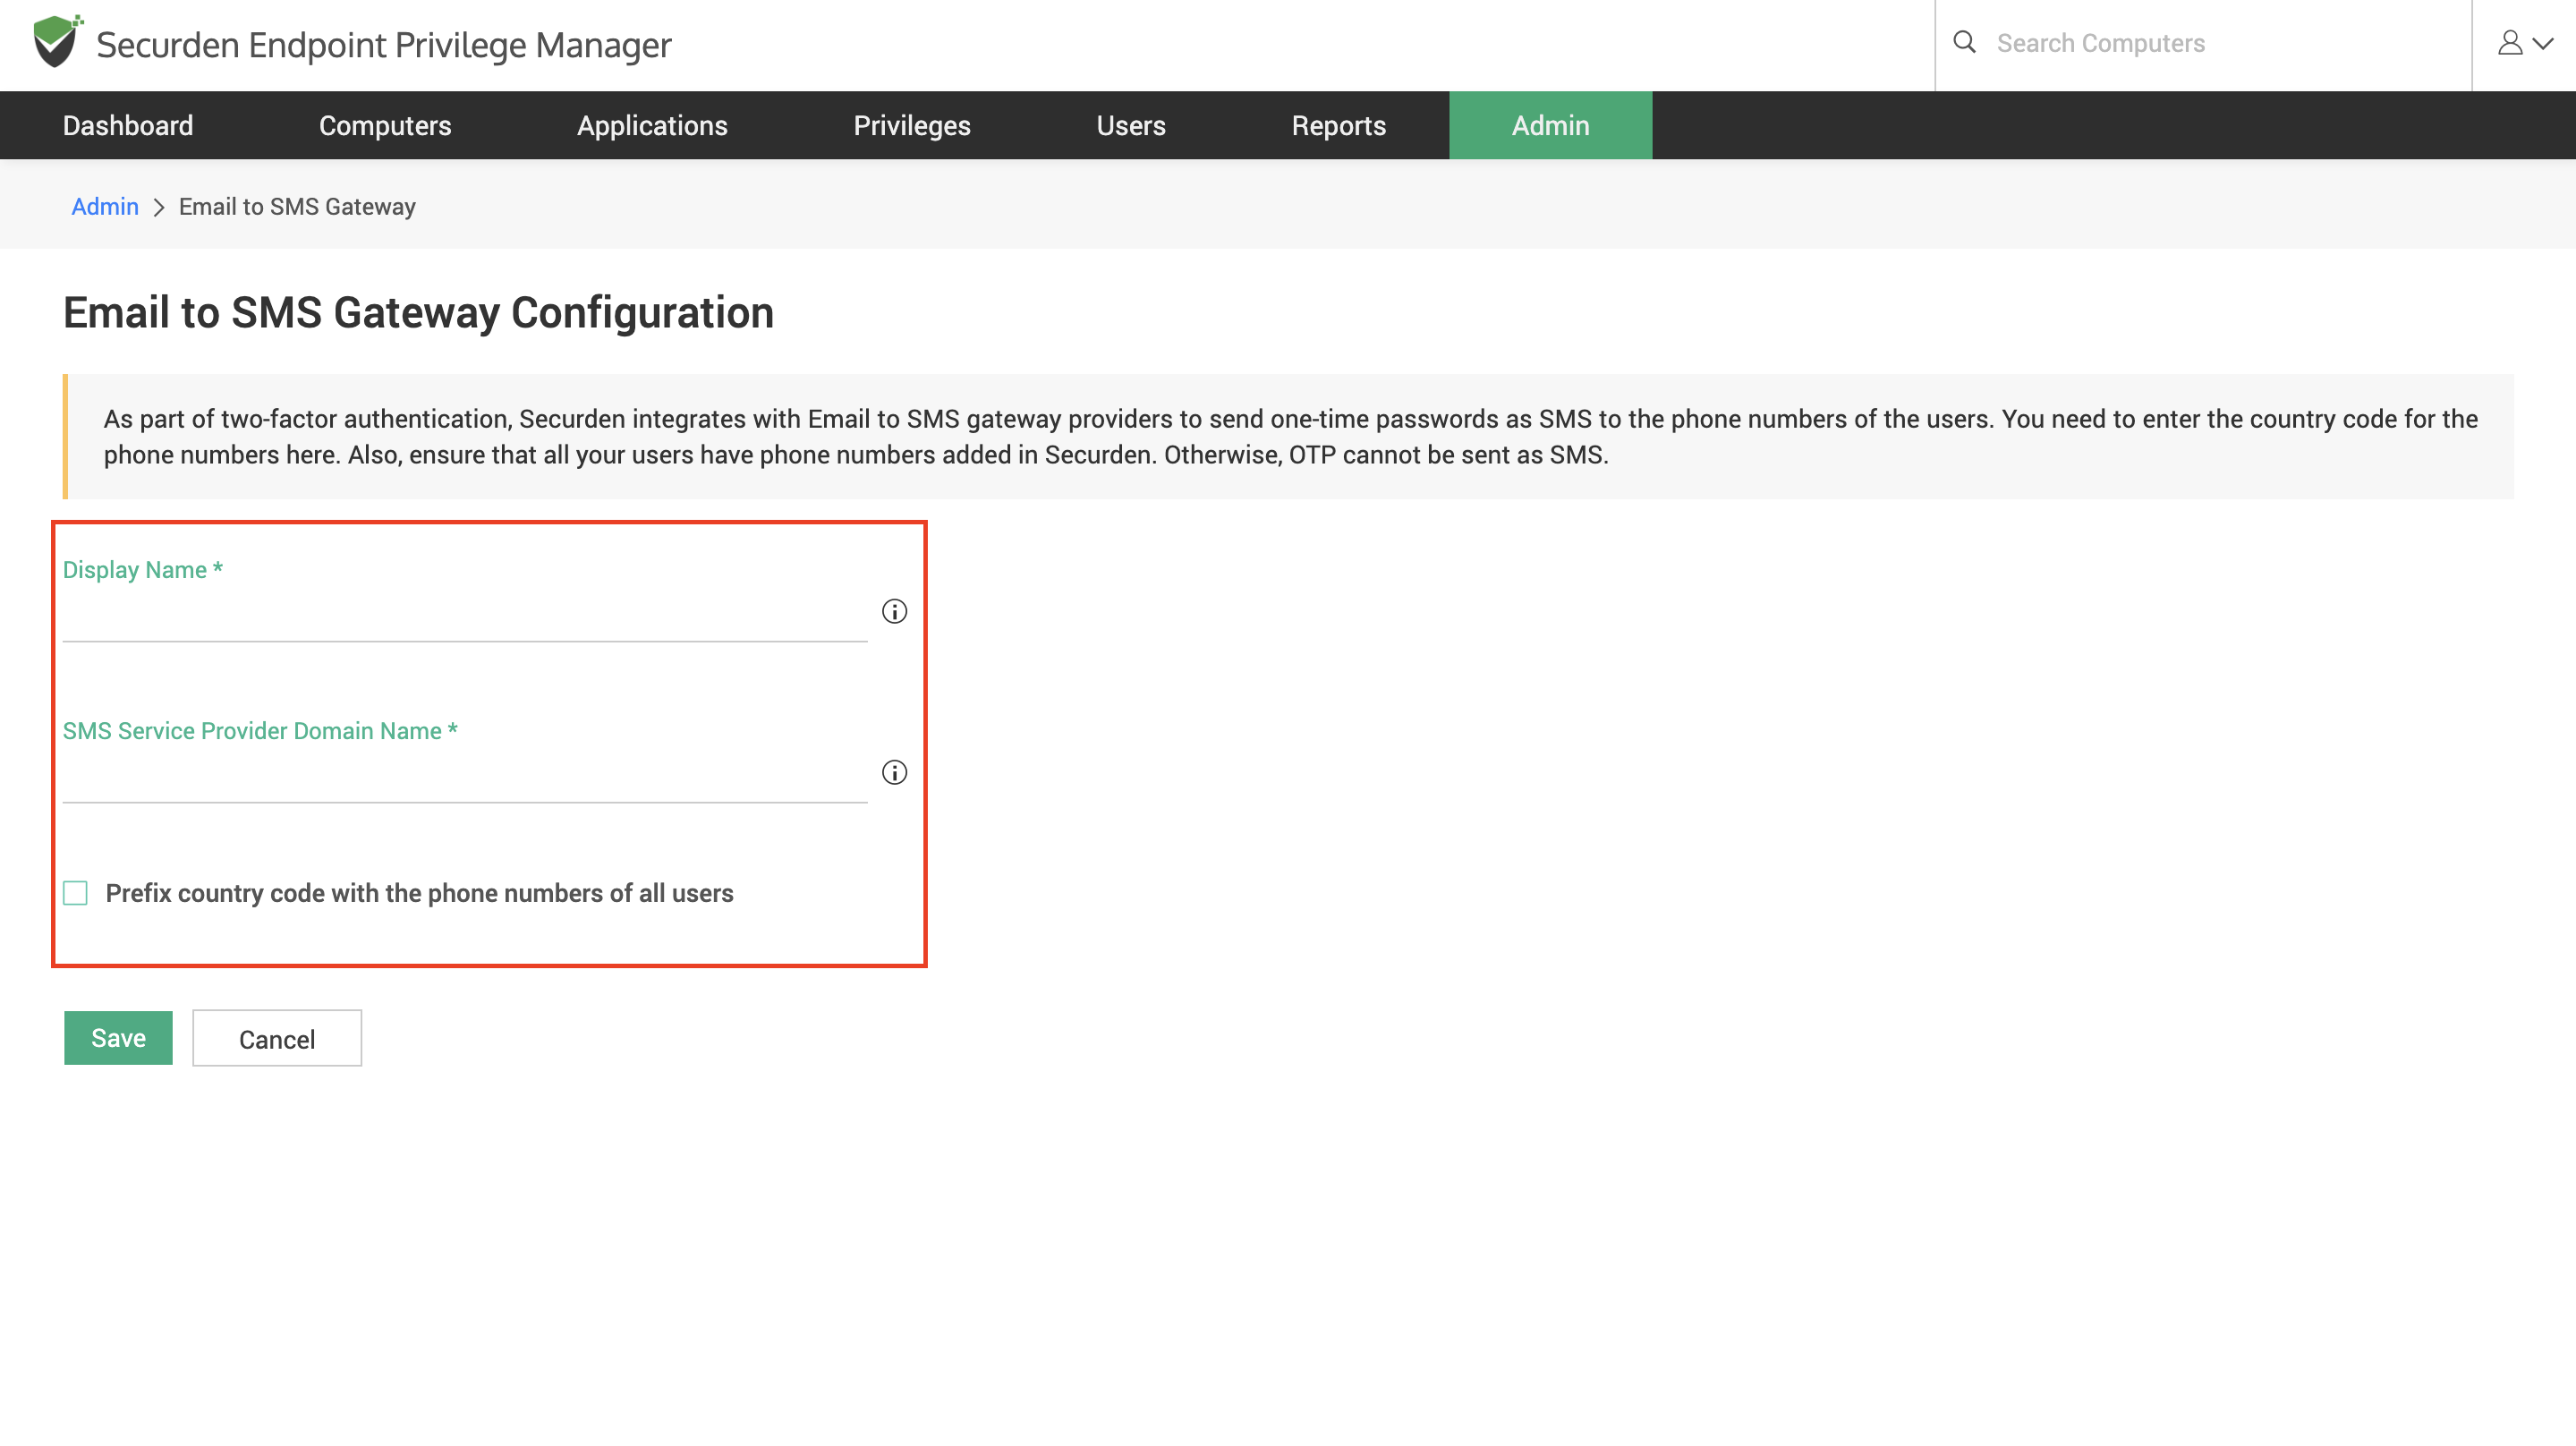
How to Configure the Email to SMS Gateway?
As part of two-factor authentication, Securden integrates with Email to SMS gateway providers to send one-time passwords as SMS to users' phone numbers.
You need to enter the country code for the phone numbers here.
Pre-requisite:
The users for whom this MFA method is enforced must have a phone number added to Securden.
Otherwise, OTPs cannot be sent through SMS.
To configure:
Navigate to Admin ➝ Authentication ➝ Email to SMS Gateway and then, provide the required details to complete the setup.
-
Display Name
The name you give here appears in the list of available TFA options. -
SMS Service Provider Domain Name
Enter the domain name of your email service provider here. -
Country Code
Enter the country code that needs to be appended to the mobile number.
If the country code is already associated with users, you may leave this field blank.
After filling all the required fields, click Save.
How to Configure YubiKeys?
YubiKey tokens supplied by Yubico can be used to enforce MFA in Securden.
To enforce YubiKey-based MFA, navigate to:
Admin ➝ Authentication ➝ Two-Factor Authentication
Select YubiKey and click Save.
Once enforced, the YubiKey token must be registered by the user when they log in to the EPM interface.
-
Enter their Securden credentials and complete the first level of authentication. Once it succeeds, you will be asked to enter the Yubikey OTP.
-
Each Yubikey has two slots, which are configured for either a mobile device or a computer/laptop
-
Before generating a one-time password using the Yubikey, you need to decide which of the two slots, slot 1 or slot 2, you intend to use for authenticating with Securden
Choose the slot you intend to use:
-
Slot 1:
If you tap the YubiKey once, it generates a 44-character security key whose first 12 characters are unique to this slot. For every subsequent login through this slot, the first 12 characters remain the same and the rest of the 32 characters are randomized. -
Slot 2:
If you tap and hold the YubiKey for 2-5 seconds, it generates a 44character security key whose first 12 characters are unique to this slot. For every subsequent login through this slot, the first 12 characters will remain the same and the rest of the 32 characters will be randomized.
Here is a sample output from a YubiKey where the button has been pressed three times.
Info
cccjgdwkdjkwjdkjwikjdkhhfgrtnnlgedjlftrbdeut
cccjgjubuebduhubnjkedjkehijeiocjbnublfnrev
cccjgjgkcbejnvchfkfhiiuunbtnvgihdfiktncvlhck
-
In the USB port of your Computer/Mobile, insert the Yubikey and generate a 12-character key.
-
Securden associates the 12-character key against this user account in the database. This key will be used to verify your identity during subsequent login attempts.
Note
By default, YubiKey generates slot 1 passcode for NFC configured mobile devices. You can set slot 2 passcodes as default by changing the setting from slot 1 to slot 2 using the Yubikey Personalization Tool.
Securden matches the 12-character key against your account in its database and verifies the same for the second level of authentication during future login attempts.
After submitting the YubiKey one-time password, click Register and Login.
Note
For users logging in for the first time, the users will be prompted to reset their login password after they register their YubiKey.
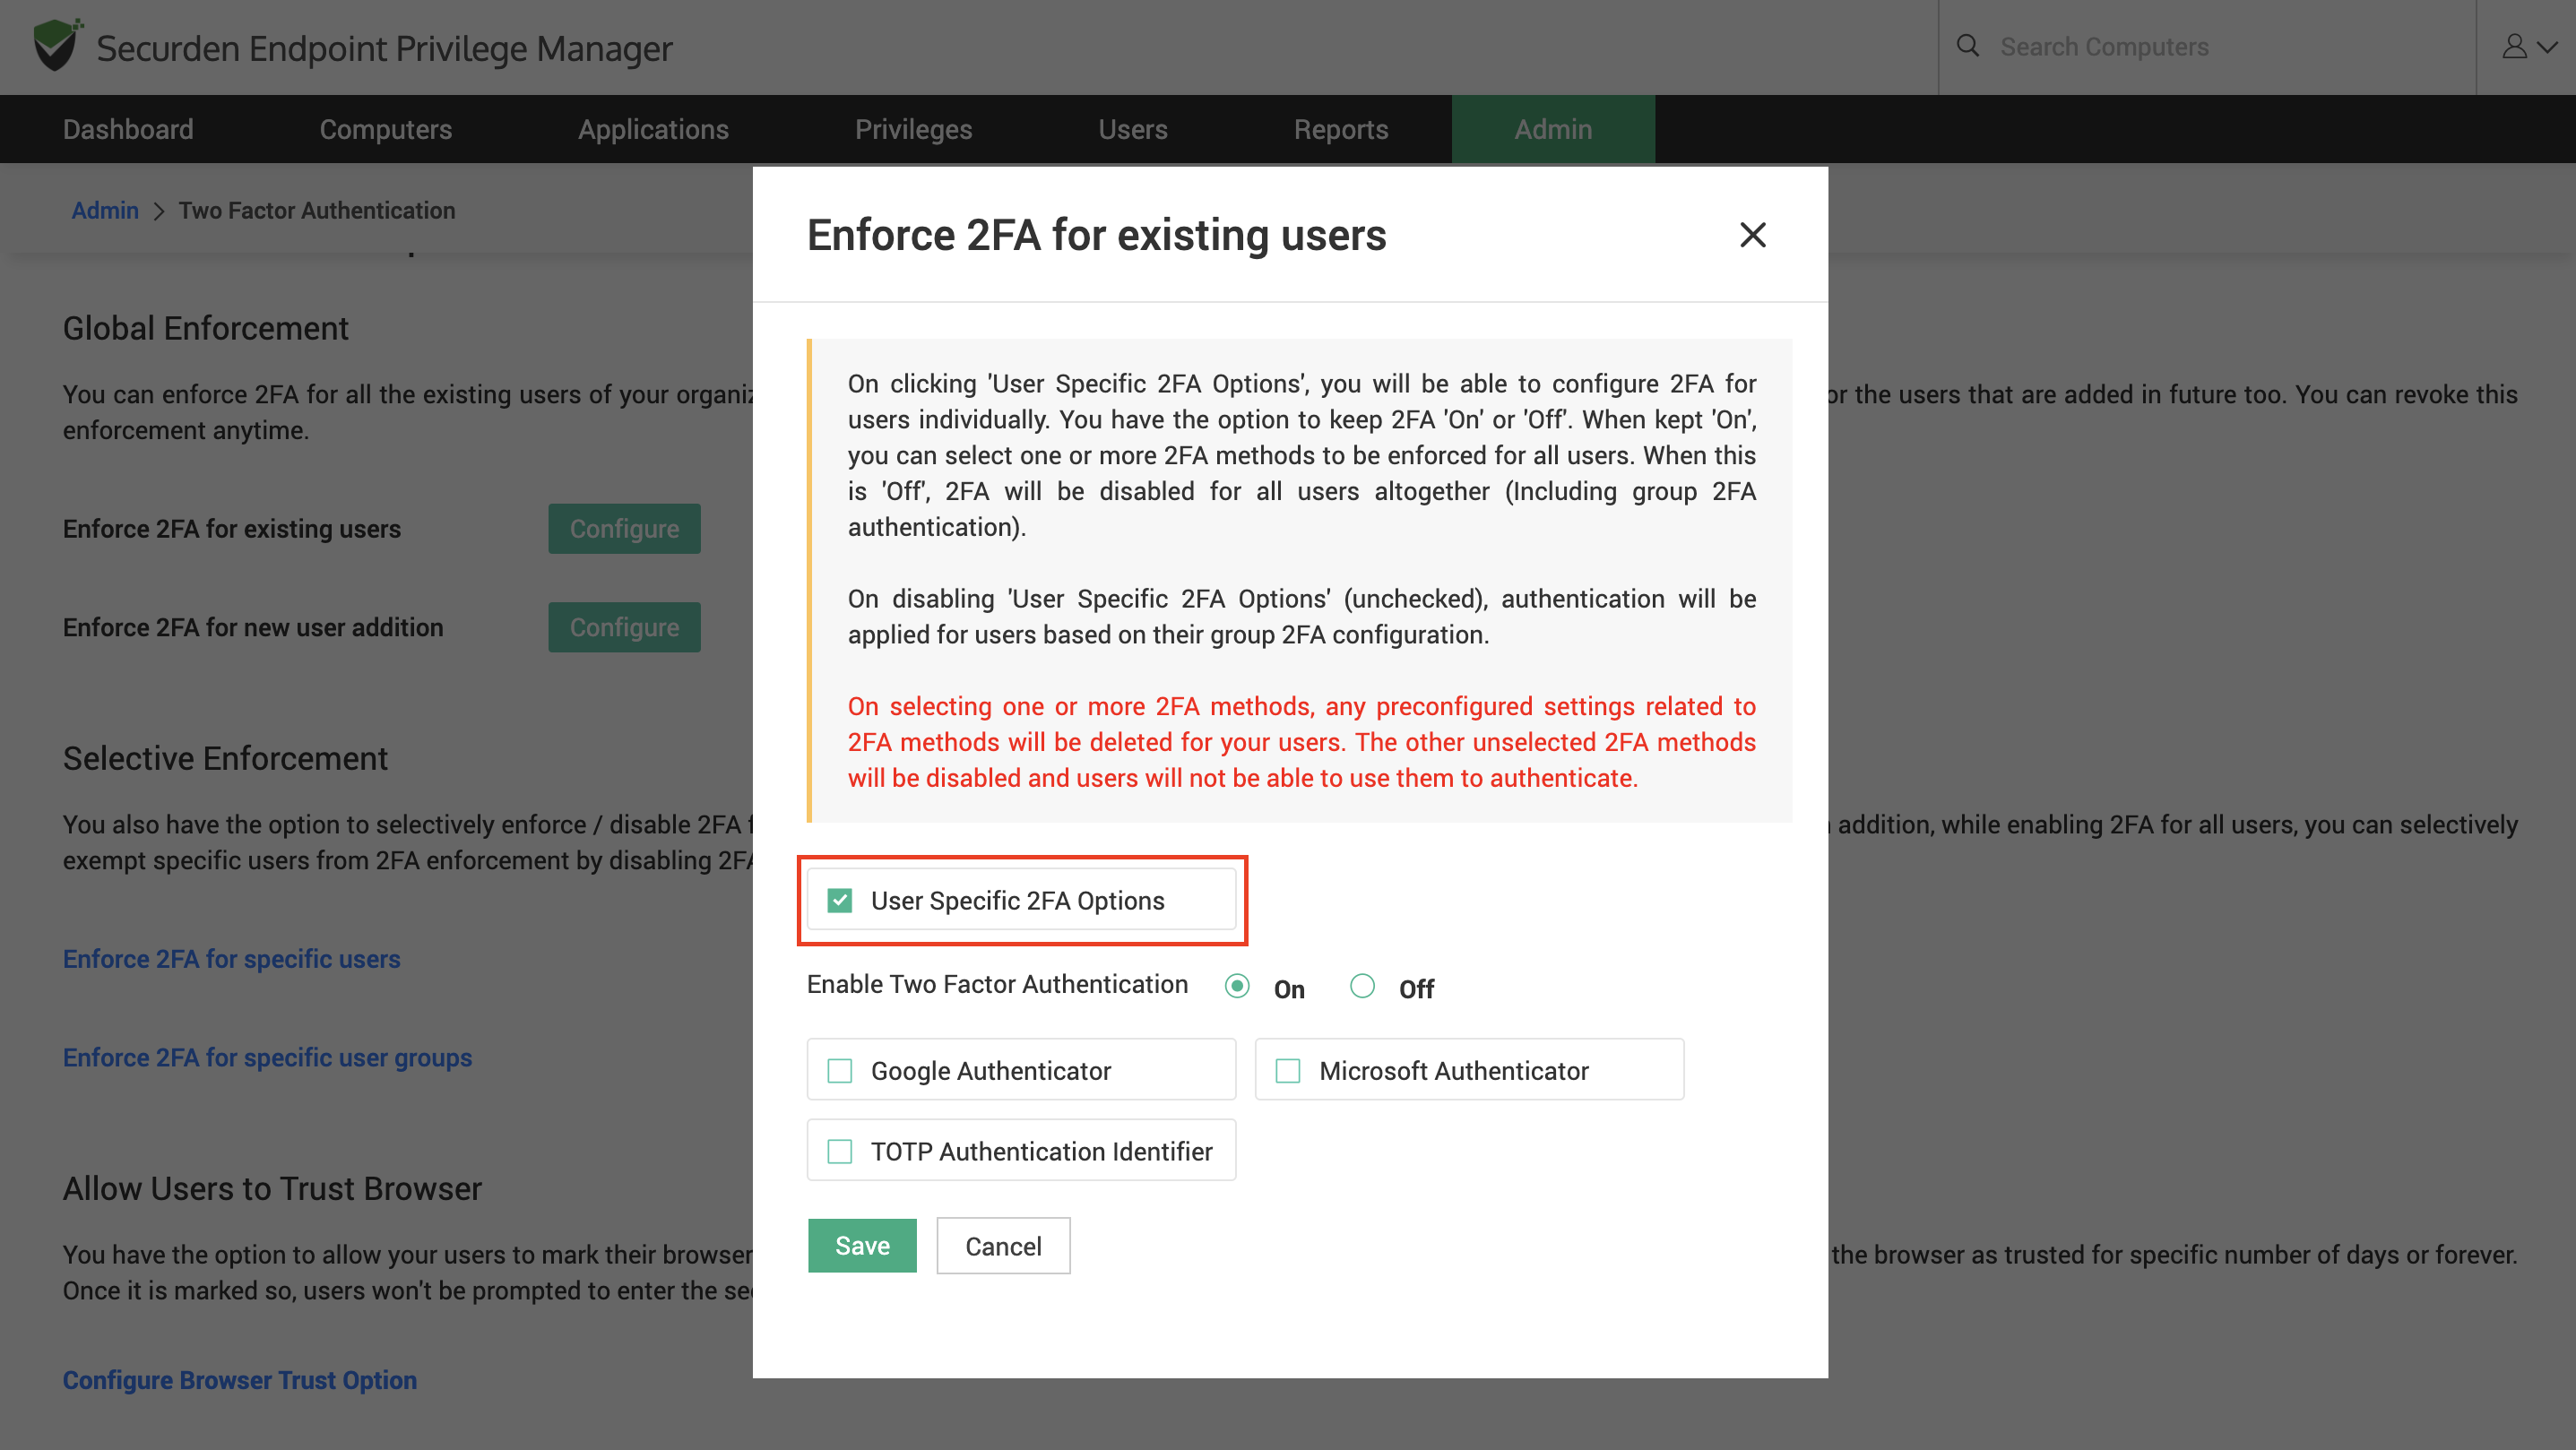
How to Enforce MFA for All Users?
Once the desired MFA options are enabled and configured, you can enforce MFA on all existing users or just the users that are added hereon. You also have the option to enforce MFA on specific users and user groups. This is explained in the next section.
When MFA is configured at the global level, the configuration acts as the default configuration for all users. This overwrites the MFA configurations set at the user group level. However, if MFA is configured at the user level individually, the individual user level configuration will take precedence over the global configuration.
To globally enforce MFA for all existing users, navigate to the Two Factor Authentication page and follow the steps below.
-
Scroll down to the section named Enforcement Options.
-
Click on Configure against Enforce 2FA for existing users.
To enforce MFA for all users added in the future, navigate to the Two Factor Authentication page and follow the steps below.
-
Scroll down to the section named Enforcement Options.
-
Click on Configure against Enforce 2FA for new users.
Selecting the TFA options
In the GUI that pops up, select the checkbox, enable two factor authentication, and enable the desired options by selecting the checkboxes.
How to Enforce MFA for Specific Users/User Groups?
Once MFA options are enabled from the admin section, you can enforce customized MFA options for individual user groups and users.
Note
Configuring 2FA at the user level will override the selections made at the group level.
To enforce MFA on a user level, navigate to Users section. Here you can change the MFA options for one user at a time or for multiple users at the same time.
To configure the MFA options for a particular user, select the user and navigate to Actions >> Configure 2FA. To configure MFA options for multiple users at the same time, select the required users and go to More >> Configure 2FA.
In the GUI that opens,
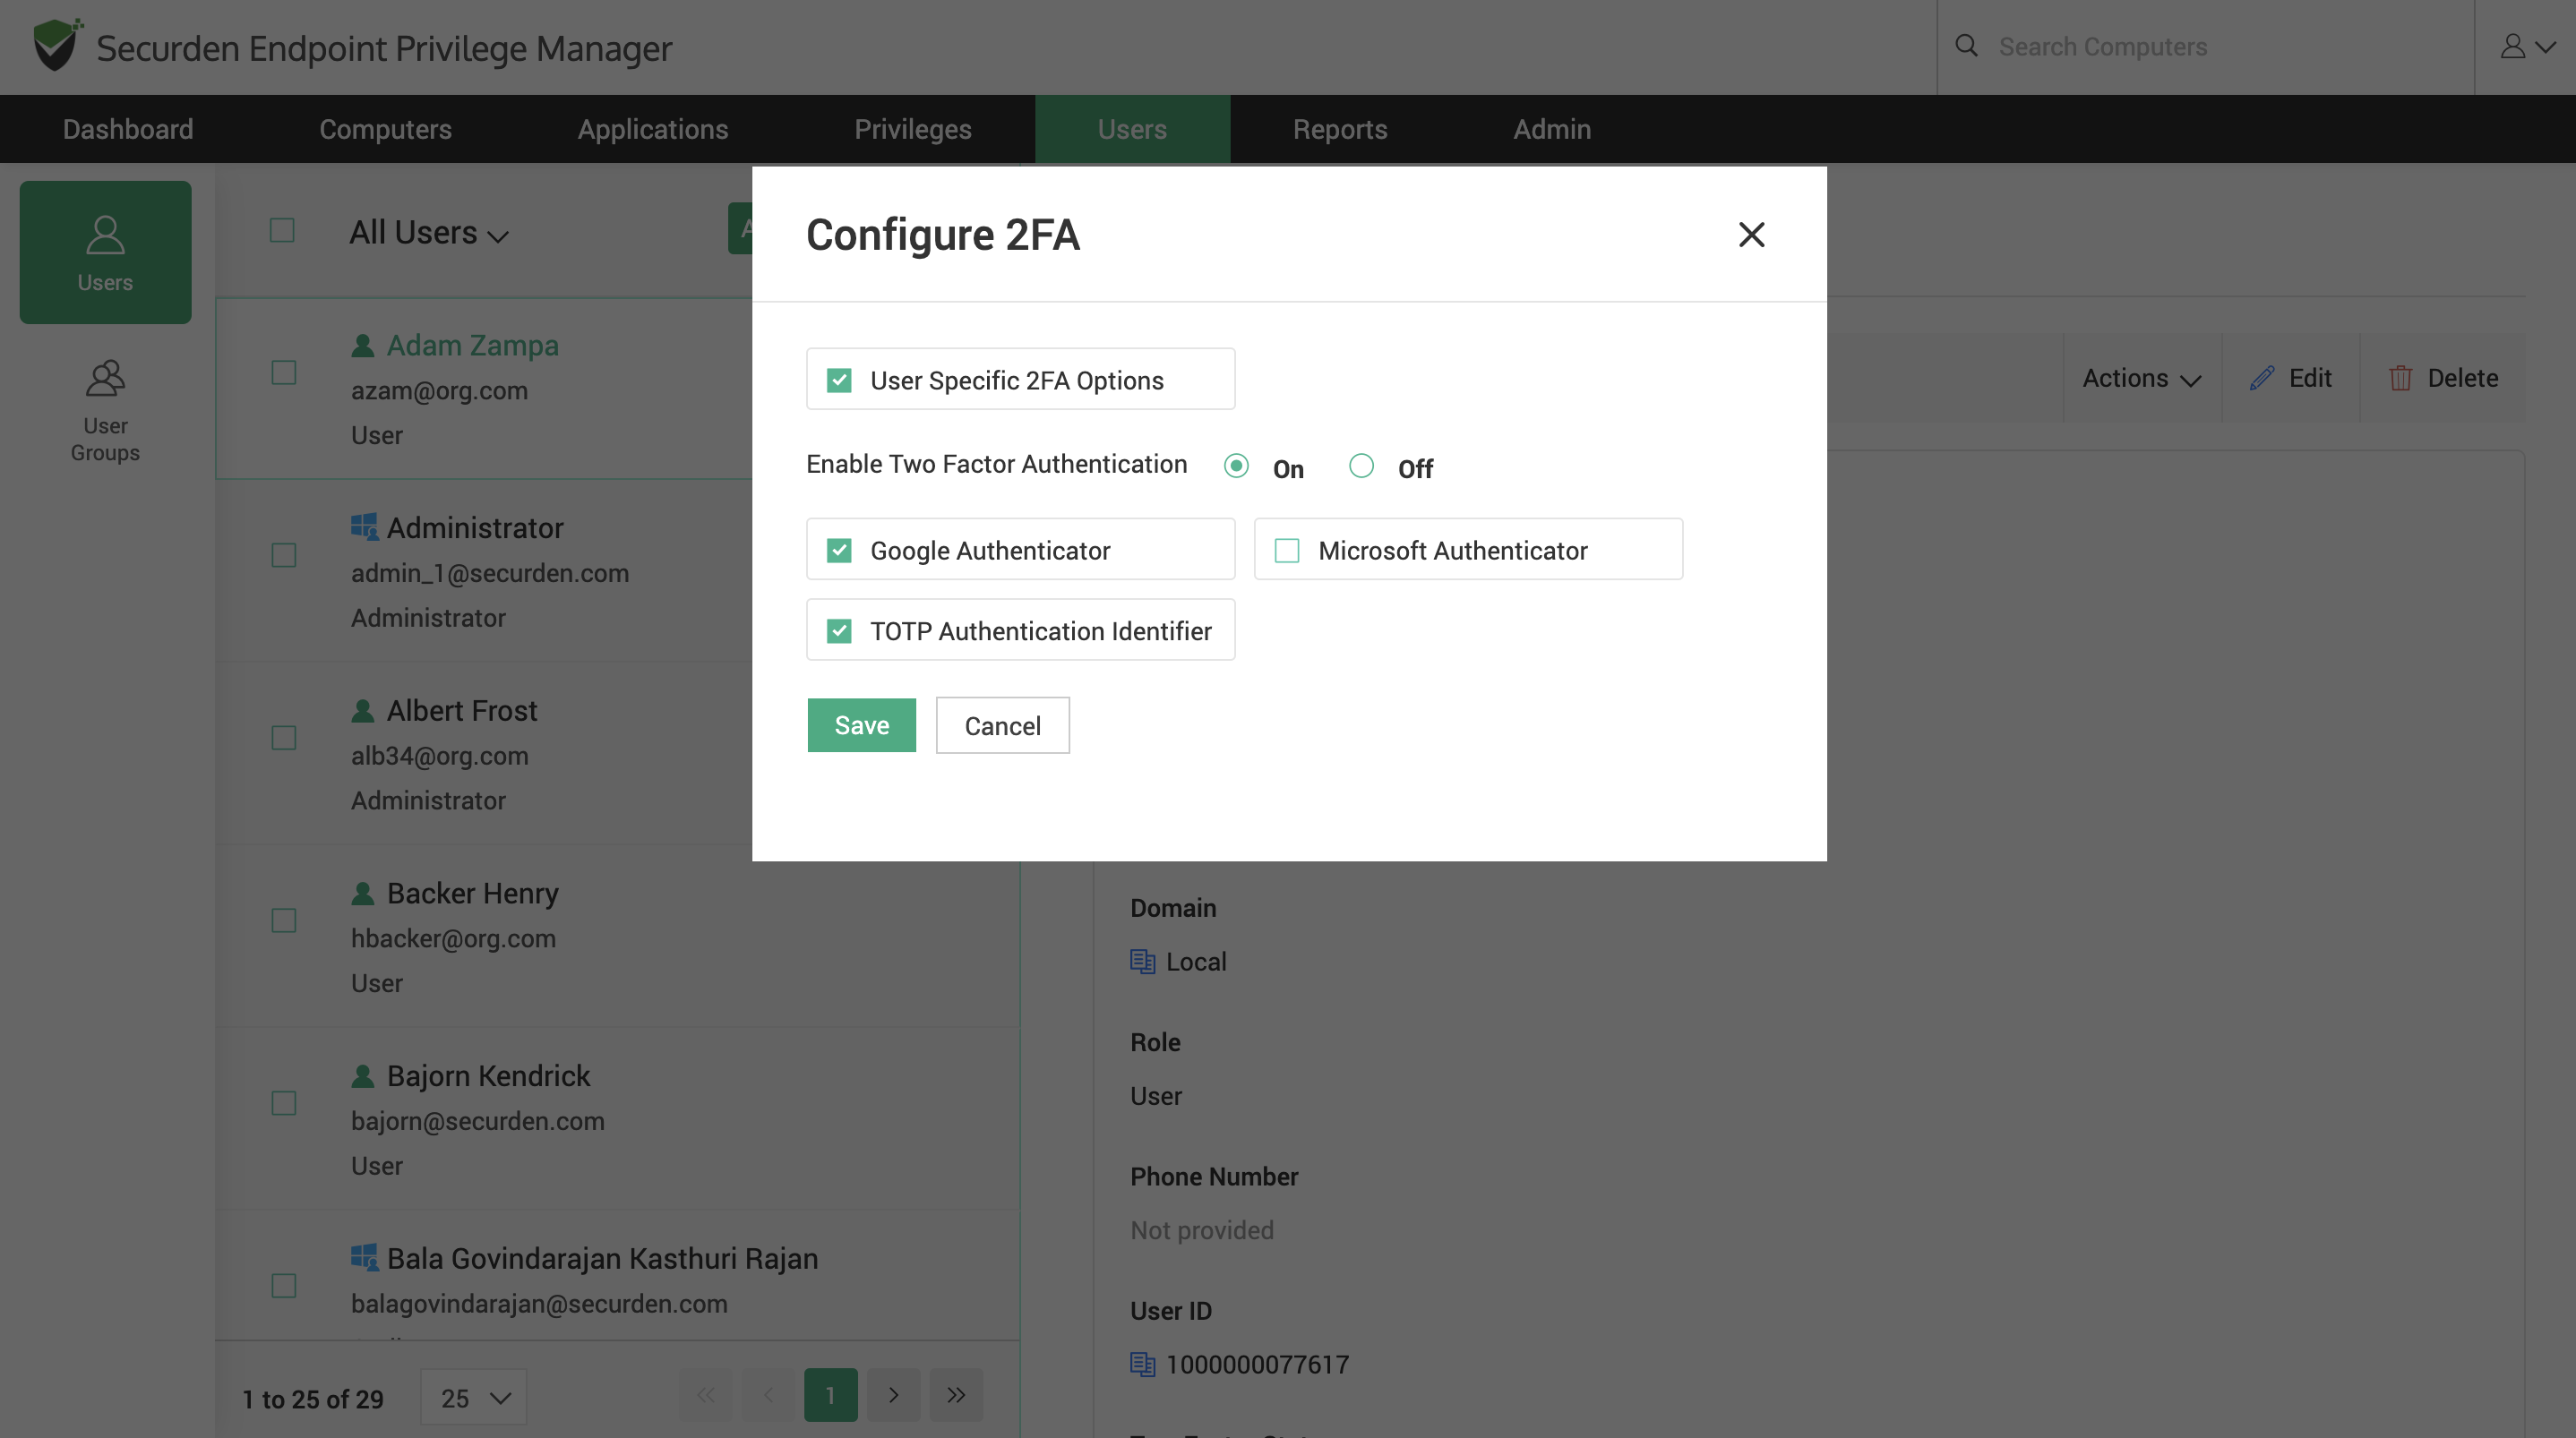
1) Select the checkbox User Specific 2FA Options.
2) Select On against the Enable Two Factor Authentication.
3) Select the desired options from the list of options.
4) Click Save.
To configure MFA at the User Group level, navigate to Users >> User Groups. Here, you have the option to configure MFA for individual groups or select multiple groups and configure MFA for the selected groups at once.
To configure MFA for a particular group, click on the required group and navigate to Actions >> Configure 2FA. To configure MFA for multiple groups, select the required user groups and click on More >> Configure 2FA.
In the GUI that opens,
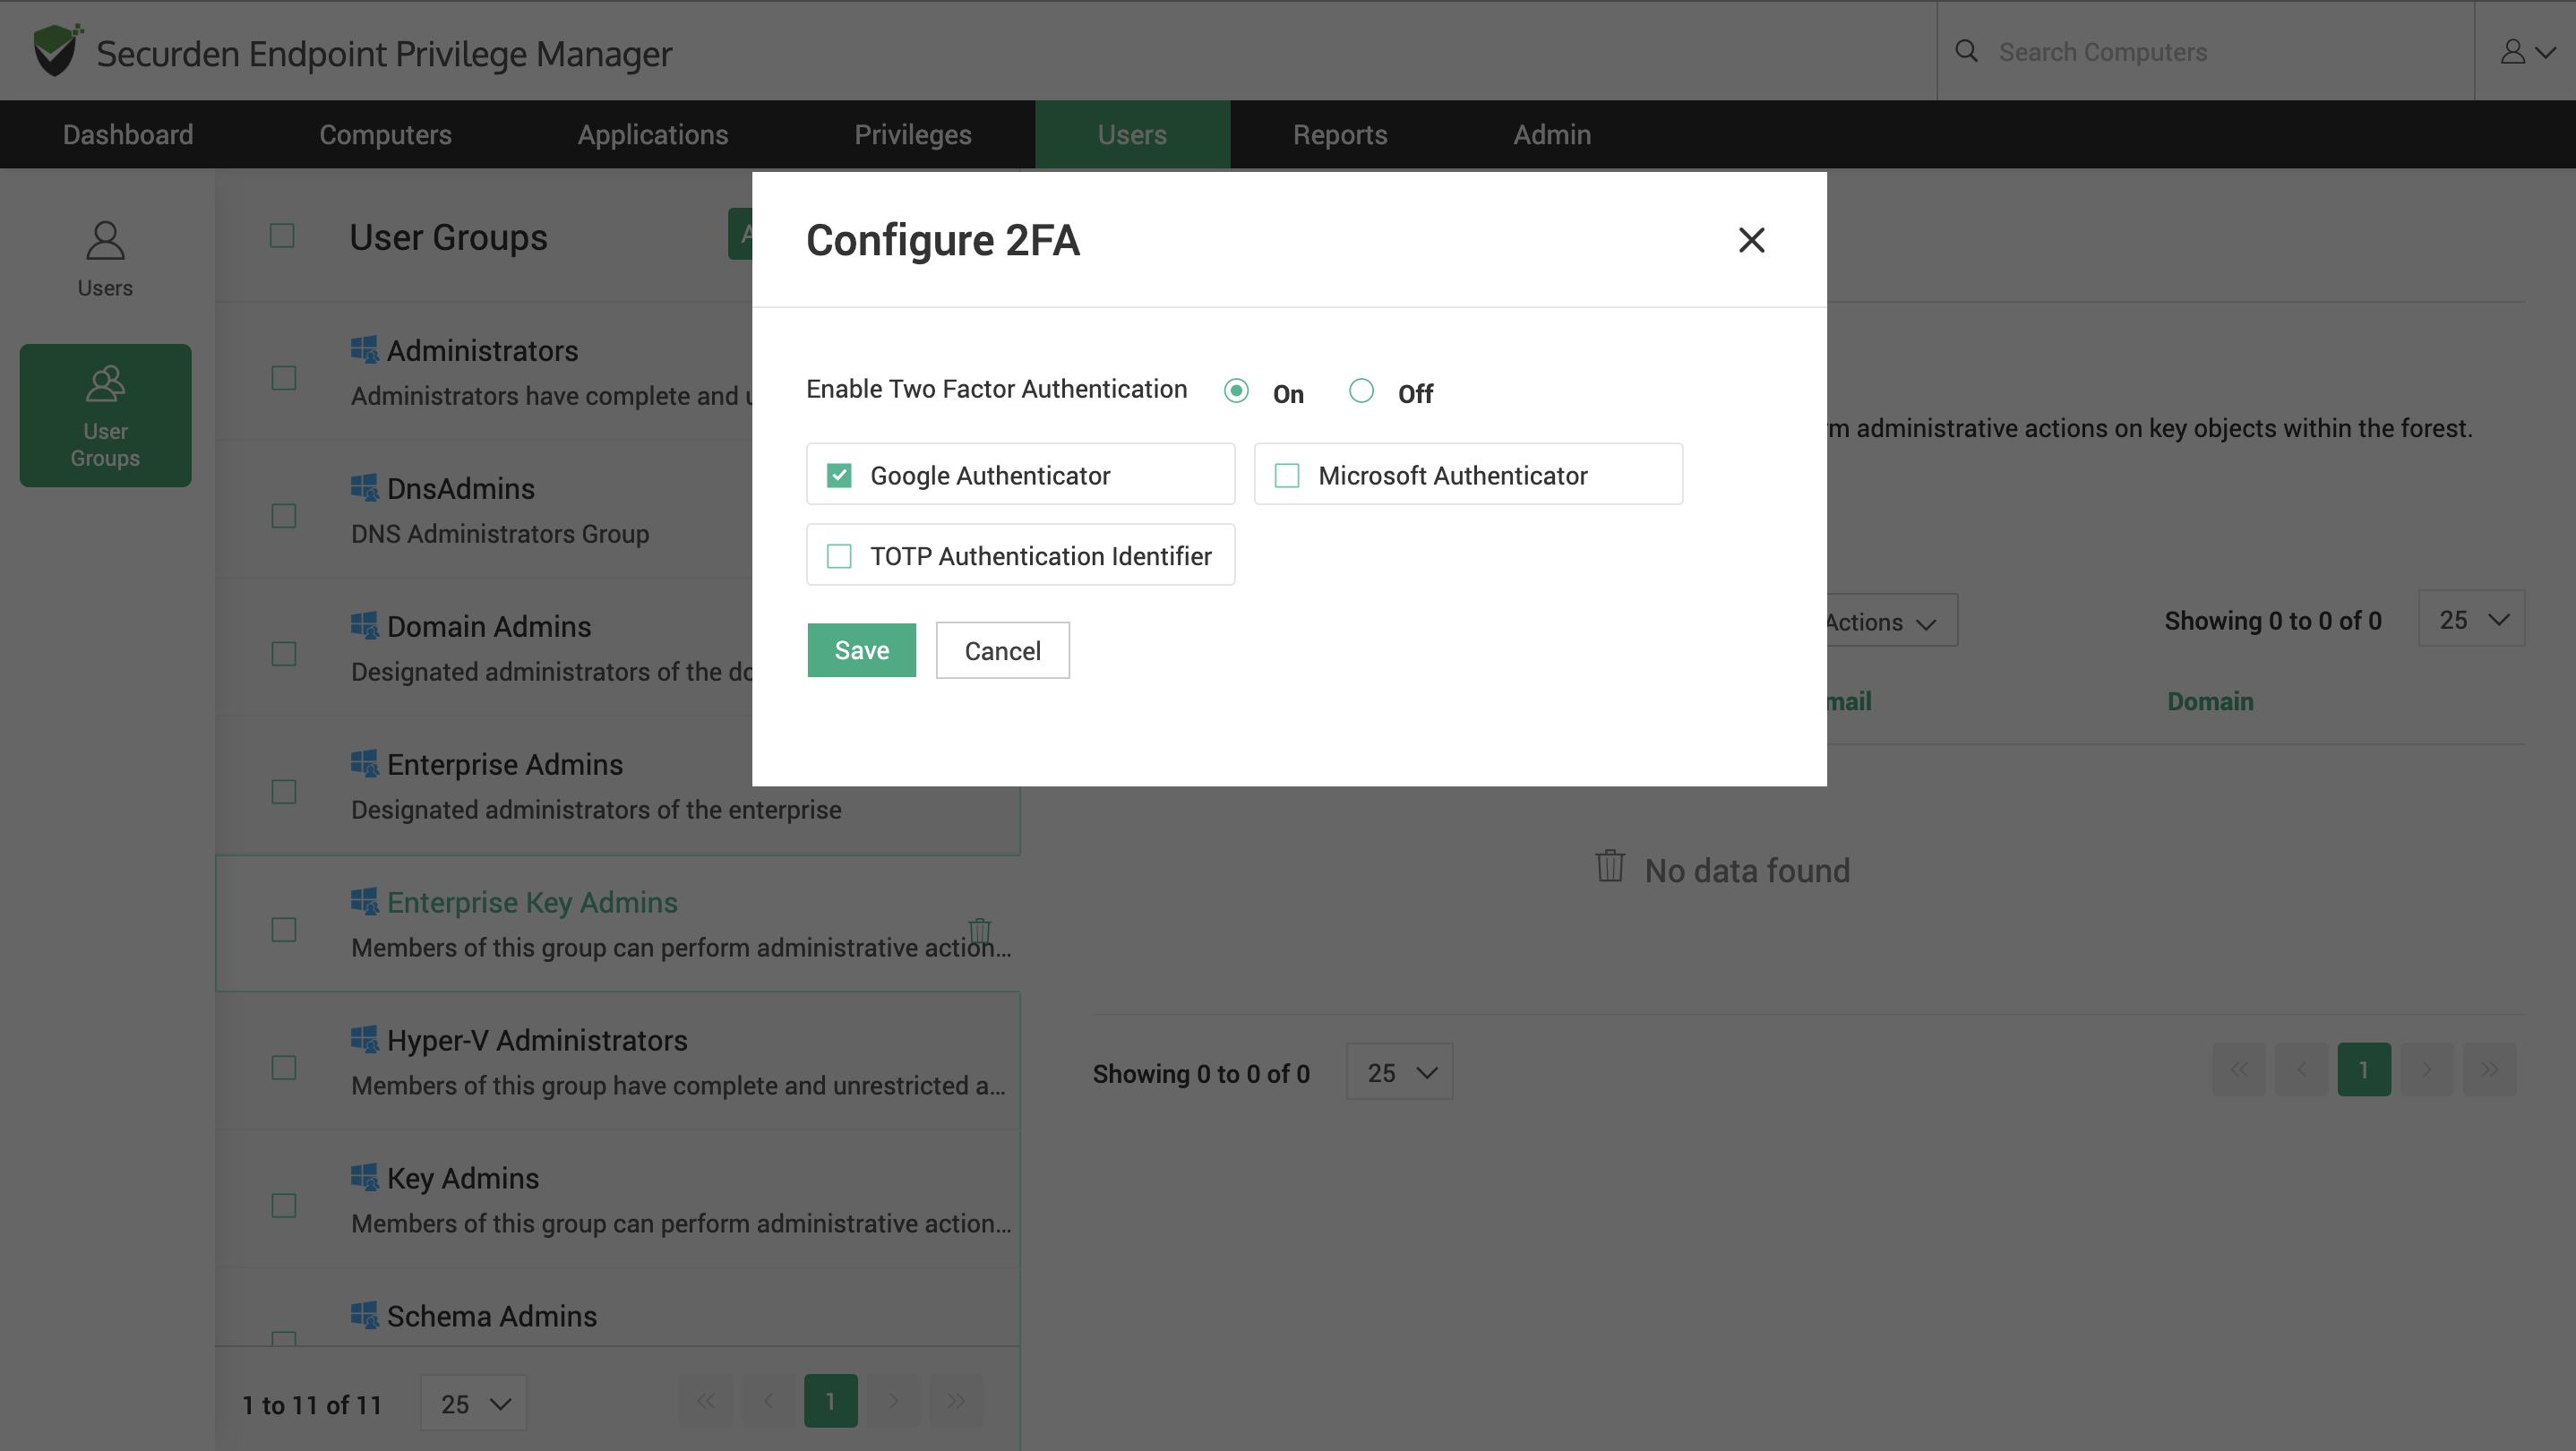
1) Select On against the Enable Two Factor Authentication.
2) Select the desired options from the list of options.
3) Click Save.
How to Enforce MFA for Privilege Elevation?
When users try to elevate privileges through requests or through permissions granted by policies, multi-factor authentication can be enforced as an additional measure of security.
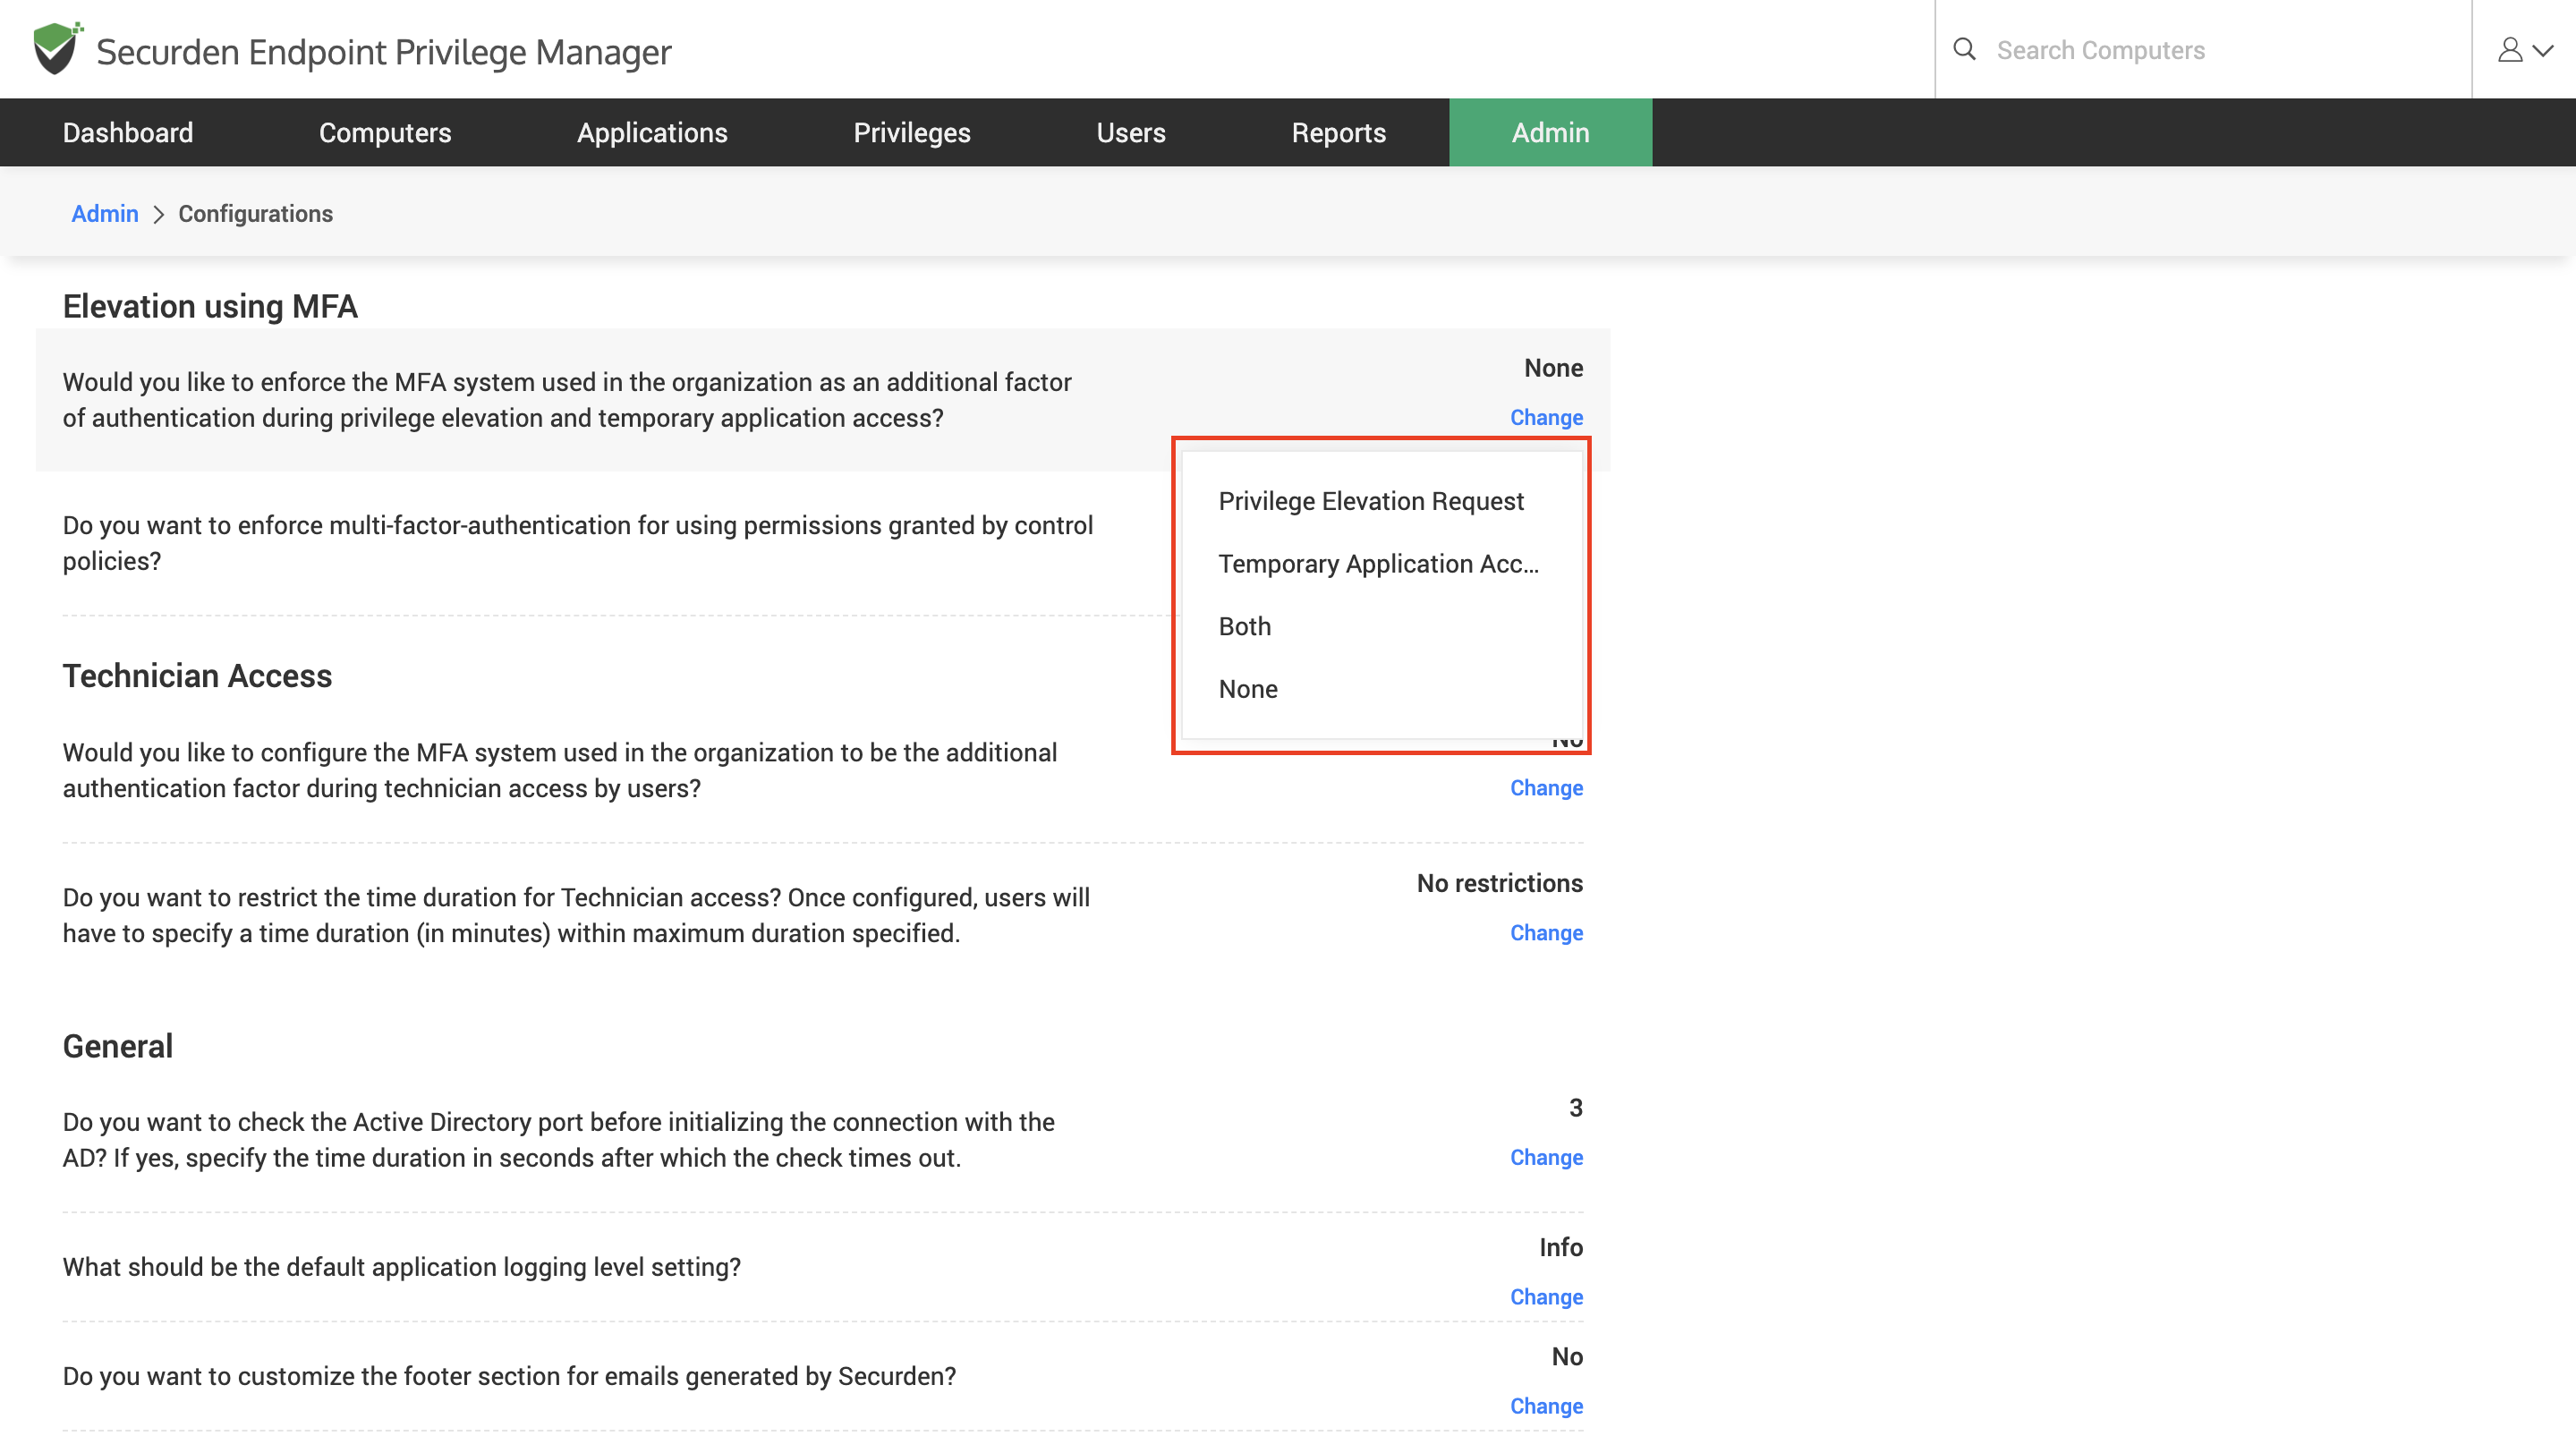
To enforce MFA for privilege elevation, navigate to Admin >> Configurations and scroll down to the topic Elevation Using MFA.
Here, you can enforce MFA for privilege elevation using requests and through policies separately.
To enforce MFA for request-based privilege elevation,
1) Click on Change to select the scenarios for which MFA must be enforced according to your preferences.
2) Select the required option from the drop-down menu.
To enforce MFA for policy-based application elevation,
1) Click on Customize to select the type of privilege elevation for which MFA must be enforced.
2) Select the required options and click on Save.
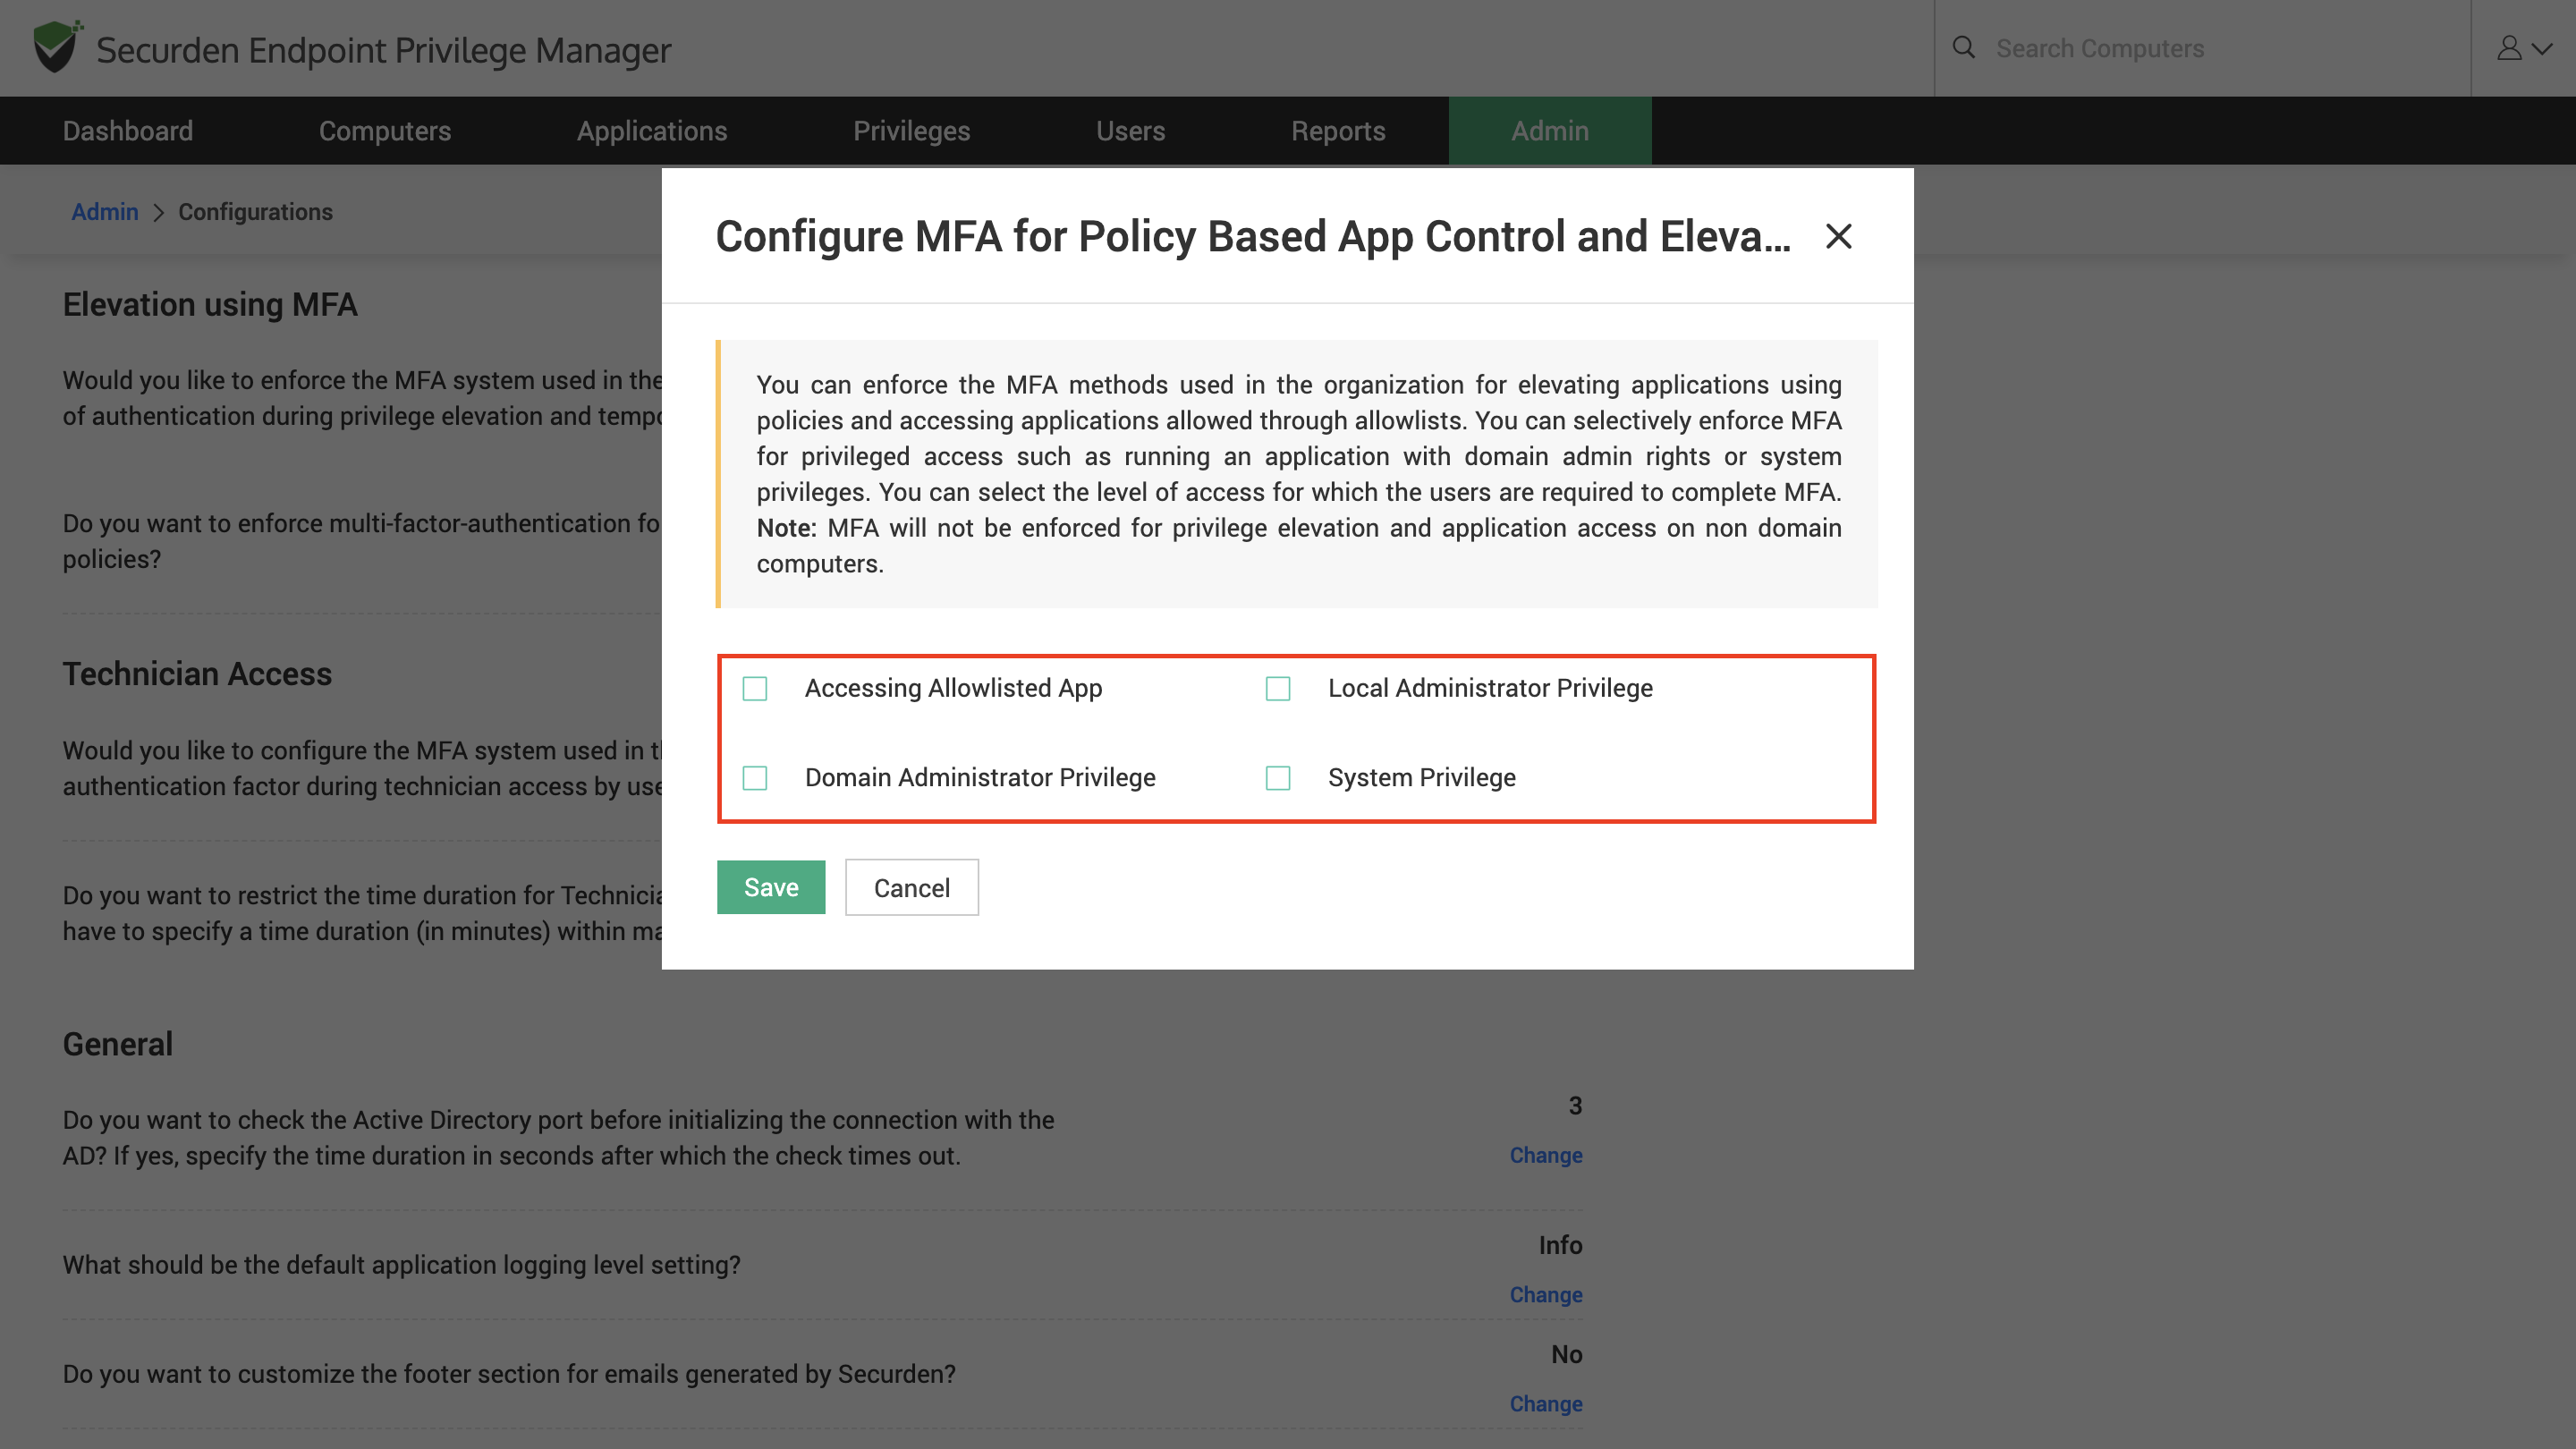
Once the configuration is set, users can elevate privileges only after the MFA is completed.
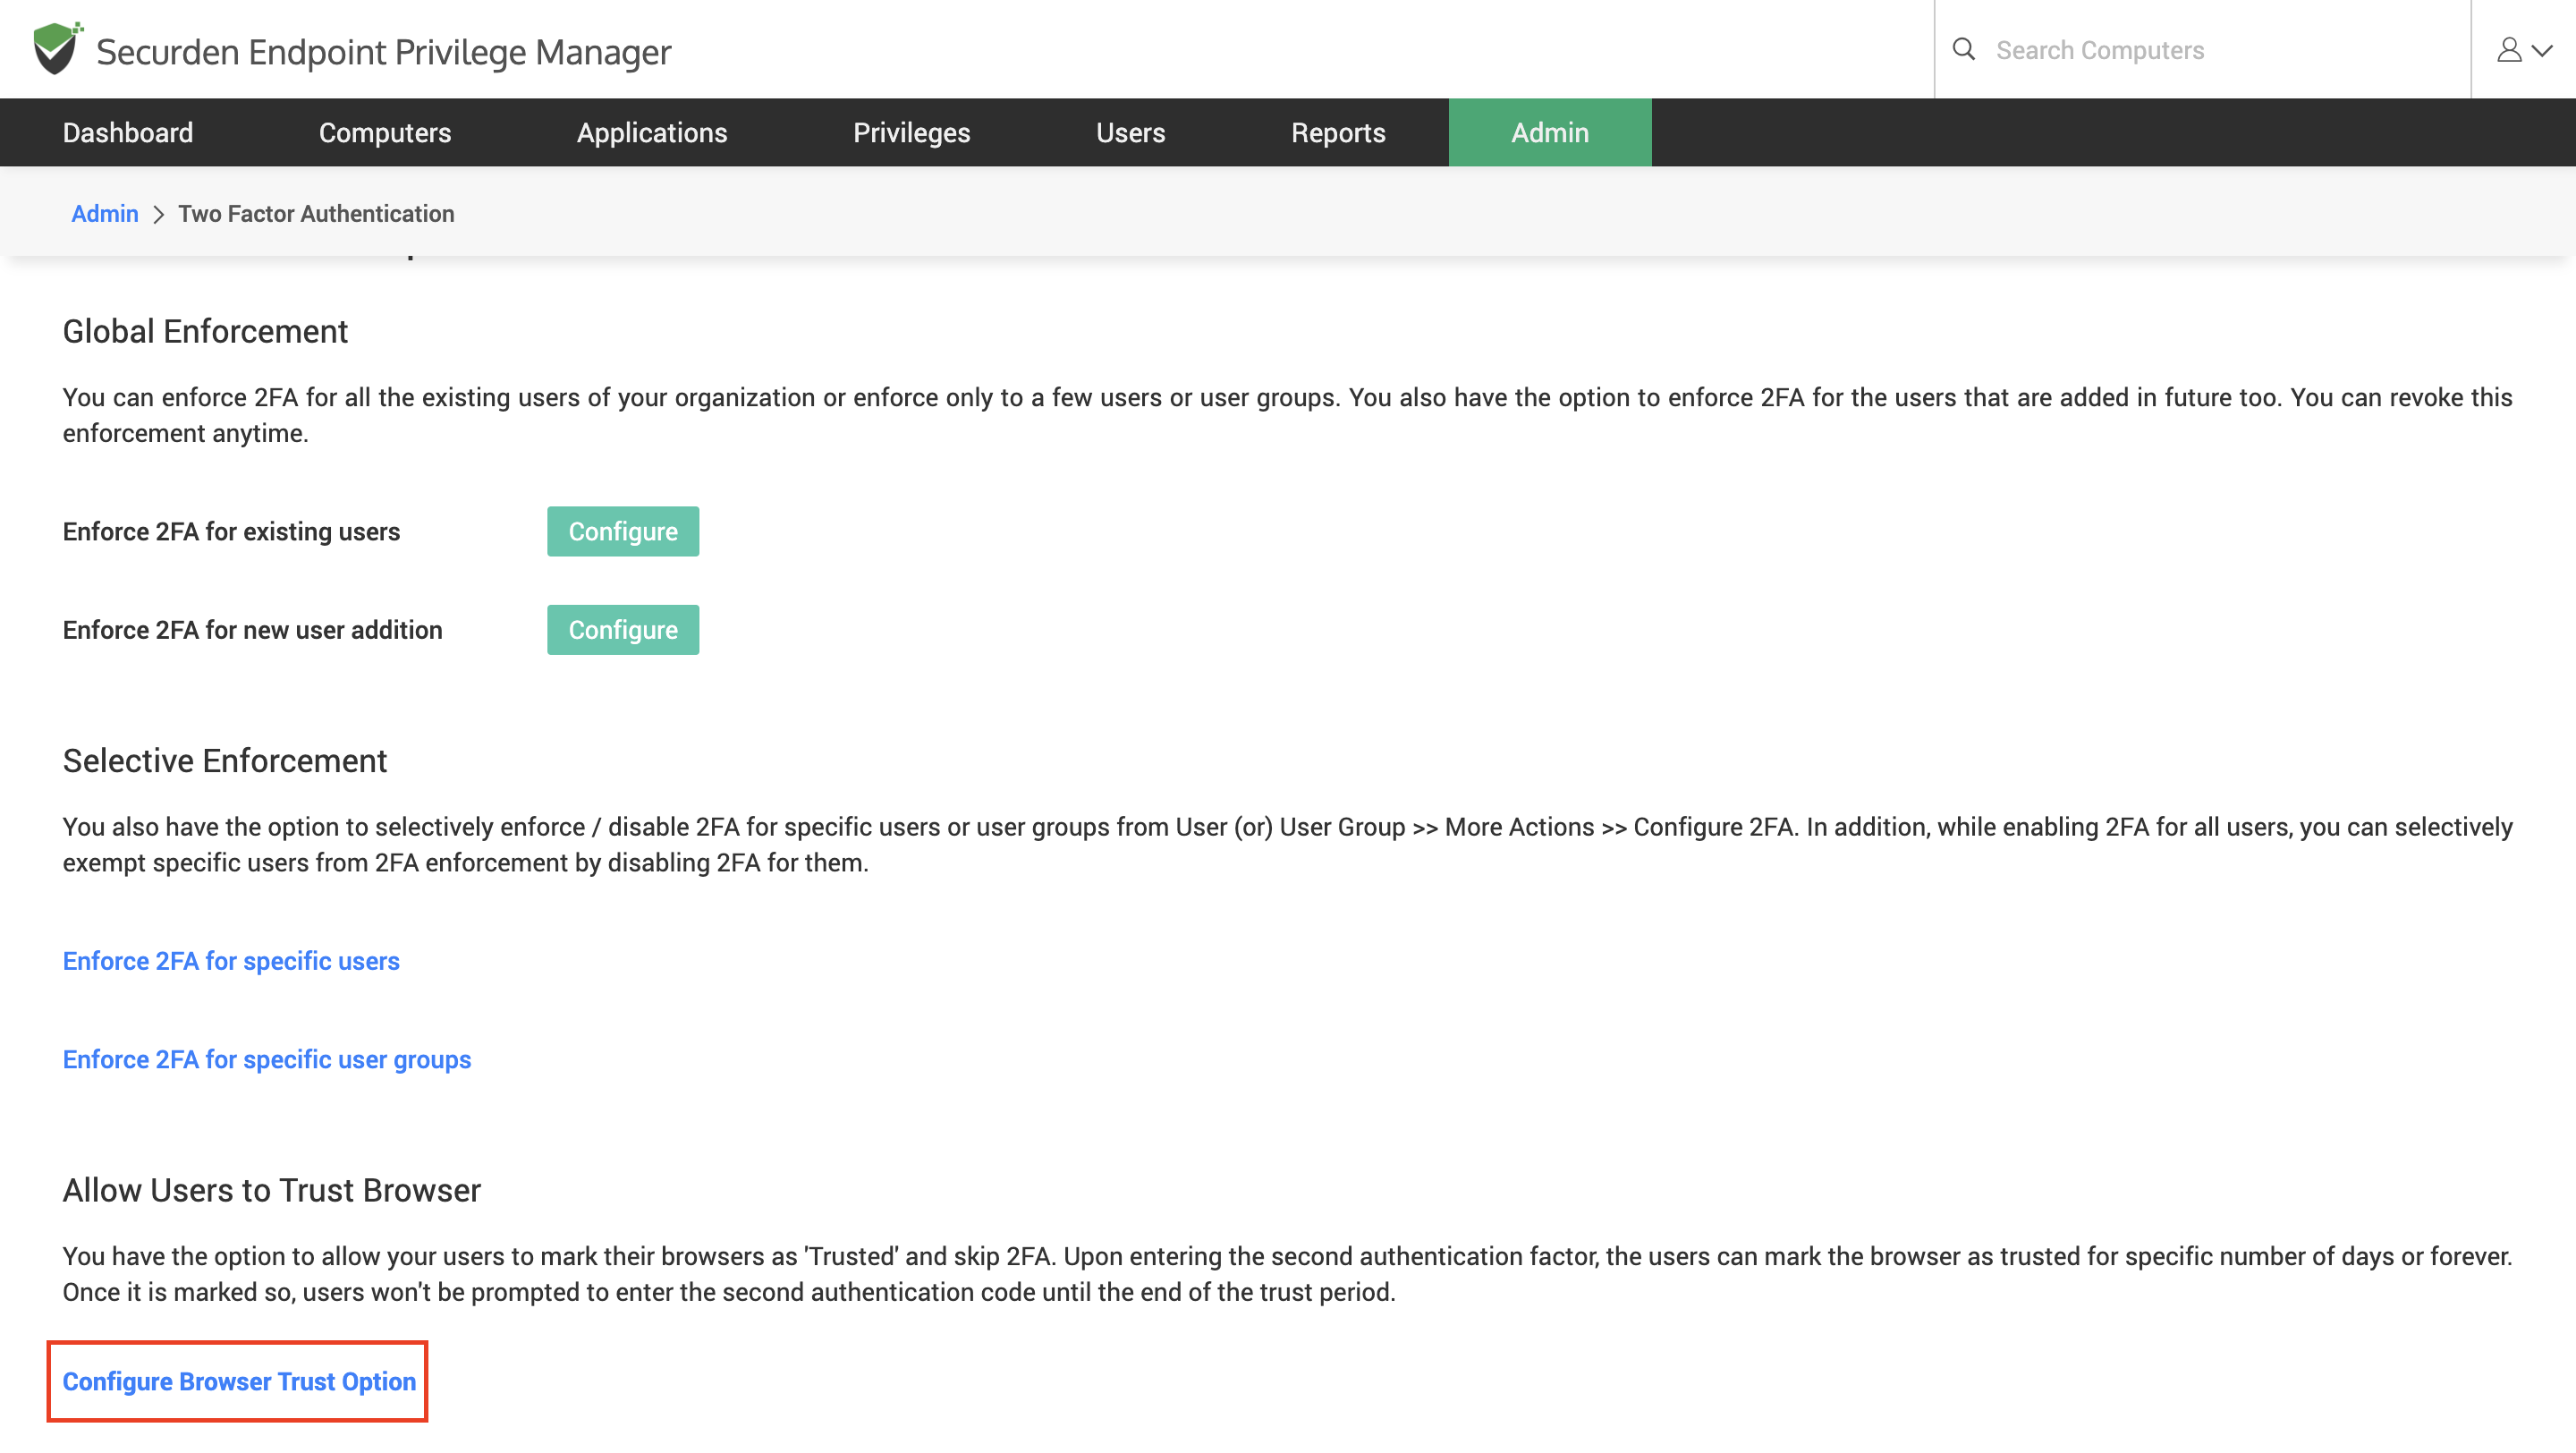
How to Skip MFA with Trusted Browsers in EPM?
You have the option to allow your users to mark their browsers as Trusted and skip TFA. Upon entering the second authentication factor, the users can mark the browser as trusted for a specific number of days or forever. Once it is marked so, users won't be prompted to enter the second authentication code until the end of the trust period.
To enable this feature, click the Configure Browser Trust Option link, and a pop-up box will appear.
1) Specify the maximum period until which the browser trust option would be in effect. You may either enter a specific number of days or even choose to have it enabled forever.
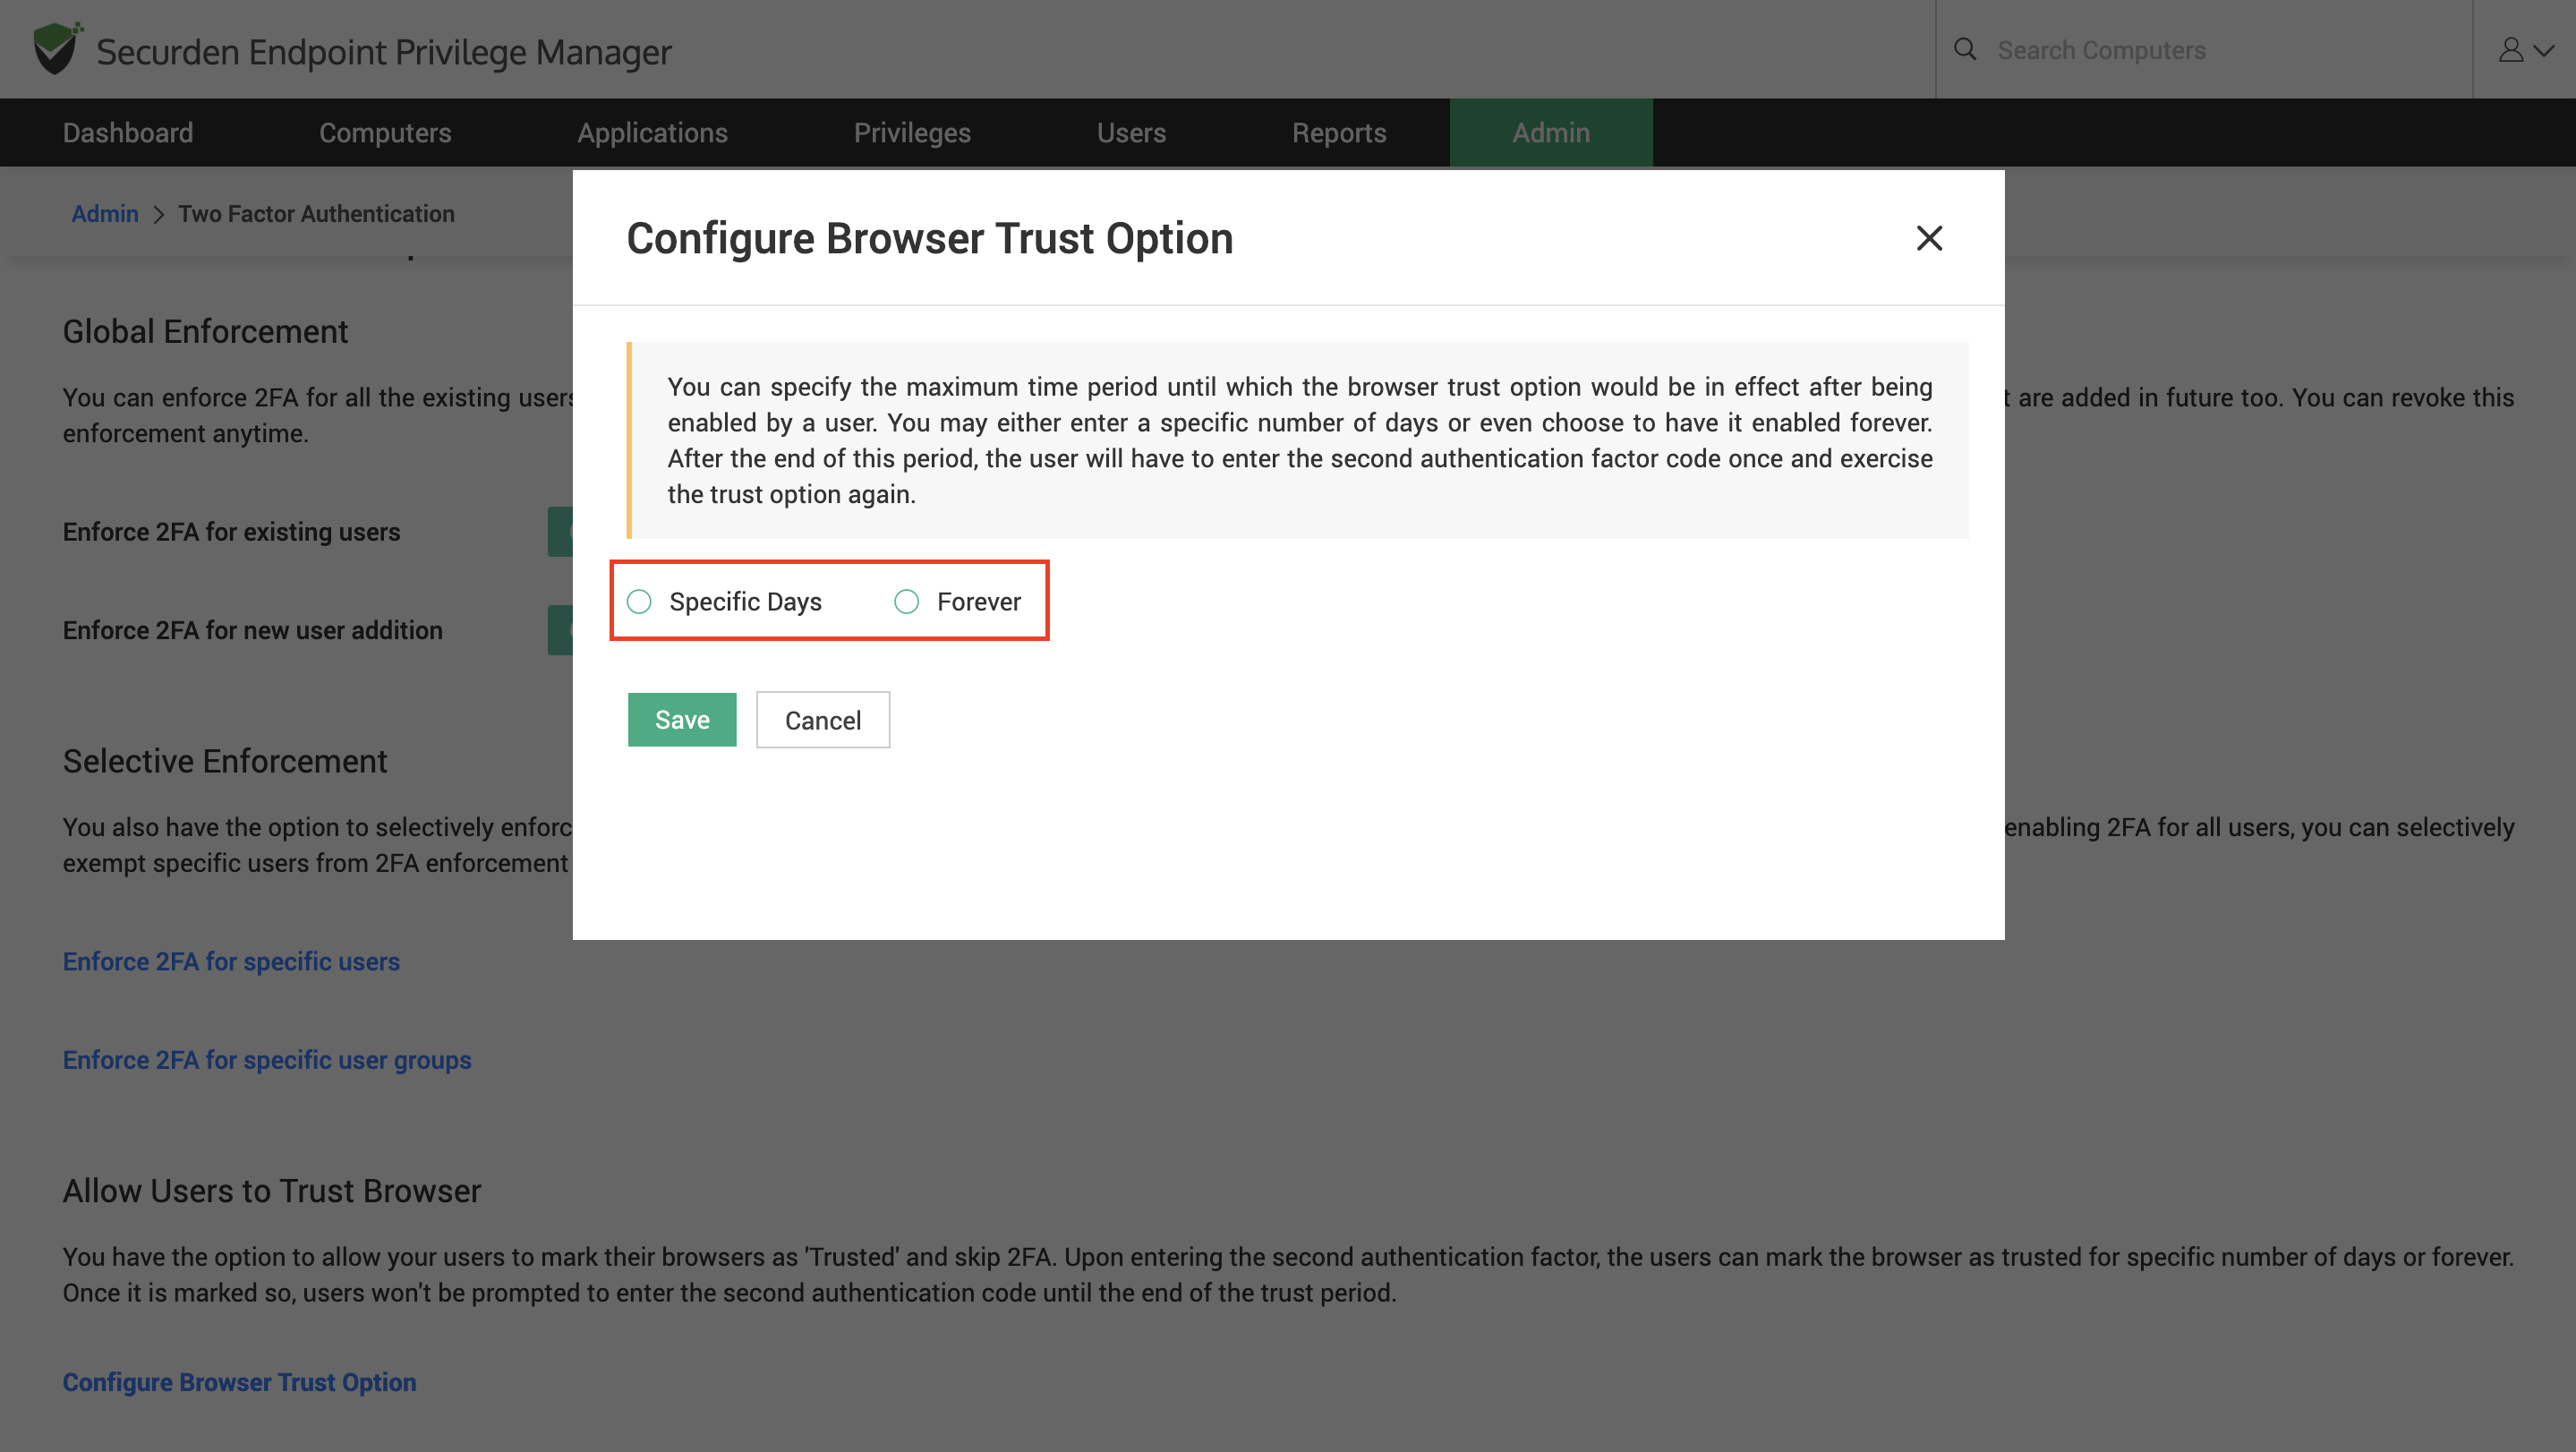
2) After the end of this period, the user will have to enter the second authentication factor code once and exercise the trust option again.

