How to Onboard Domain Users into Securden Endpoint Privilege Manager?
Securden supports direct integration with Active Directory Domains, Azure AD (Entra ID), and as a result, hybrid environments running both AD and Azure for identity management.
Users that are a part of the domain can be onboarded by connecting to the domain and fetching individual users, user groups, or entire operational units. Domain users can be classified into three cases.
-
Active Directory Users
-
Azure (Entra ID) Users
-
Hybrid Users (AD + Azure (Entra ID))
We will explore the steps involved in each case in the sections below.
How to Import Users from Active Directory Domains?
When you integrate with AD, Securden scans your AD domain and obtains the users and groups in the domain. You can search for any specific User(s), OUs or a User Groups and add them to Securden.
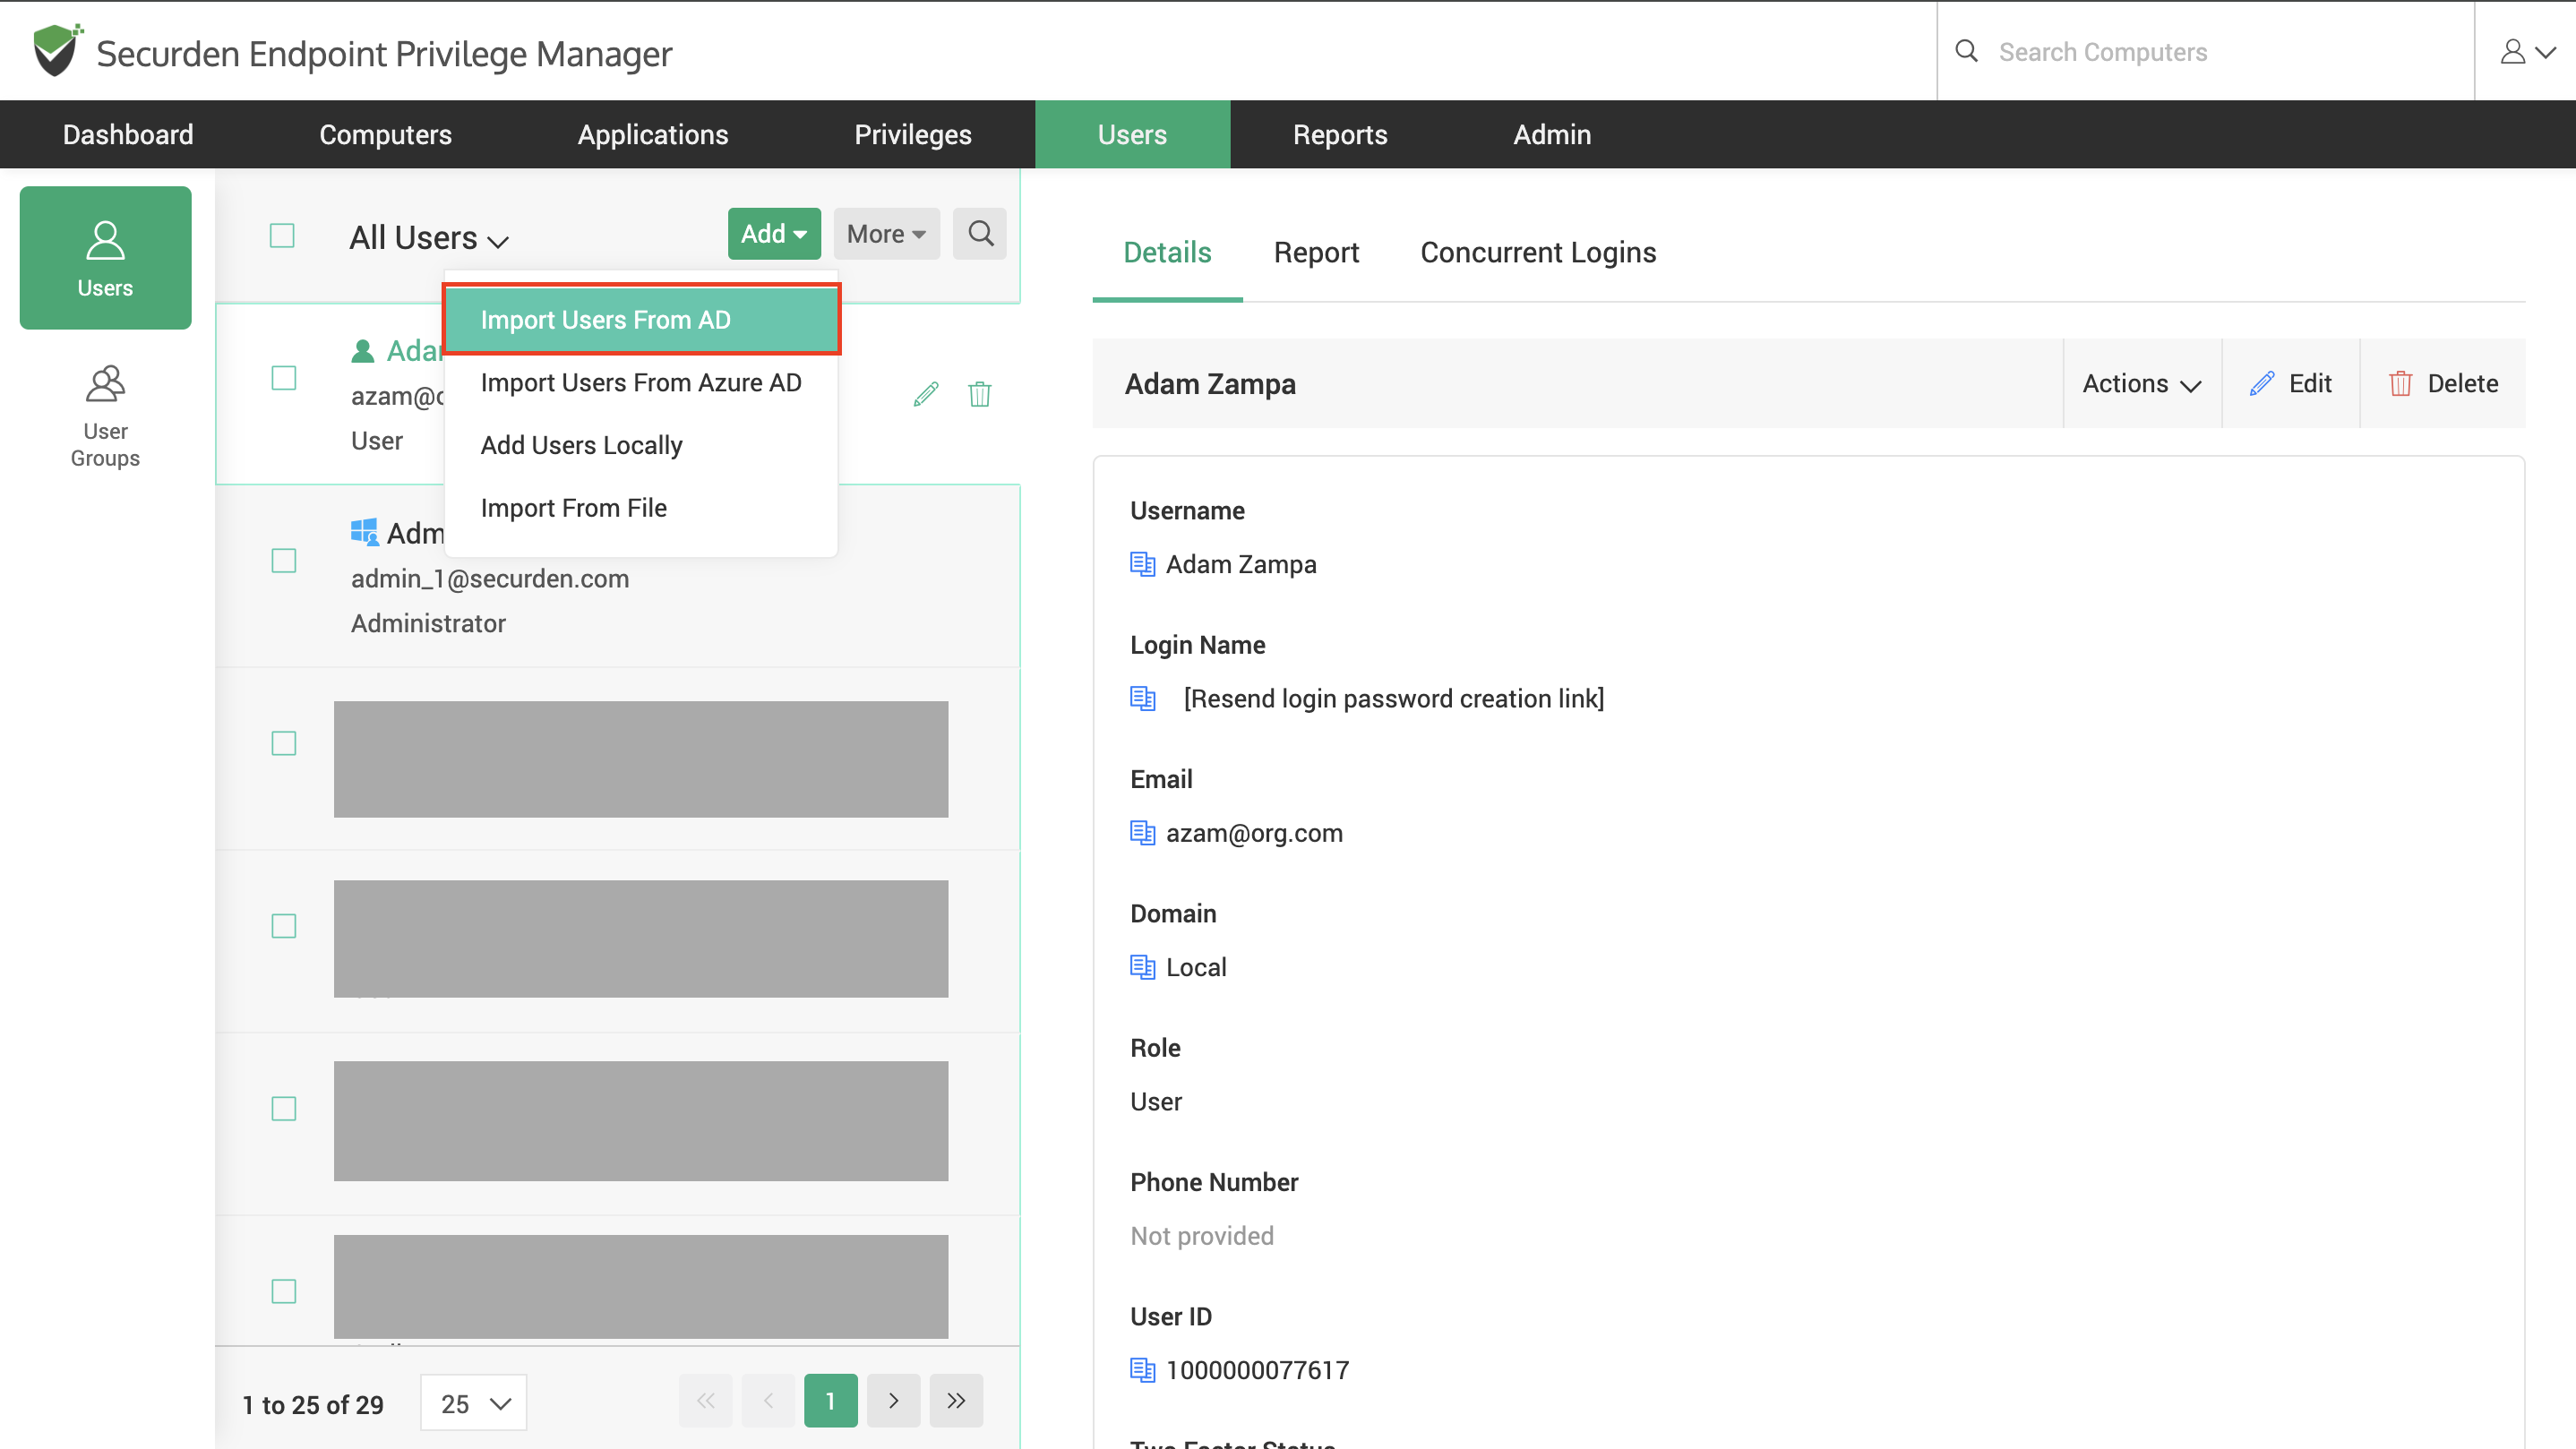
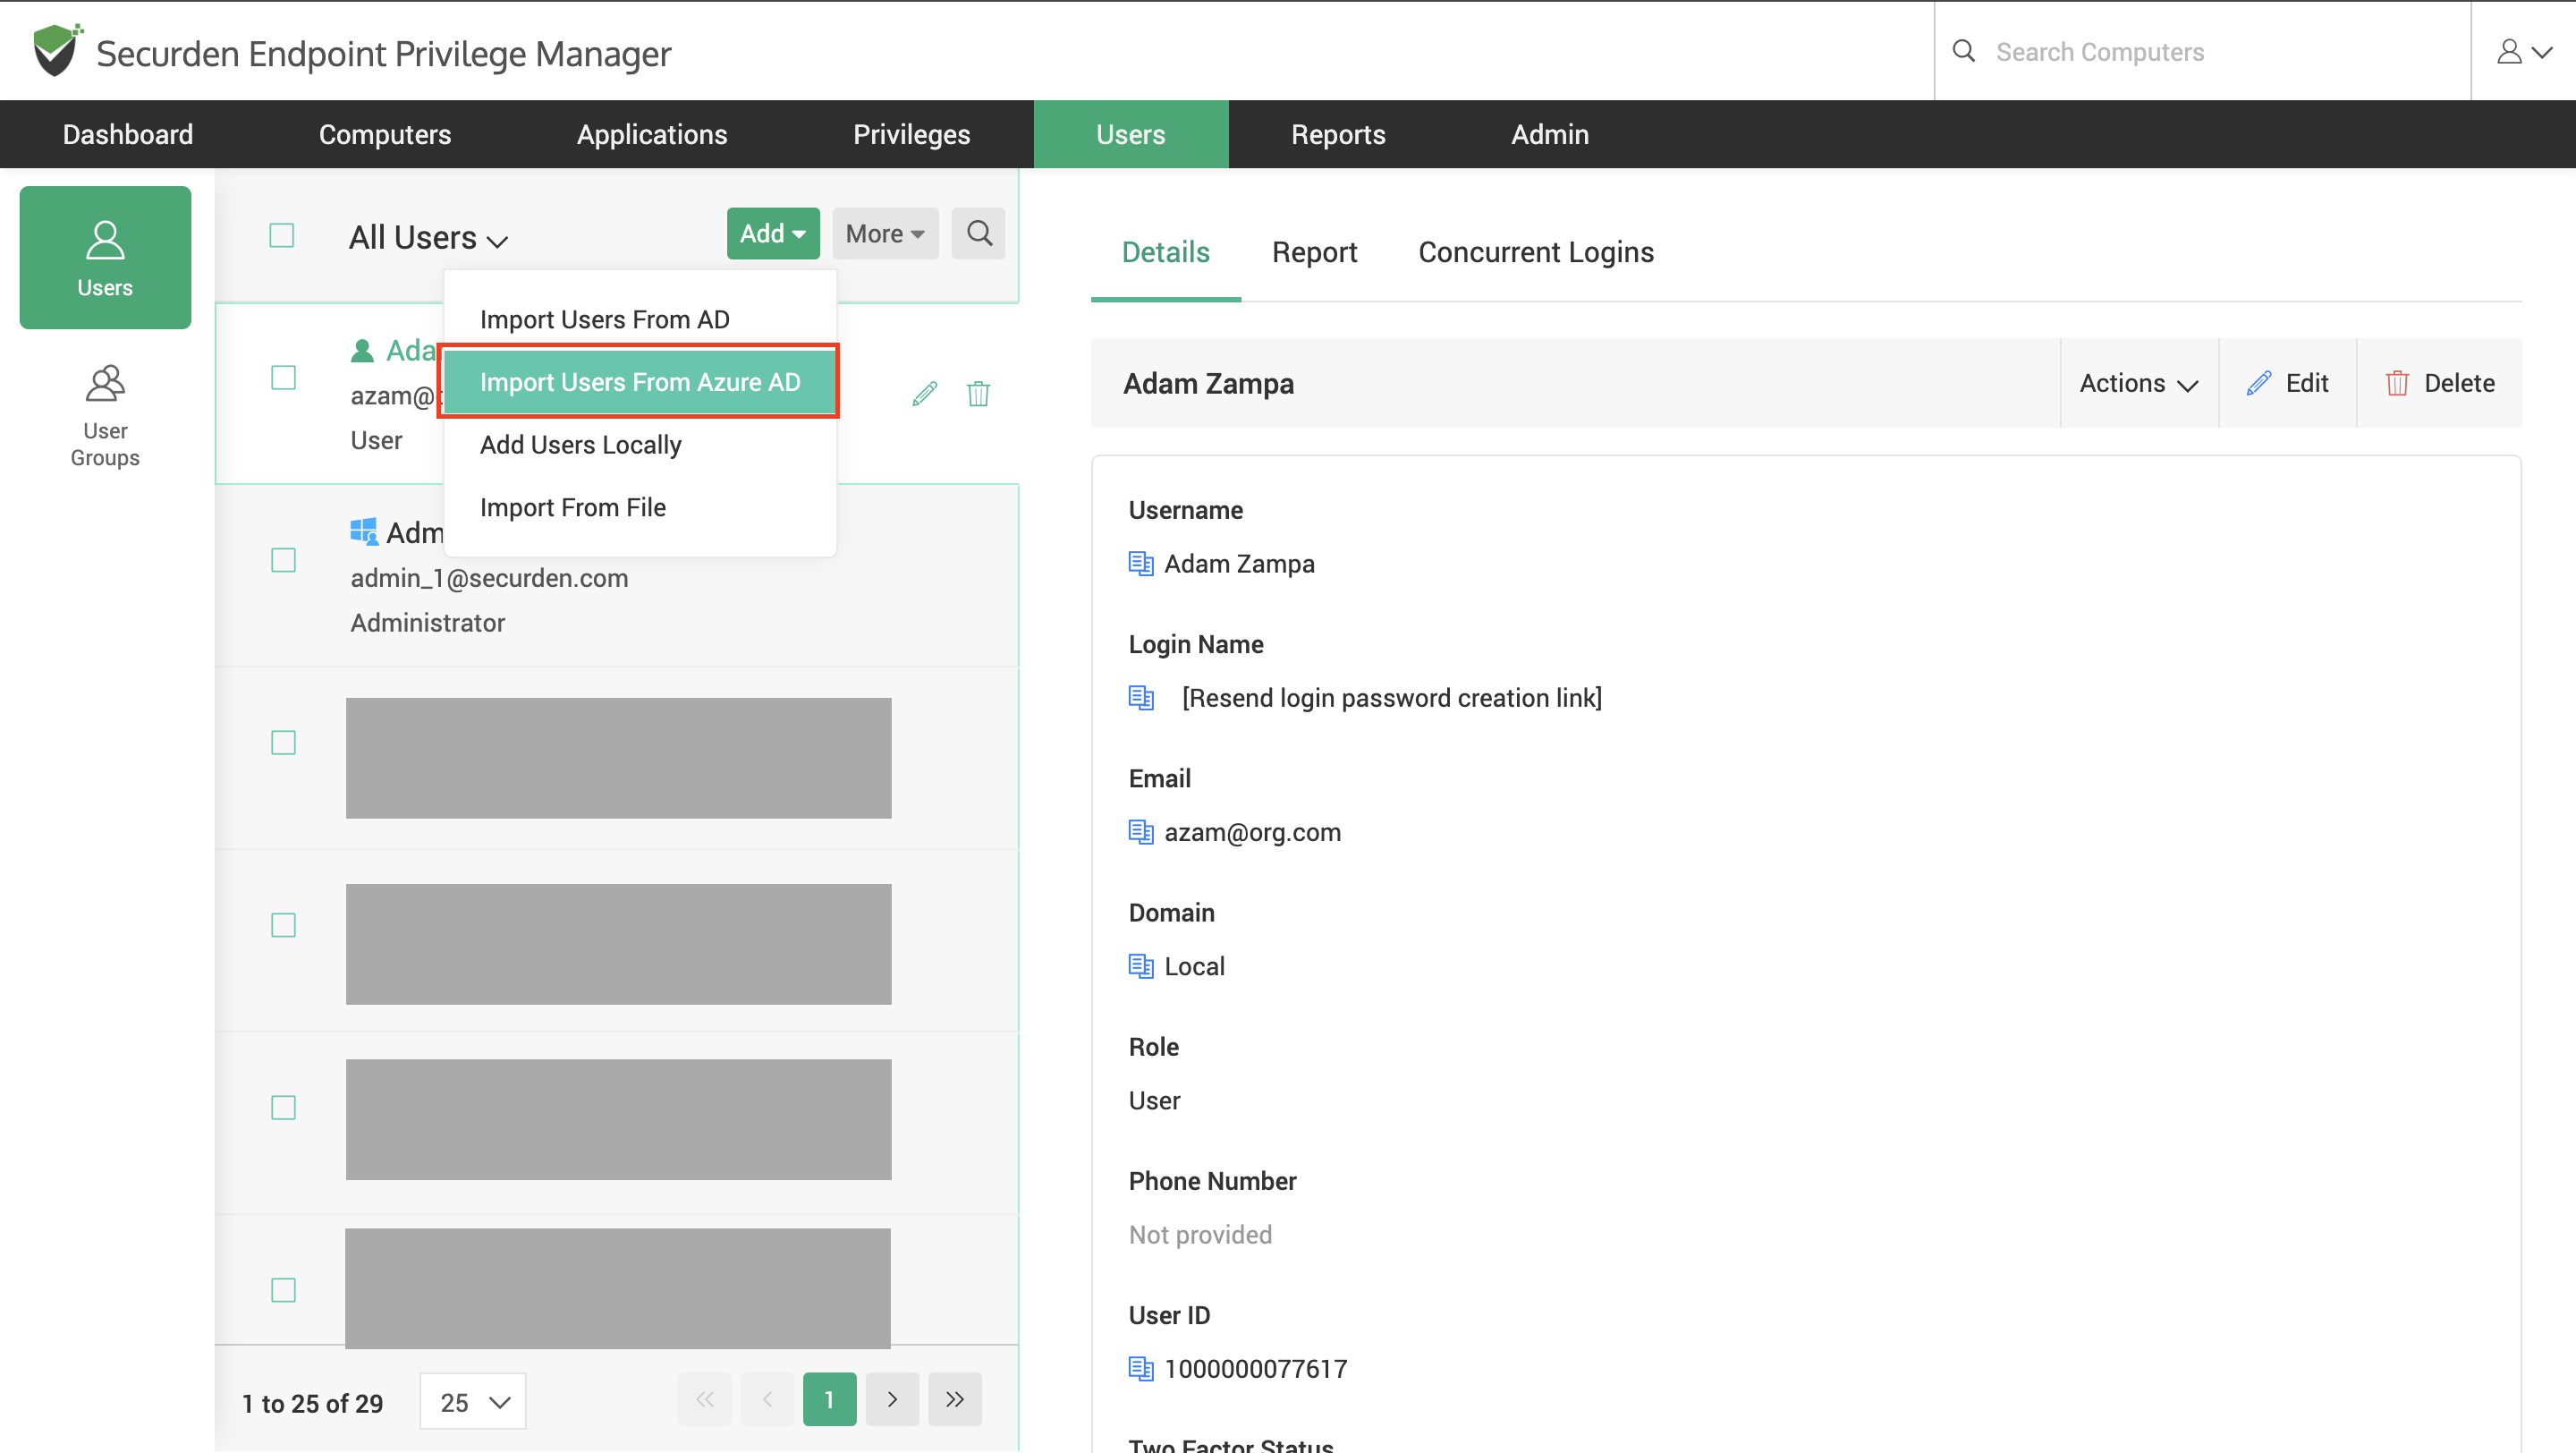
Navigate to Users >> Add >> Import Users from AD to start importing users from AD.
This is a two-step process.
Step 1: Connecting to the Active Directory Domain
To import users from Active Directory domains to EPM, Securden must be able to connect with the AD domain. Once connectivity is established, we can proceed to the next step.
You need to select one of the available Active Directory domains or add connectivity details to a new one in this window.
Refer to this section for details on each attribute.
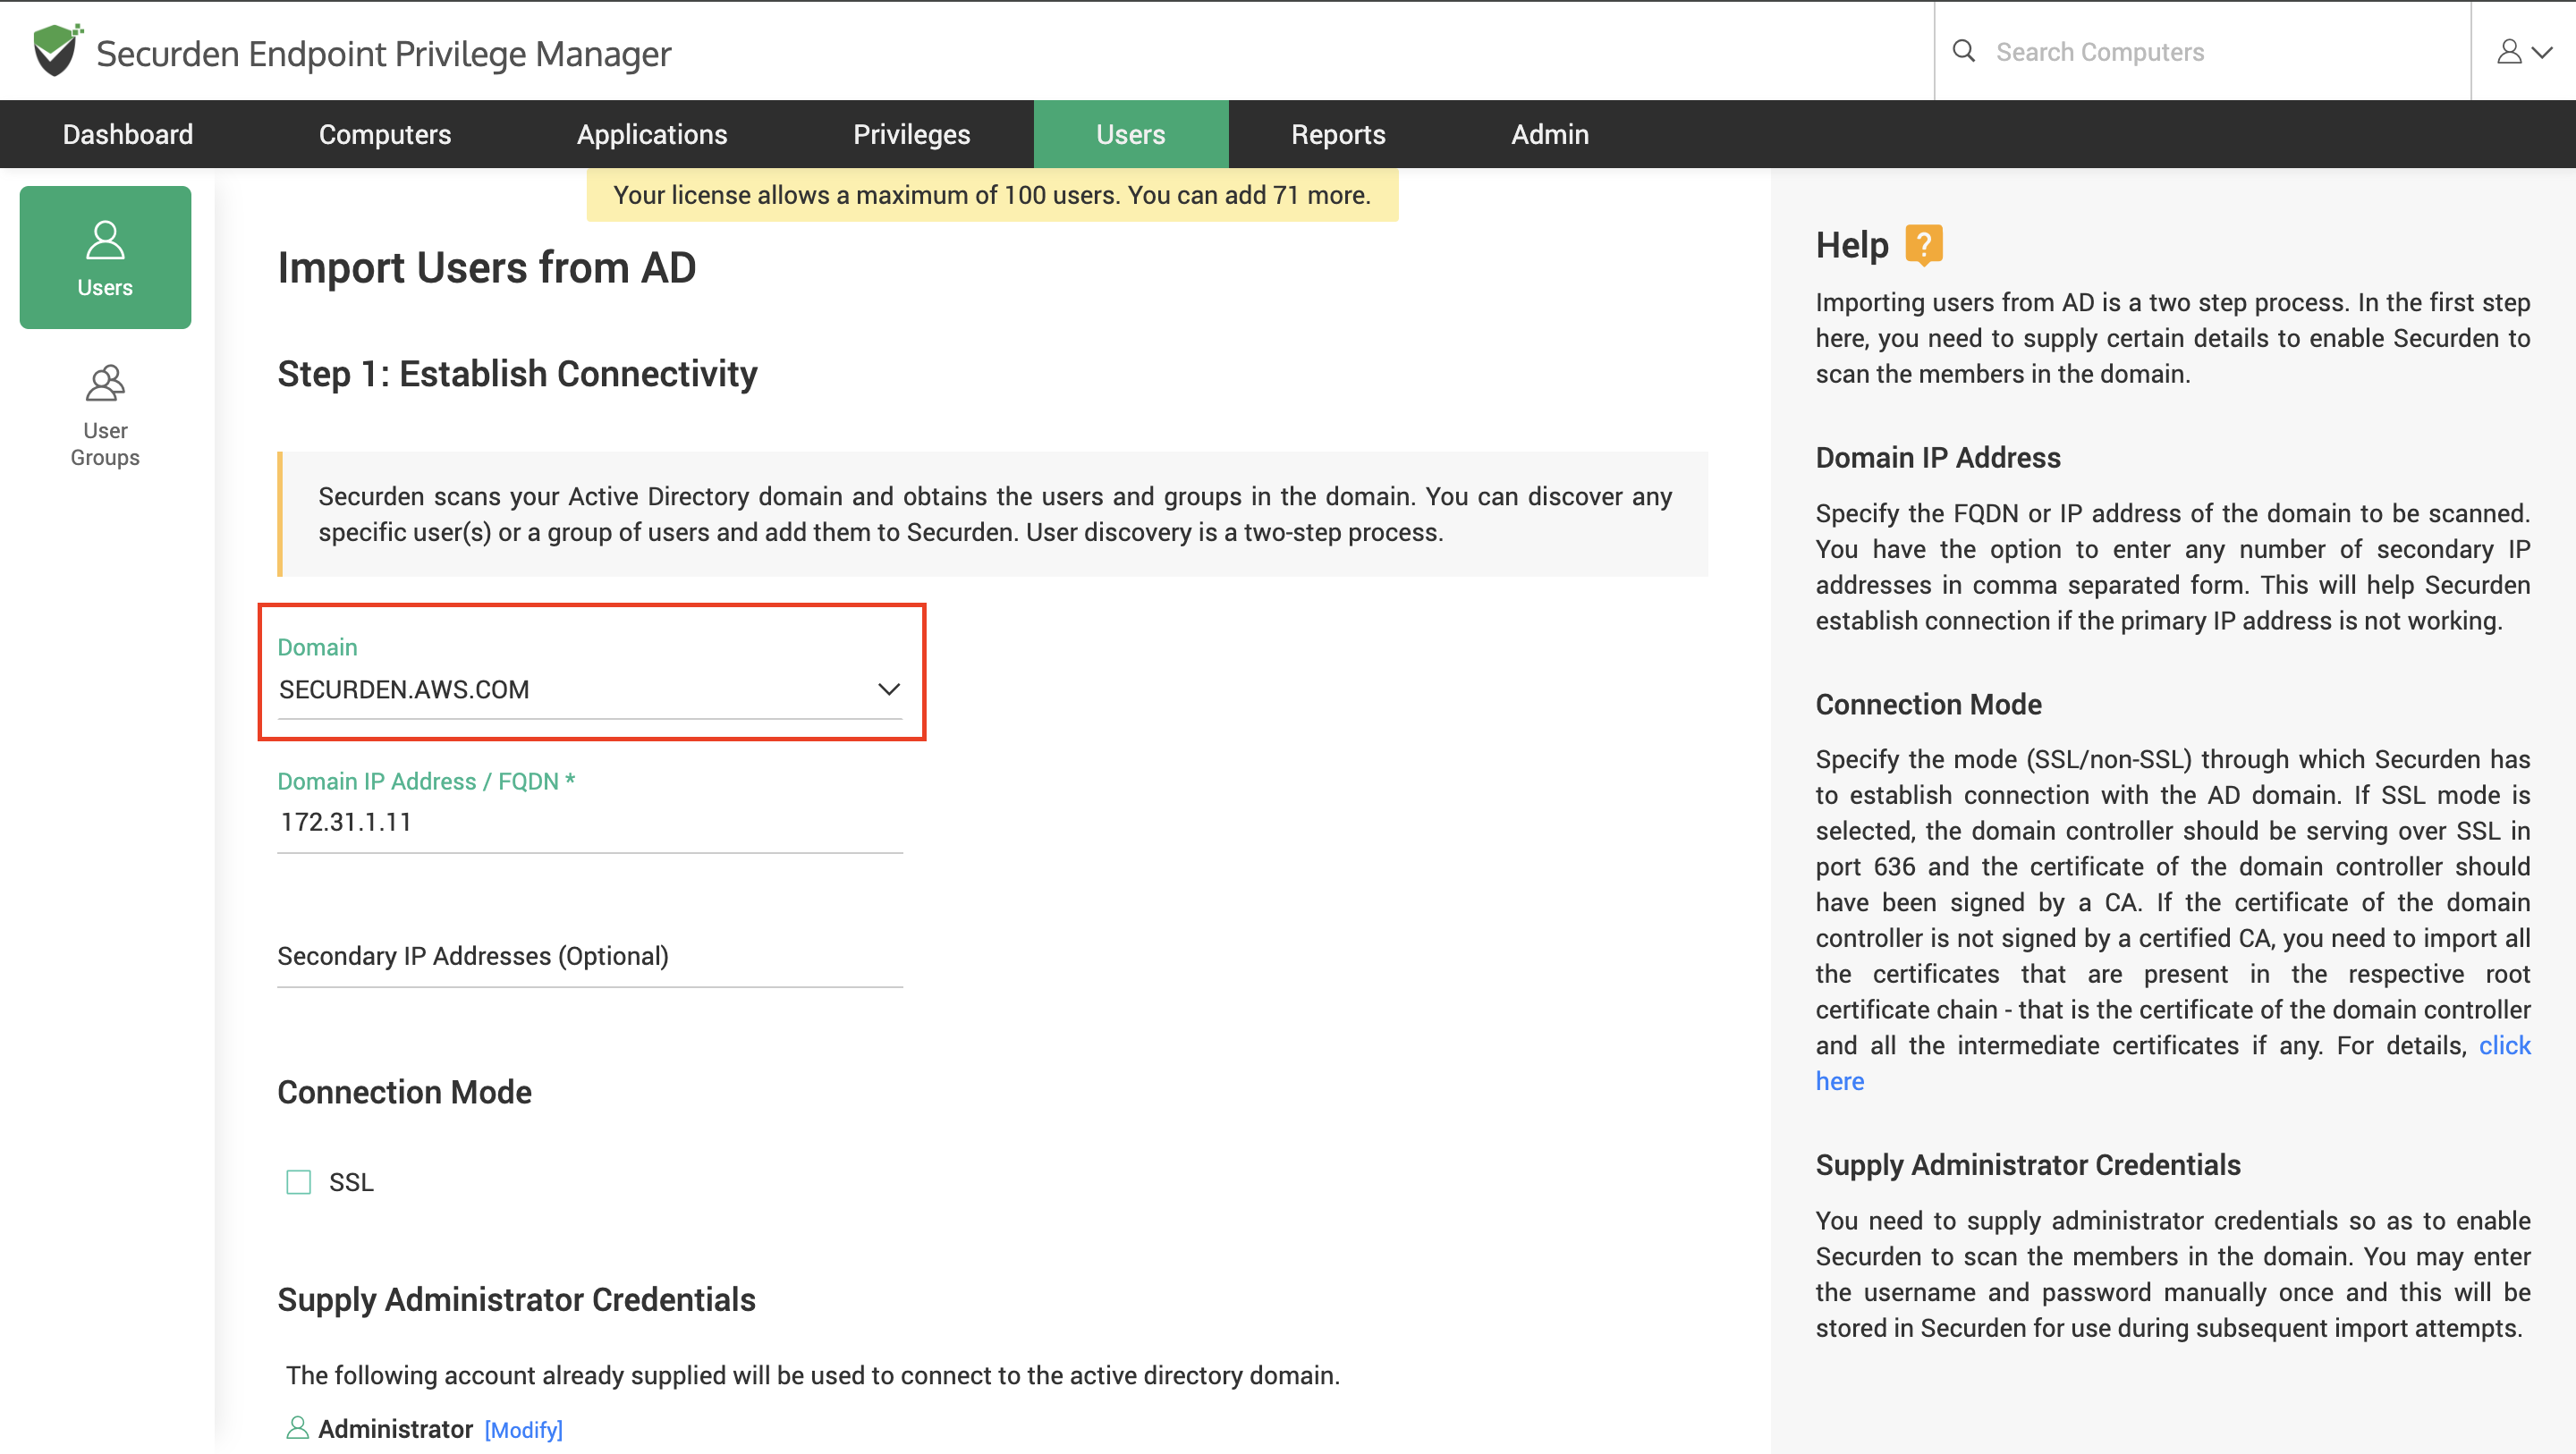
Once the required details are furnished, you may click on Next.
Step 2: Fetching users, user groups, and OUs from the domain
This step is to select and fetch the required users and groups from the AD domain specified. The GUI offers the flexibility to fetch users from OUs/Groups in bulk and even specific users, in a single step. That means you can discover, search, and add the users, OUs, and groups to be imported in a single step.
You can enter the discovery details in any combination of OUs, groups, and users as you wish.
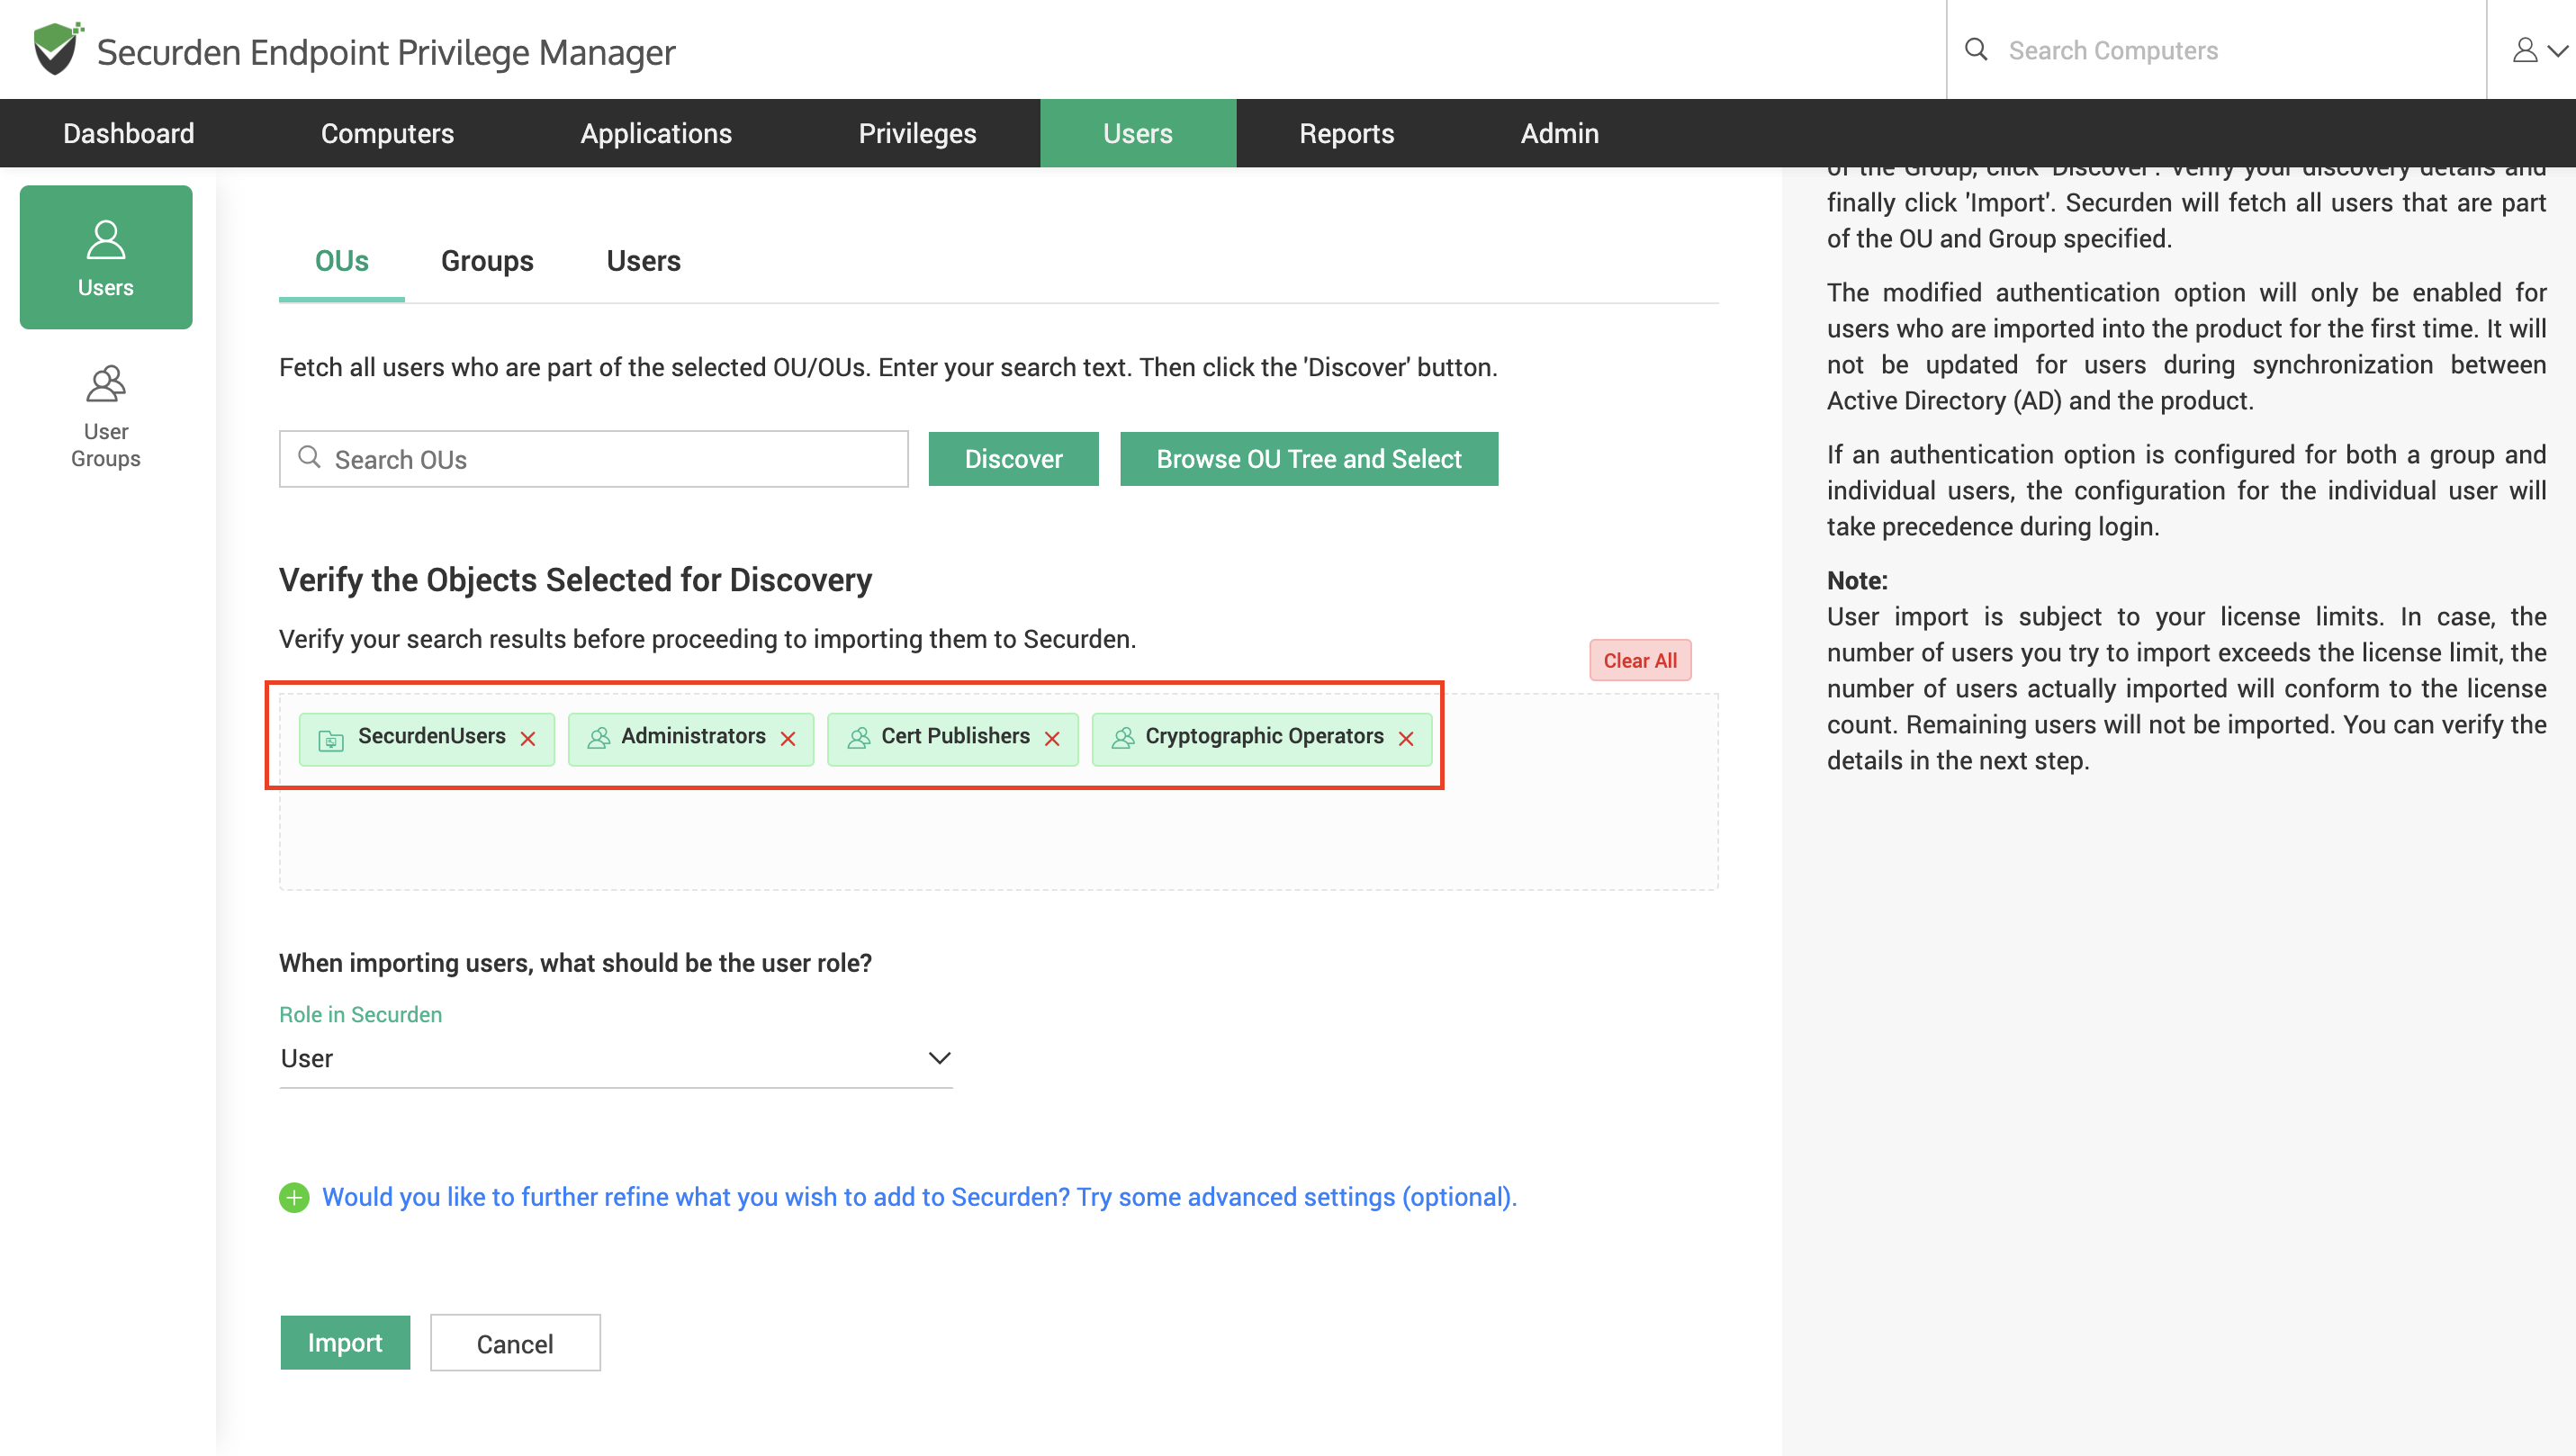
To import OUs, select the OUs tab.
-
Enter the OU name in the field named Search OUs and click Discover.
-
You can also browse from the OU tree by clicking on the Browse OU Tree and Select. You can select the required OUs from here and select Add.
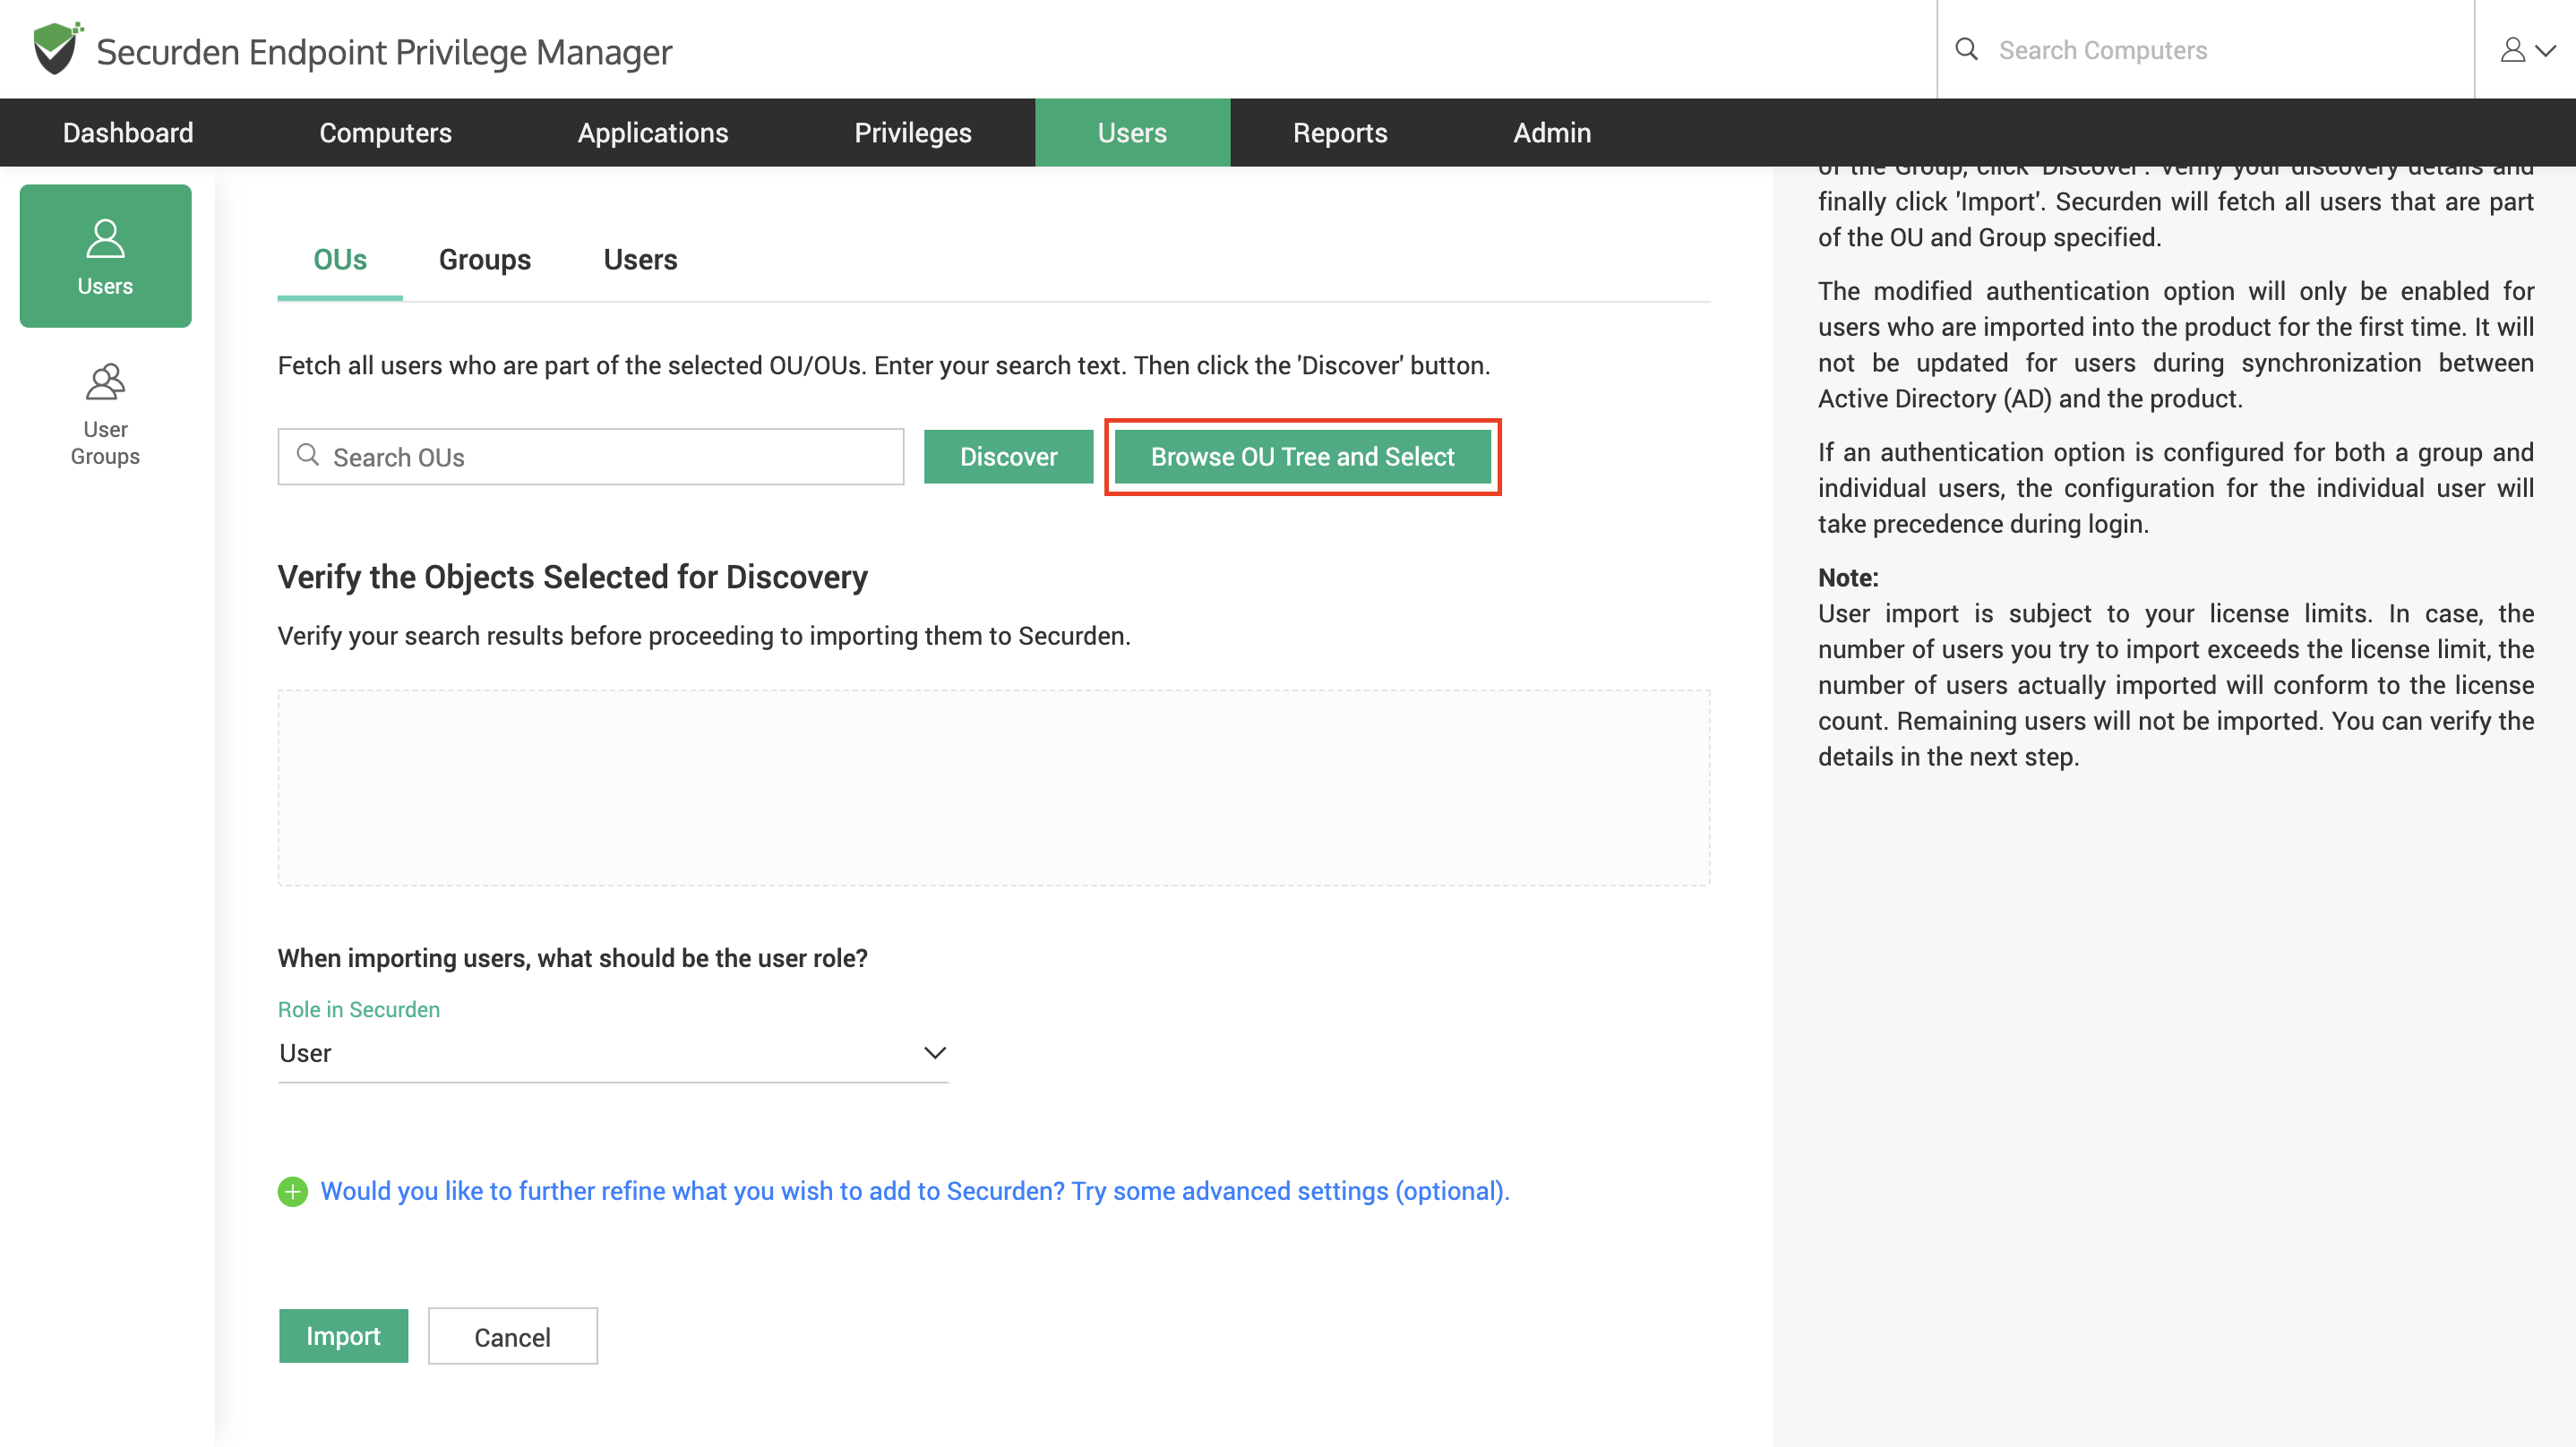
- Once all the required OUs are selected, you can verify the selected OUs in the Verify the Objects Selected for Discovery section.
To import users from groups, select the Groups tab.
1) Enter the group name and select Discover.
2) You can also browse from the OU tree by clicking on the Browse Groups and Select Option. You can select one or multiple groups and select Add.
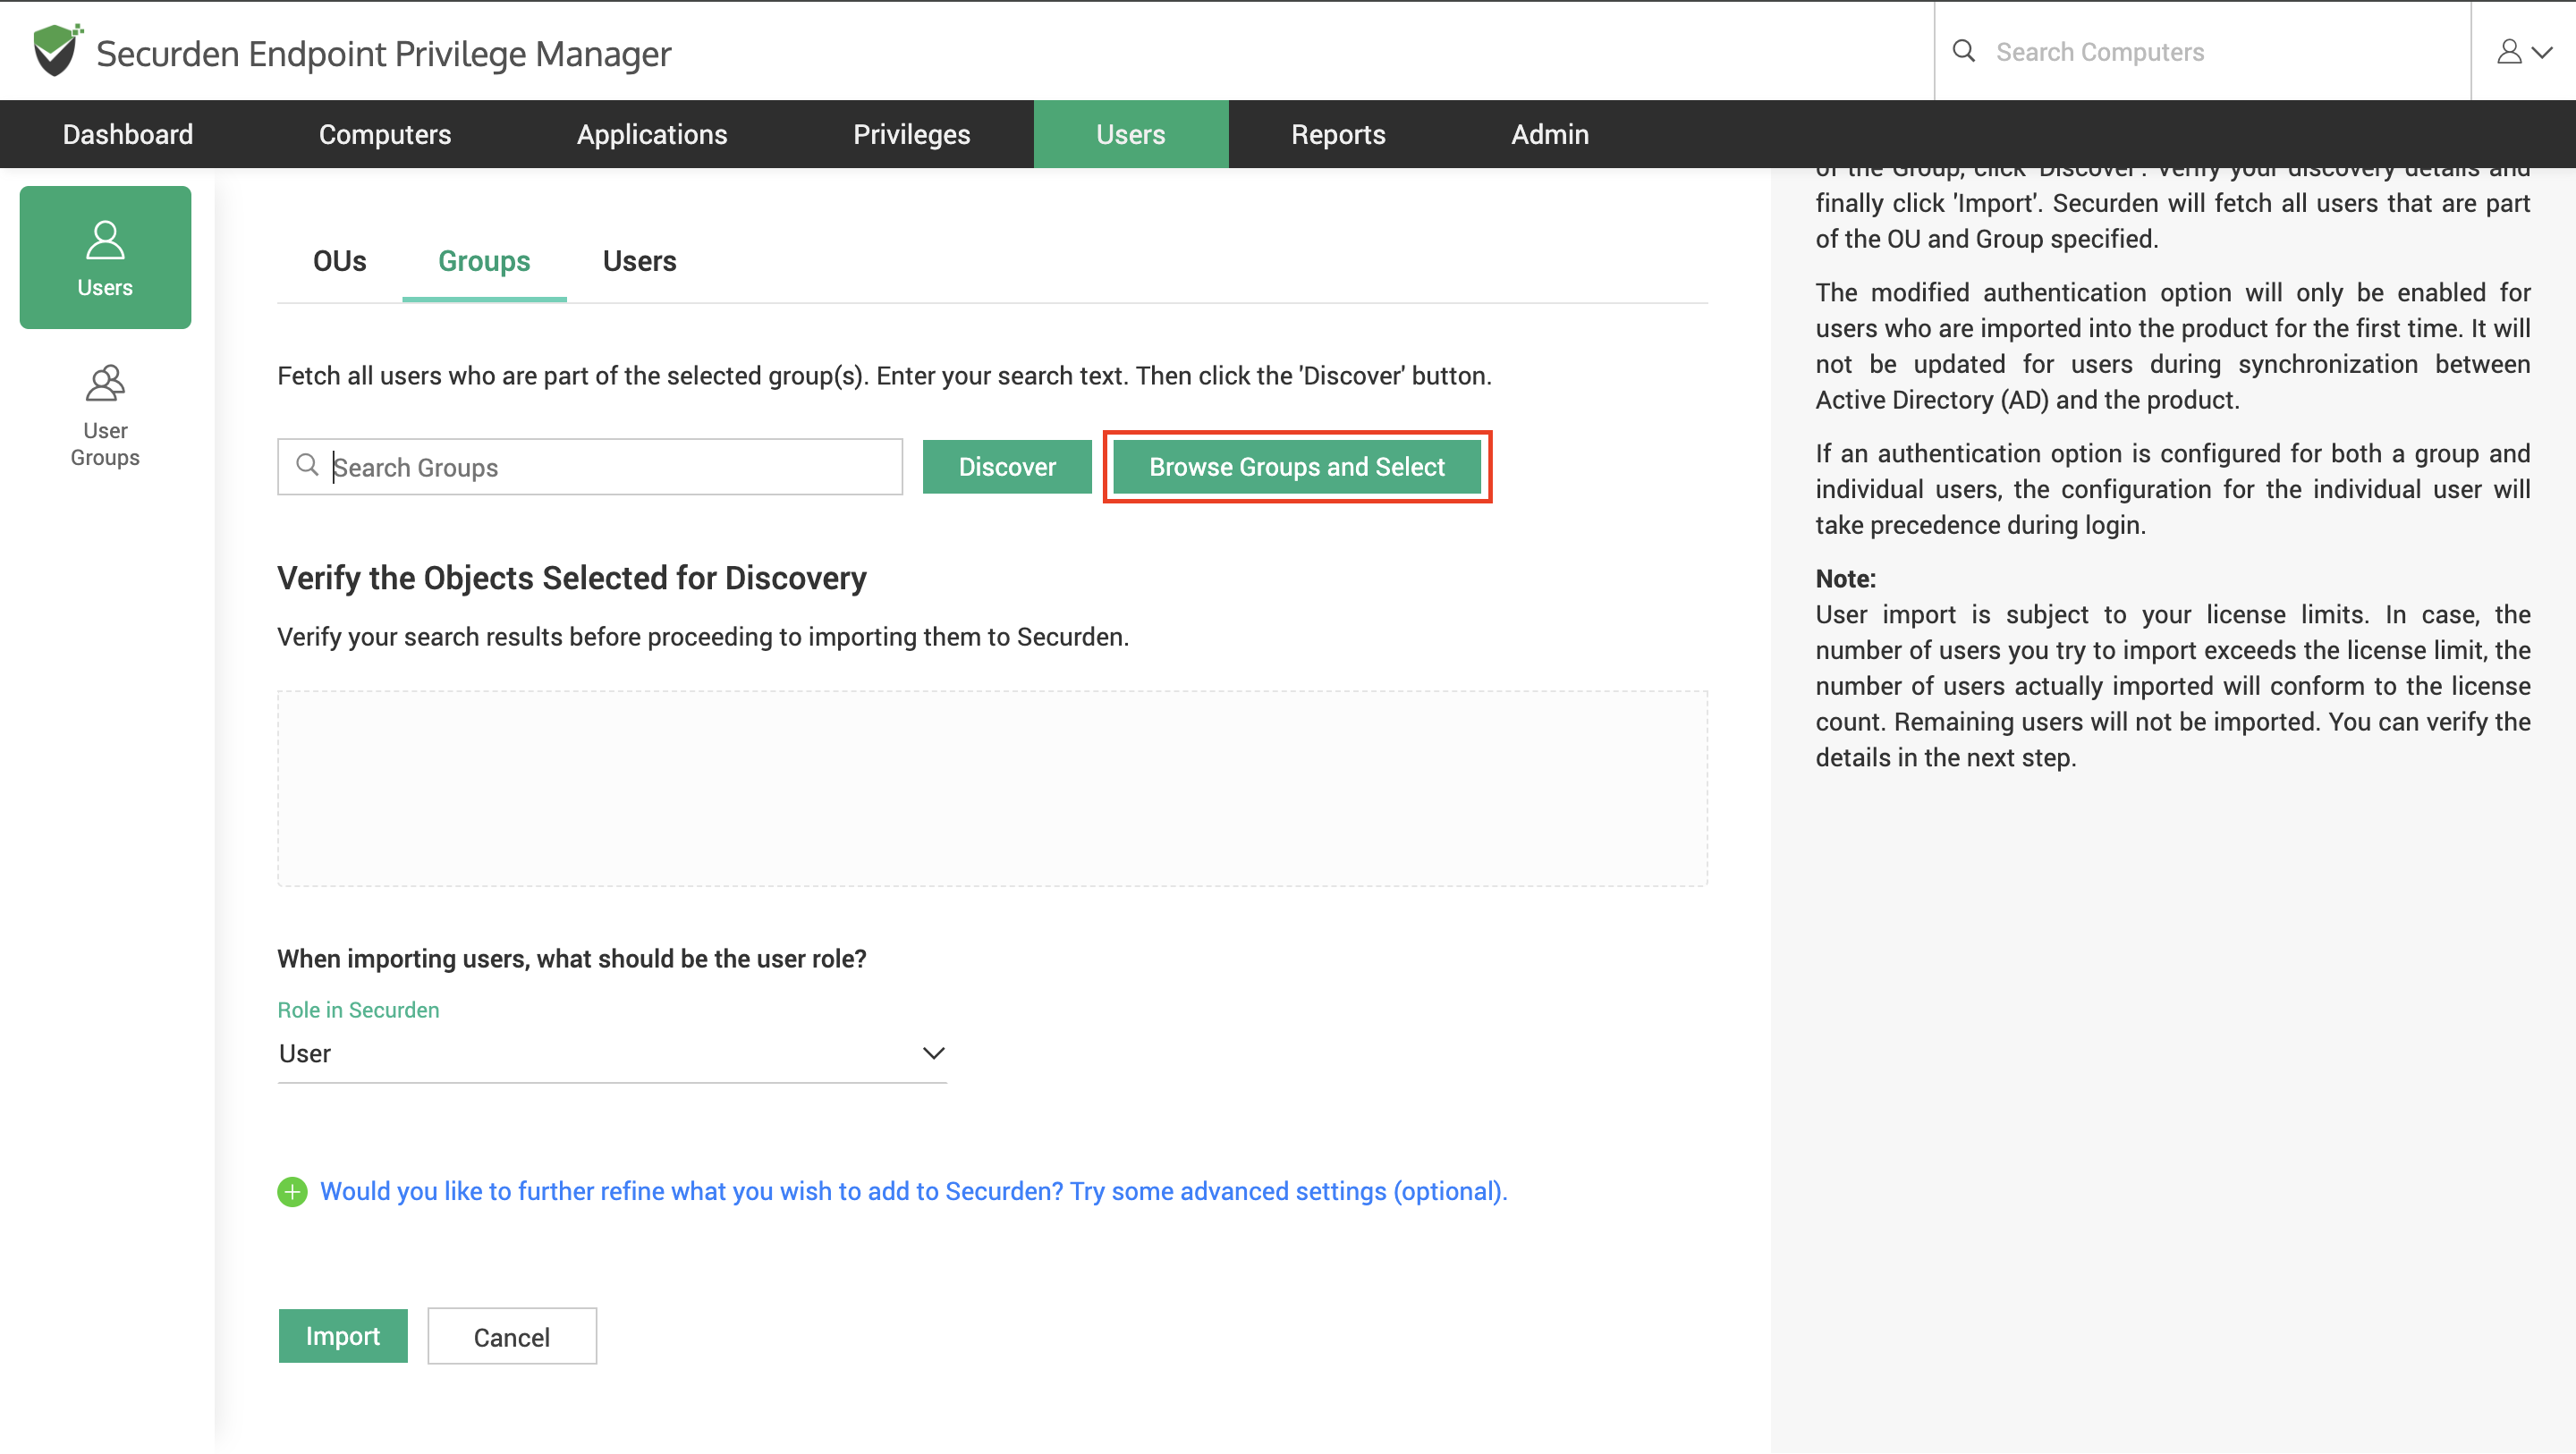
3) You can then verify your selection in the Verify the Objects Selected for Discovery section.
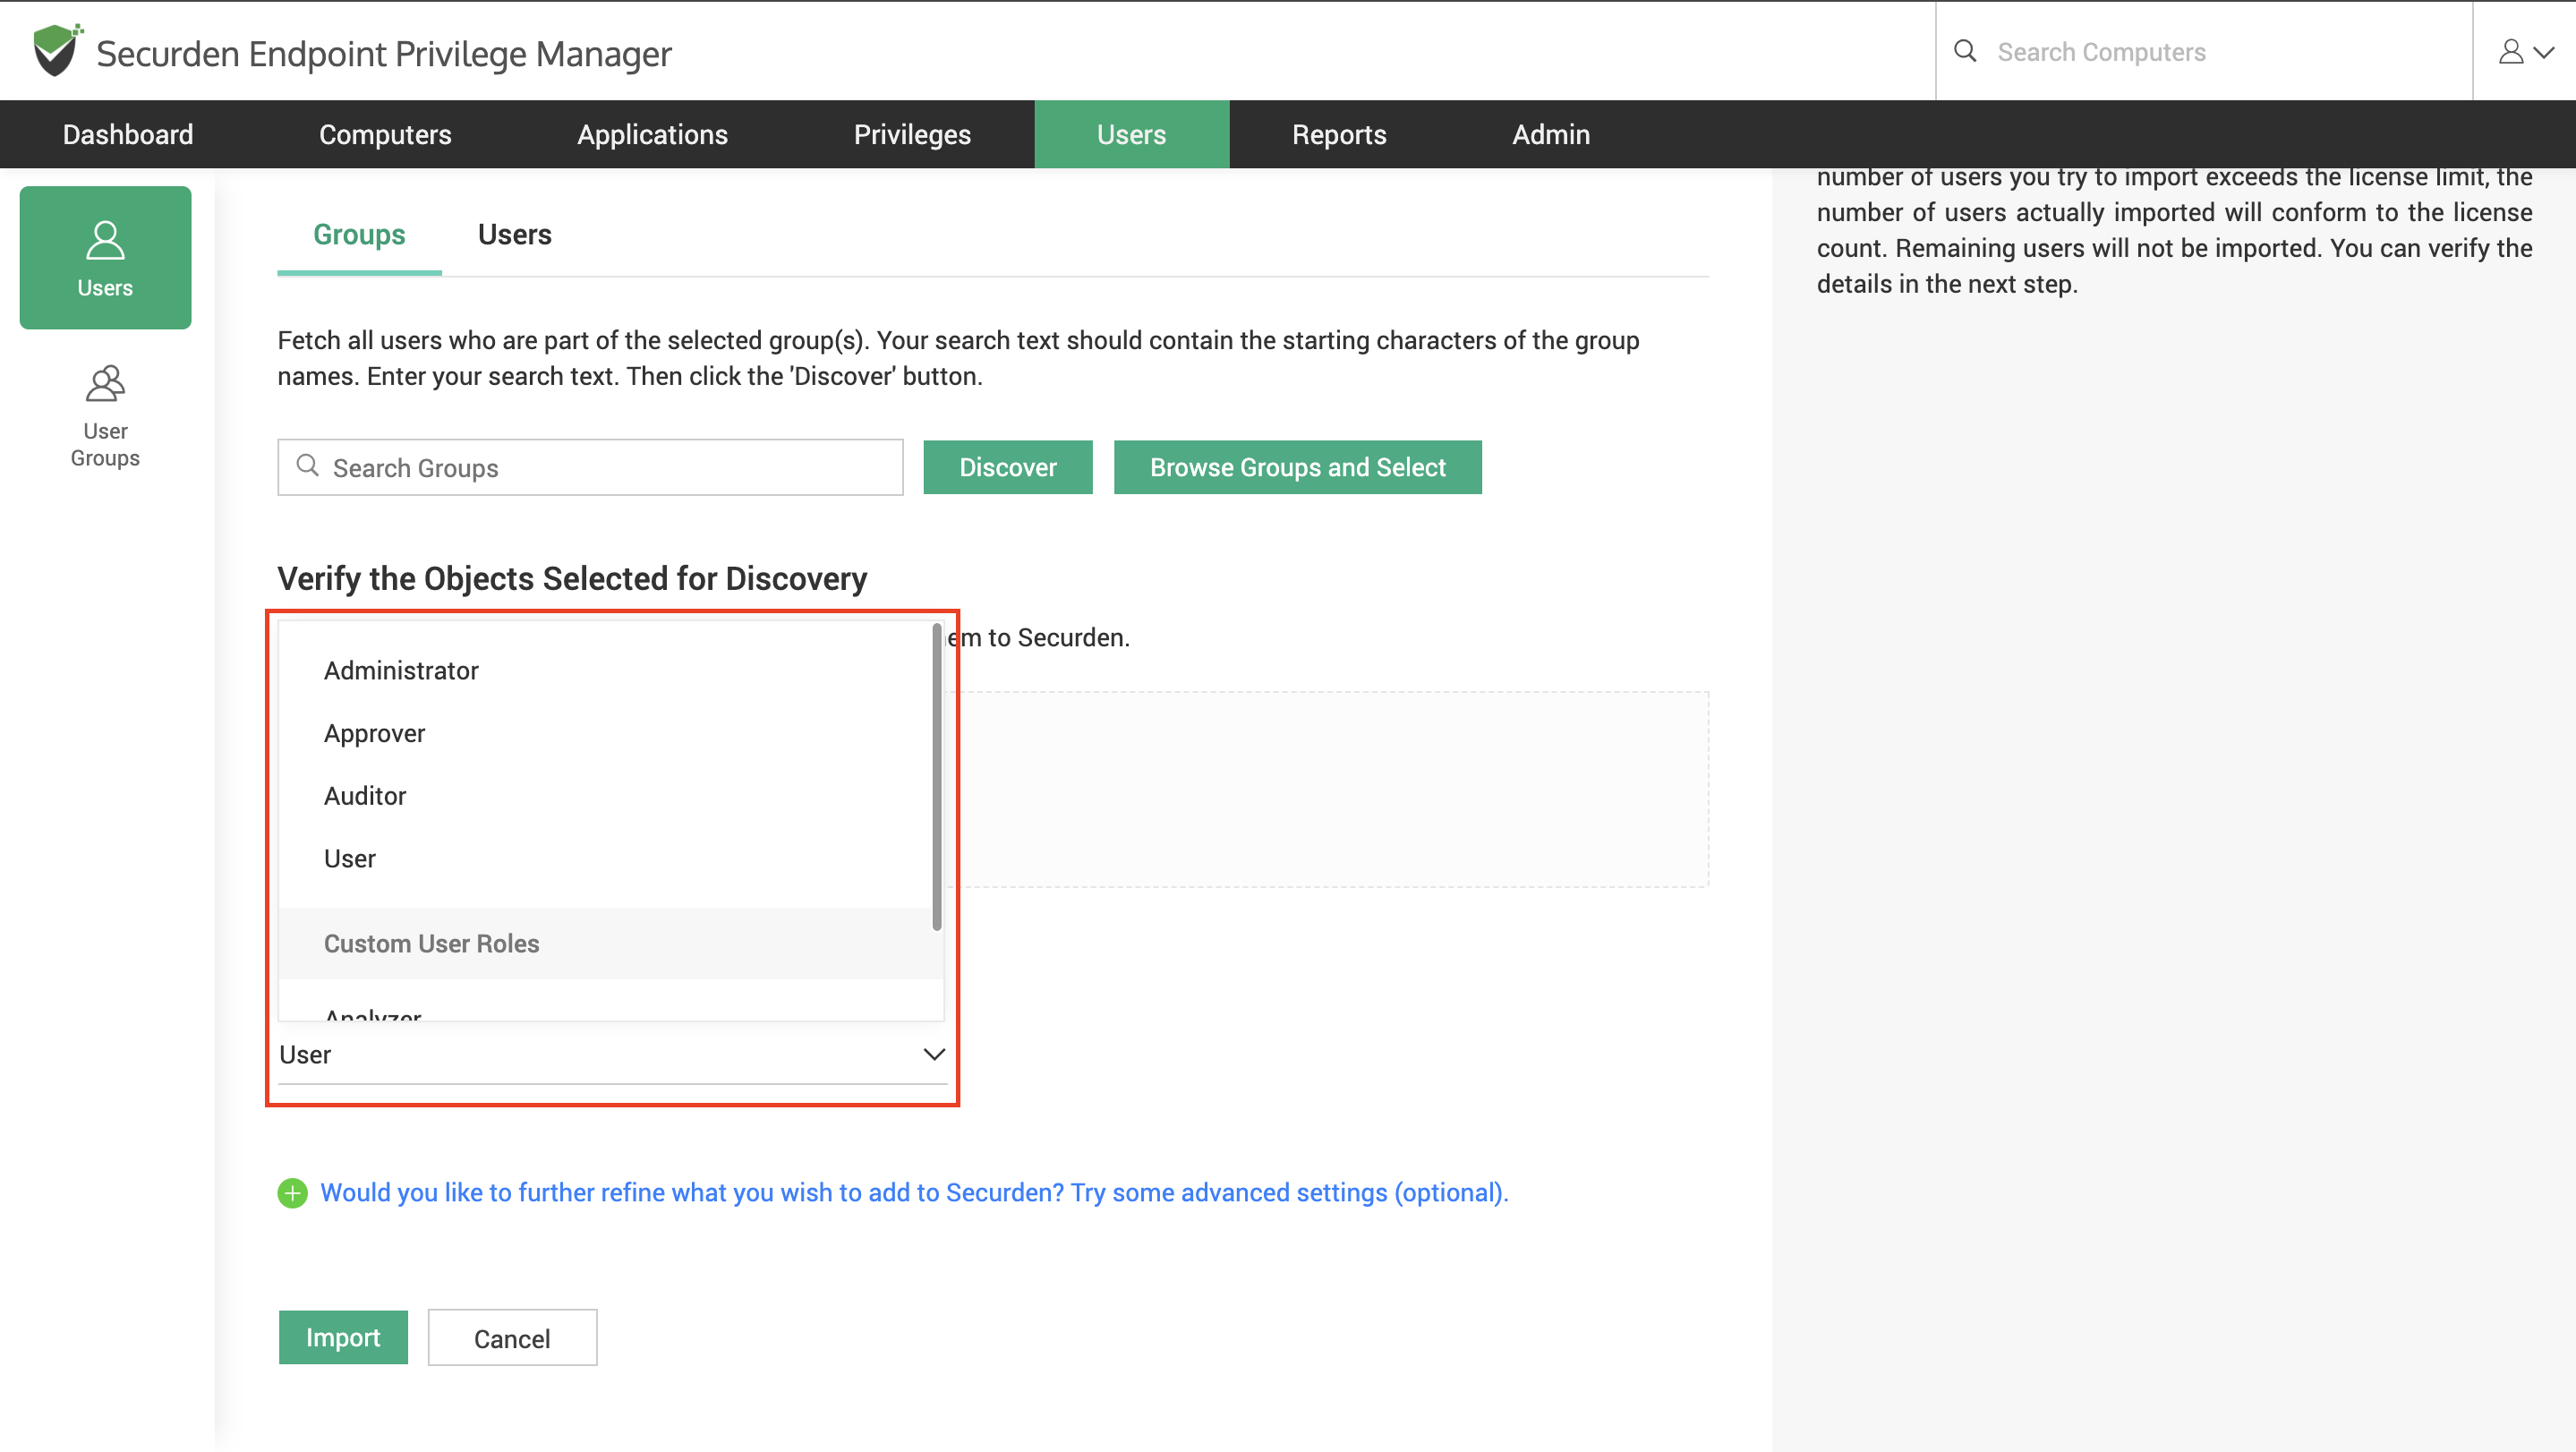
To import users individually, Select the Users tab.
1) Enter the name of the user to be searched and select Discover.
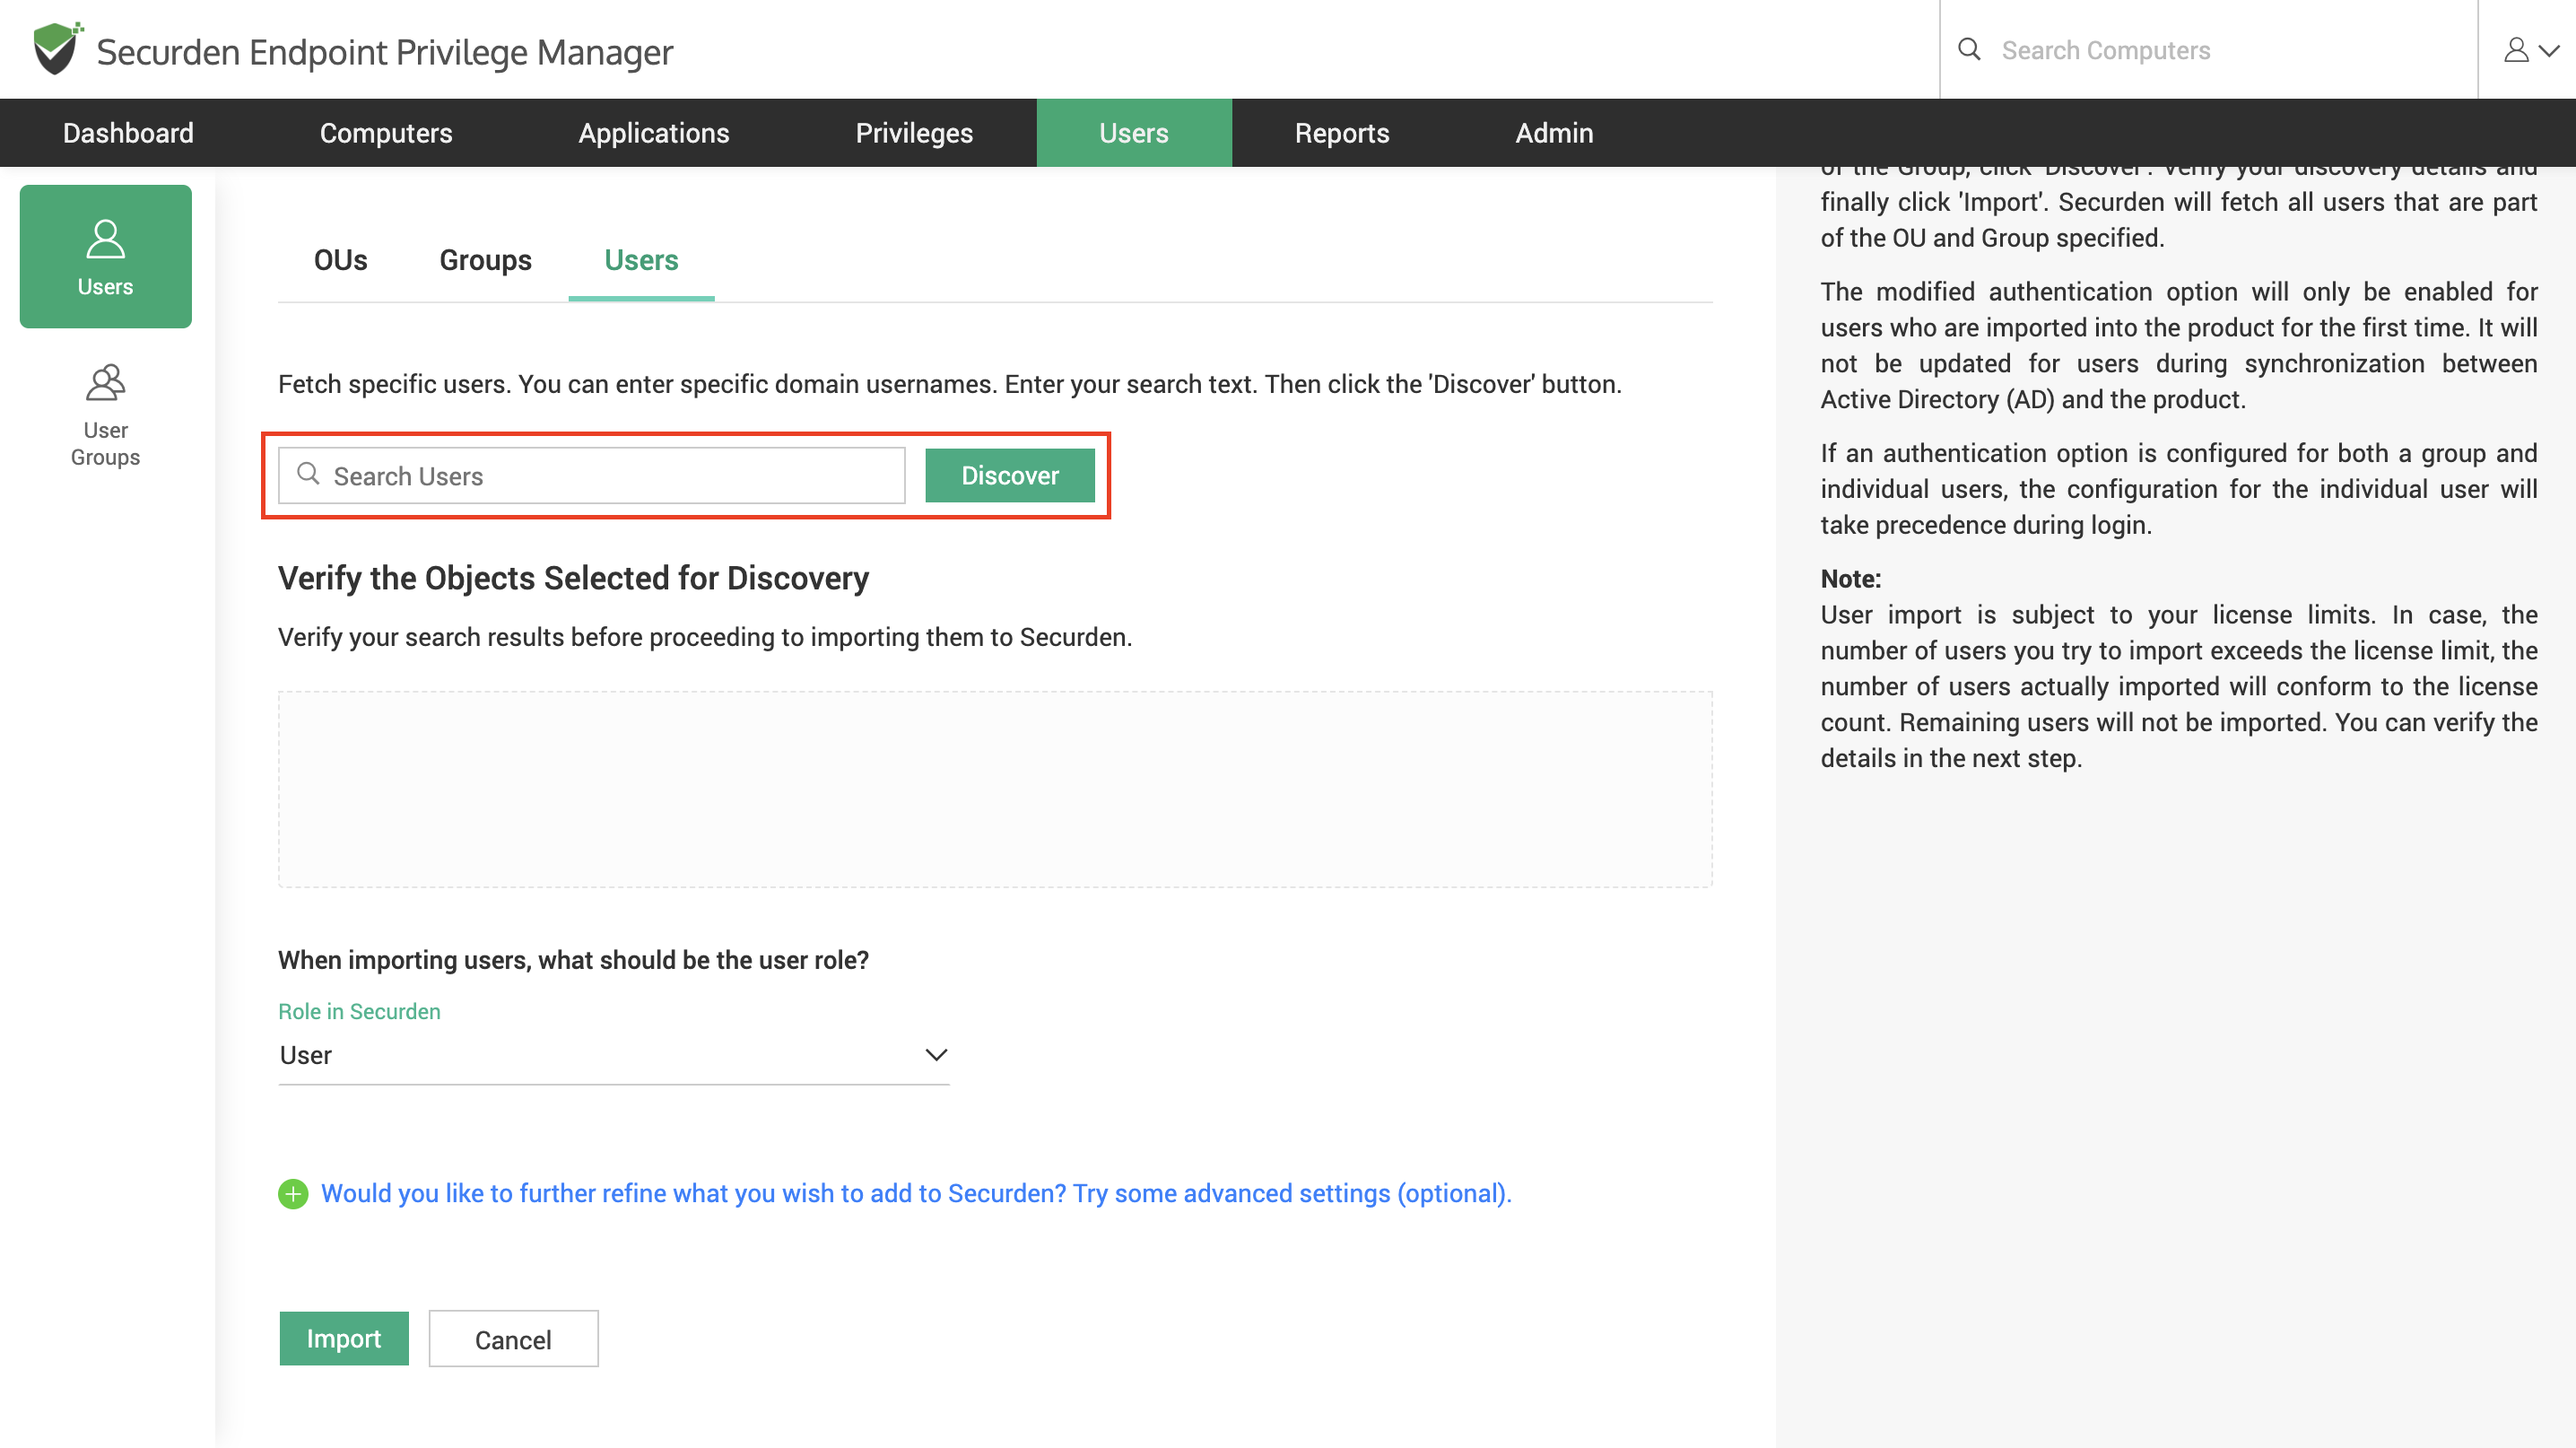
2) You can then verify your selection in the Verify the Objects Selected for Discovery section.
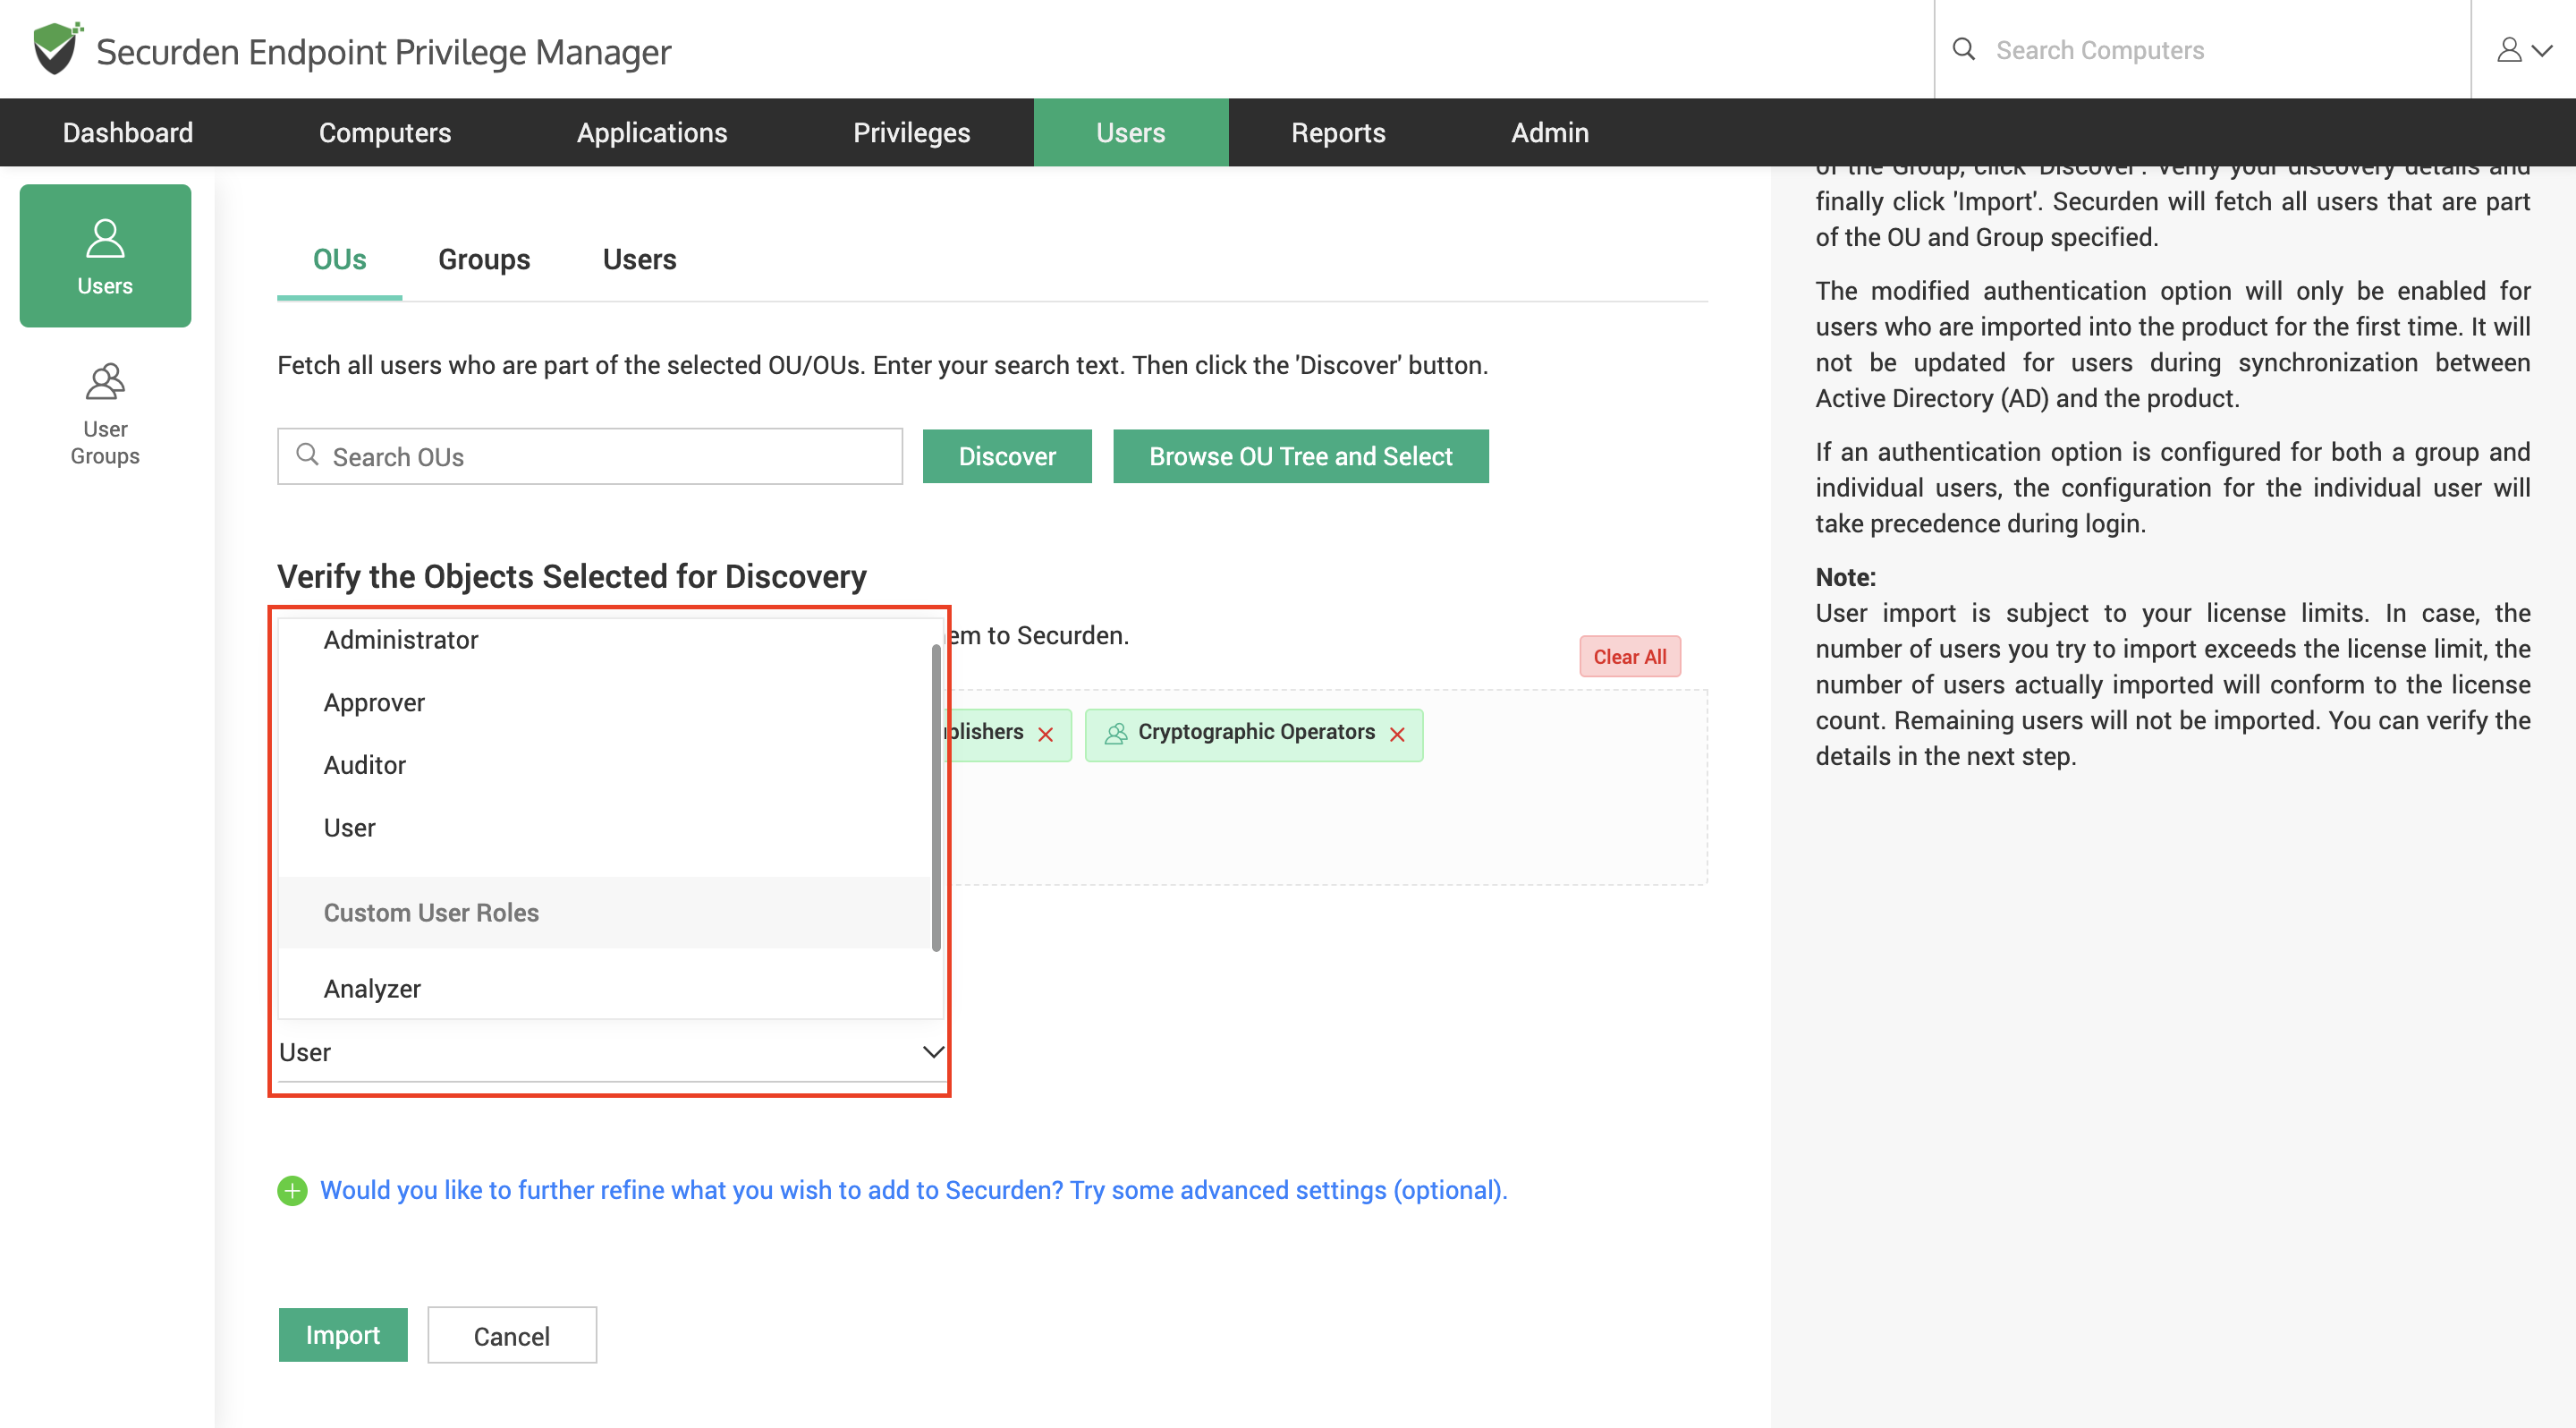
Once you have selected the required OUs, groups, and users, you may assign a user role for the selected entities from the Role in Securden dropdown.
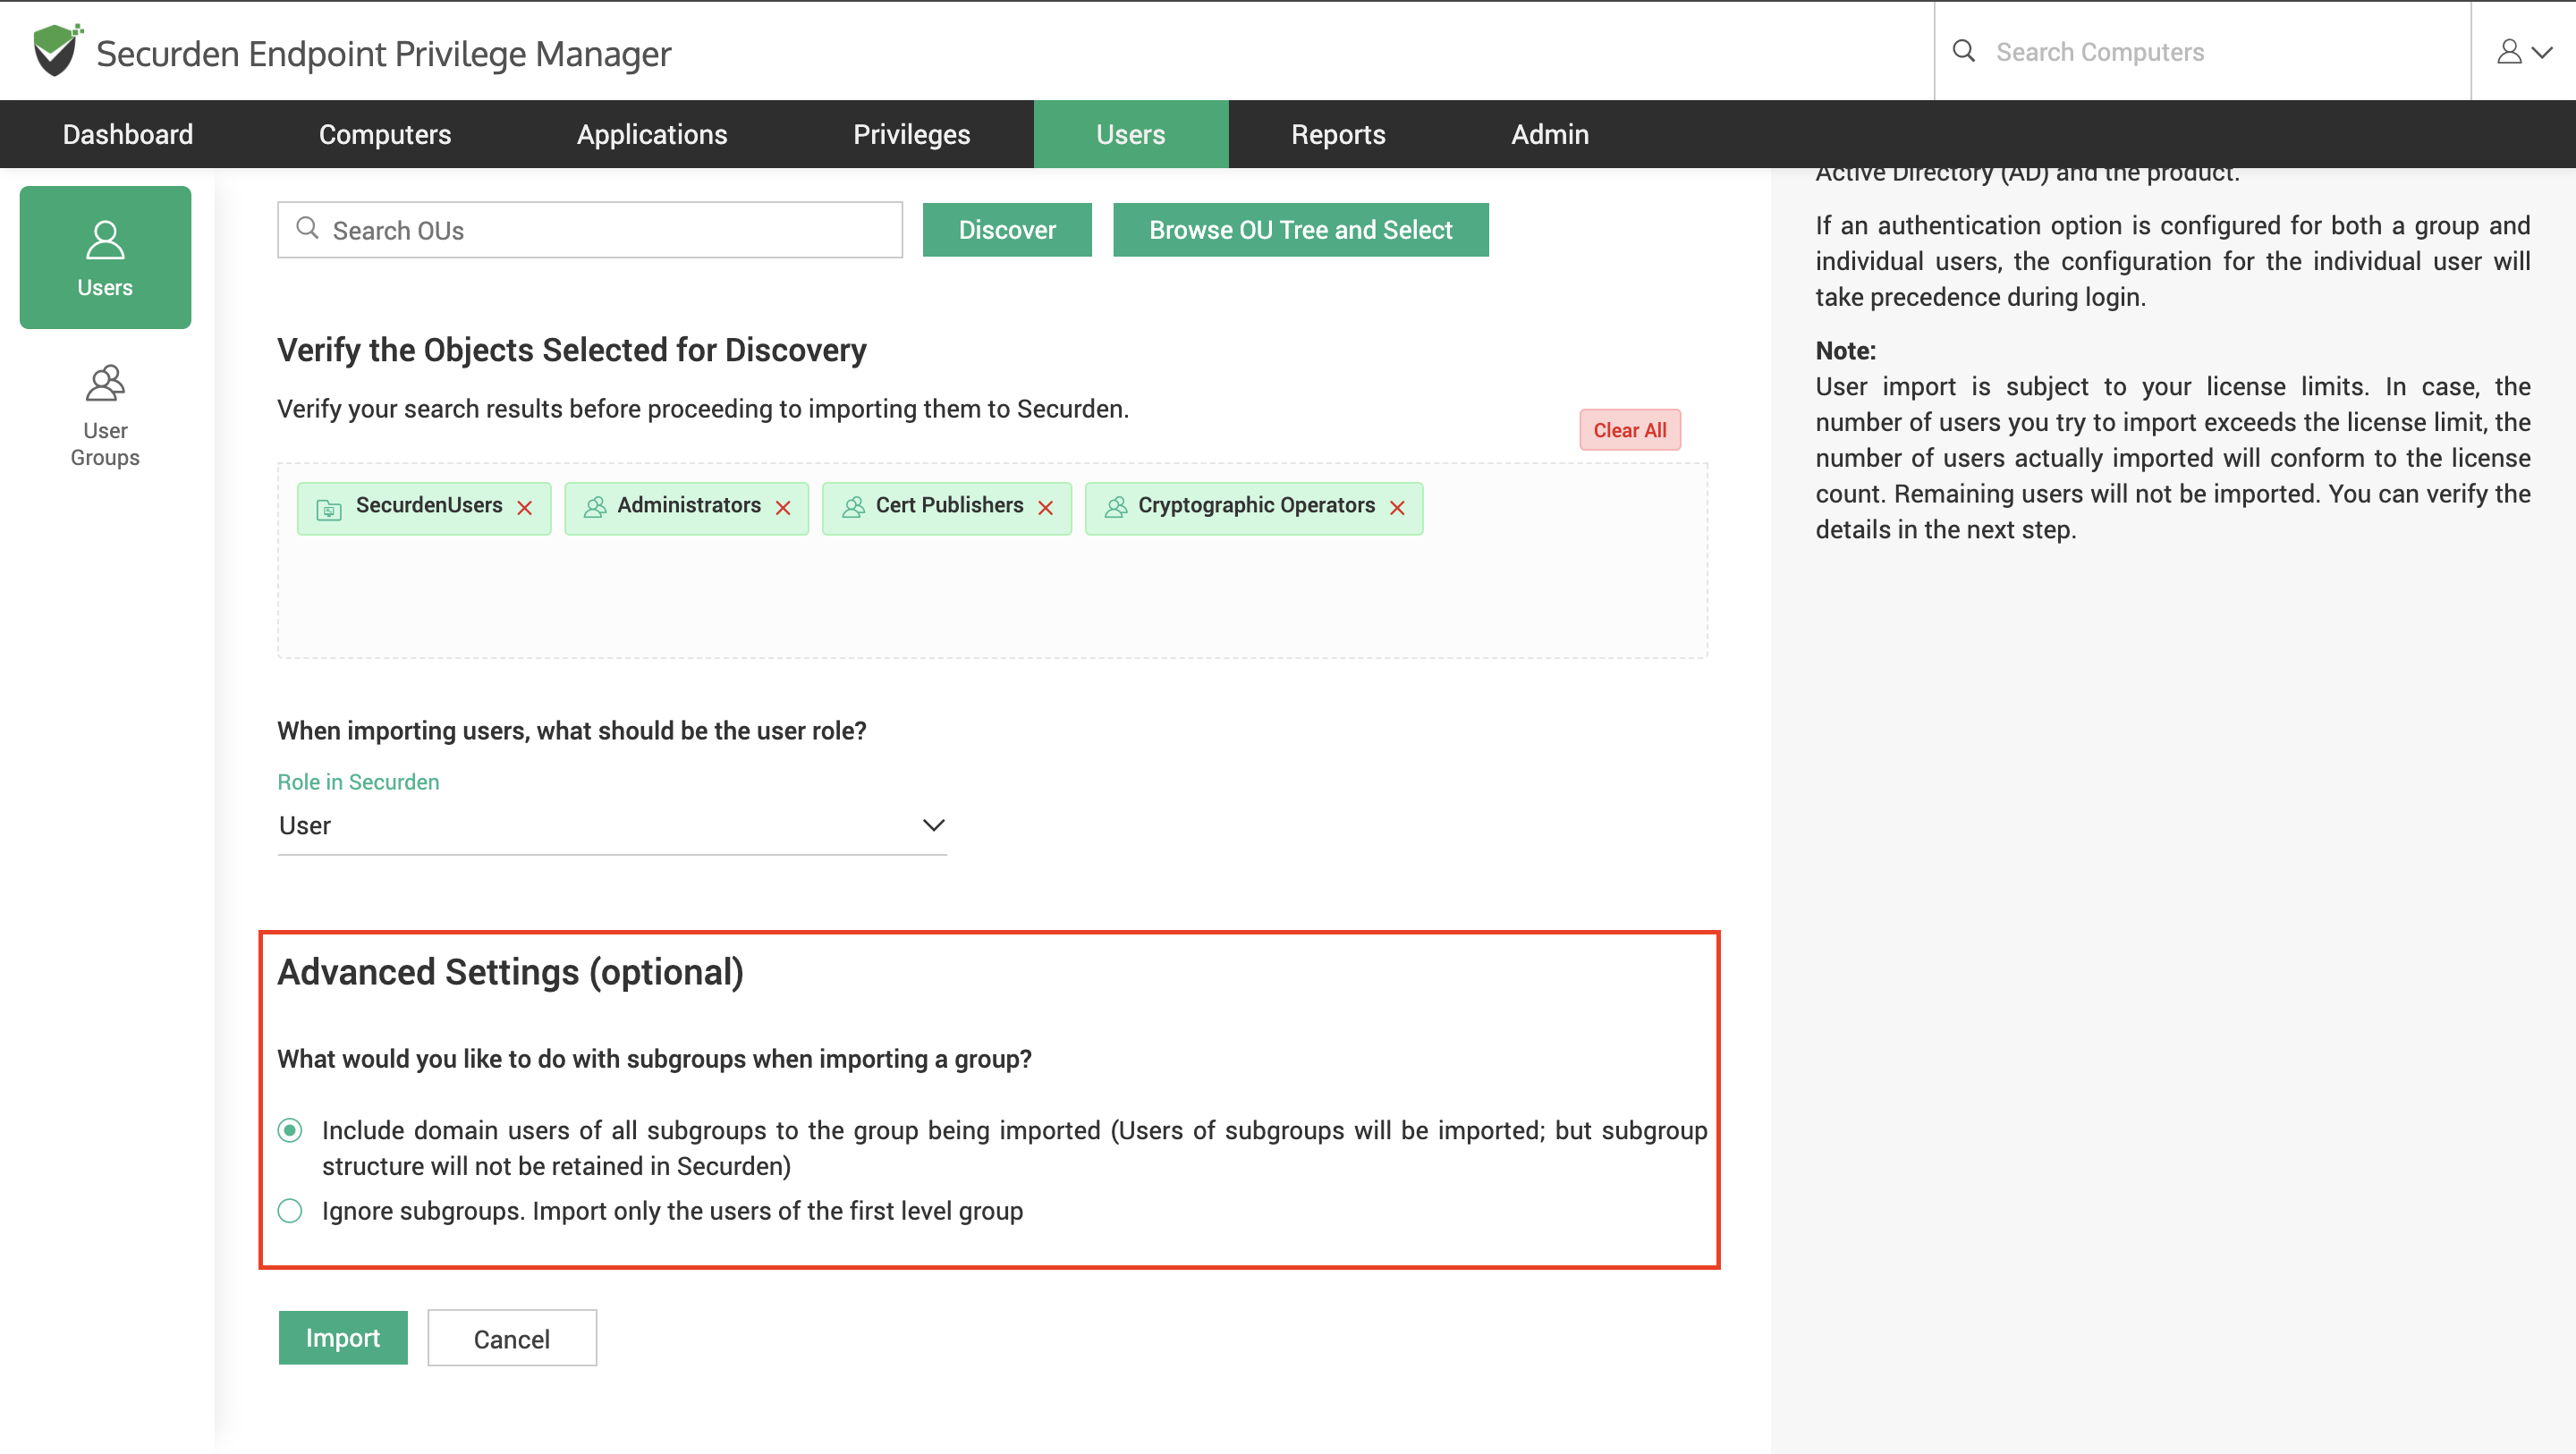
Before selecting import, you can look into the advanced settings which are explained below.
Advanced settings
This option allows you to either include domain users of all subgroups of the group being imported or ignore the subgroups and import only the users of the first level group.
Verify your selections and Click Import.
The process of discovering the OUs/Groups/Users will take a while to complete. The discovered OUs/Groups/Users will be automatically populated to Securden inventory after completion.
How to Import Users from Azure AD?
Prerequisite: Azure AD import requires internet connectivity. If your organization makes use of a proxy server to regulate internet traffic, you should have configured proxy server settings (from Admin >> General >> Proxy Server Settings).
Securden supports import of domain users directly by integrating with your Azure AD (Entra ID) domain.
Navigate to Users >> Add >> Import from Azure AD to begin the process.
This is a two-step process.
Step 1: Establishing Connectivity with Azure AD
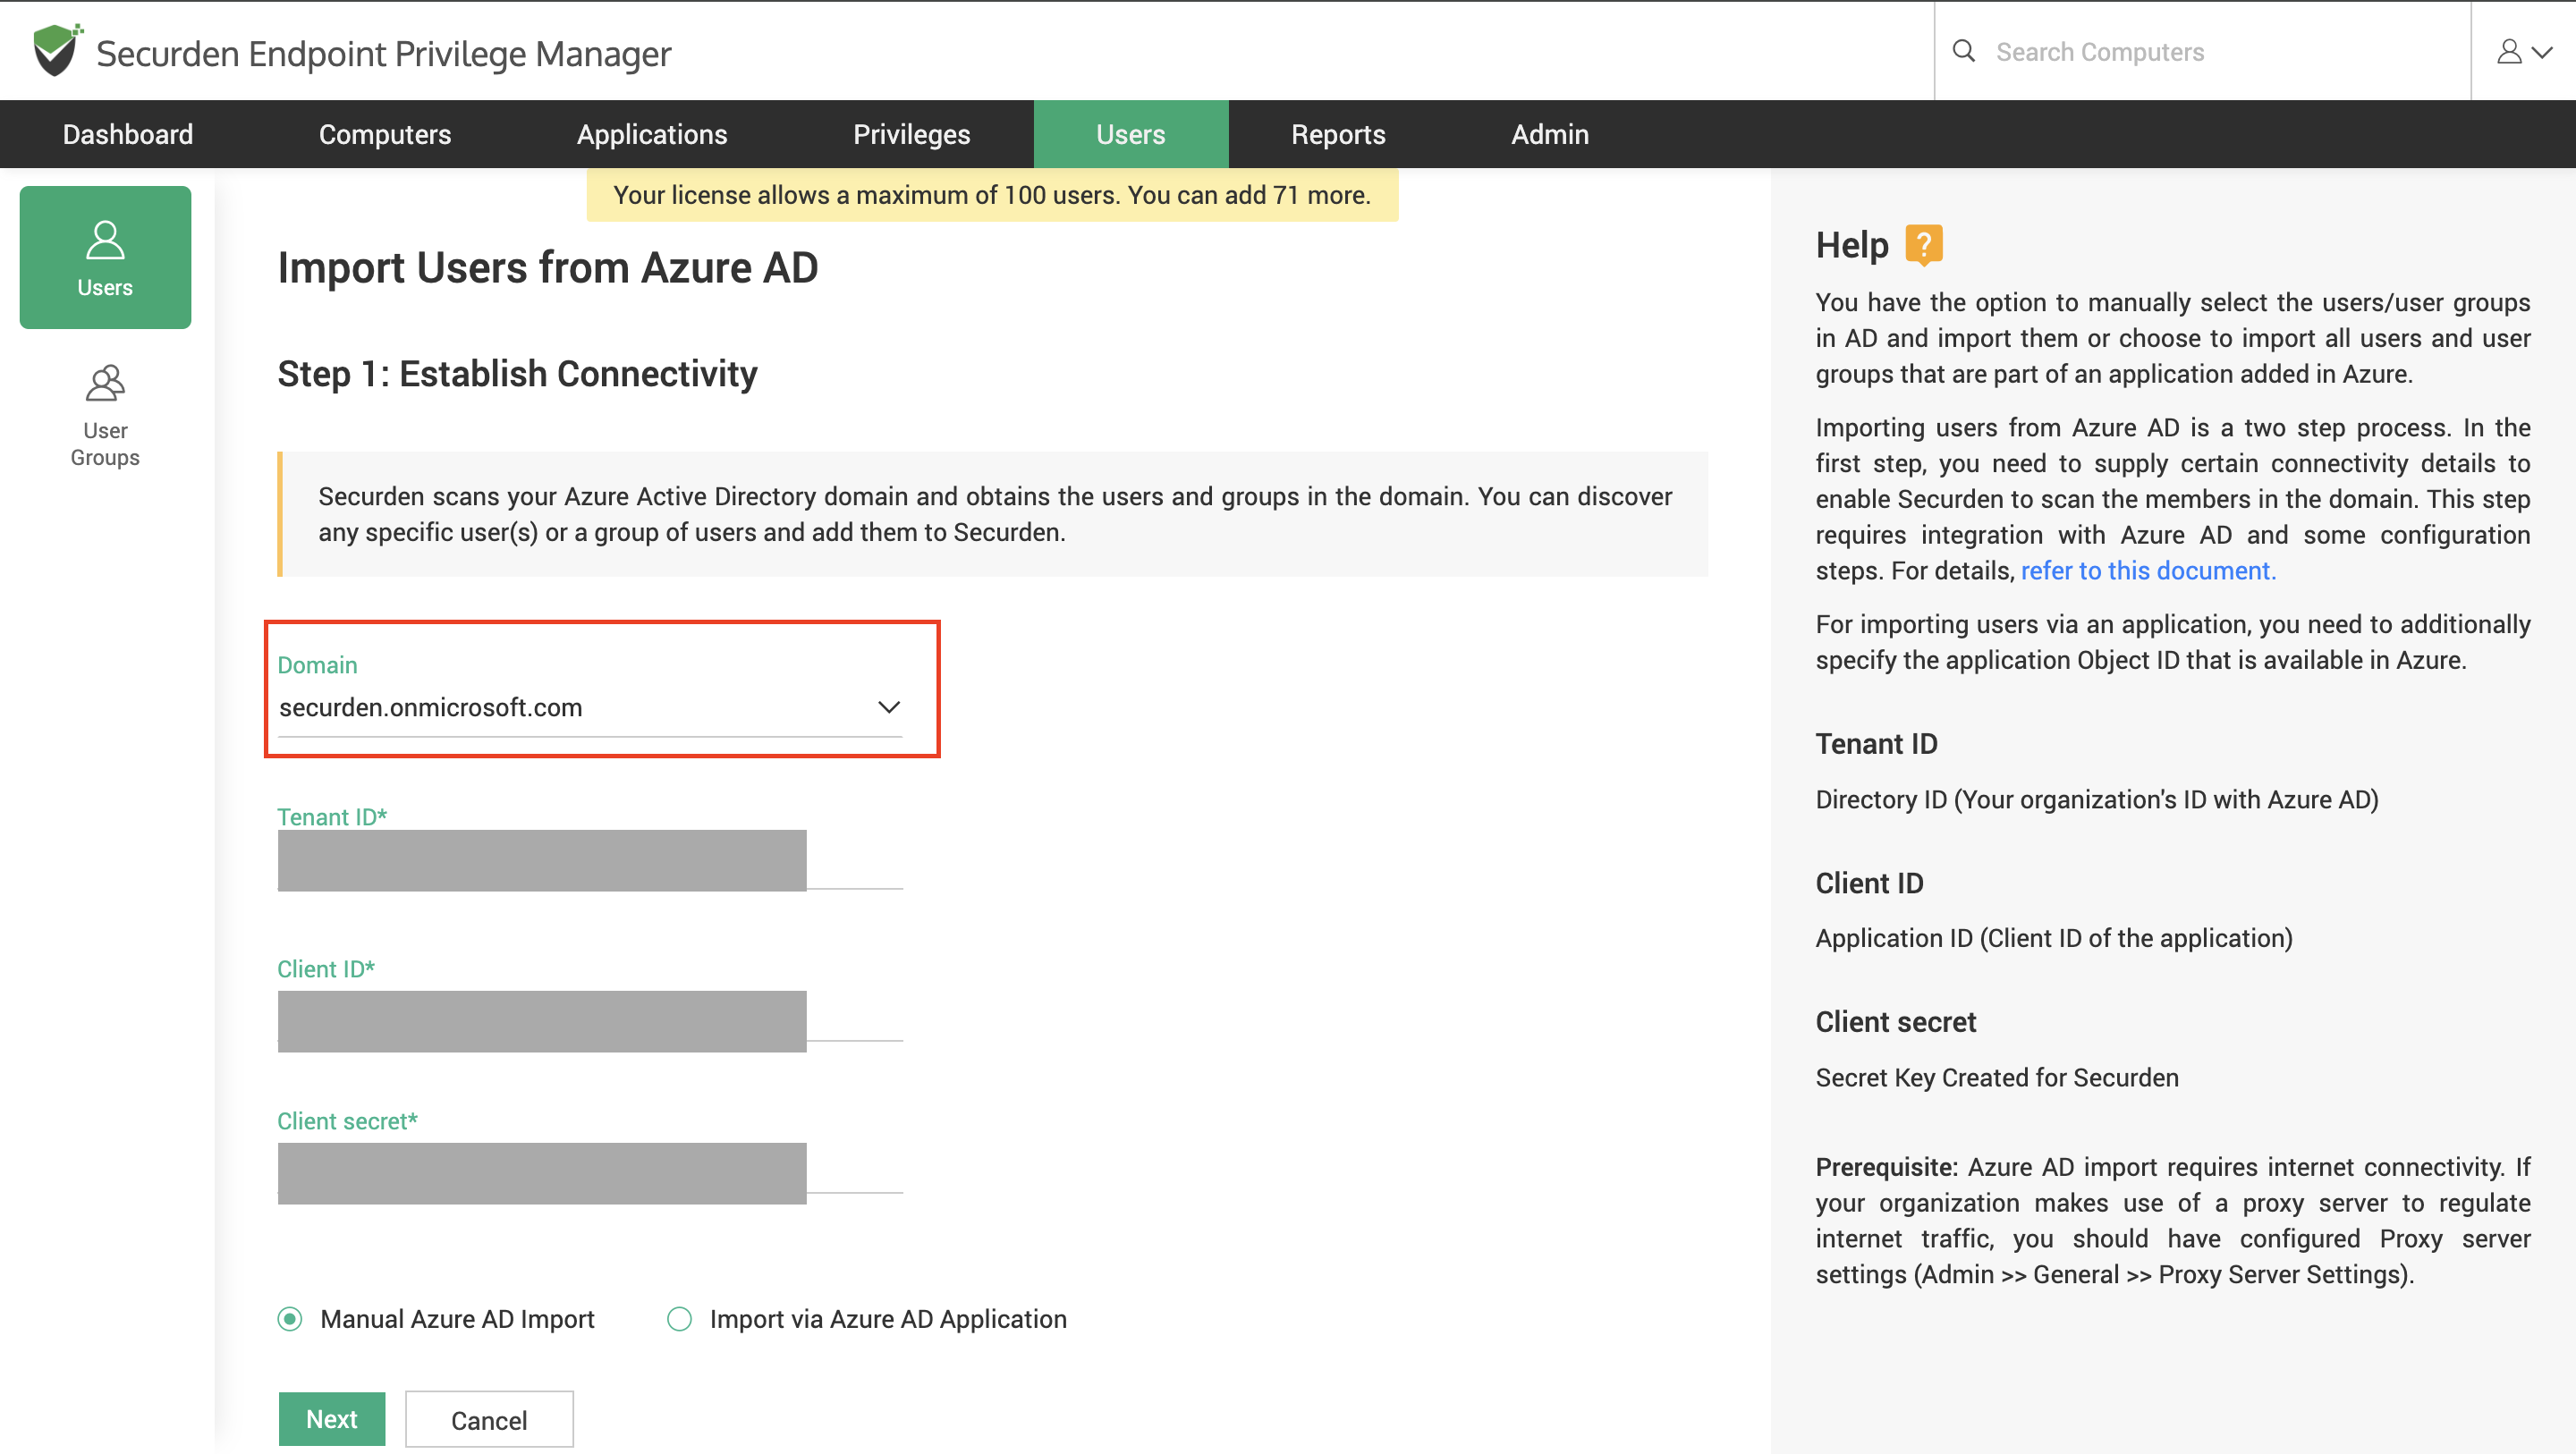
- You need to select the required Azure AD domain from the list of domains added to Securden.
Note
If you haven’t added your Azure AD domain already, refer to this document for instructions.
-
Once the required Azure AD domain is selected, the Azure credentials will automatically be filled.
-
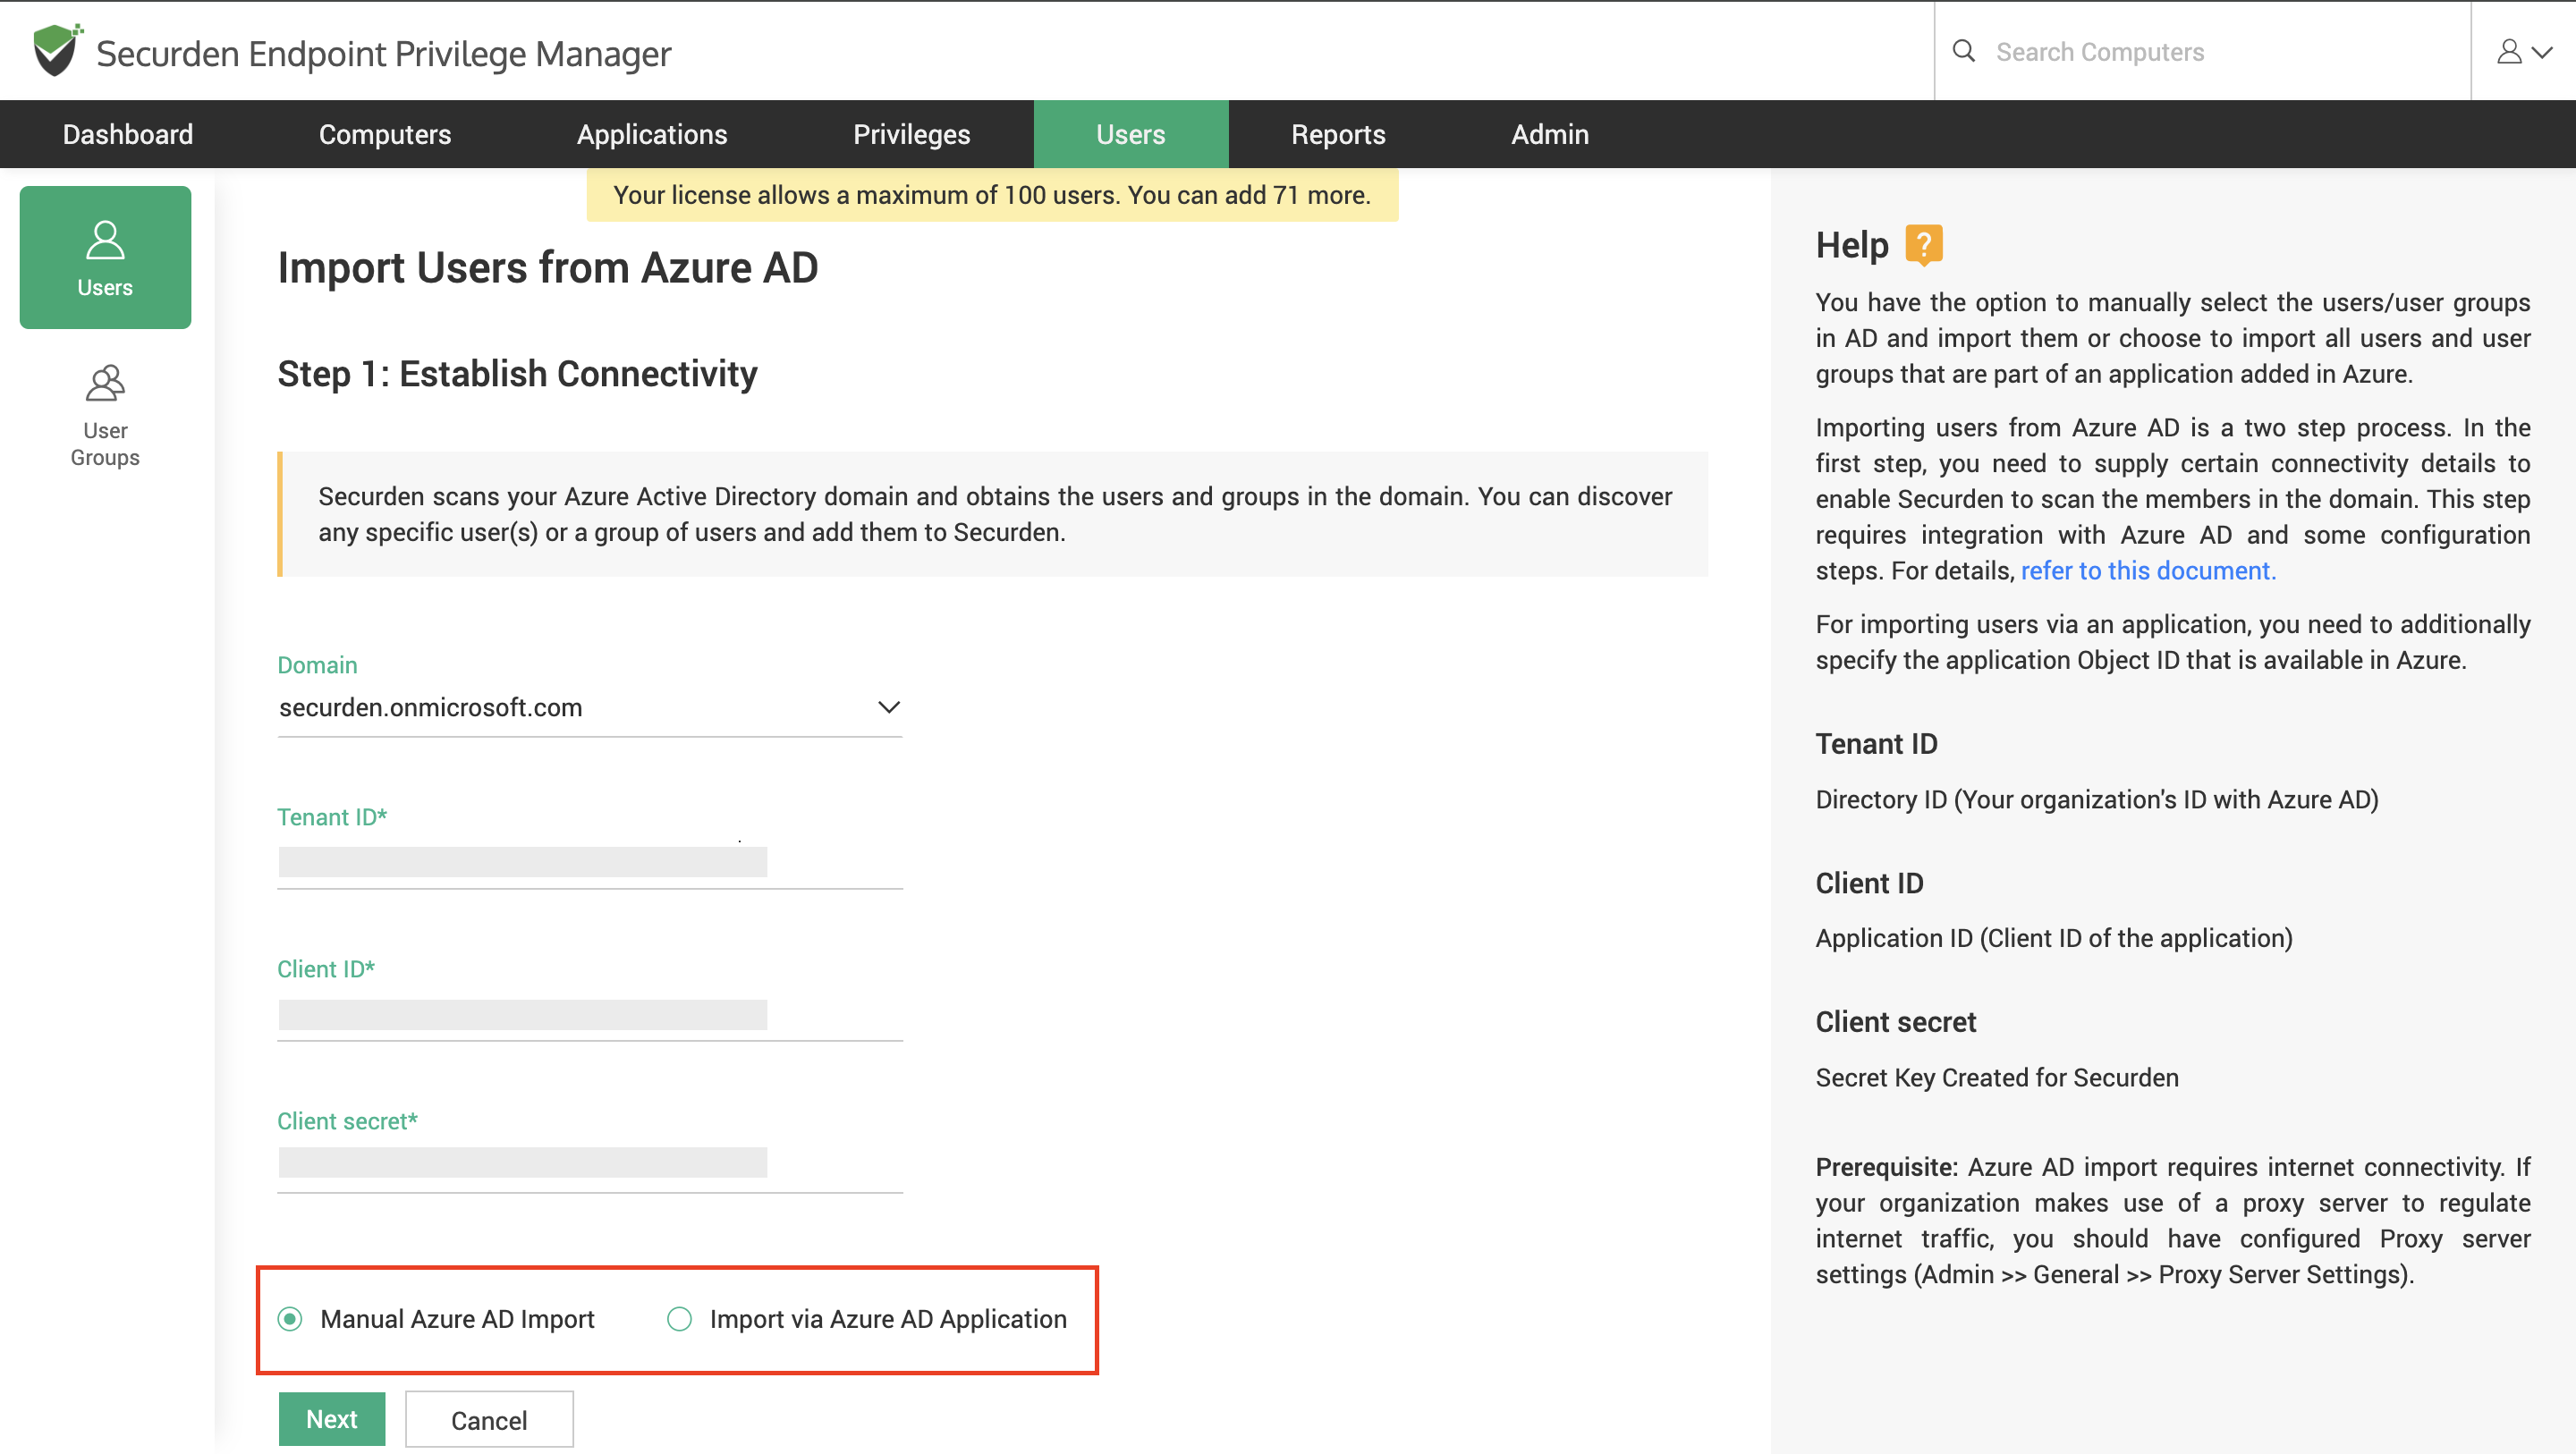
You need to select whether you want to perform a Manual Azure AD Import or Import via Azure AD Application.
-
If you are choosing Manual Azure AD Import, then you can click Next.
-
If you are choosing to import via an Azure AD Application, you need to follow the steps below.
-
Login to your Azure Portal.
-
Go to Enterprise Applications and click on the required application.
-
In the Overview section, locate the Object ID and copy the credential.
-
Paste the Object ID in the Securden interface as shown below.

-
Once the Object ID is added, you have the option to Configure Periodic Discovery of users from this object. You can choose which Azure groups and group types to fetch the users from by exploring the Advanced Settings.
Note
If you want to configure periodic discovery of users through an enterprise application in Azure, you can do so by navigating to Users >> More >> Configure Periodic Discovery.
-
Once the preferences are selected, click Discover.
-
Step 2: Selecting the Required Users and Groups (only if Manual Azure AD Import is selected in the previous step)
This step is to fetch the required users and groups from the Azure AD domain specified. This GUI offers the flexibility to fetch users from groups in bulk and individual users, in a single step. That means you can enter the names of the groups and users to be discovered in a single step.
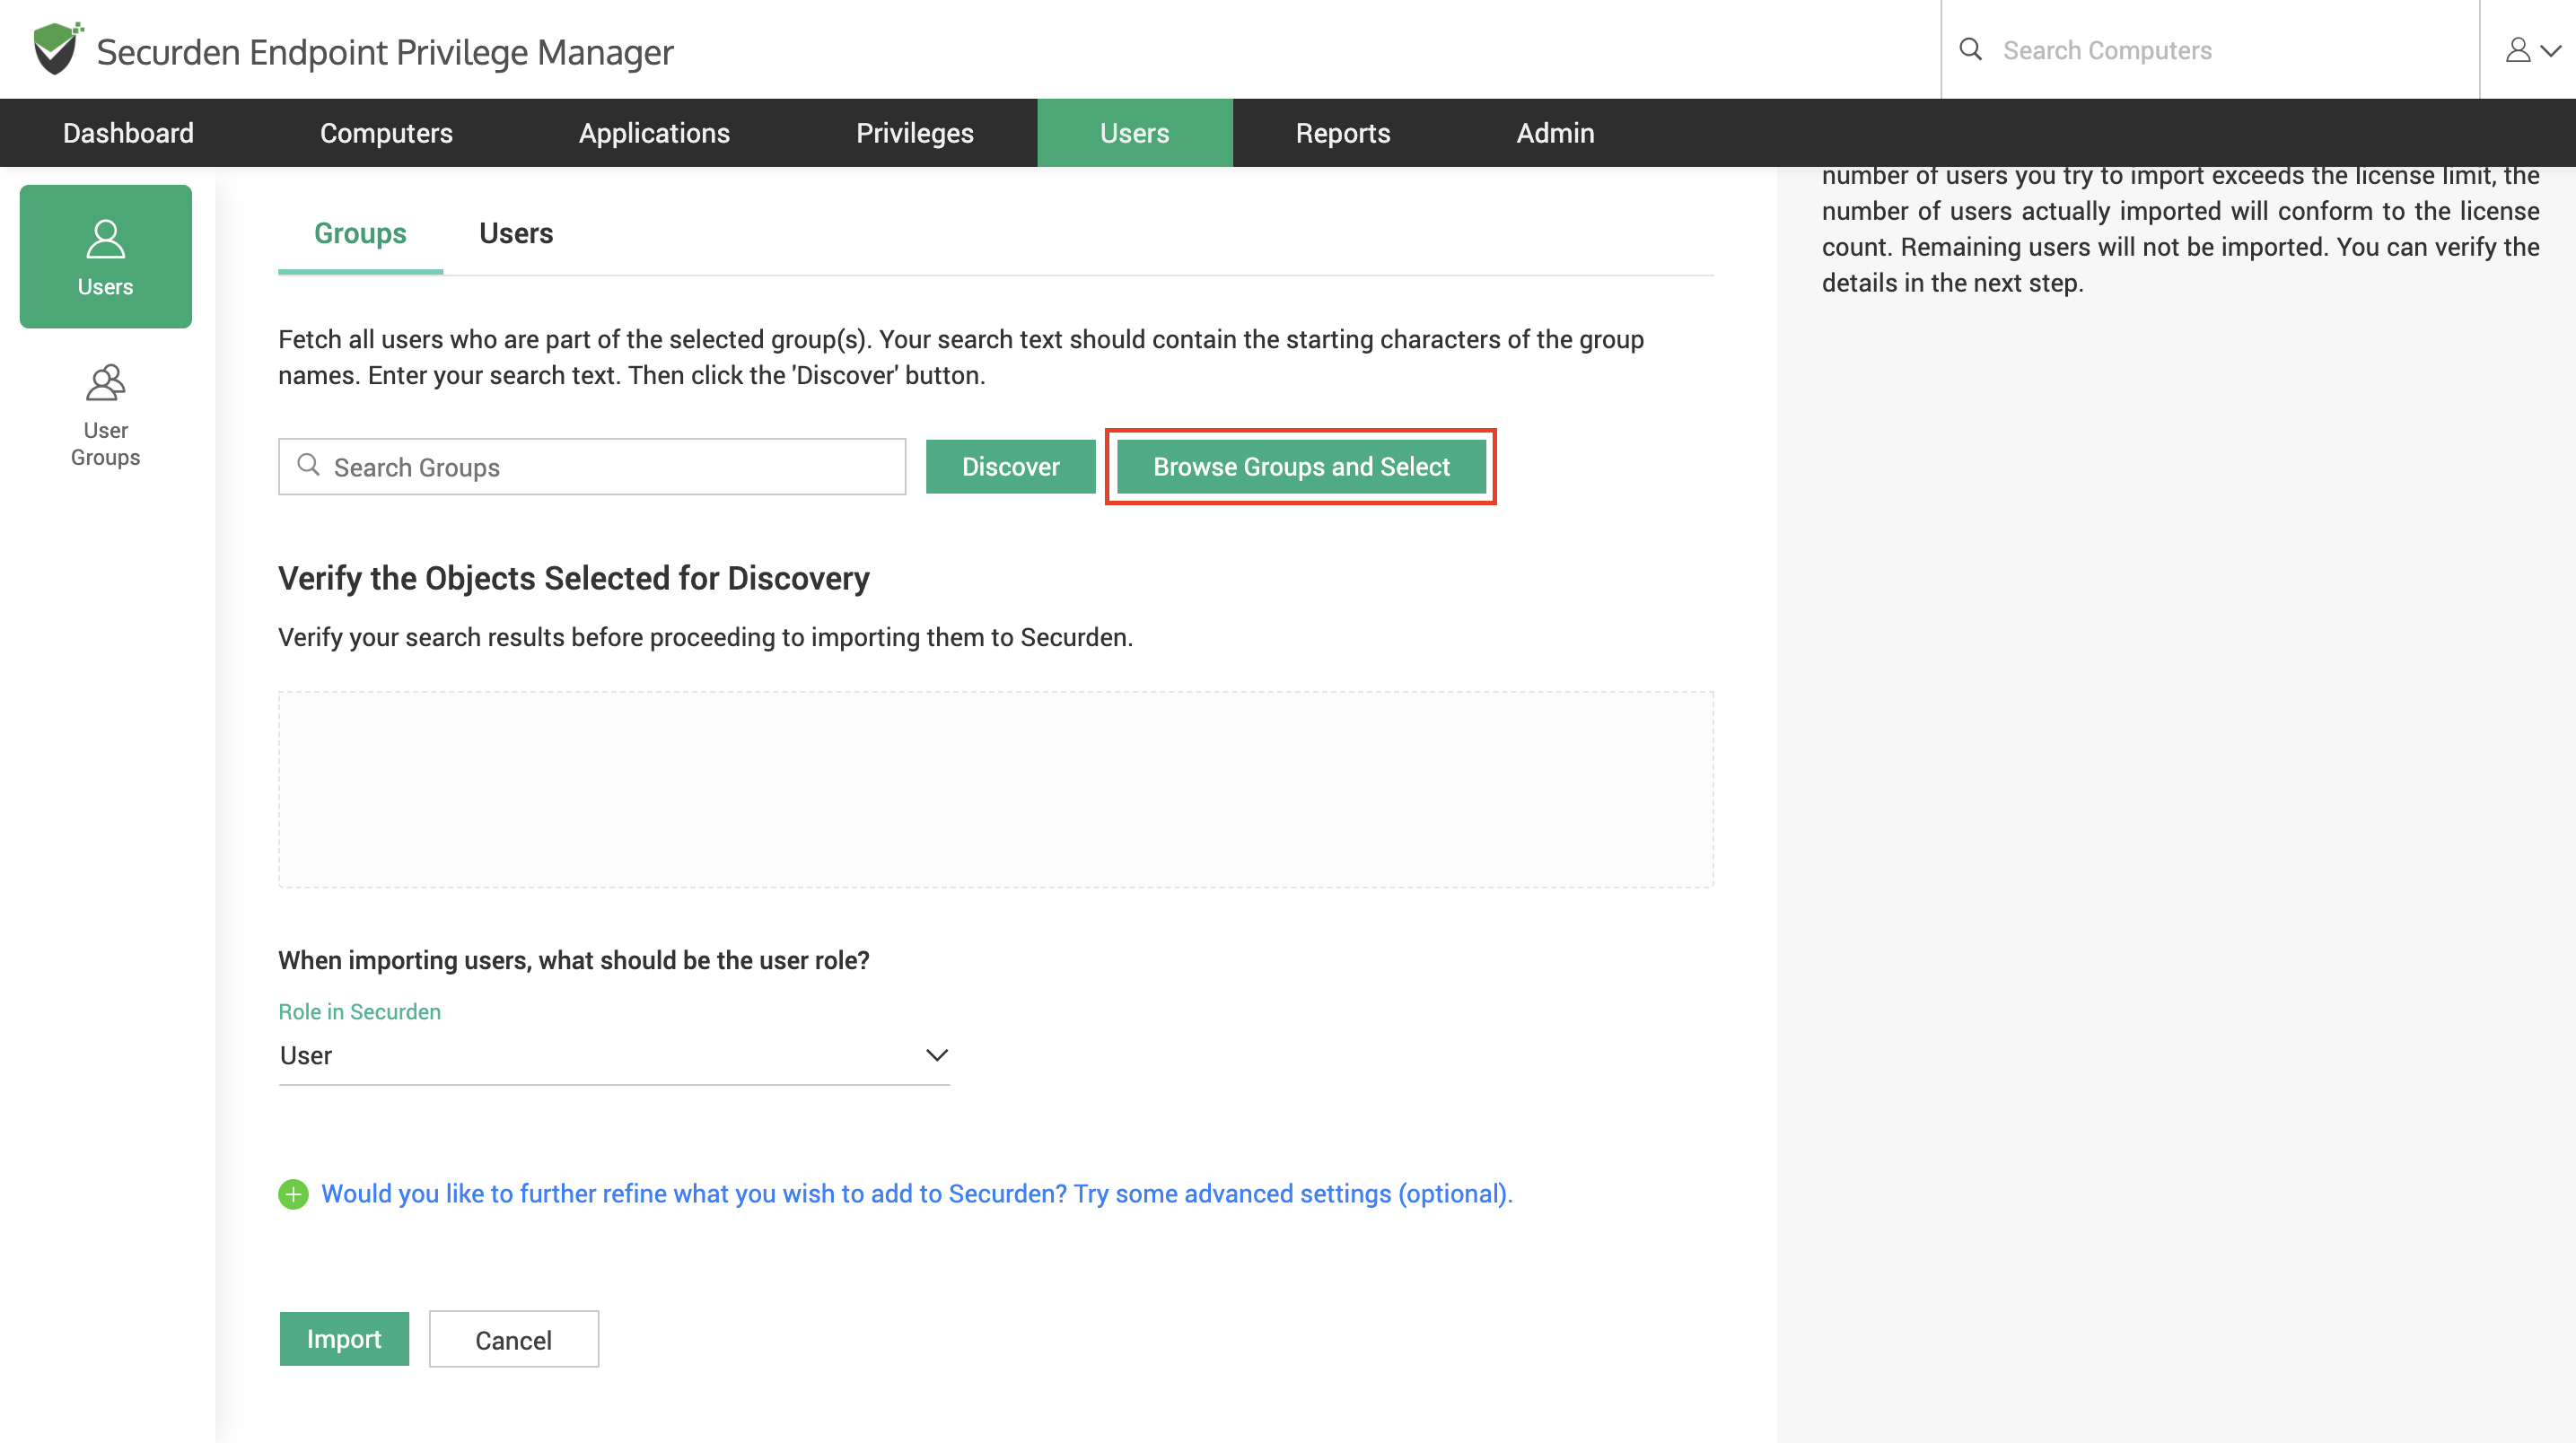
To import Groups, select the Groups tab
-
Enter the required group name and select Discover.
-
You can alternatively browse groups available in your Azure AD and select the groups you want.
-
You can then verify your selection in the Verify the Objects Selected for Discovery.
-
You can select the role for the users in the groups imported using the Role in Securden dropdown.
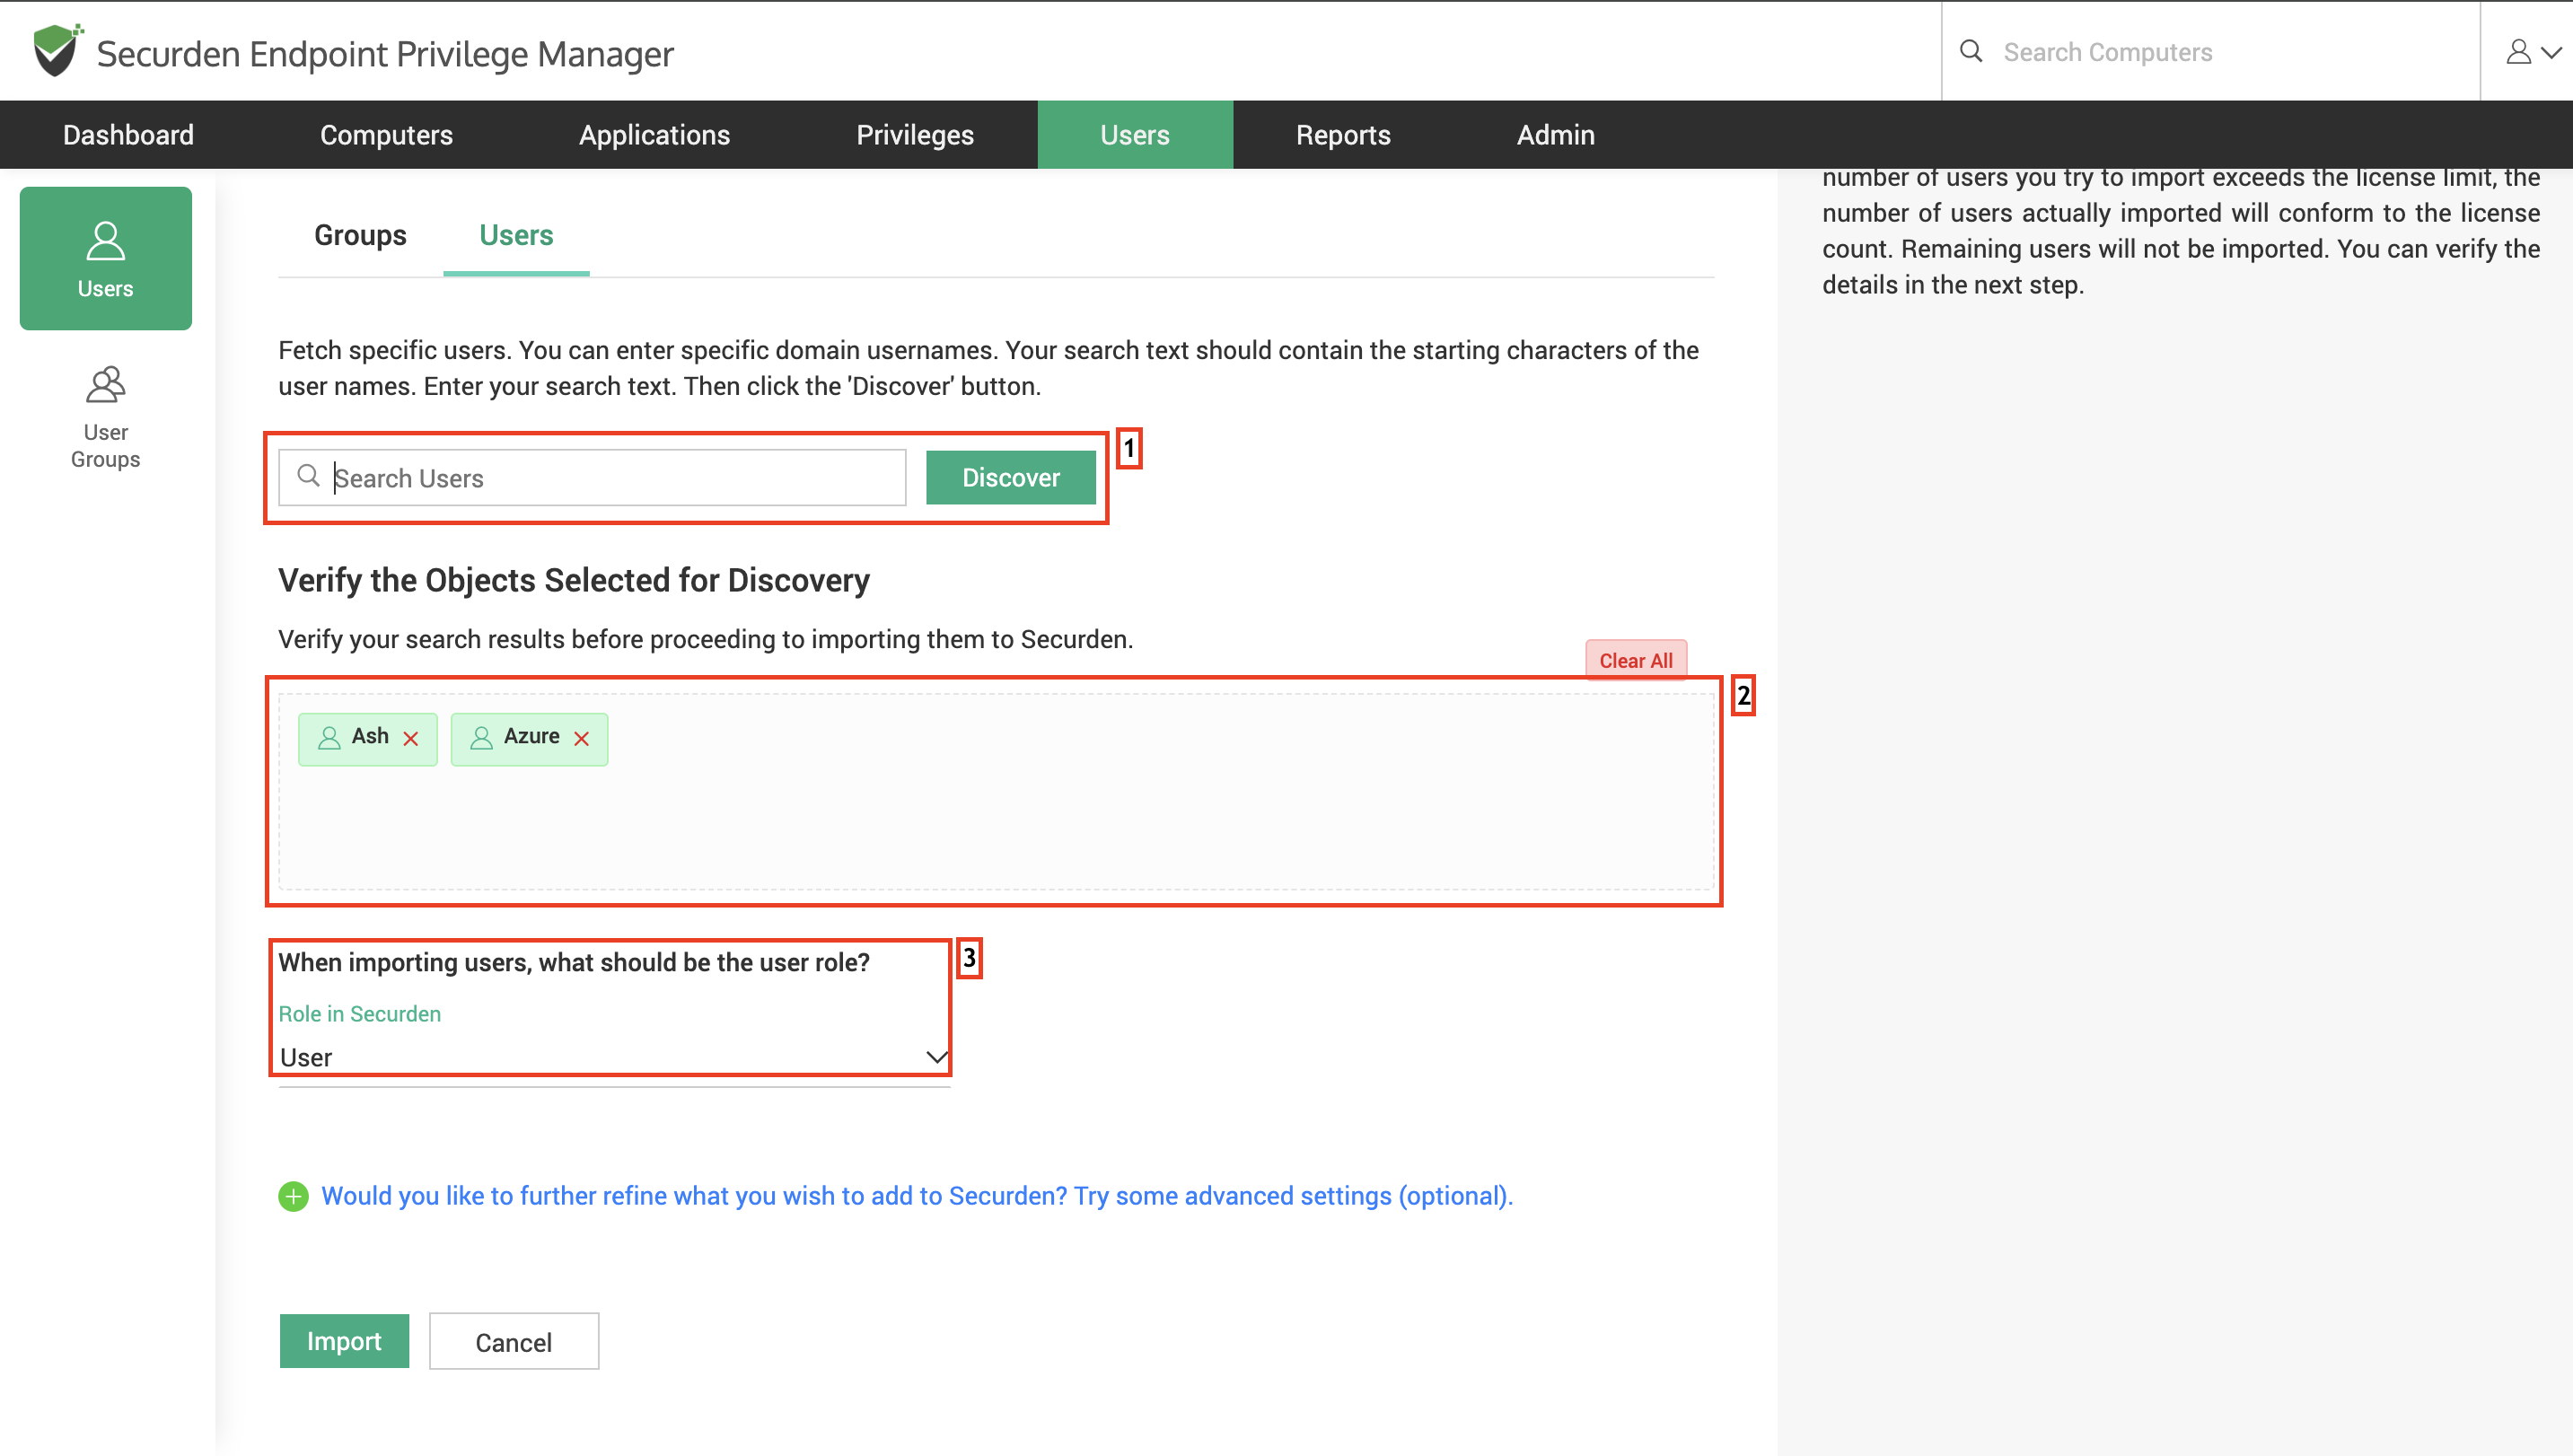
To import Users, Select the Users tab
-
Enter the name of the user in the search bar and select Discover.
-
Verify your selection in the Verify the Objects Selected for Discovery.
-
You can select the role for the Users imported using the Role in Securden dropdown.
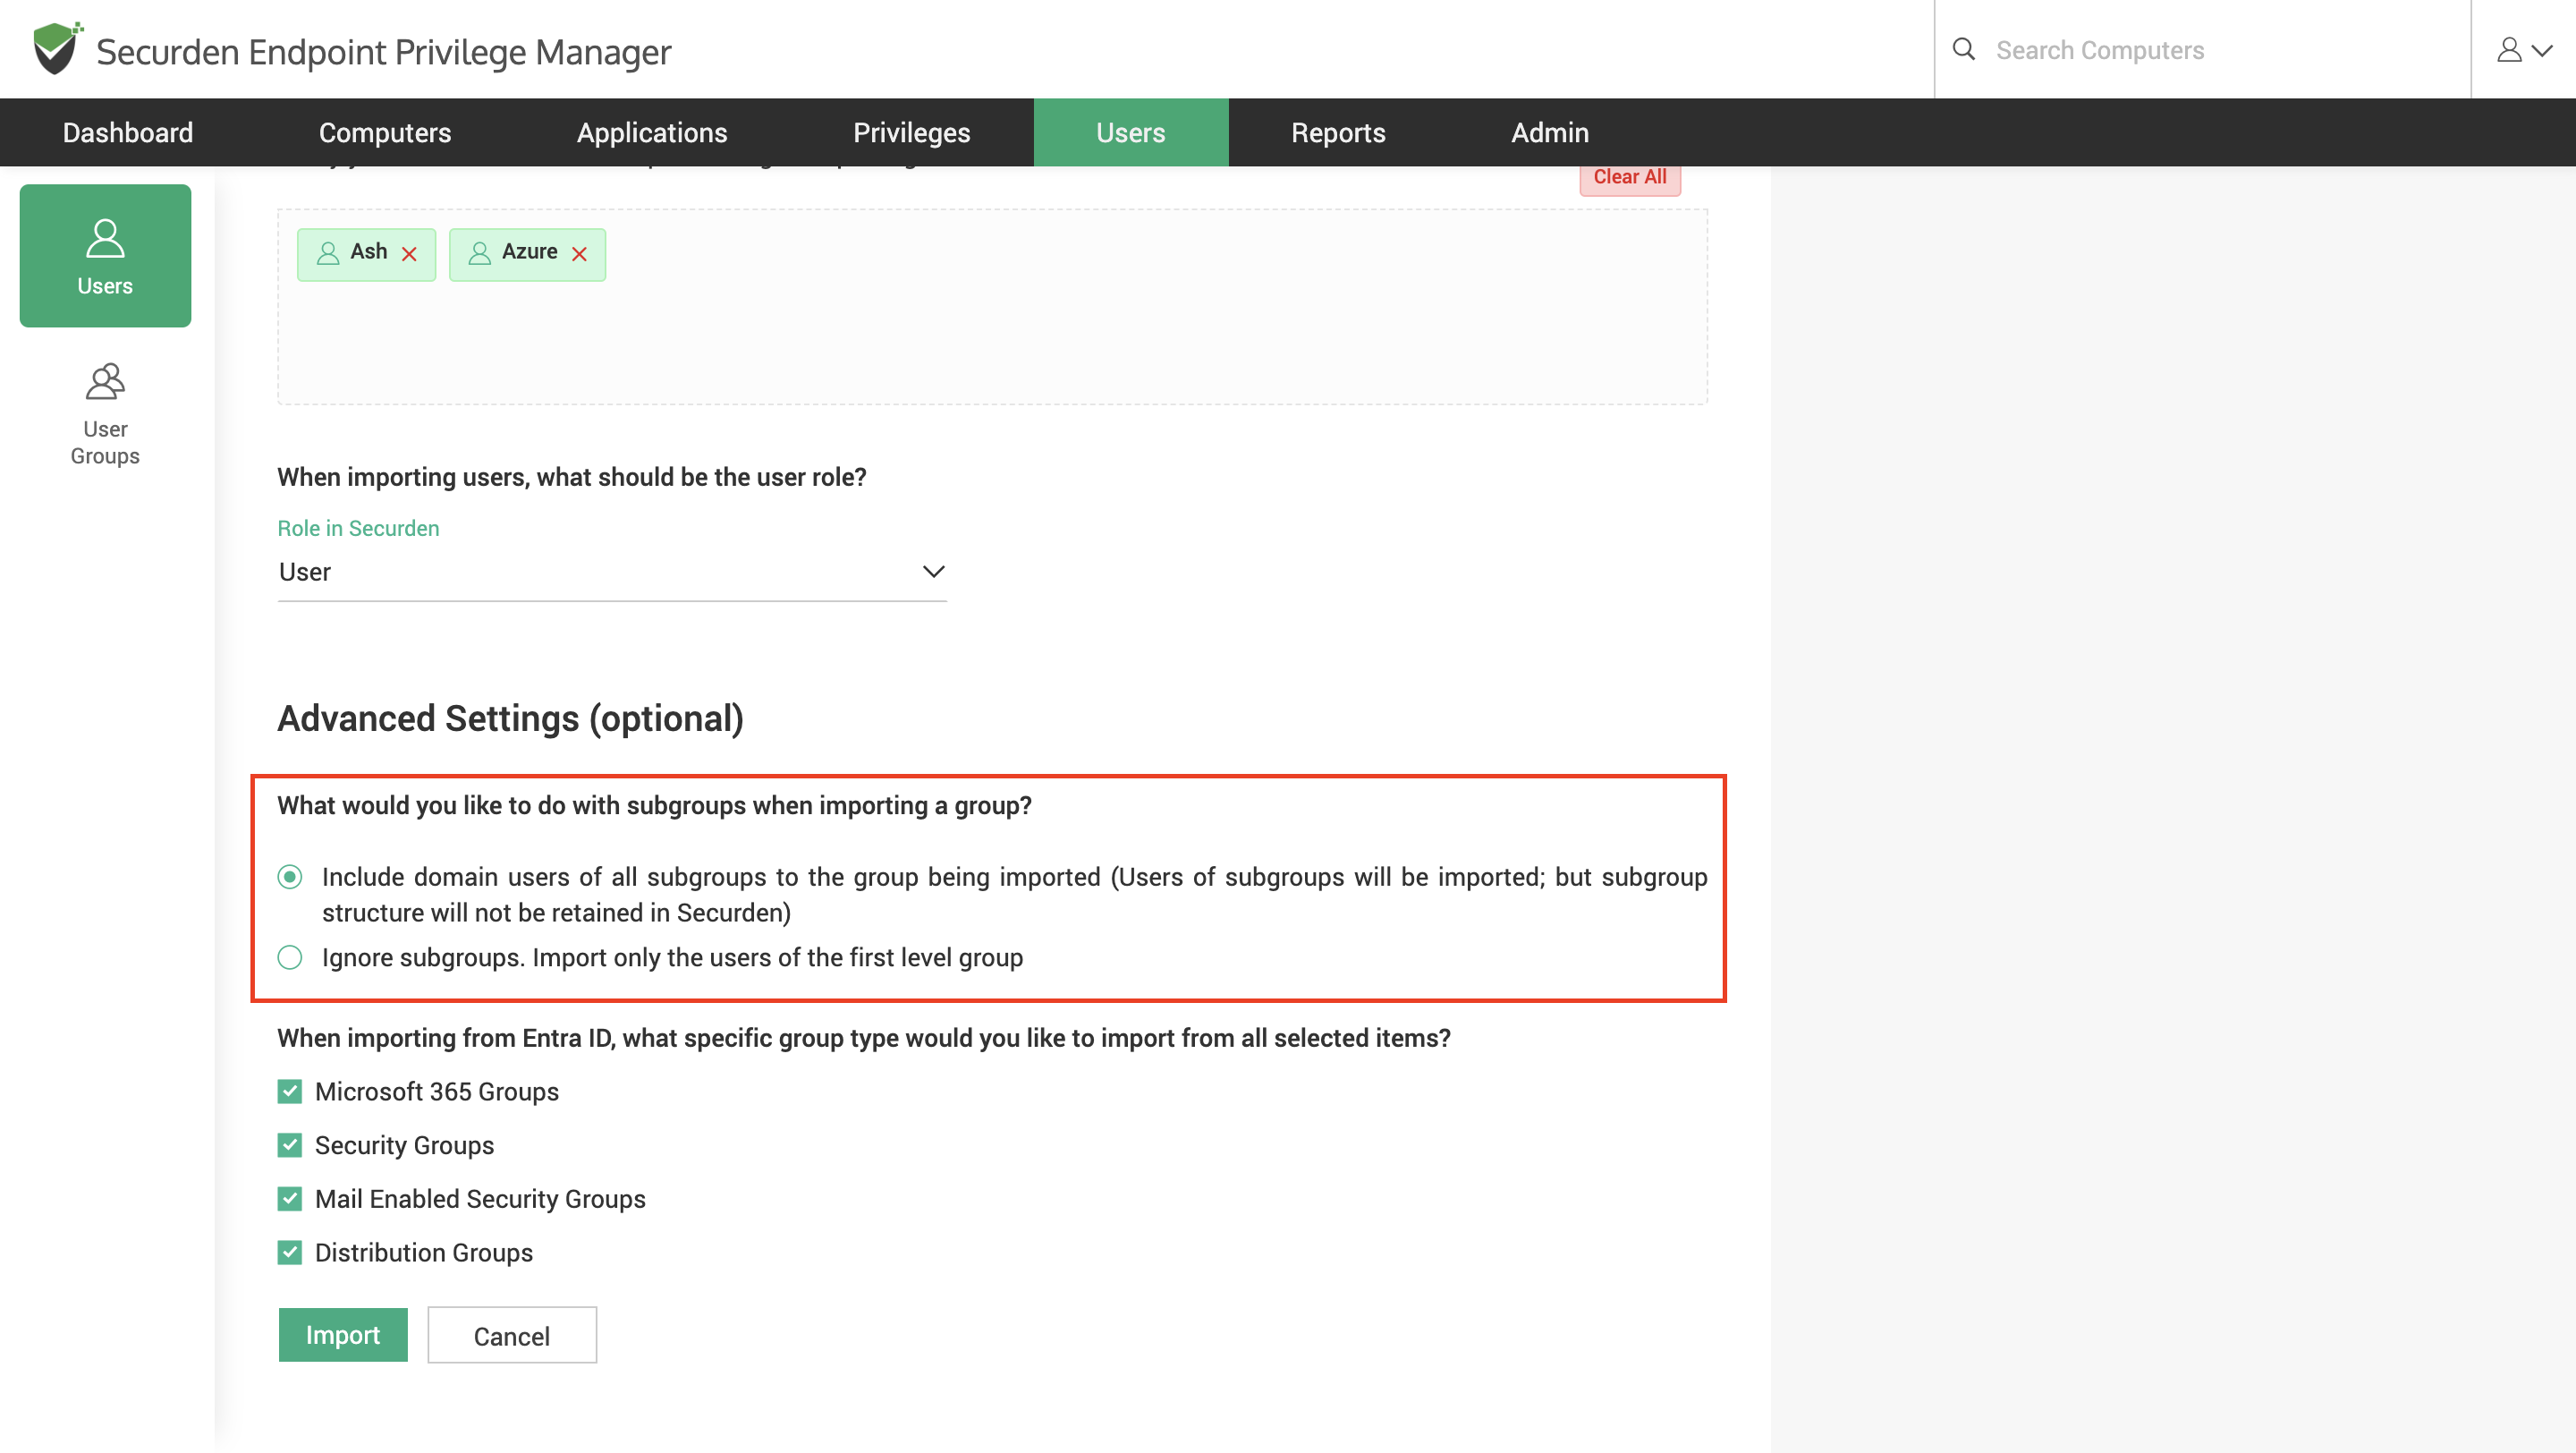
Advanced settings
-
It is common to have subgroups in AD. When importing a group, you have the option to import all the subgroups along with the users. You can choose to import the subgroup or ignore them.
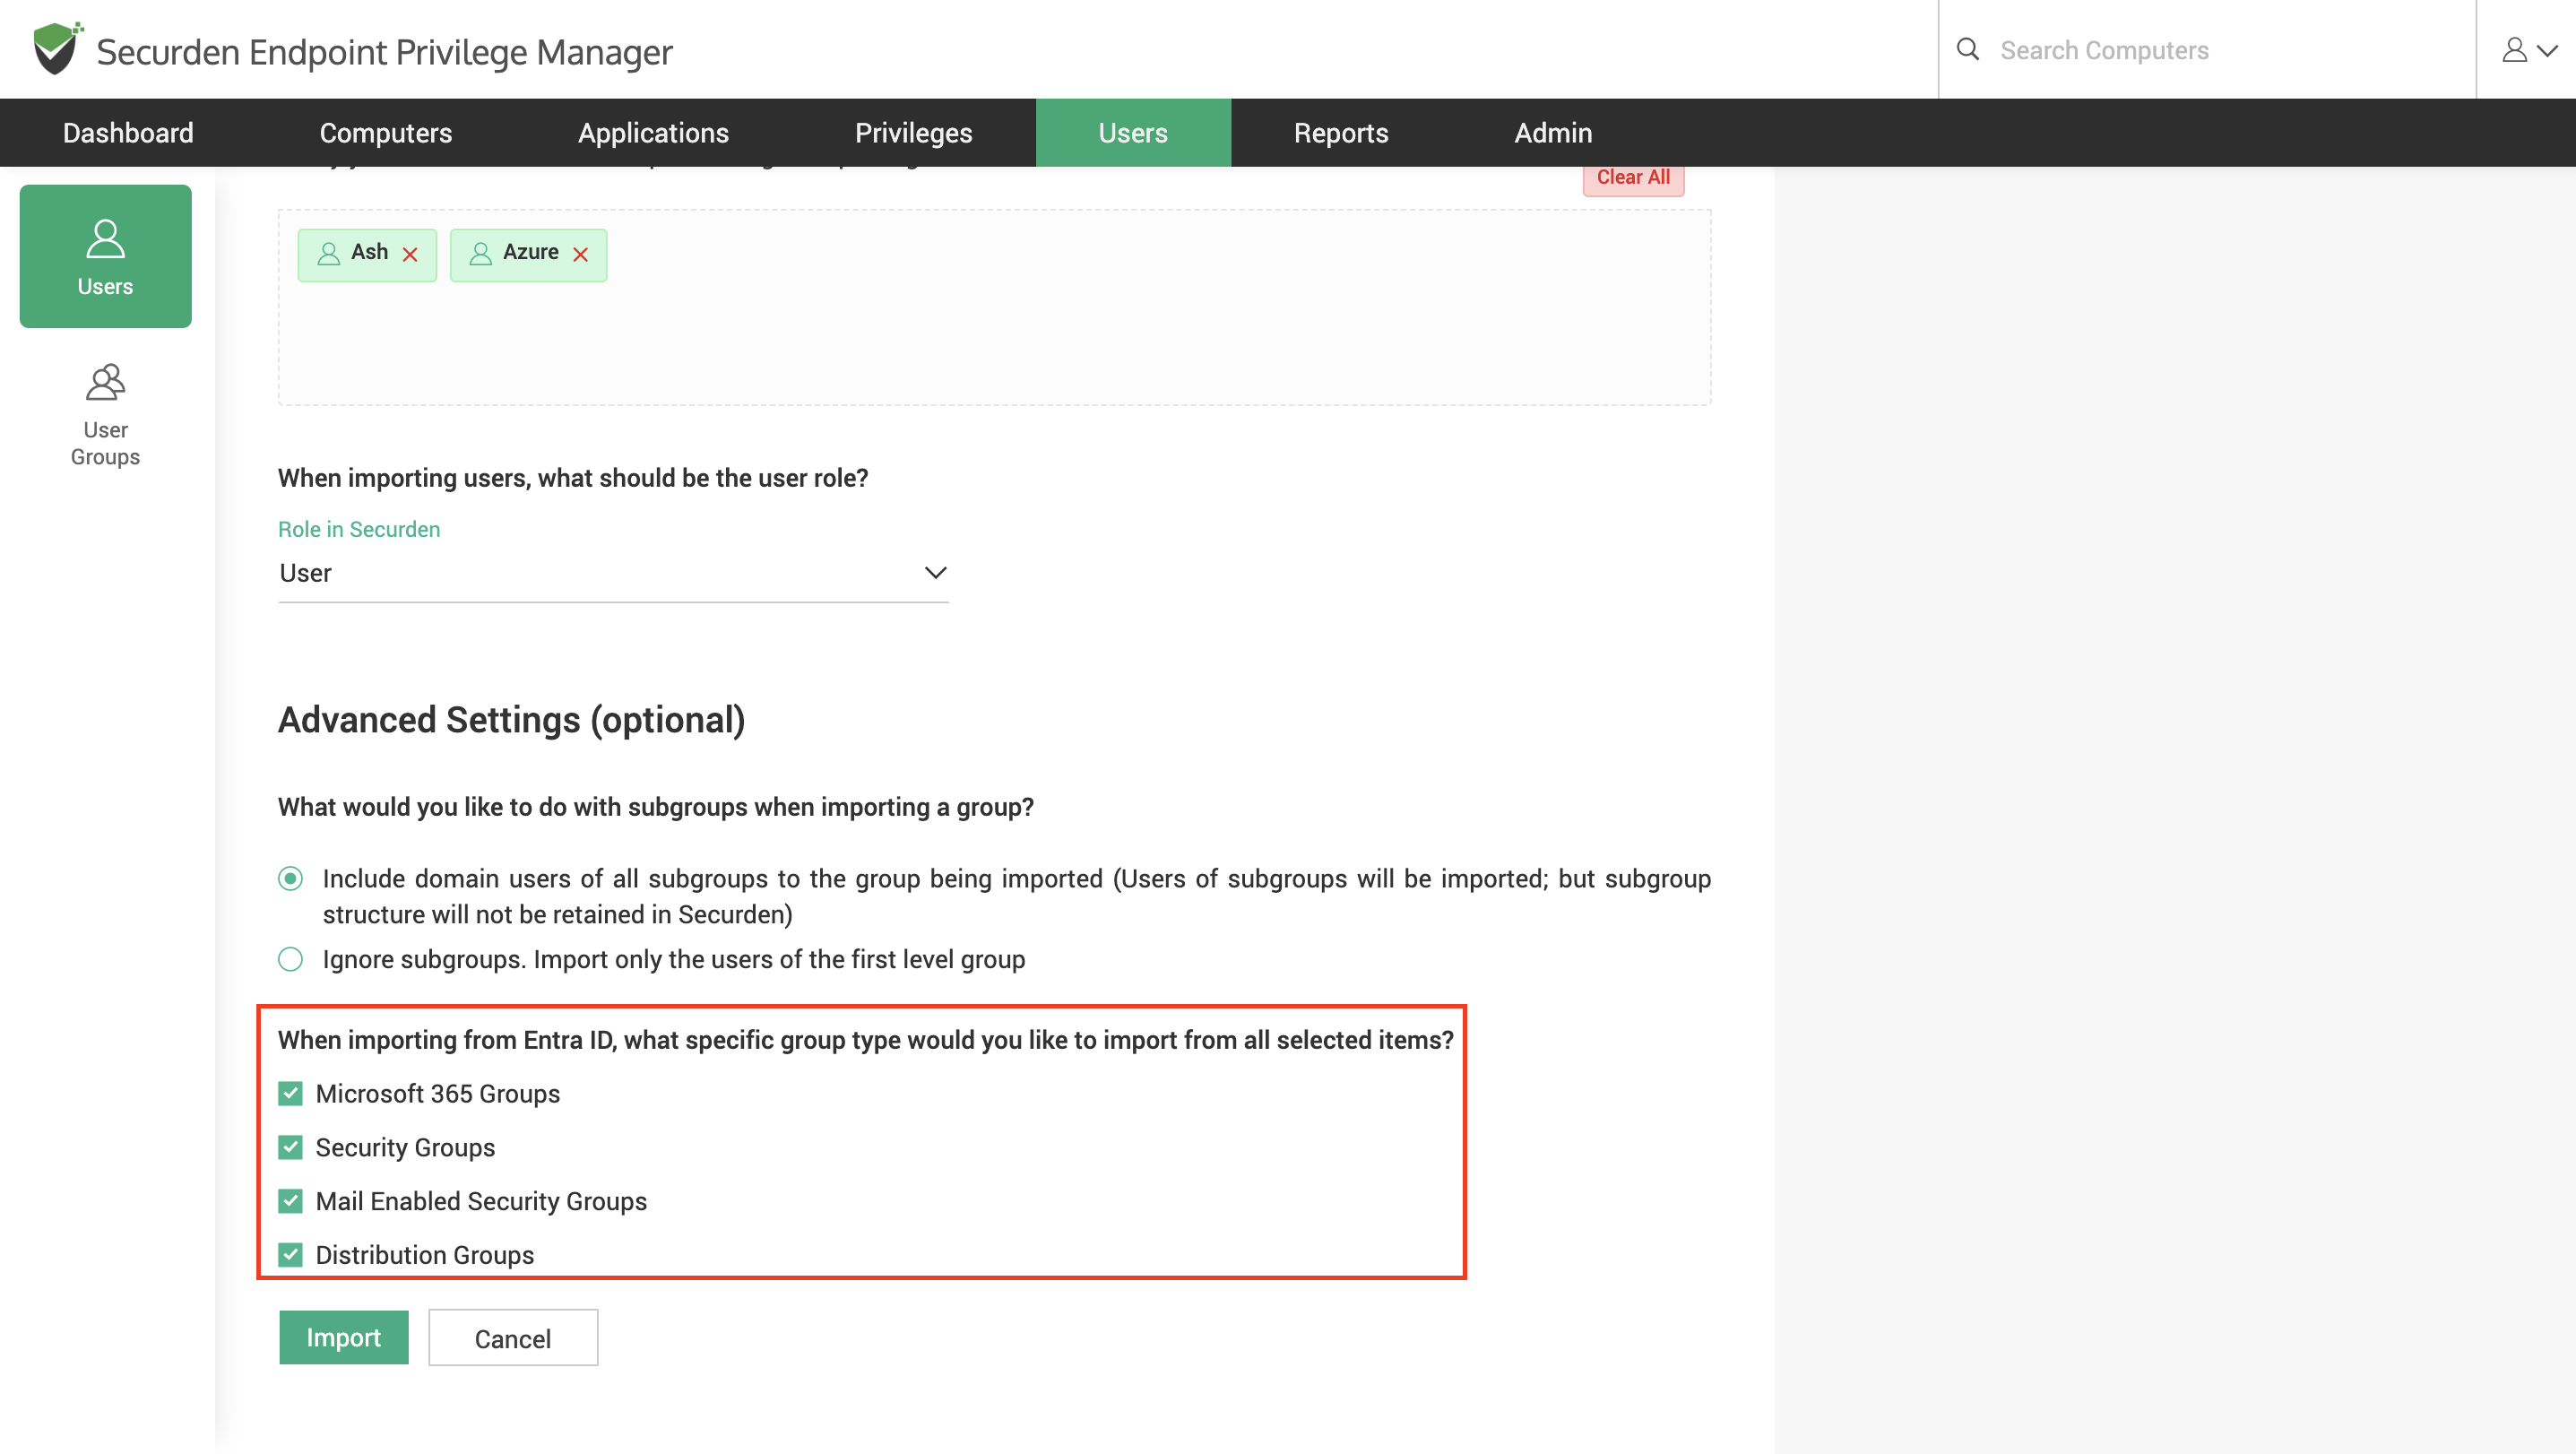
-
You can choose whether to exclude or include users from certain Azure AD group types.
Note
User import is subject to your license limits. In case, the number of users you try to import exceeds the license limit, the number of users actually imported will conform to the license count. The remaining users will not be imported. You can verify the details in the next step. You can write to if you need additional user licenses.
On selecting the required Users, OUs and Groups, click on Import.
The process of discovering and importing the OUs/Groups/Users will take some time to complete. The discovered OUs/Groups/Users will be automatically populated to Securden inventory after completion. The summary of imported Users, OUs, and Groups will be displayed.
How to Import Hybrid Users into Securden?
In hybrid environments, users are managed using both on-premises AD and cloud hosted Azure instances. In such scenarios, importing from Azure alone is sufficient.
Note
You need to configure connectivity between Securden and the AD domain along with Azure to manage hybrid environments effectively.

