Add and Manage Account Types
Account types help identify and classify the accounts being added in Securden. Proper classification comes in handy to carry out various operations such as sharing, remote password resets, reporting, etc. You can also use account types to define specific characteristics like fields for the accounts, specific password policies for the accounts belonging to that type, and so on. Super administrators, administrators, and account managers have the privilege to add custom types, edit and delete existing ones.
You need to define account types separately for Work and Personal type accounts. The procedure is the same for both.
Creating a new account type
To create a new account type, navigate to Admin >> Account Management >> Account Types. You need to select between Work and Personal type account and click Add Account Type. Enter a name for the new account type being created. The name you enter here will uniquely identify the type. Adding a description to the type would help further in this aspect.
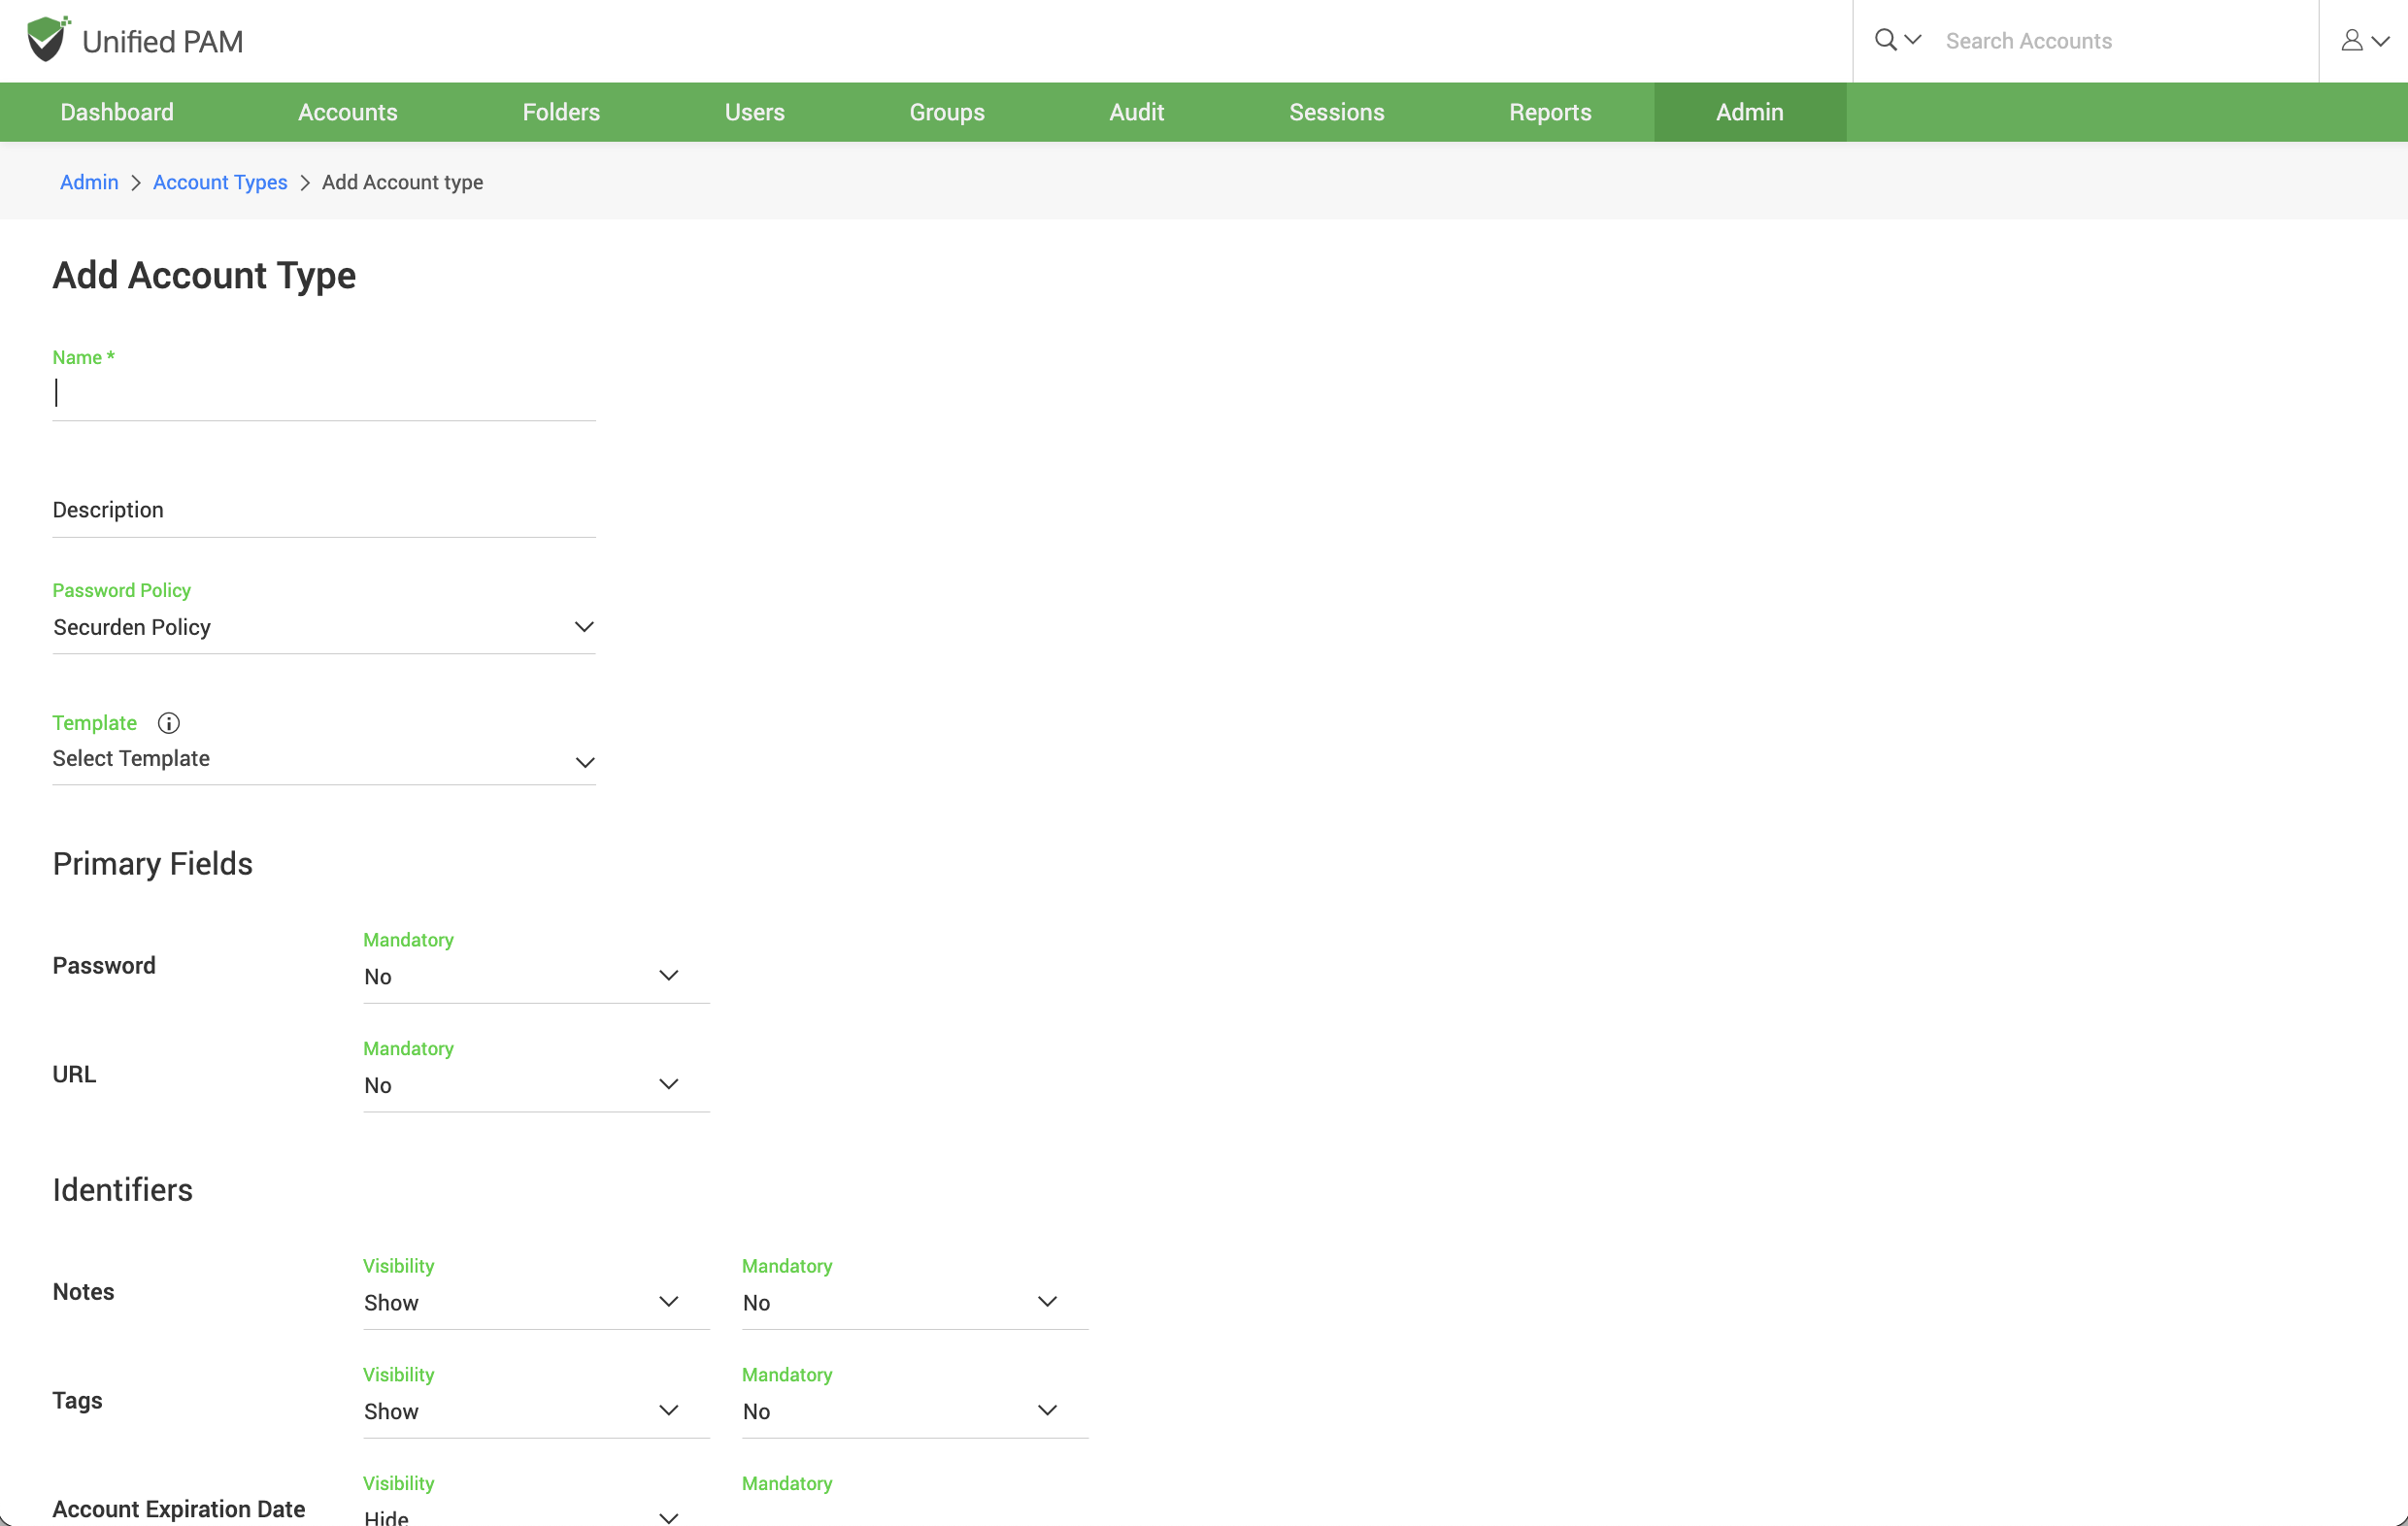
Associate a password policy
One of the most important aspects of Account Types is that password policies can only be associated at the account type level. You can create multiple password policies and associate them with different account types. The policy that is associated with an account type will take effect for all accounts that belong to the type. You may choose from the list of already available policies or create a new policy. Alternatively, if any of the types don’t require a password policy to be linked, you may choose the option Don’t link any policy.
Associate a Template
Securden allows you to perform various remote operations such as password resets on devices. The product comes with certain predefined templates to carry out those operations on various types of devices. In addition, you can create custom SSH templates to carry out remote password resets on devices that can be connected through SSH such as Linux devices, routers, server hardware, etc.
You can define a command or a sequence of commands to be used for carrying out the password reset activity in the form of a custom template. If the account type you are creating requires support for such remote operations, you may associate the required template in this step. At present, templates can be associated only at the time of creating the account type. Templates can’t be associated while editing the type.
Define the Fields
Accounts in Securden contain various fields such as Username, Password, URL etc. Depending on the type of account, the fields will vary. You might even have some specific account types in your organization that require completely new fields and values. All such requirements can be met at the account types level. You can define any number of fields required by this specific type and granularly specify if the fields are mandatory (requiring users to compulsorily fill a value when adding accounts). You can also choose to hide certain default fields.
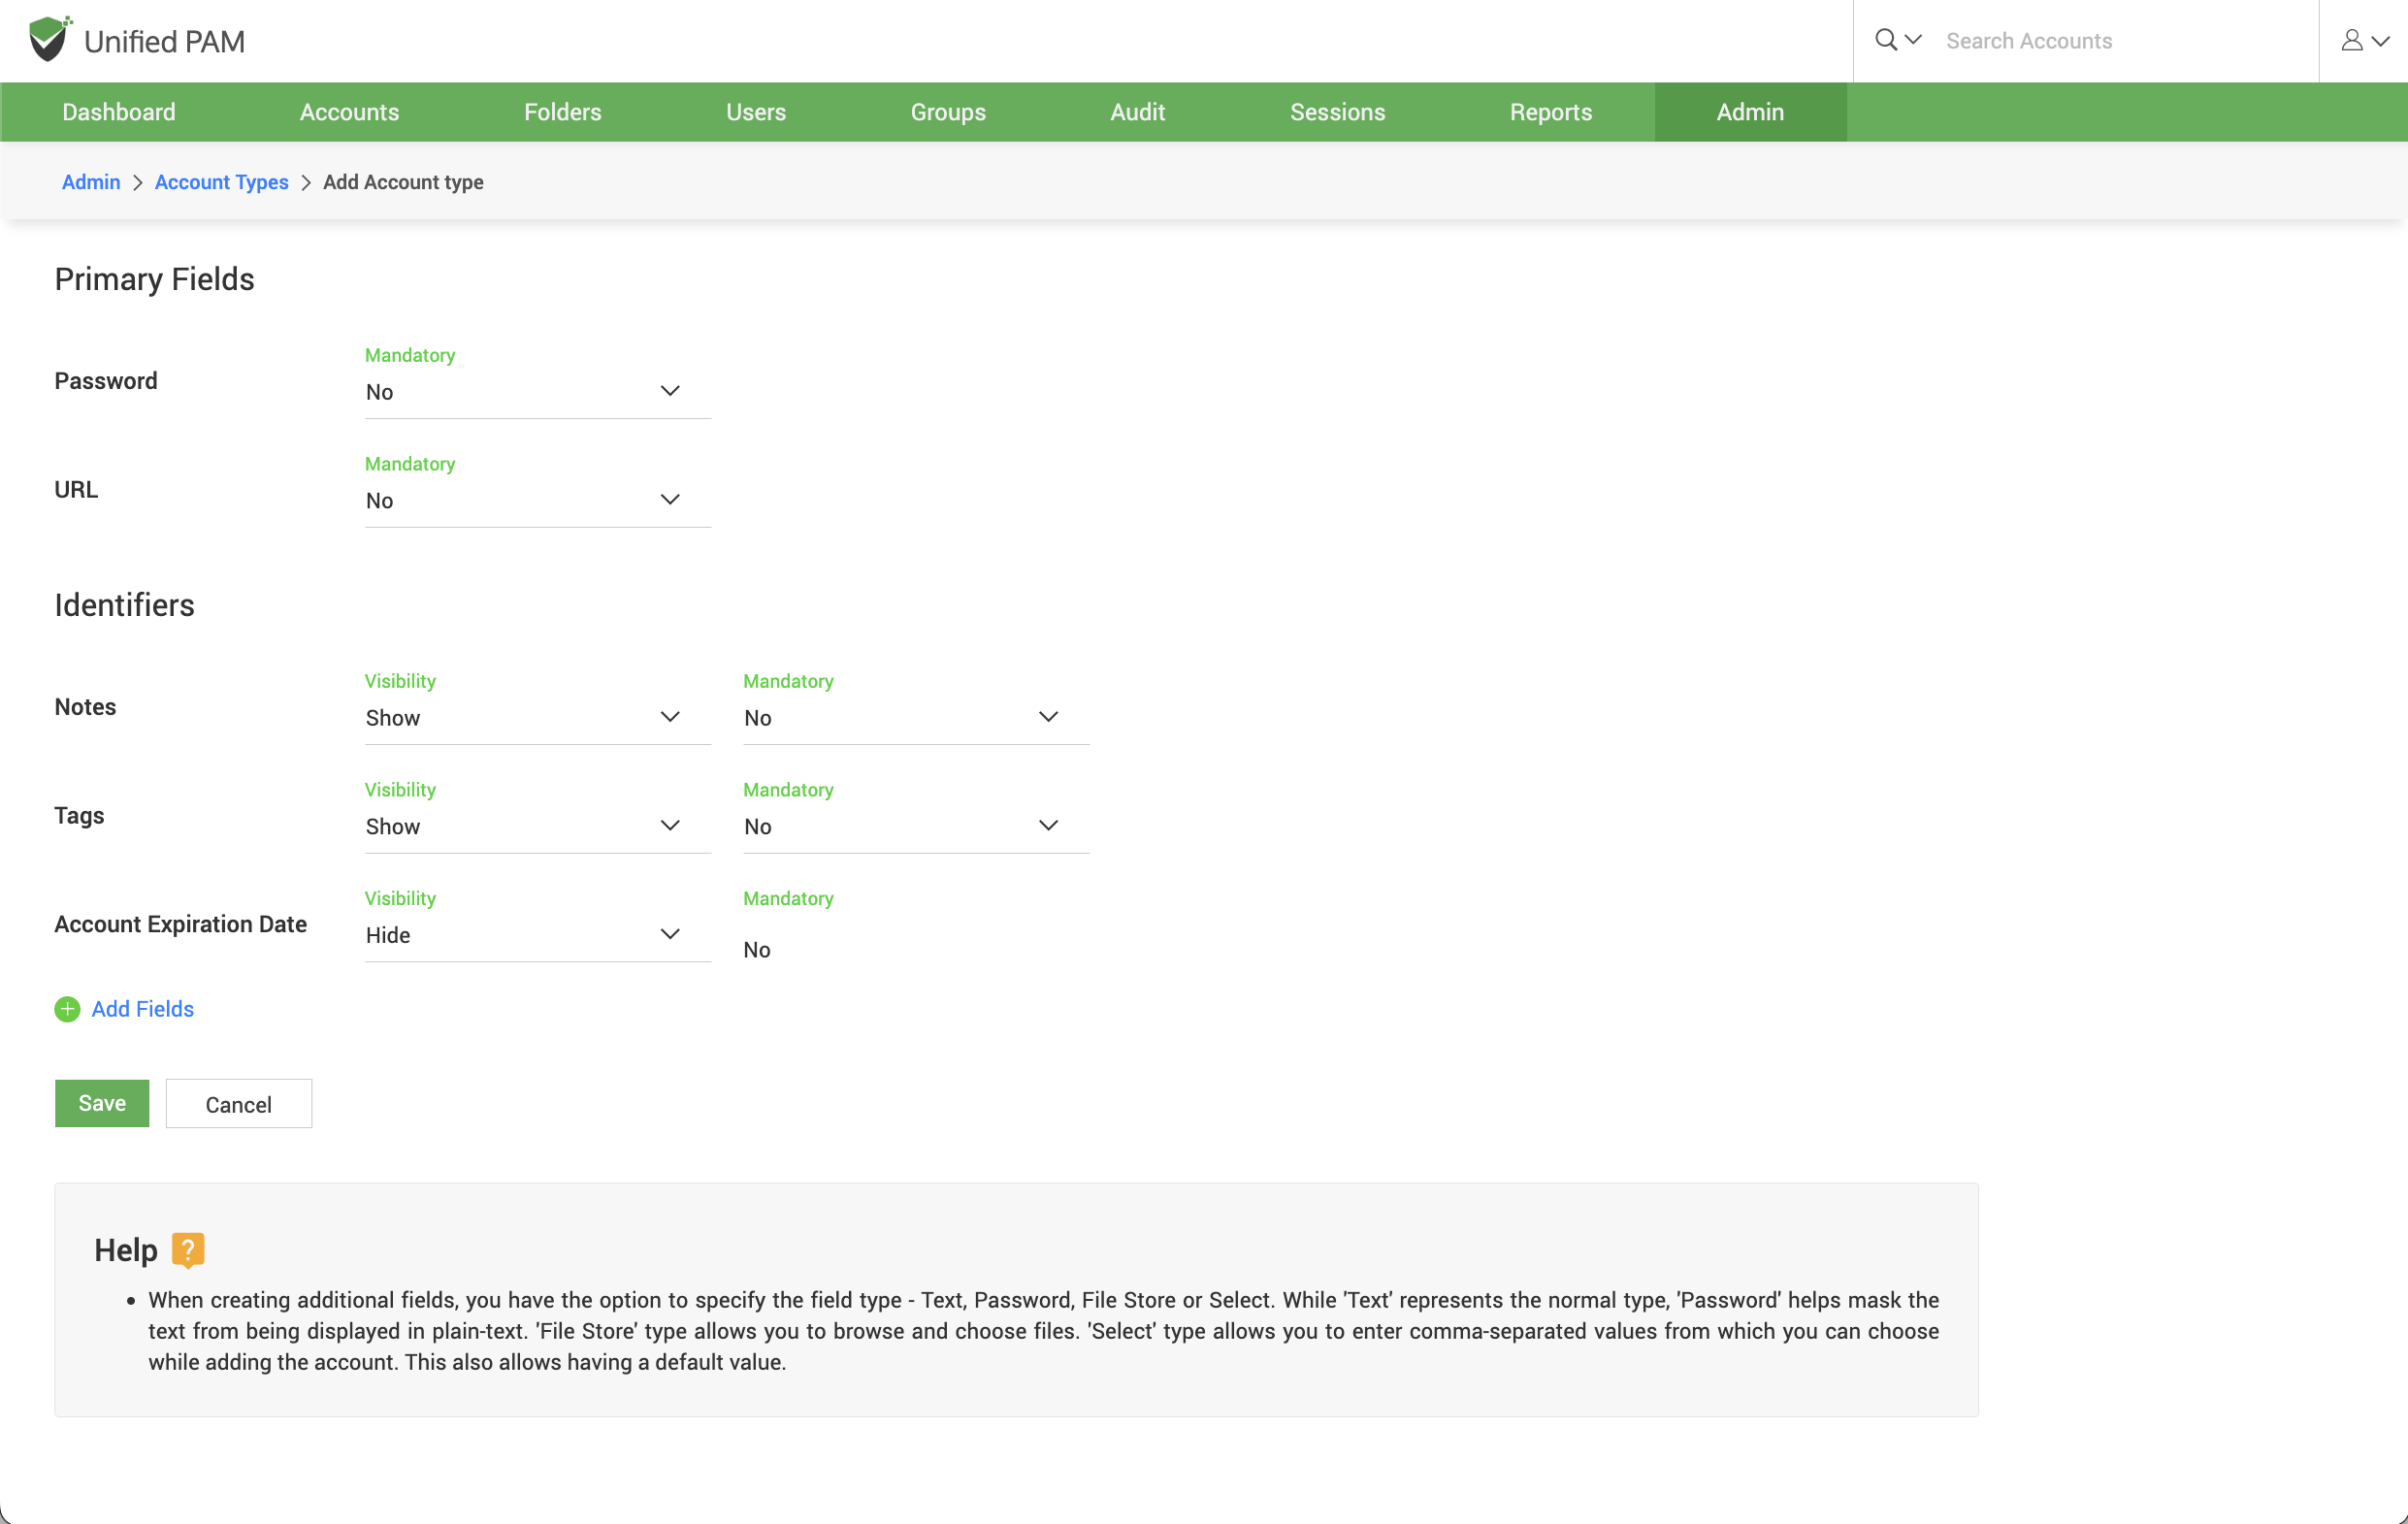
Primary Fields
The default Password and URL fields can’t be hidden or deleted, but you can mark if they are to be made mandatory or not.
Identifiers: The Notes, Tags, and Account Expiration Date fields are optional. You can choose to show or hide any of these fields as required. When you choose to show, you can also mark if it has to be mandatory or not.
Additional Fields
You can create any number of customized additional fields as required. To create additional fields, click the Add Fields button. When creating additional fields, you have the option to specify the field type - Text, Password, or File Store. While Text represents a text field, Password helps mask the value from being displayed in plain text. File Store type allows you to browse and choose files.
Managing Account Types
You can manage the existing account types from Admin >> Account Management >> Account Types section. The management operations include changing the password policy association, setting any type as the default type, disable a type, enable a disabled policy, editing the nature of various fields, and so on.
From Account Types >> More Actions drop-down,
-
You can quickly change the password policy association for any type.
-
Enable/disable a type. Among the system-defined account types, five types - Web Account, Bank Account, SSH Key, File Store, and License Key cannot be disabled. All other types can be disabled. When you disable a type, the same will not be available for choosing it during account addition.
-
Set any type as the Default Type (the type which is set as the default type here will be the default selection of account type in the Add Accounts GUI for Work account types).
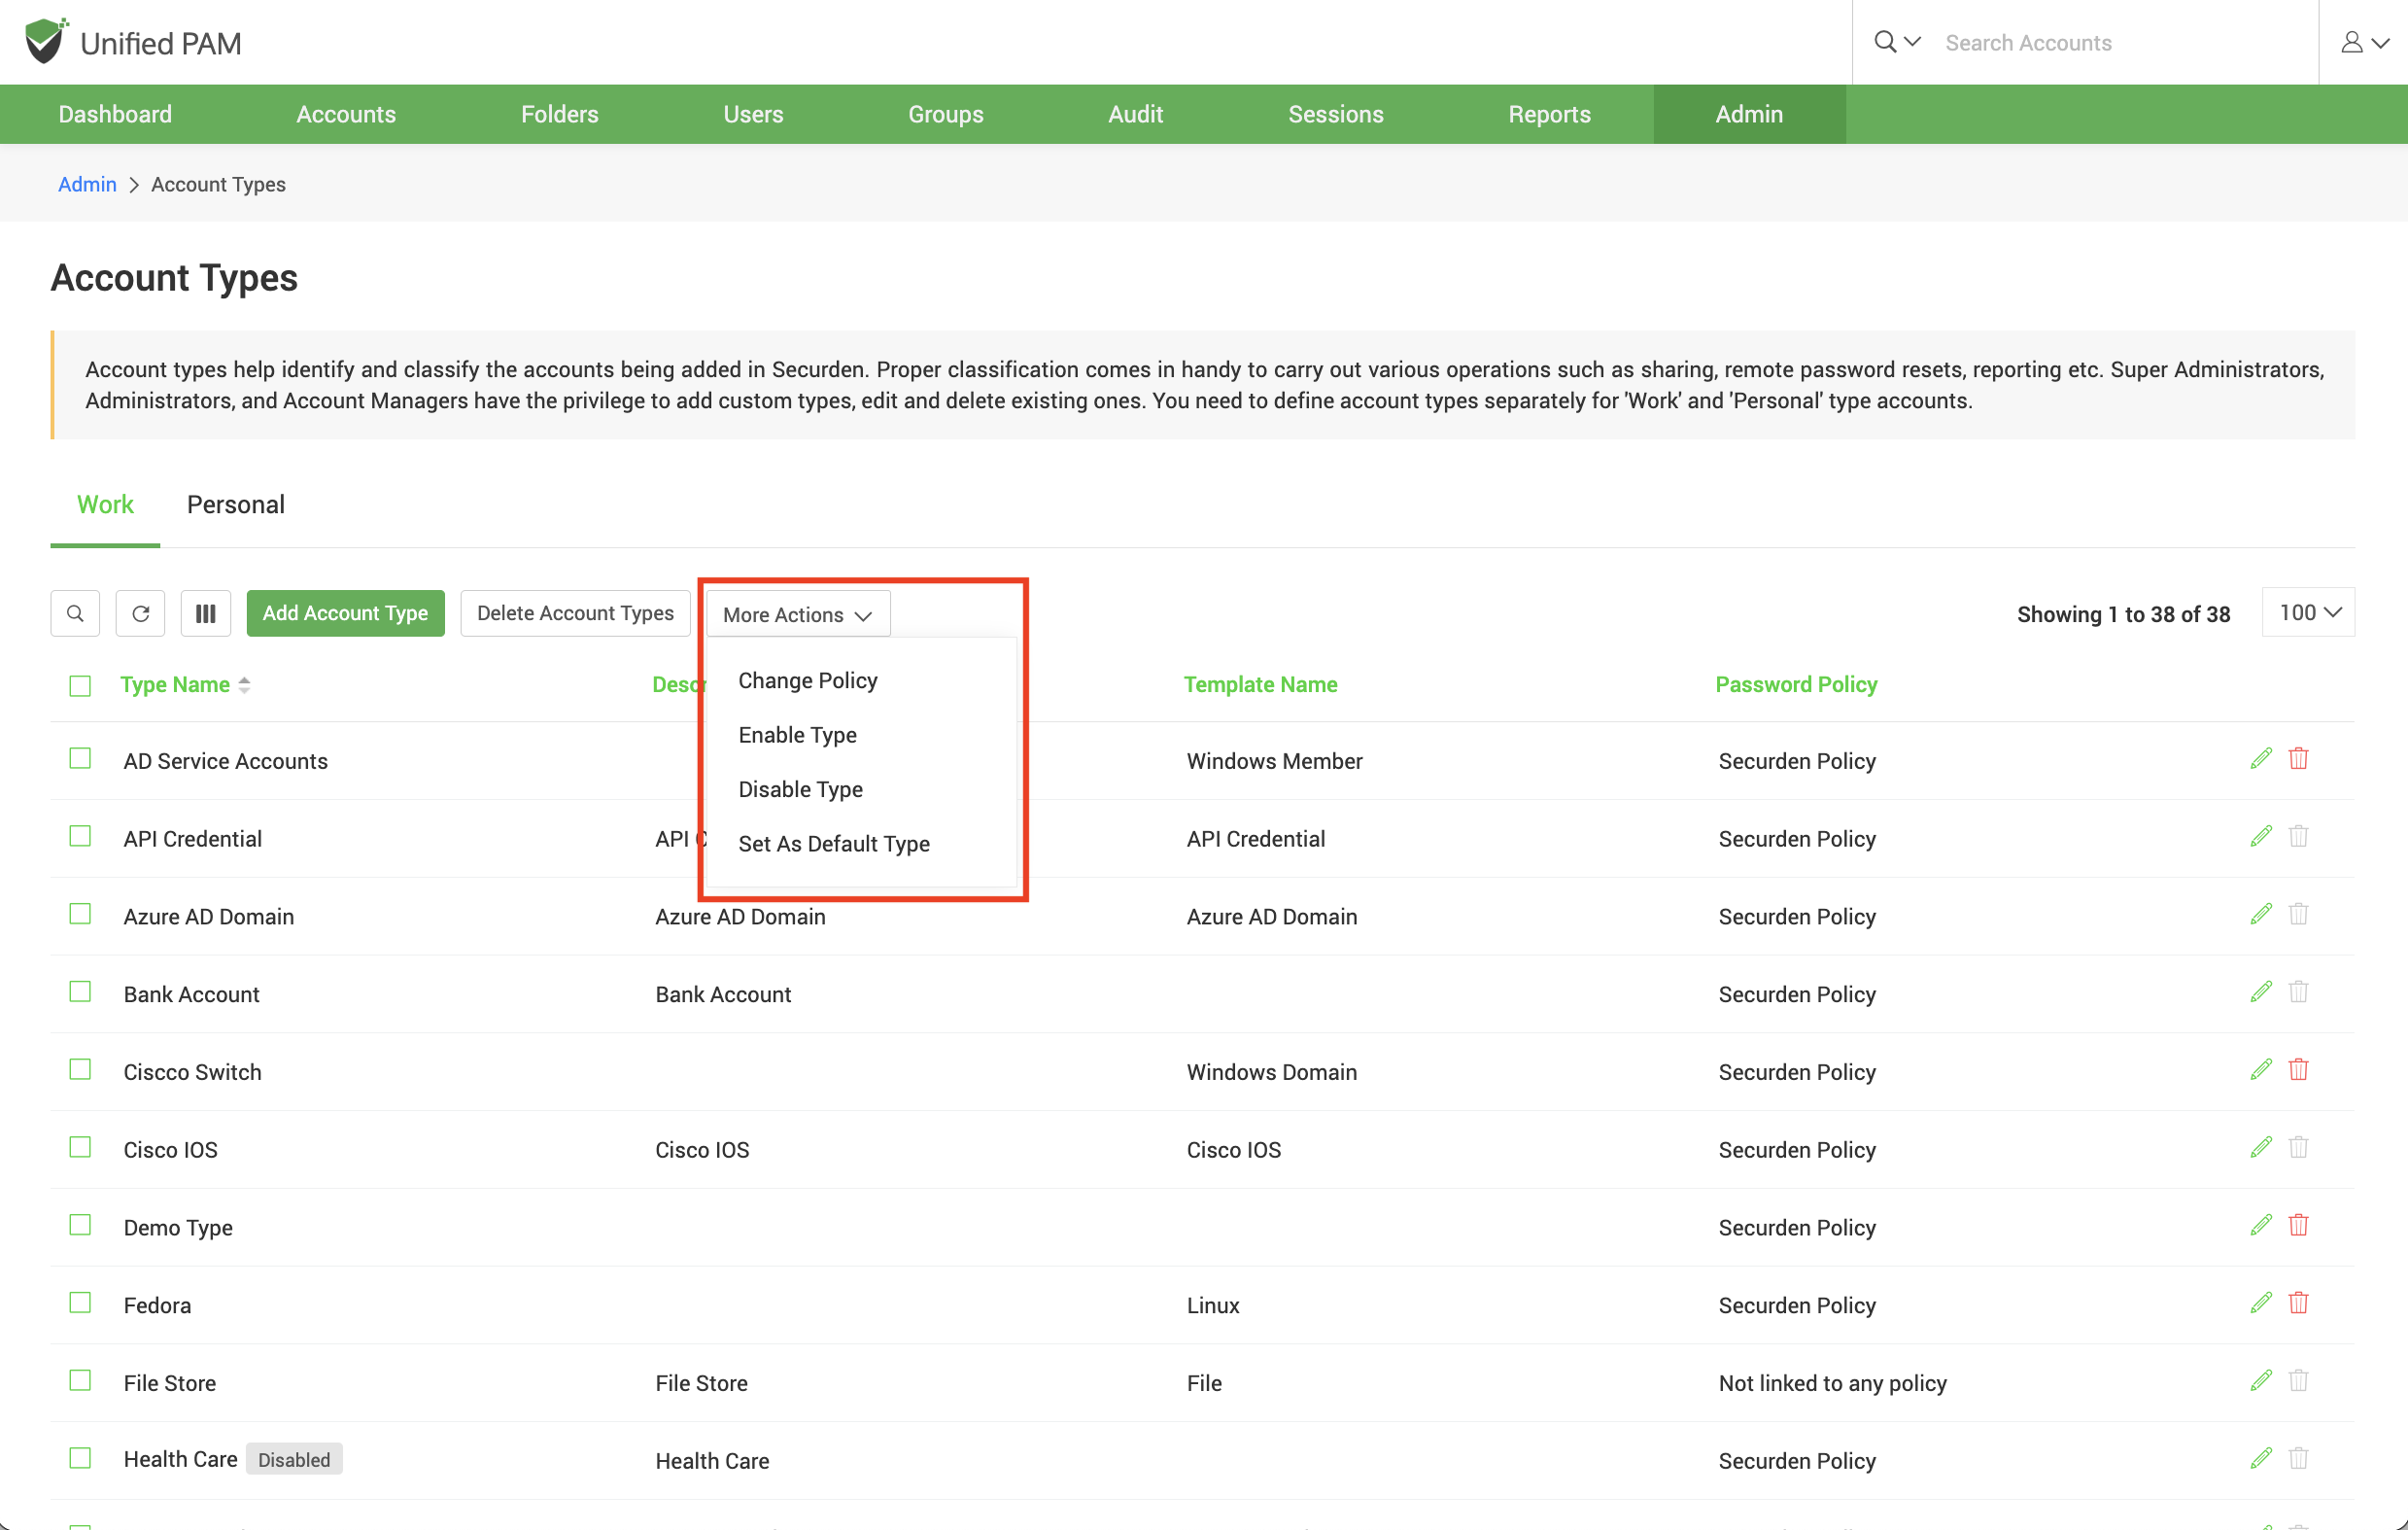
If you want to edit multiple attributes, you may use the edit icon present in the table.
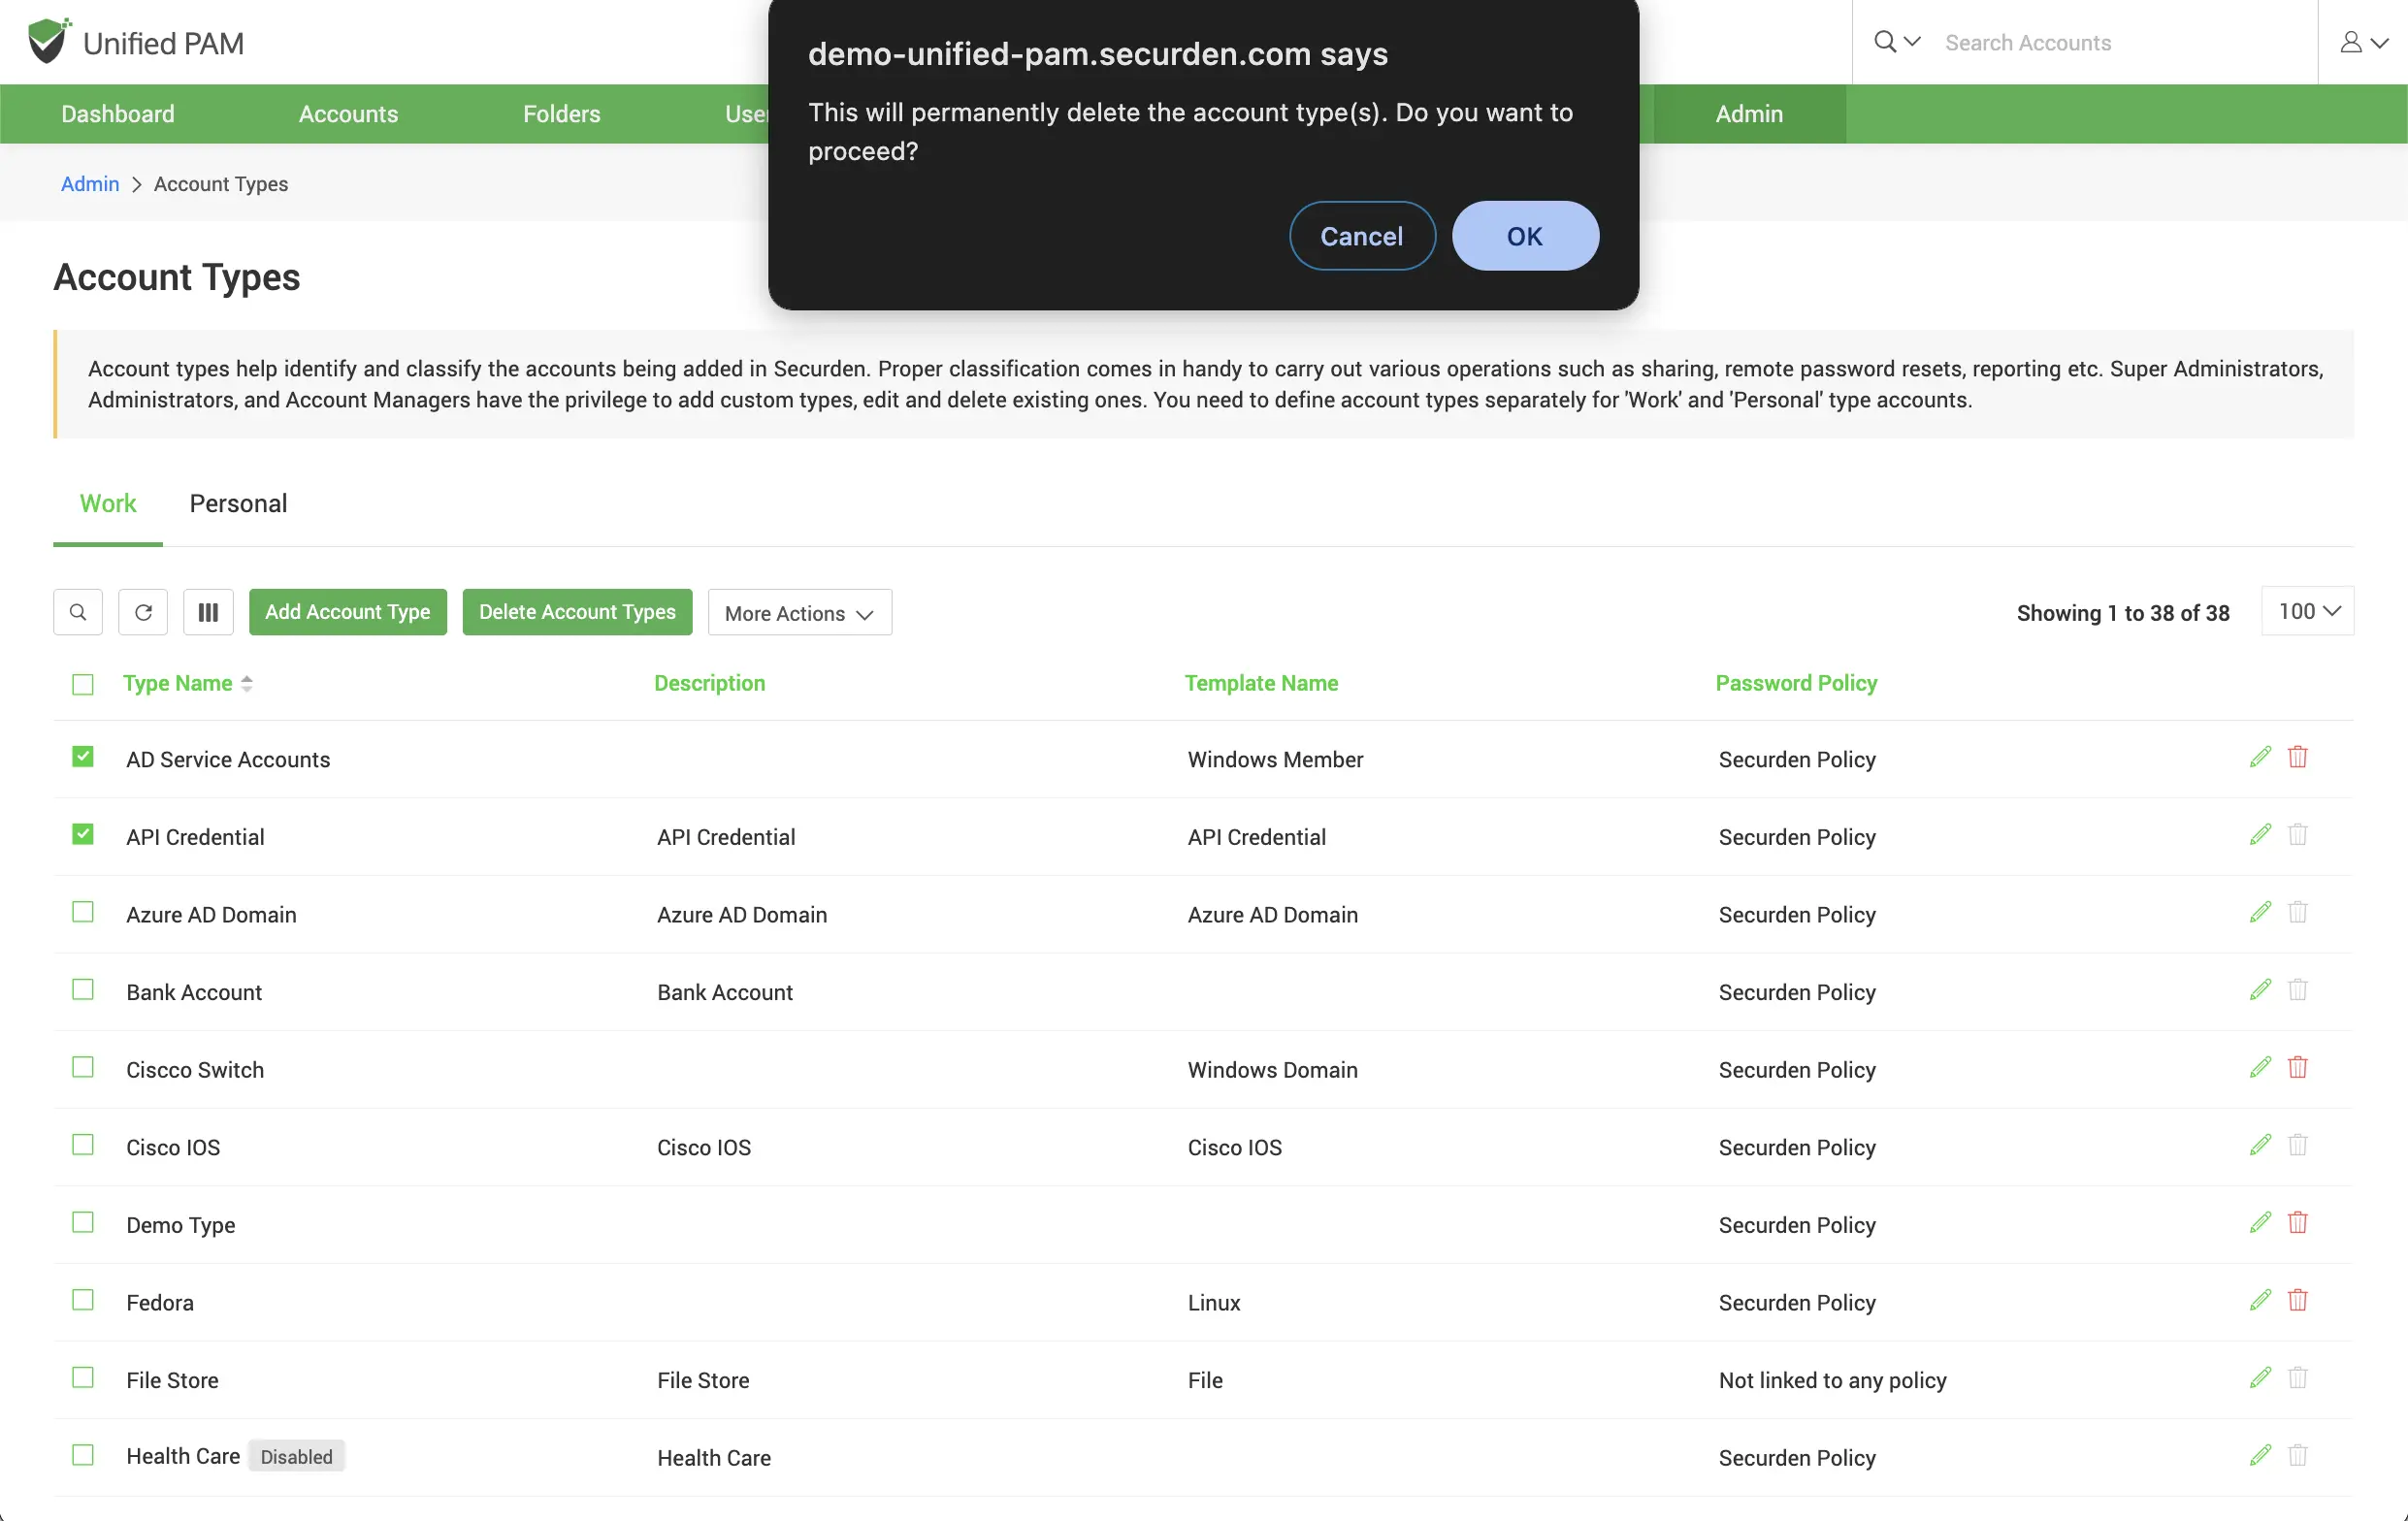
Delete Account Types
You can delete any custom account types created. Select the types to be deleted and then click the button Delete Account Types. You can also click the Delete icon present at the RHS of each entry.
Note
If the account type you are trying to delete has accounts associated with it, you will not be able to delete it. You may either edit the respective accounts and associate them with a different account type and then delete the type or you can simply disable this account type and restrict any further addition of accounts to this type. The default system defined account types cannot be deleted. They can only be disabled.
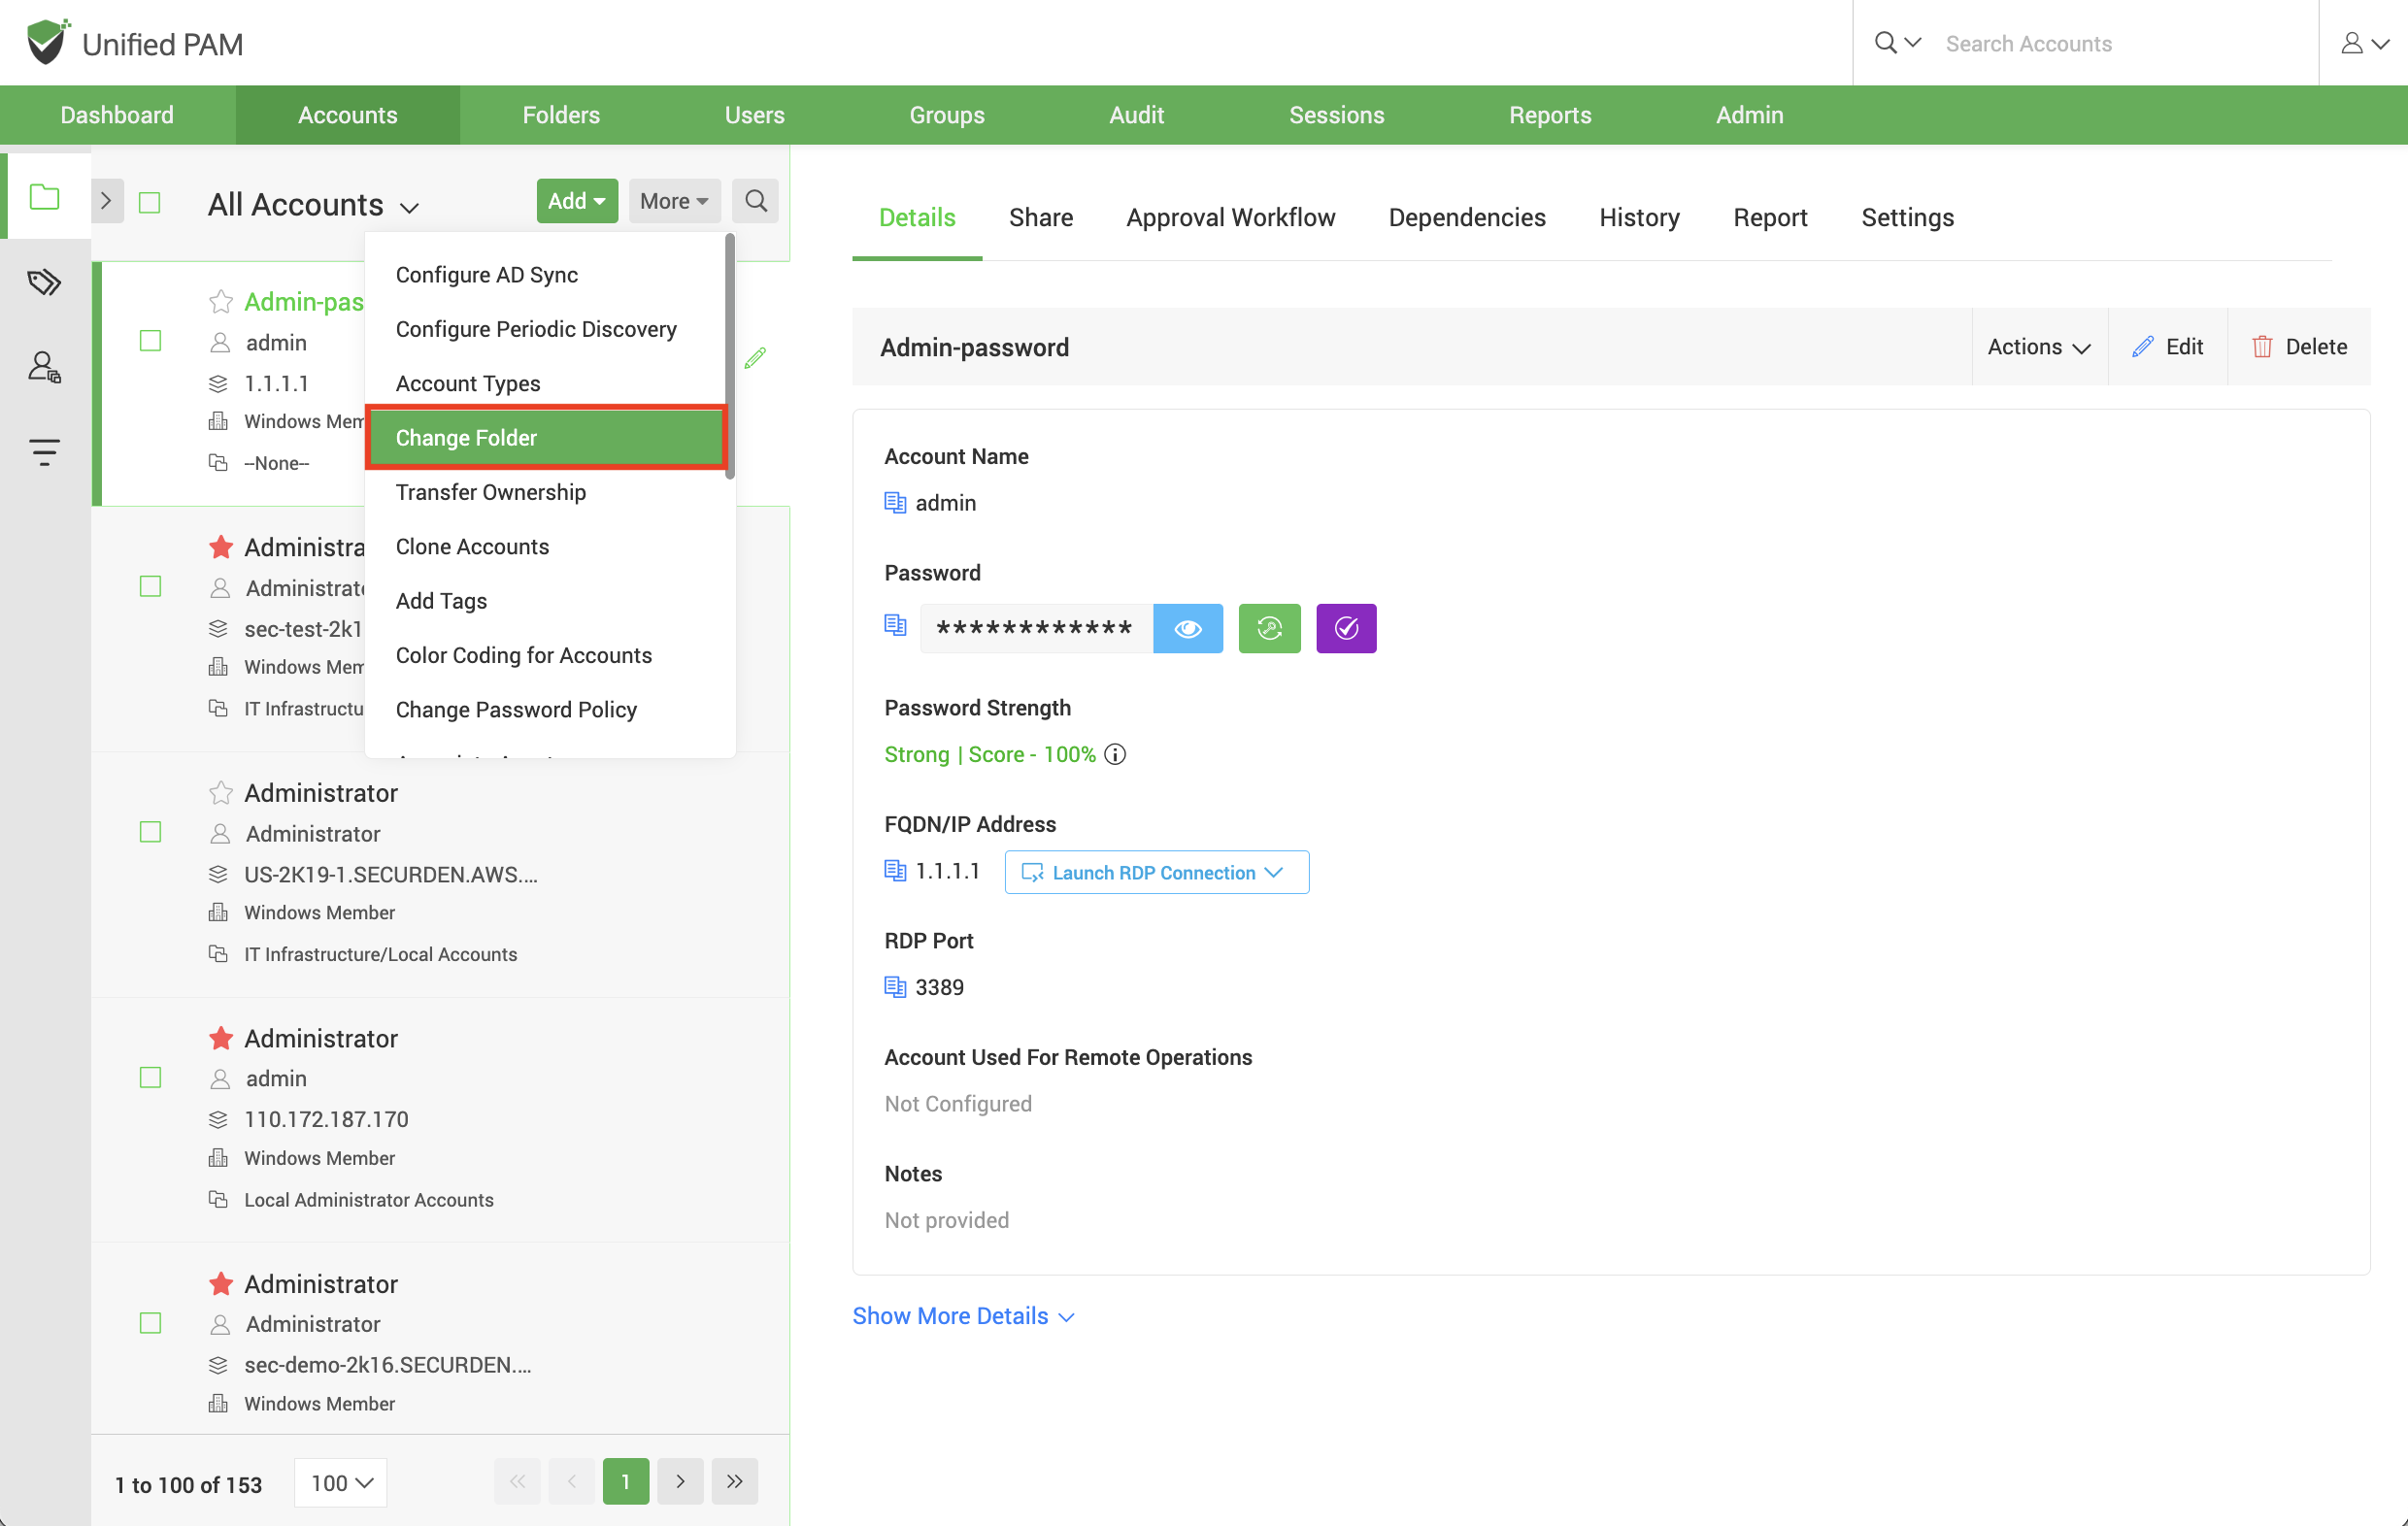
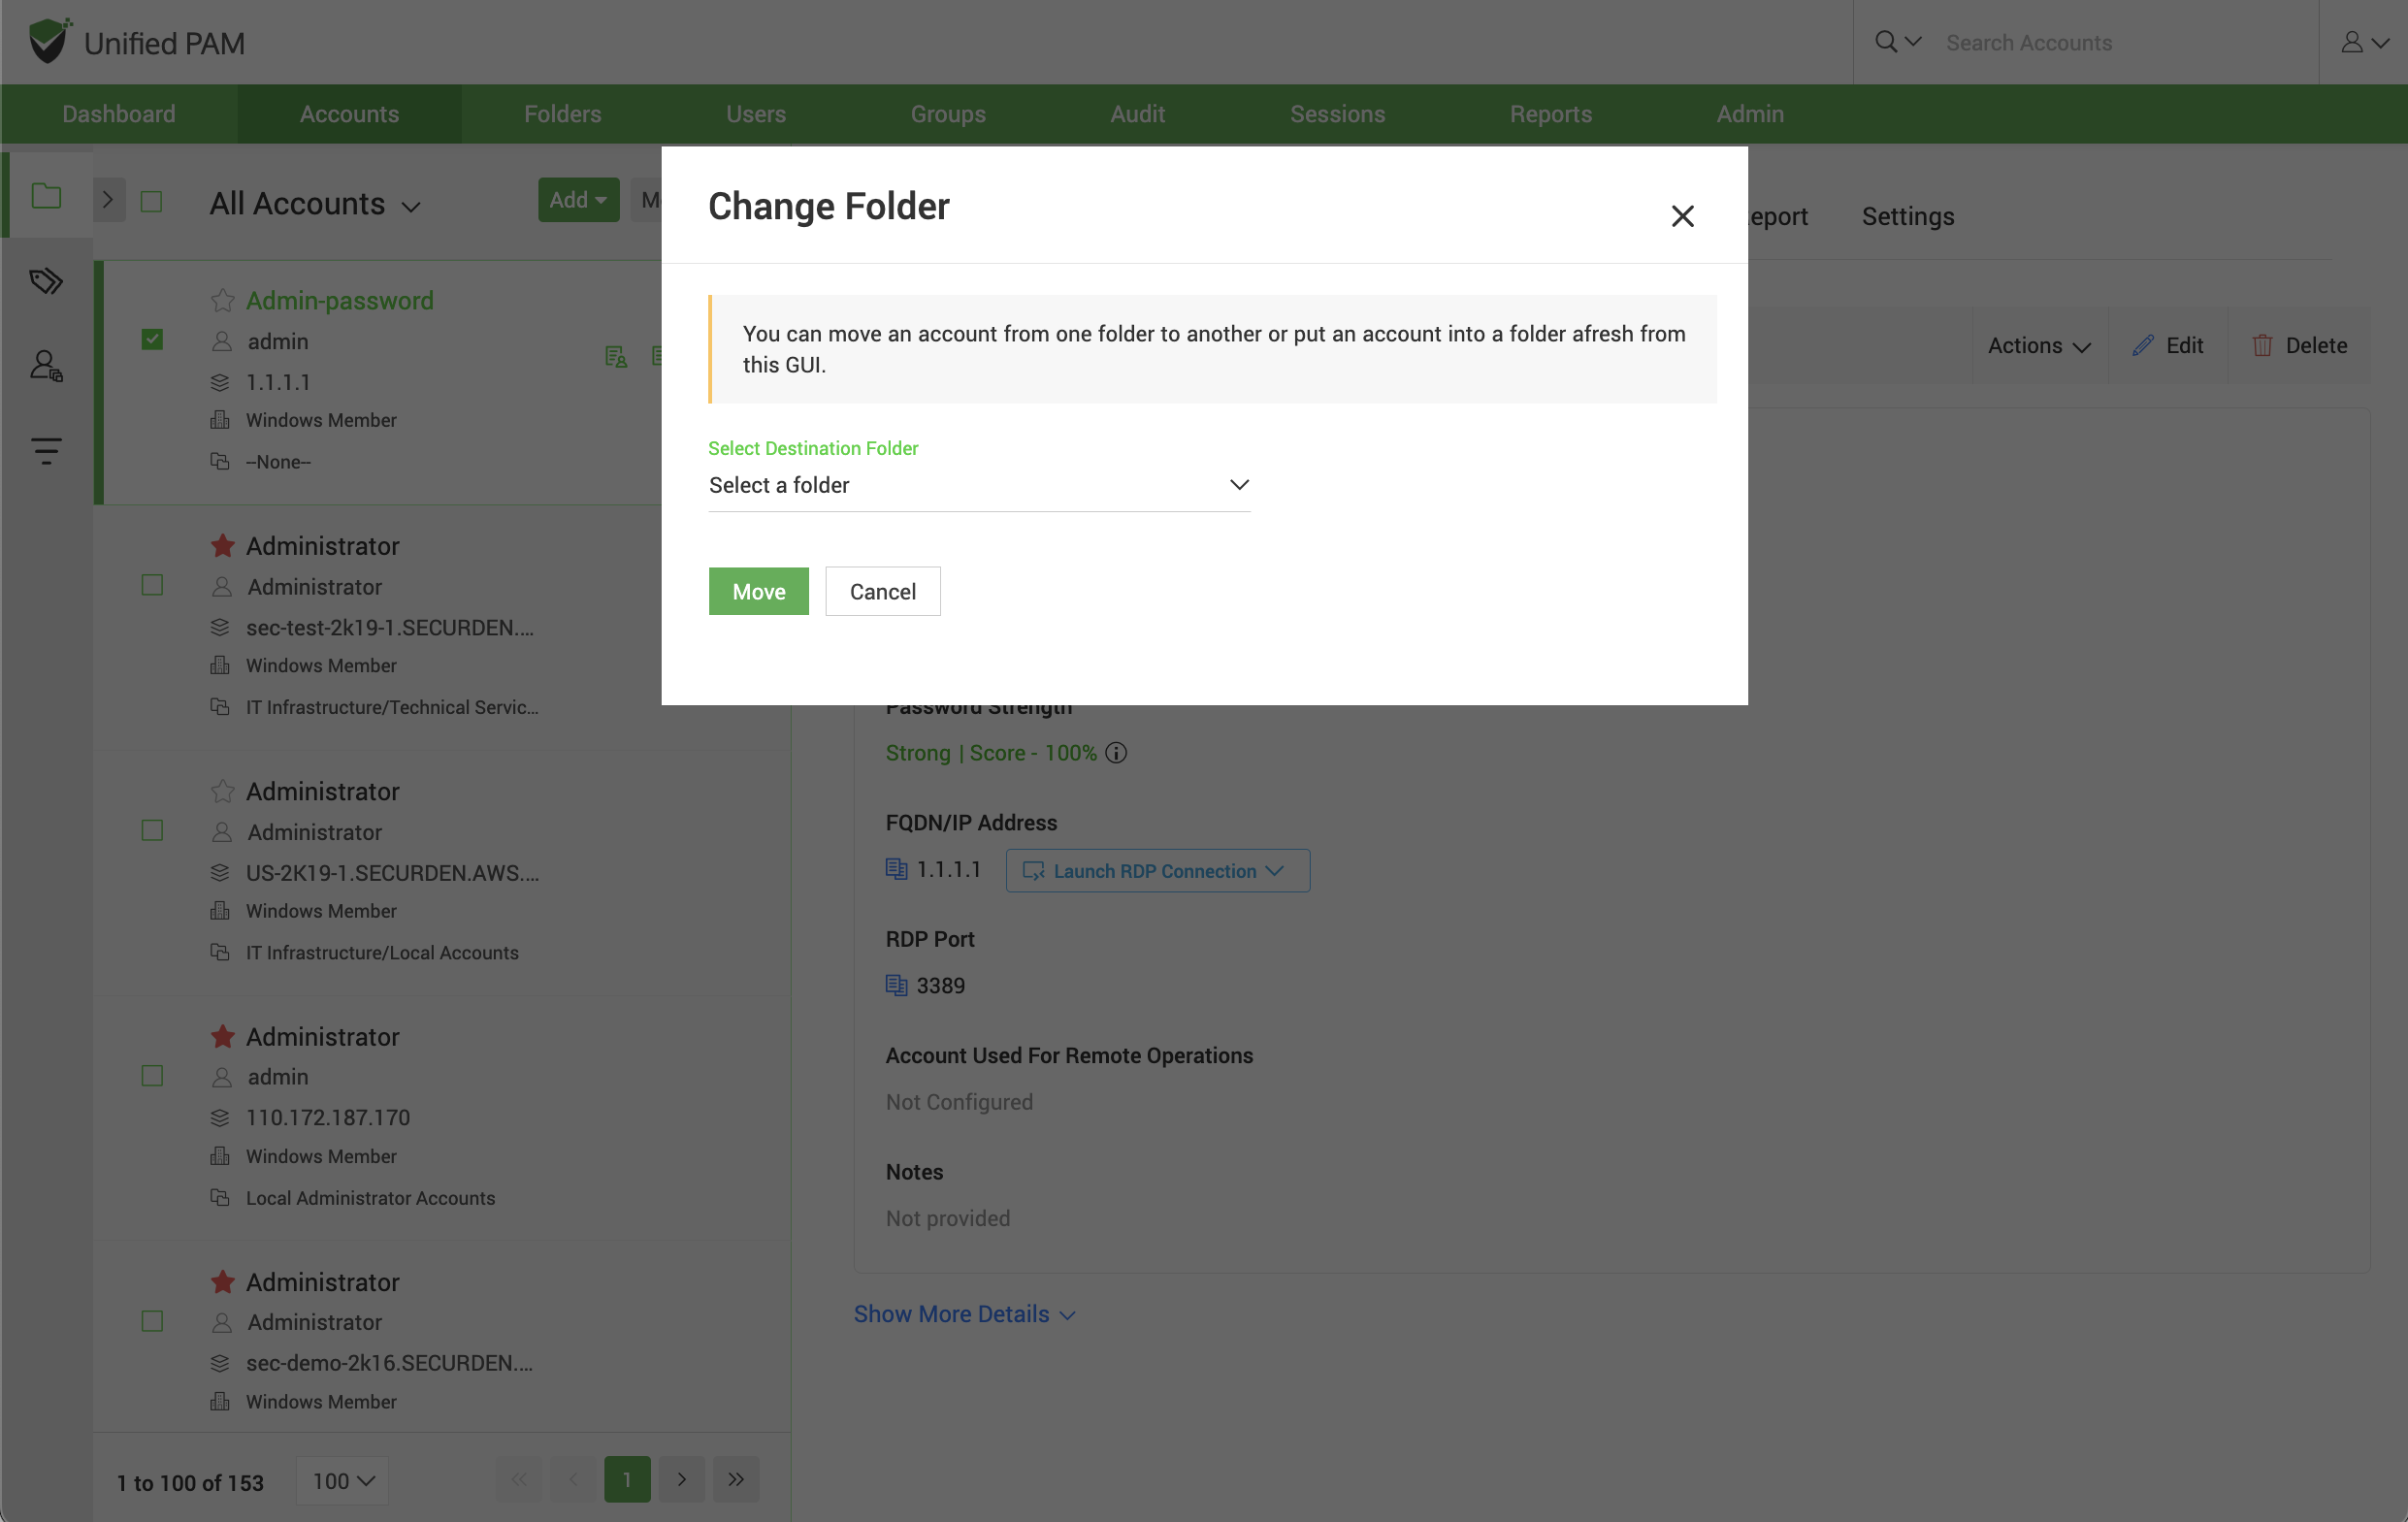
Change Folder
You can move an account from one folder to another or put an account into a new folder. Select the account to be moved, click the More drop-down. Select the Change Folder option.
In the popup that opens, choose the folder to which the account(s) are to be moved, and then click Move.
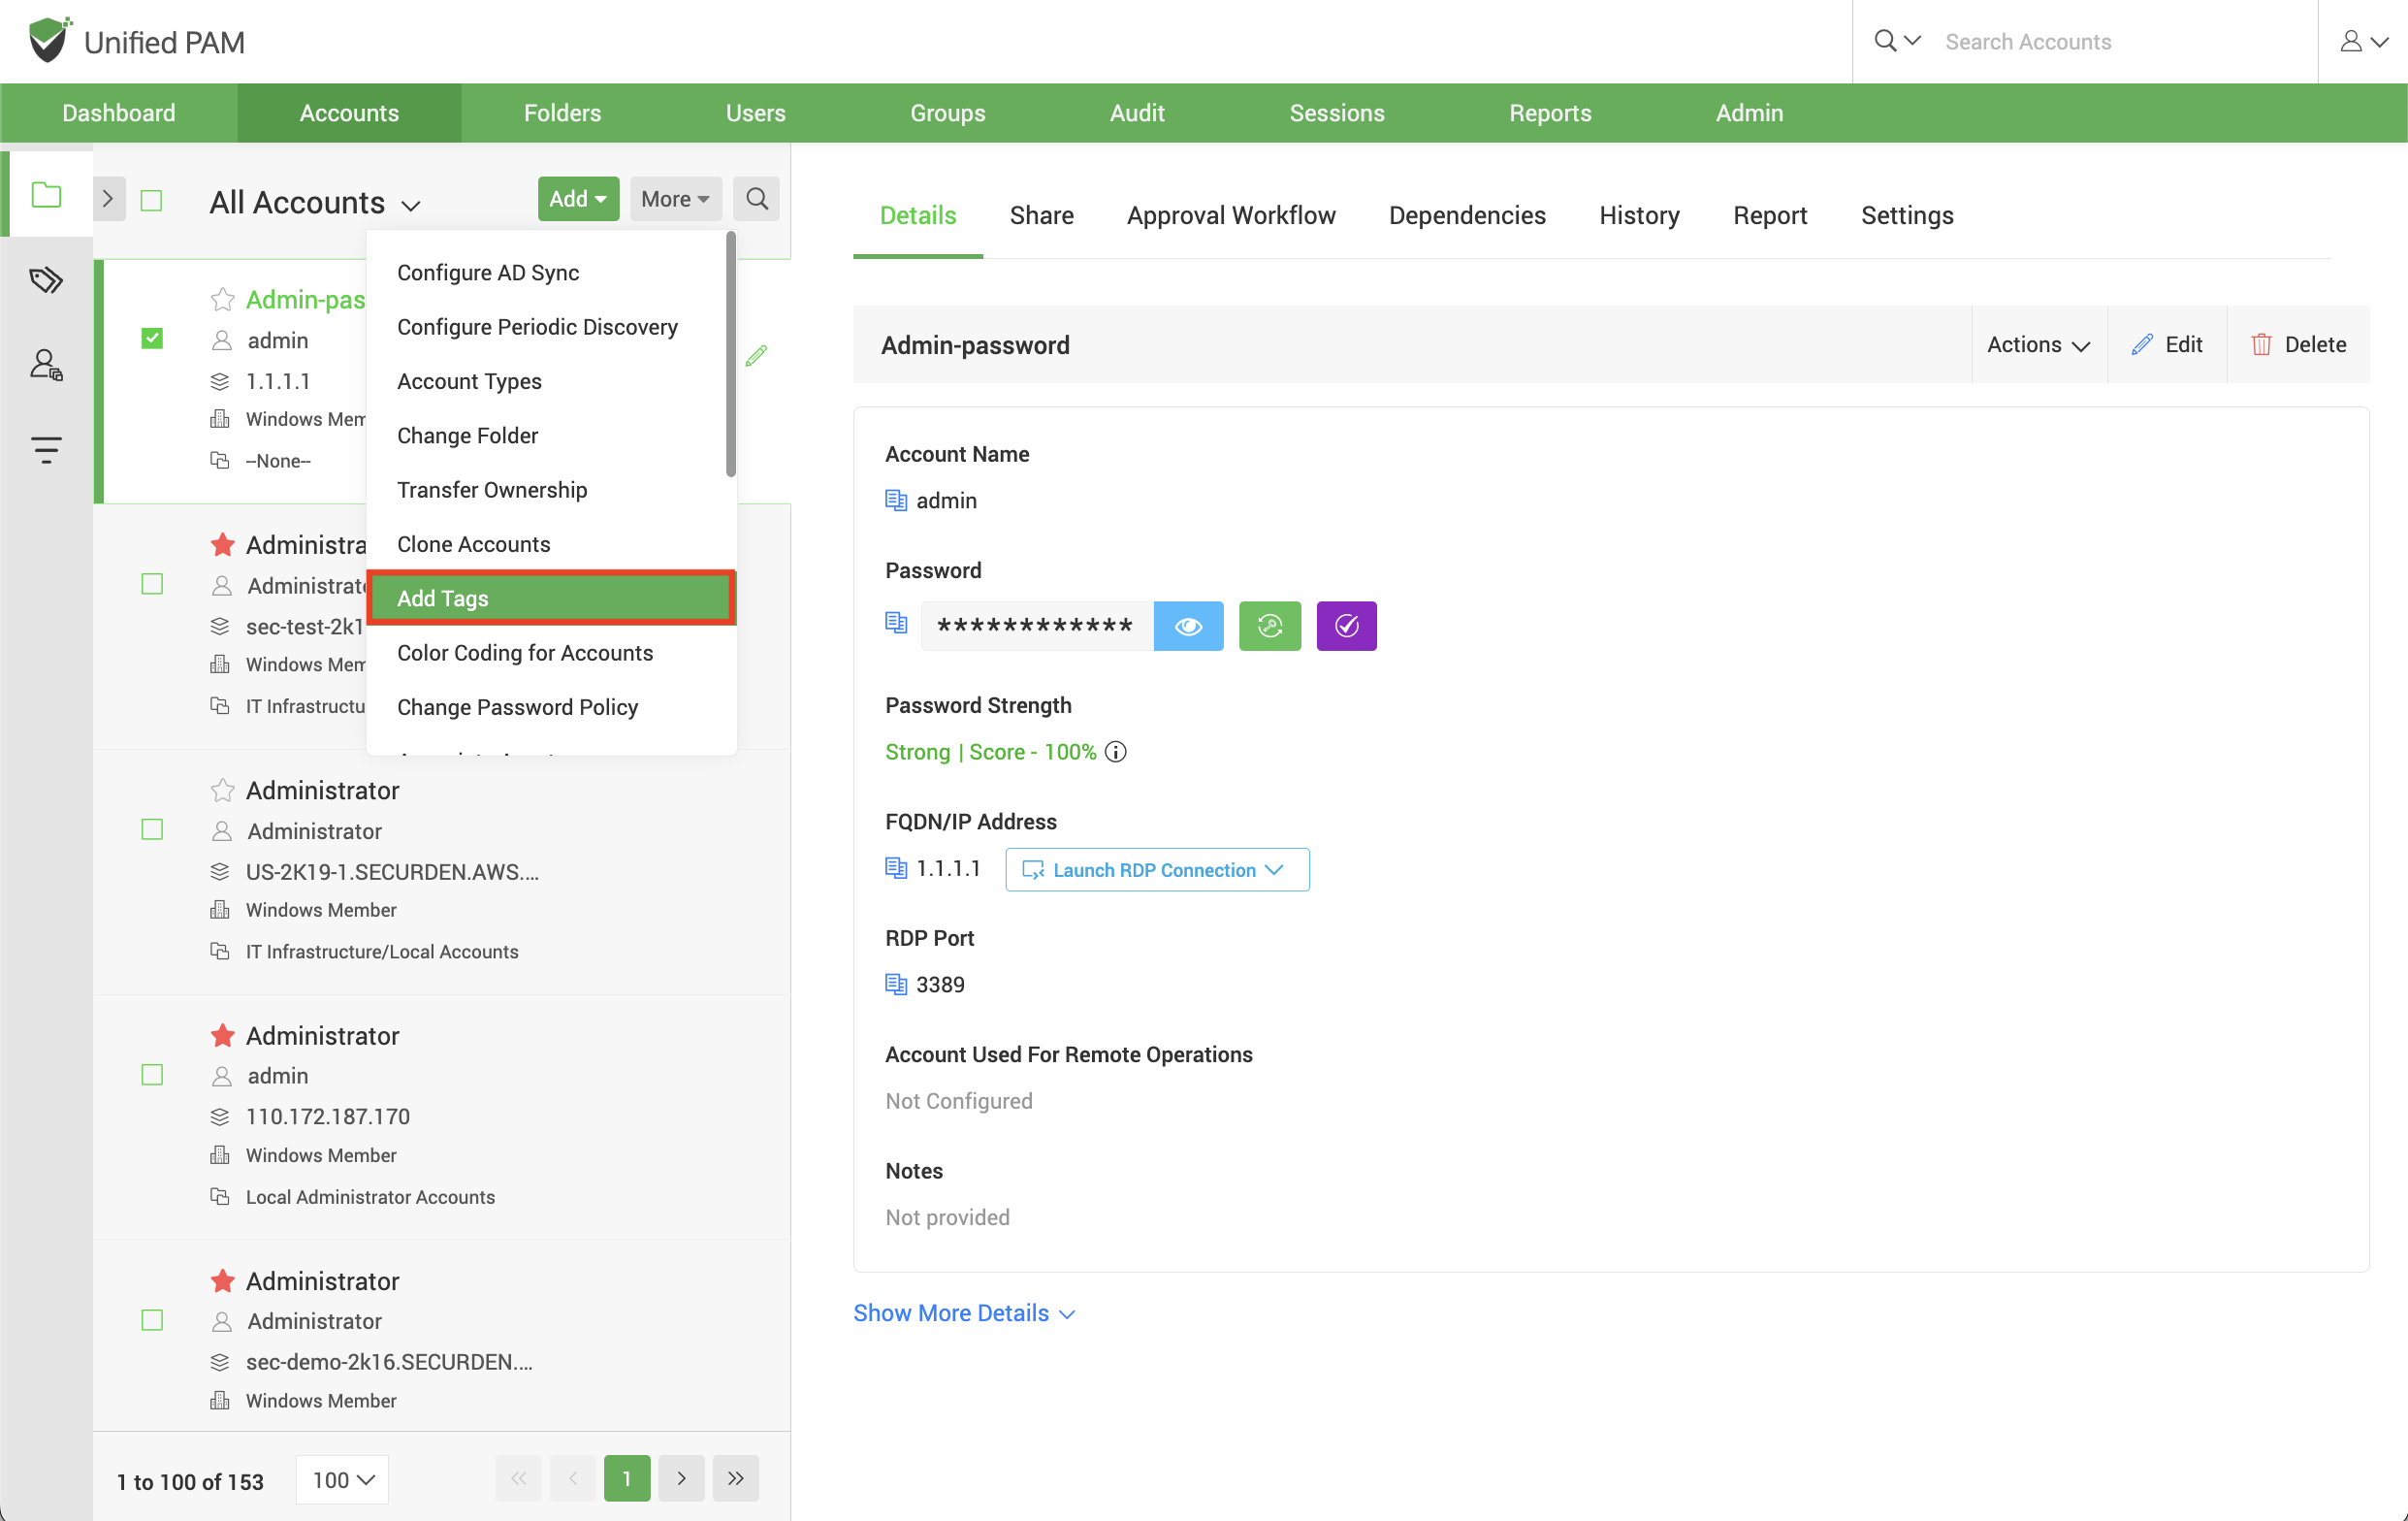
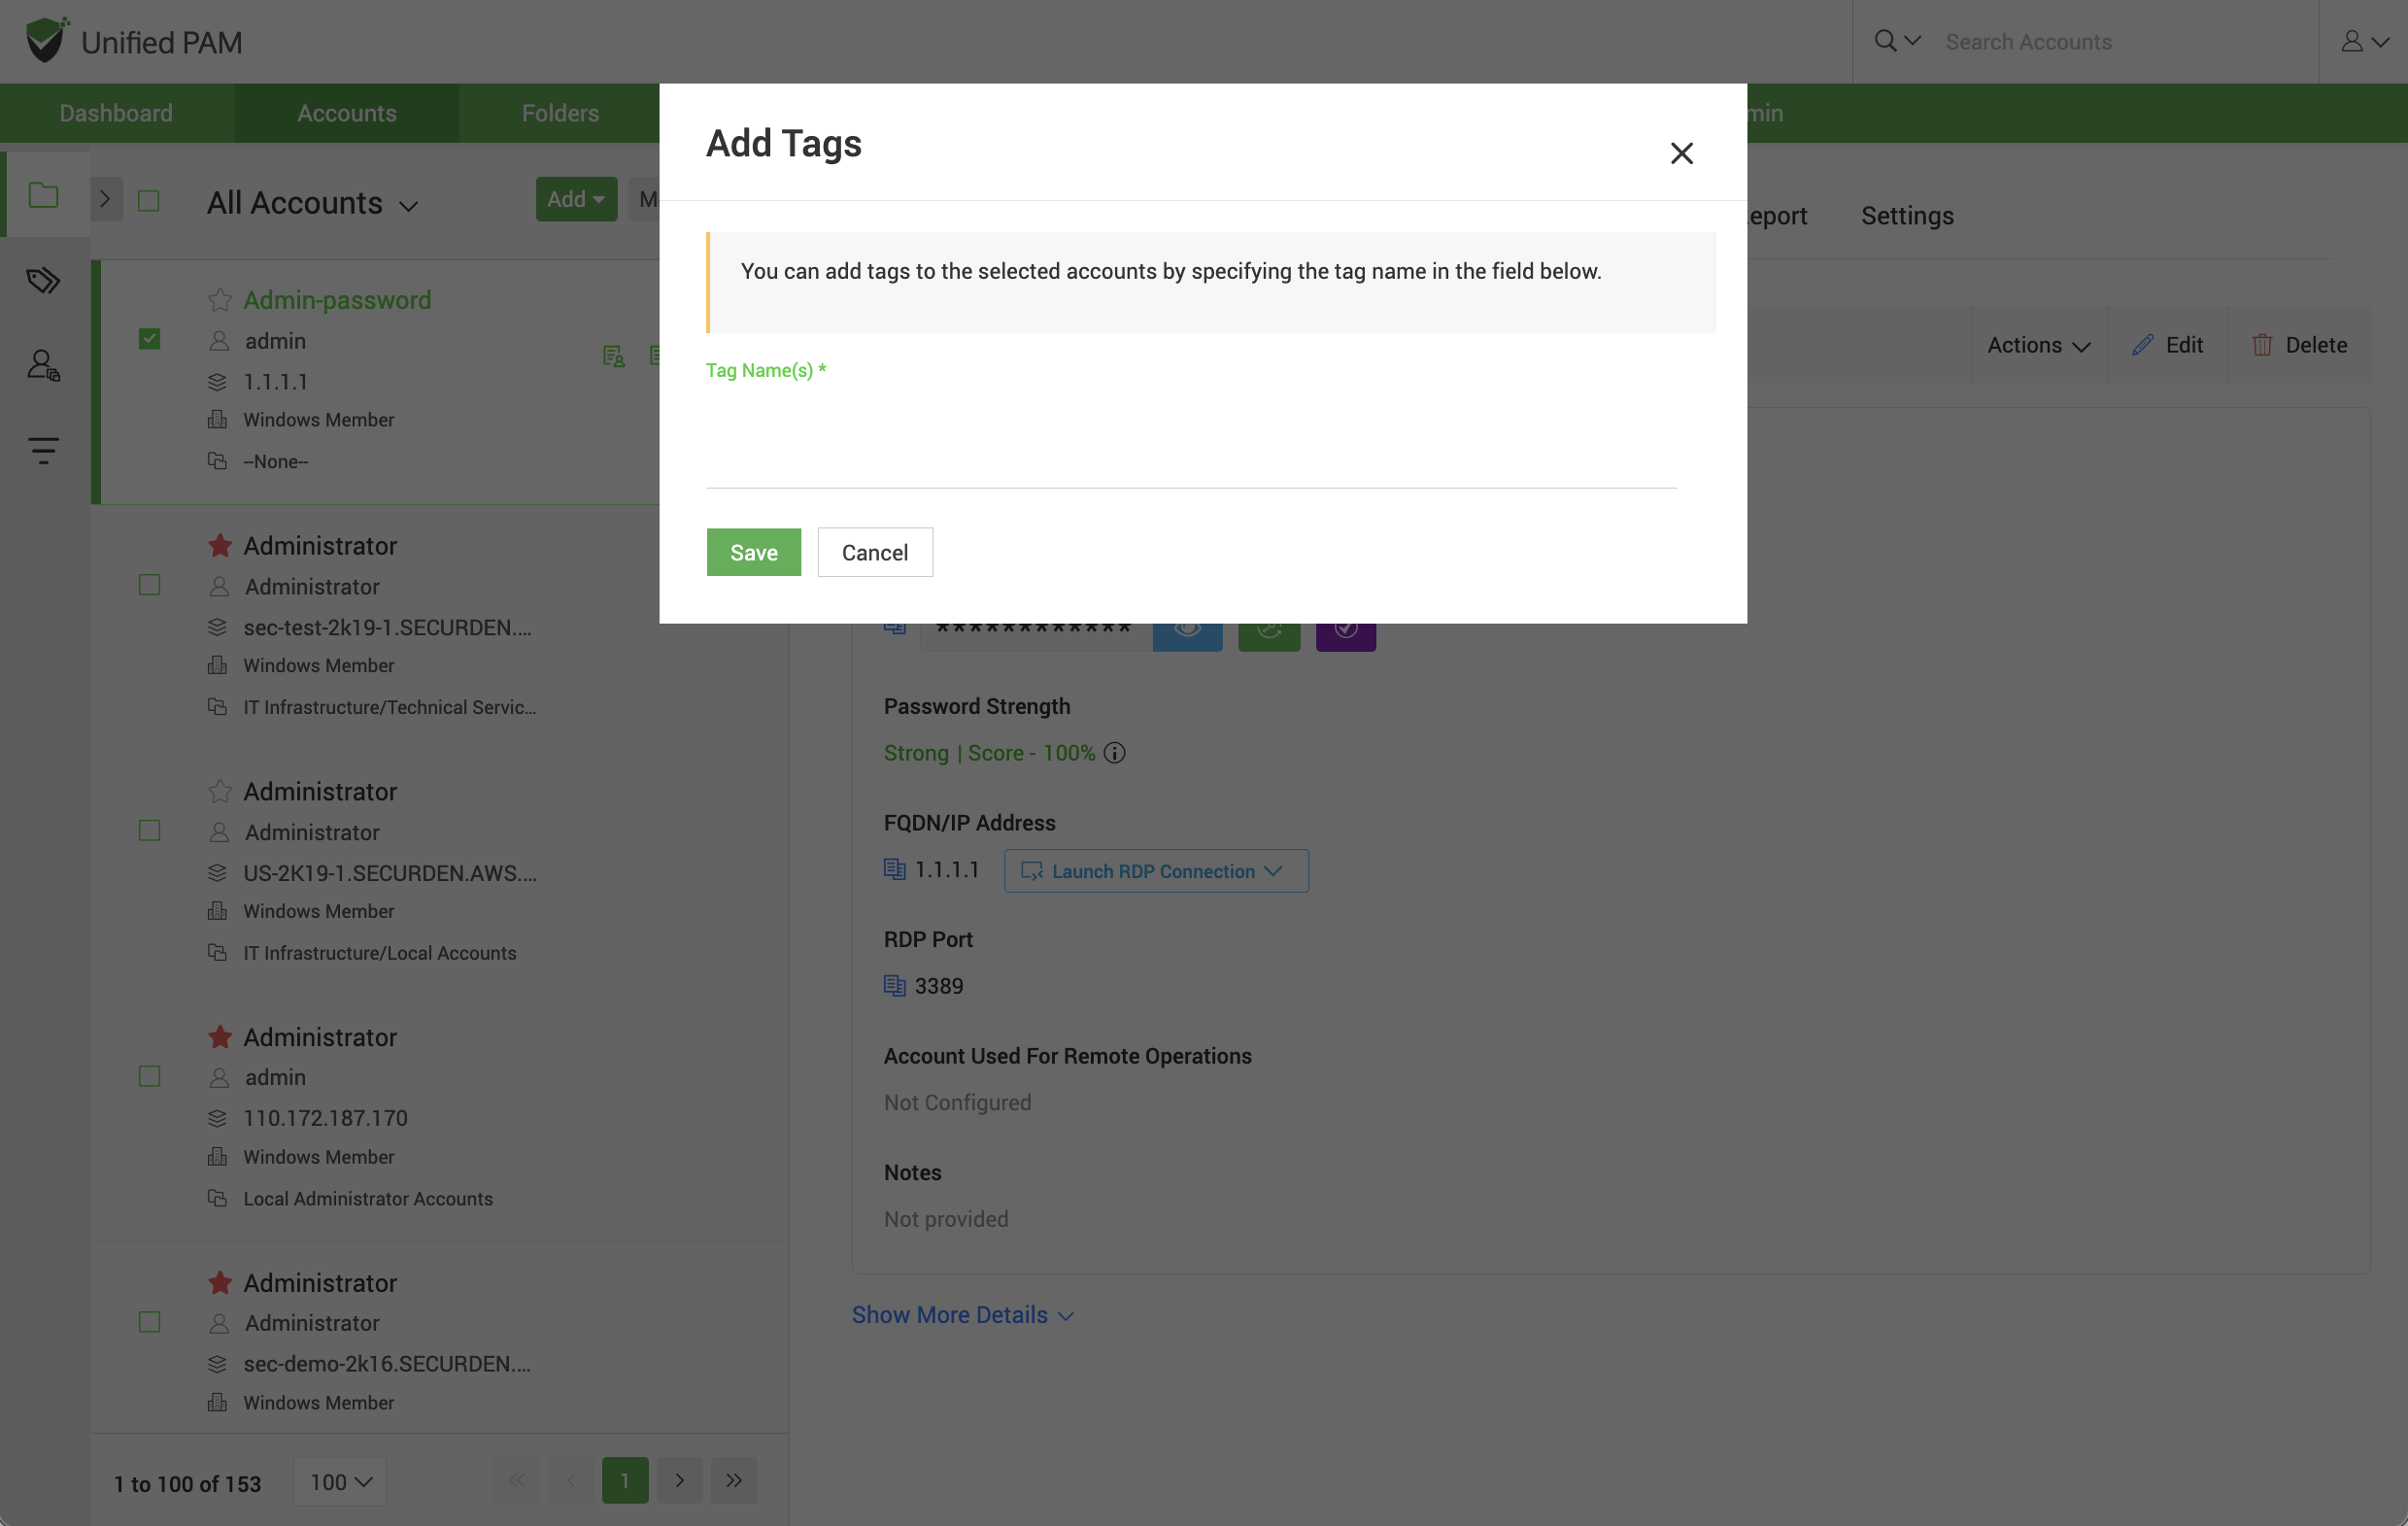
Add Tags
If you want to add any specific categorization to accounts in the form of a tag, you may do it by clicking on Add Tags under More drop-down in the Accounts section.
Select the account(s), enter the tag name(s), and click Save.
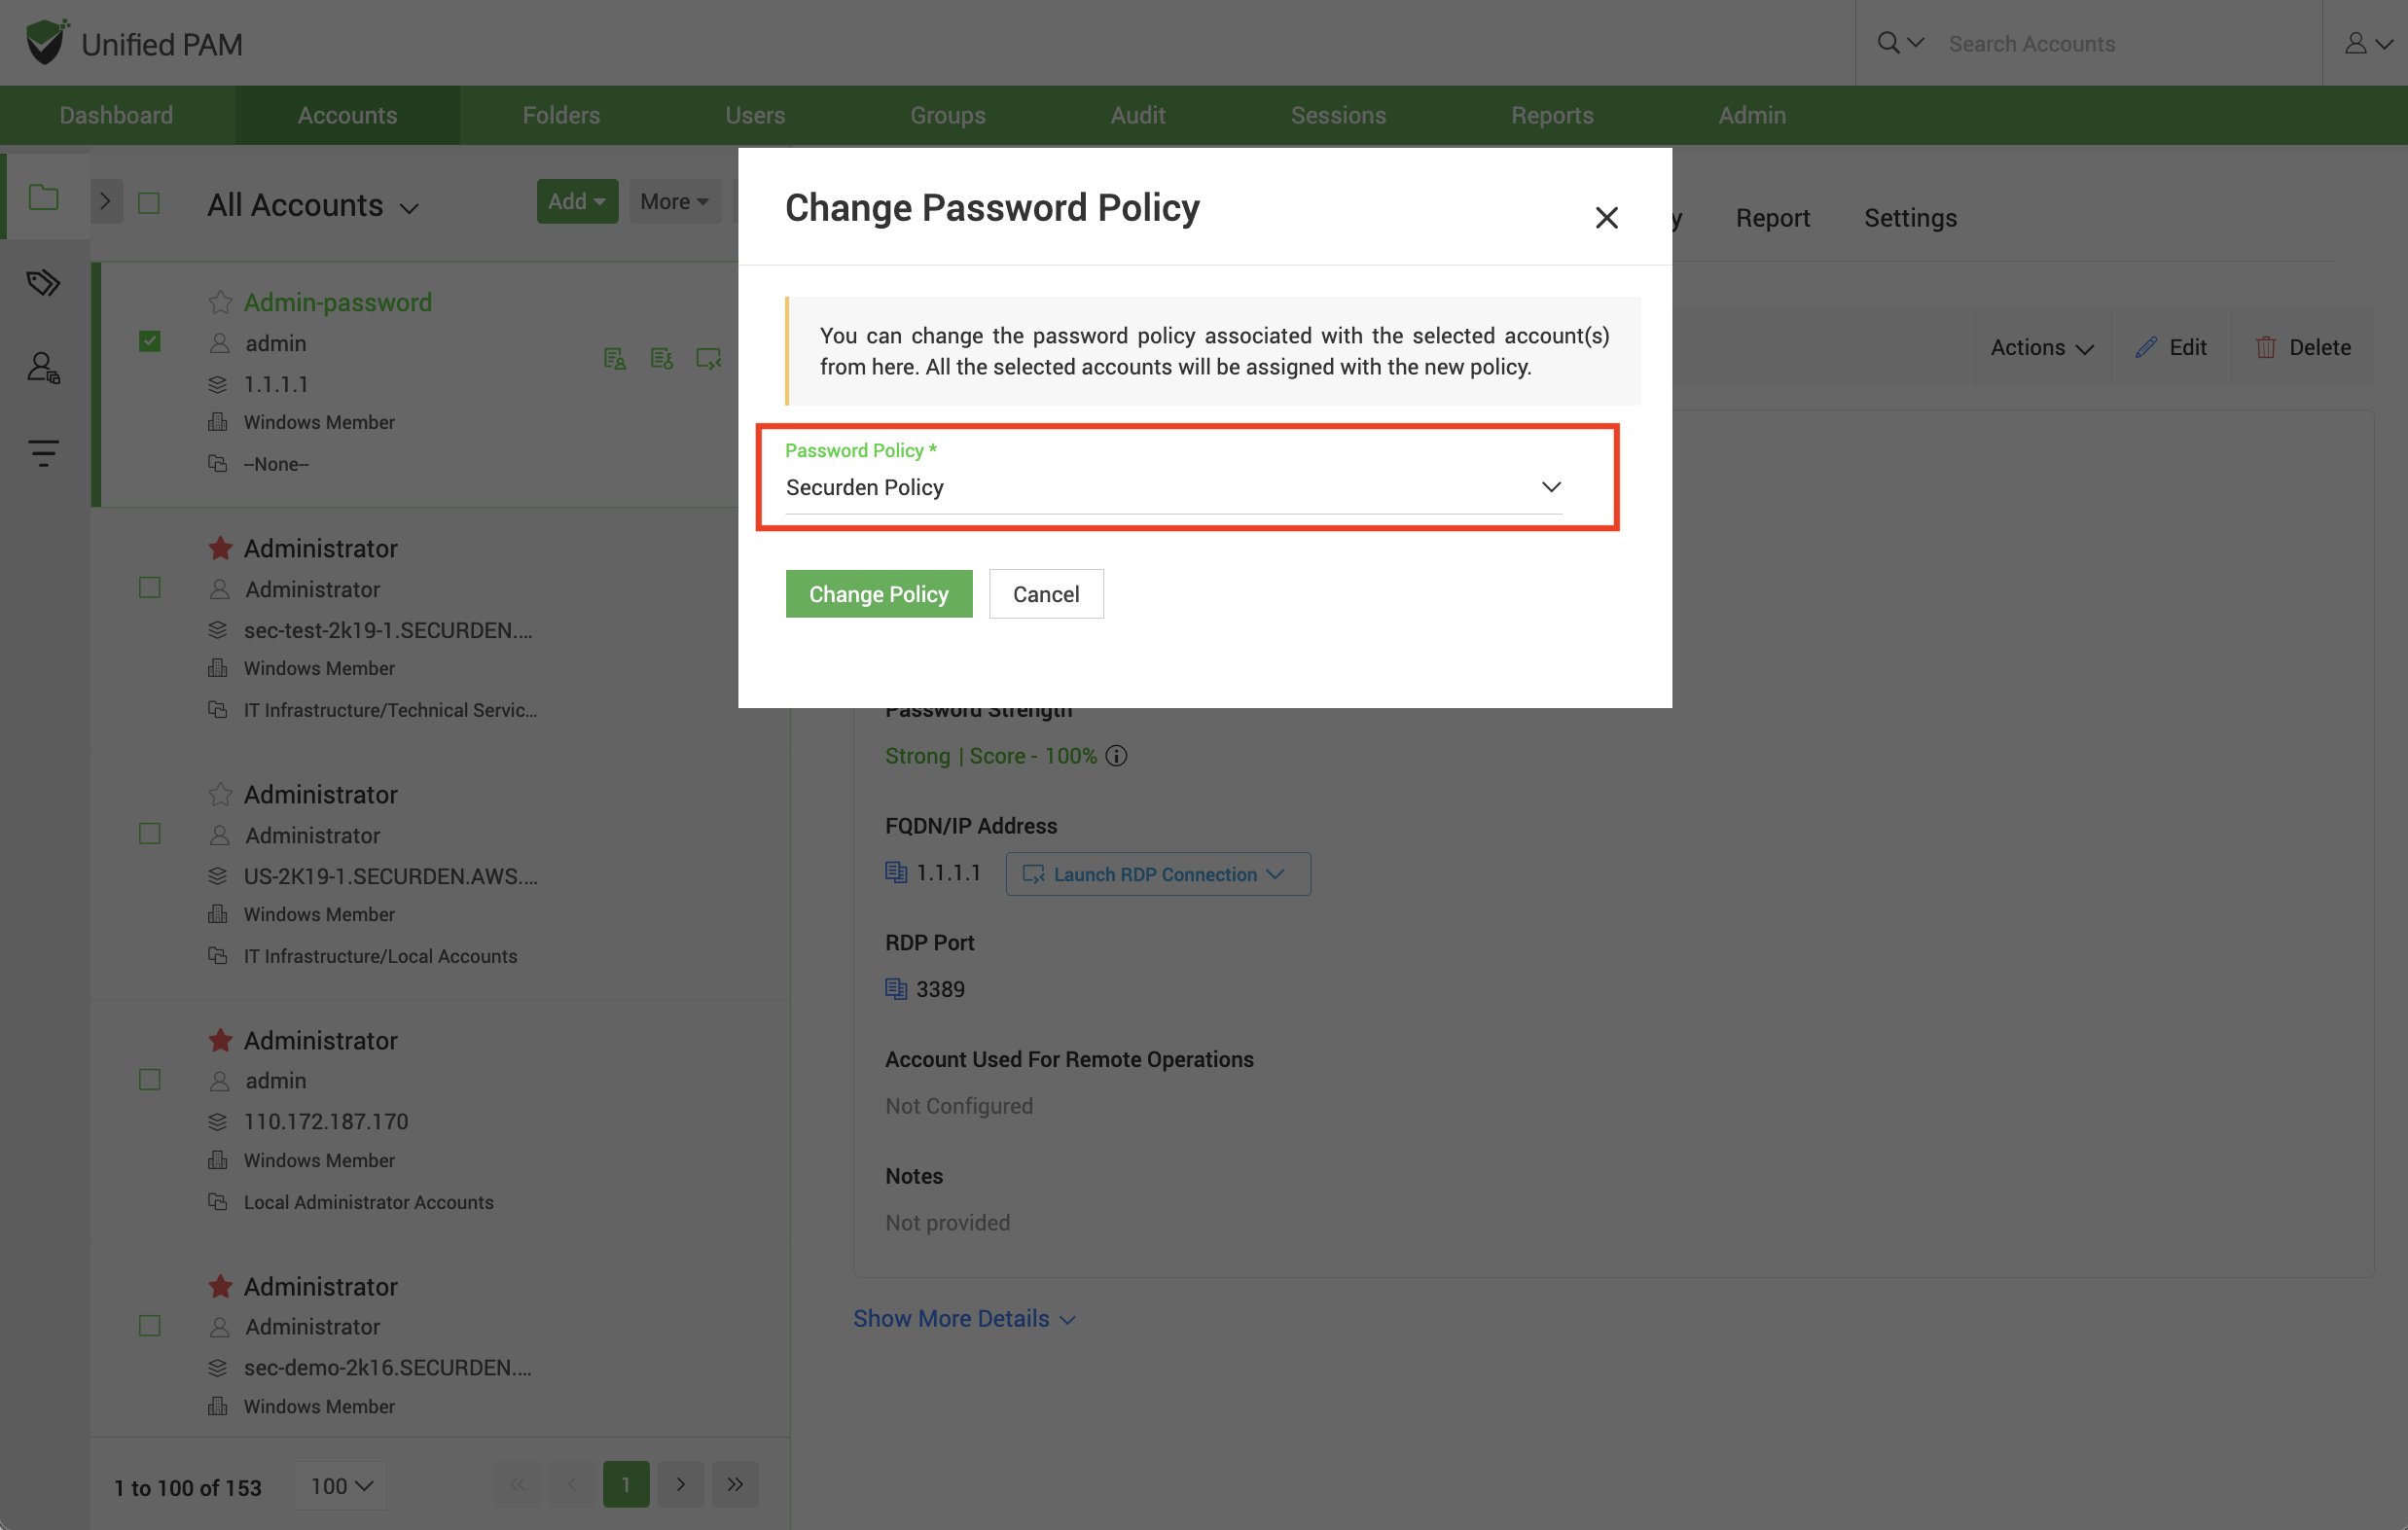
Change Password Policy
If you want to change the password policy for any specific account(s), you may change it by navigating to Accounts >> More >> Change Password Policy.
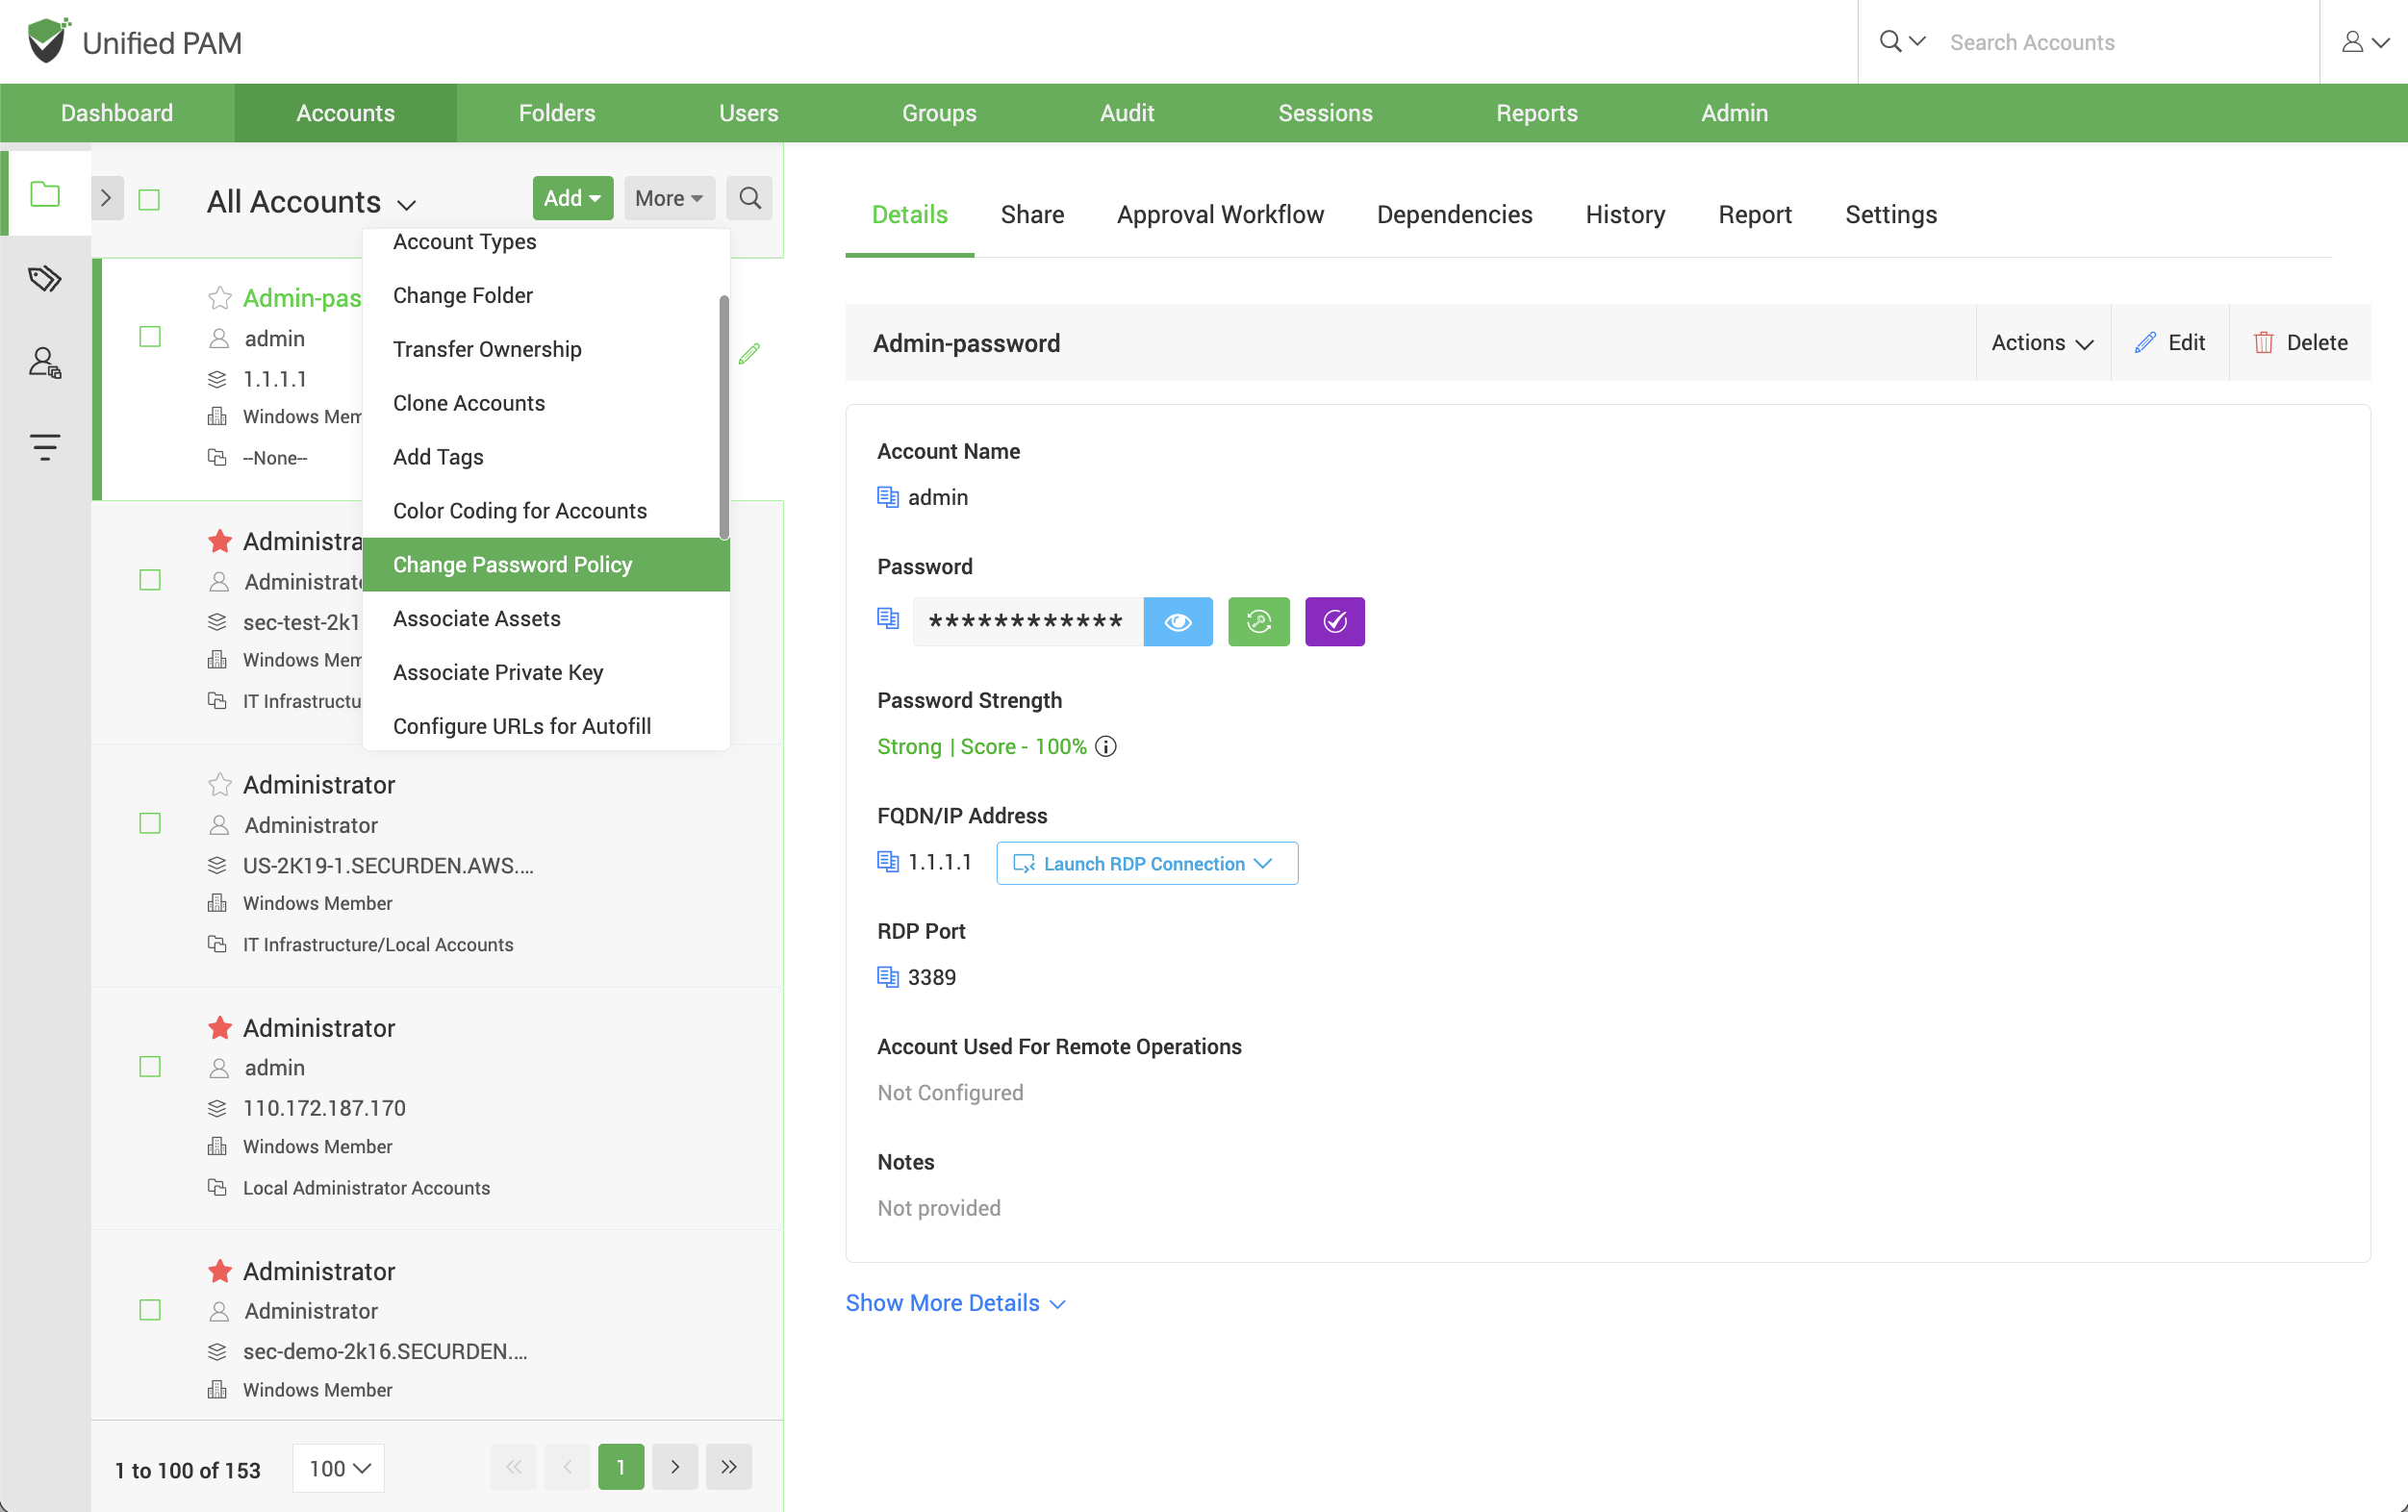
Select the account(s), click the option Change Password Policy, and then choose the policy to be applied from the drop-down. After selecting, click Change Policy to apply the policy to the account(s).
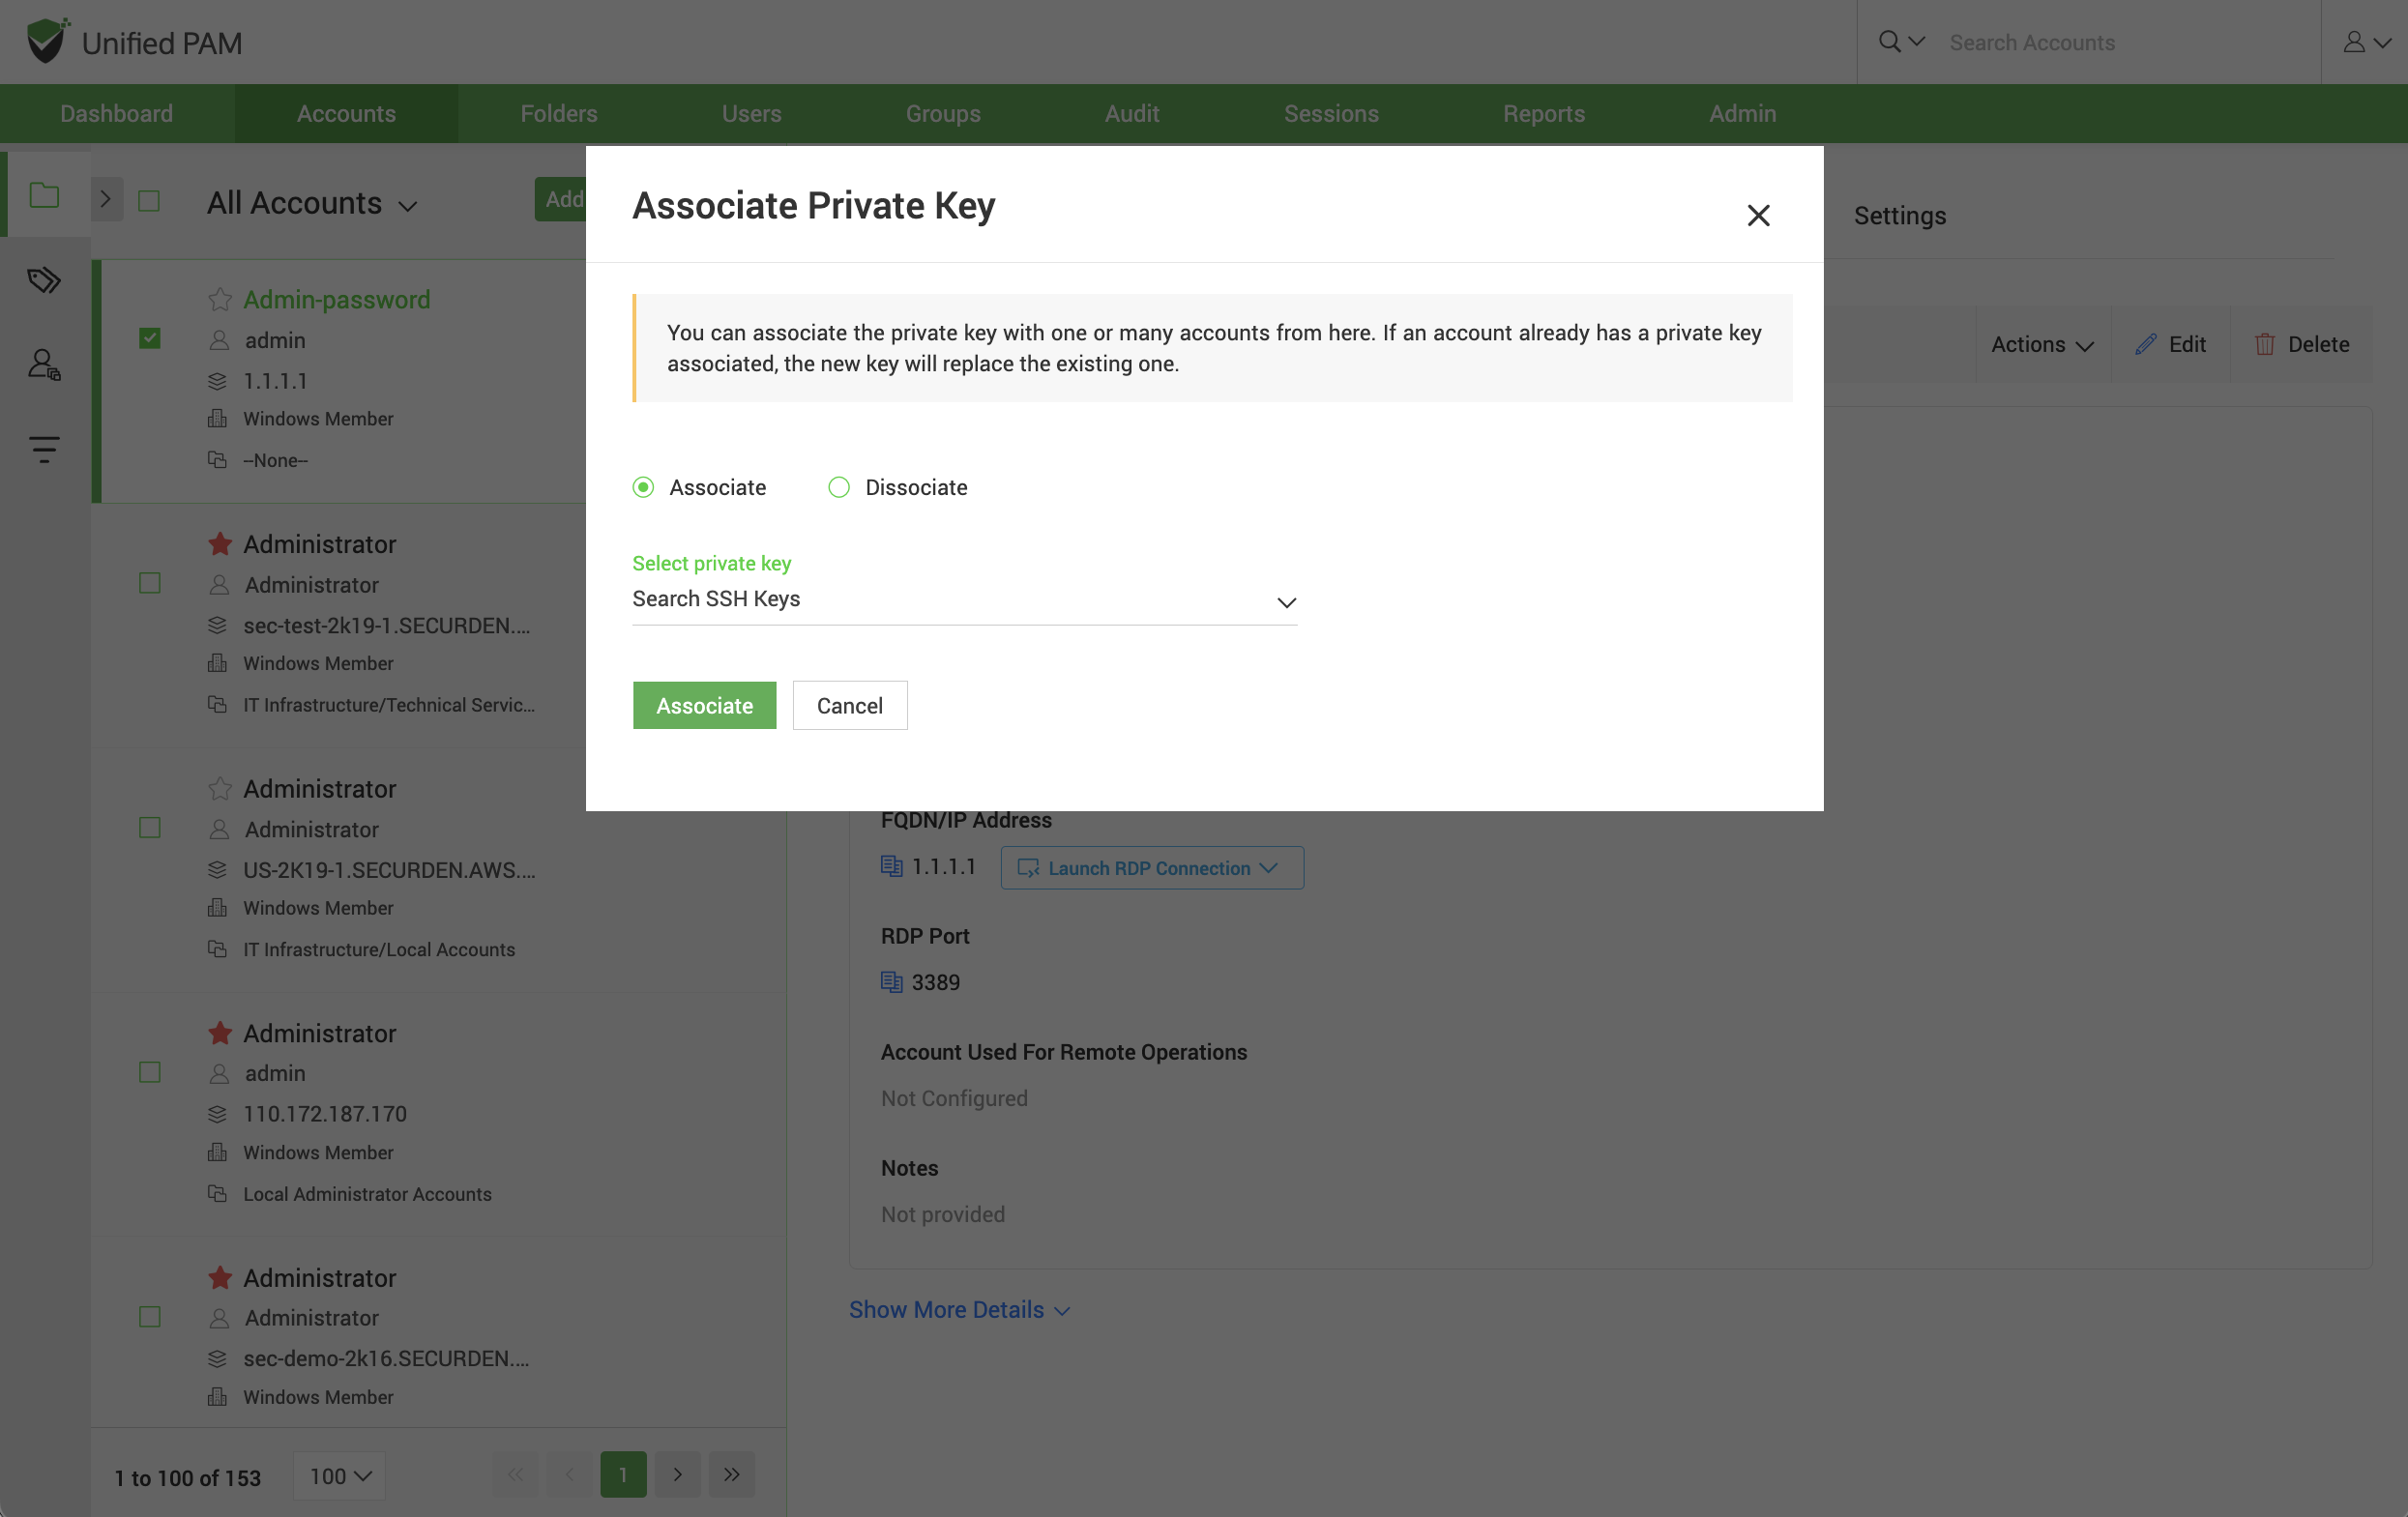
Associate Private Key
You can add an SSH key as an account and use that to launch connections to some other accounts. Navigate to Accounts >> More >> Associate Private Key. You can associate the private key with one or many accounts from this section. If an account already has a private key associated, the new key will replace the existing one. Select the key to be associated from the drop-down given and click Associate.
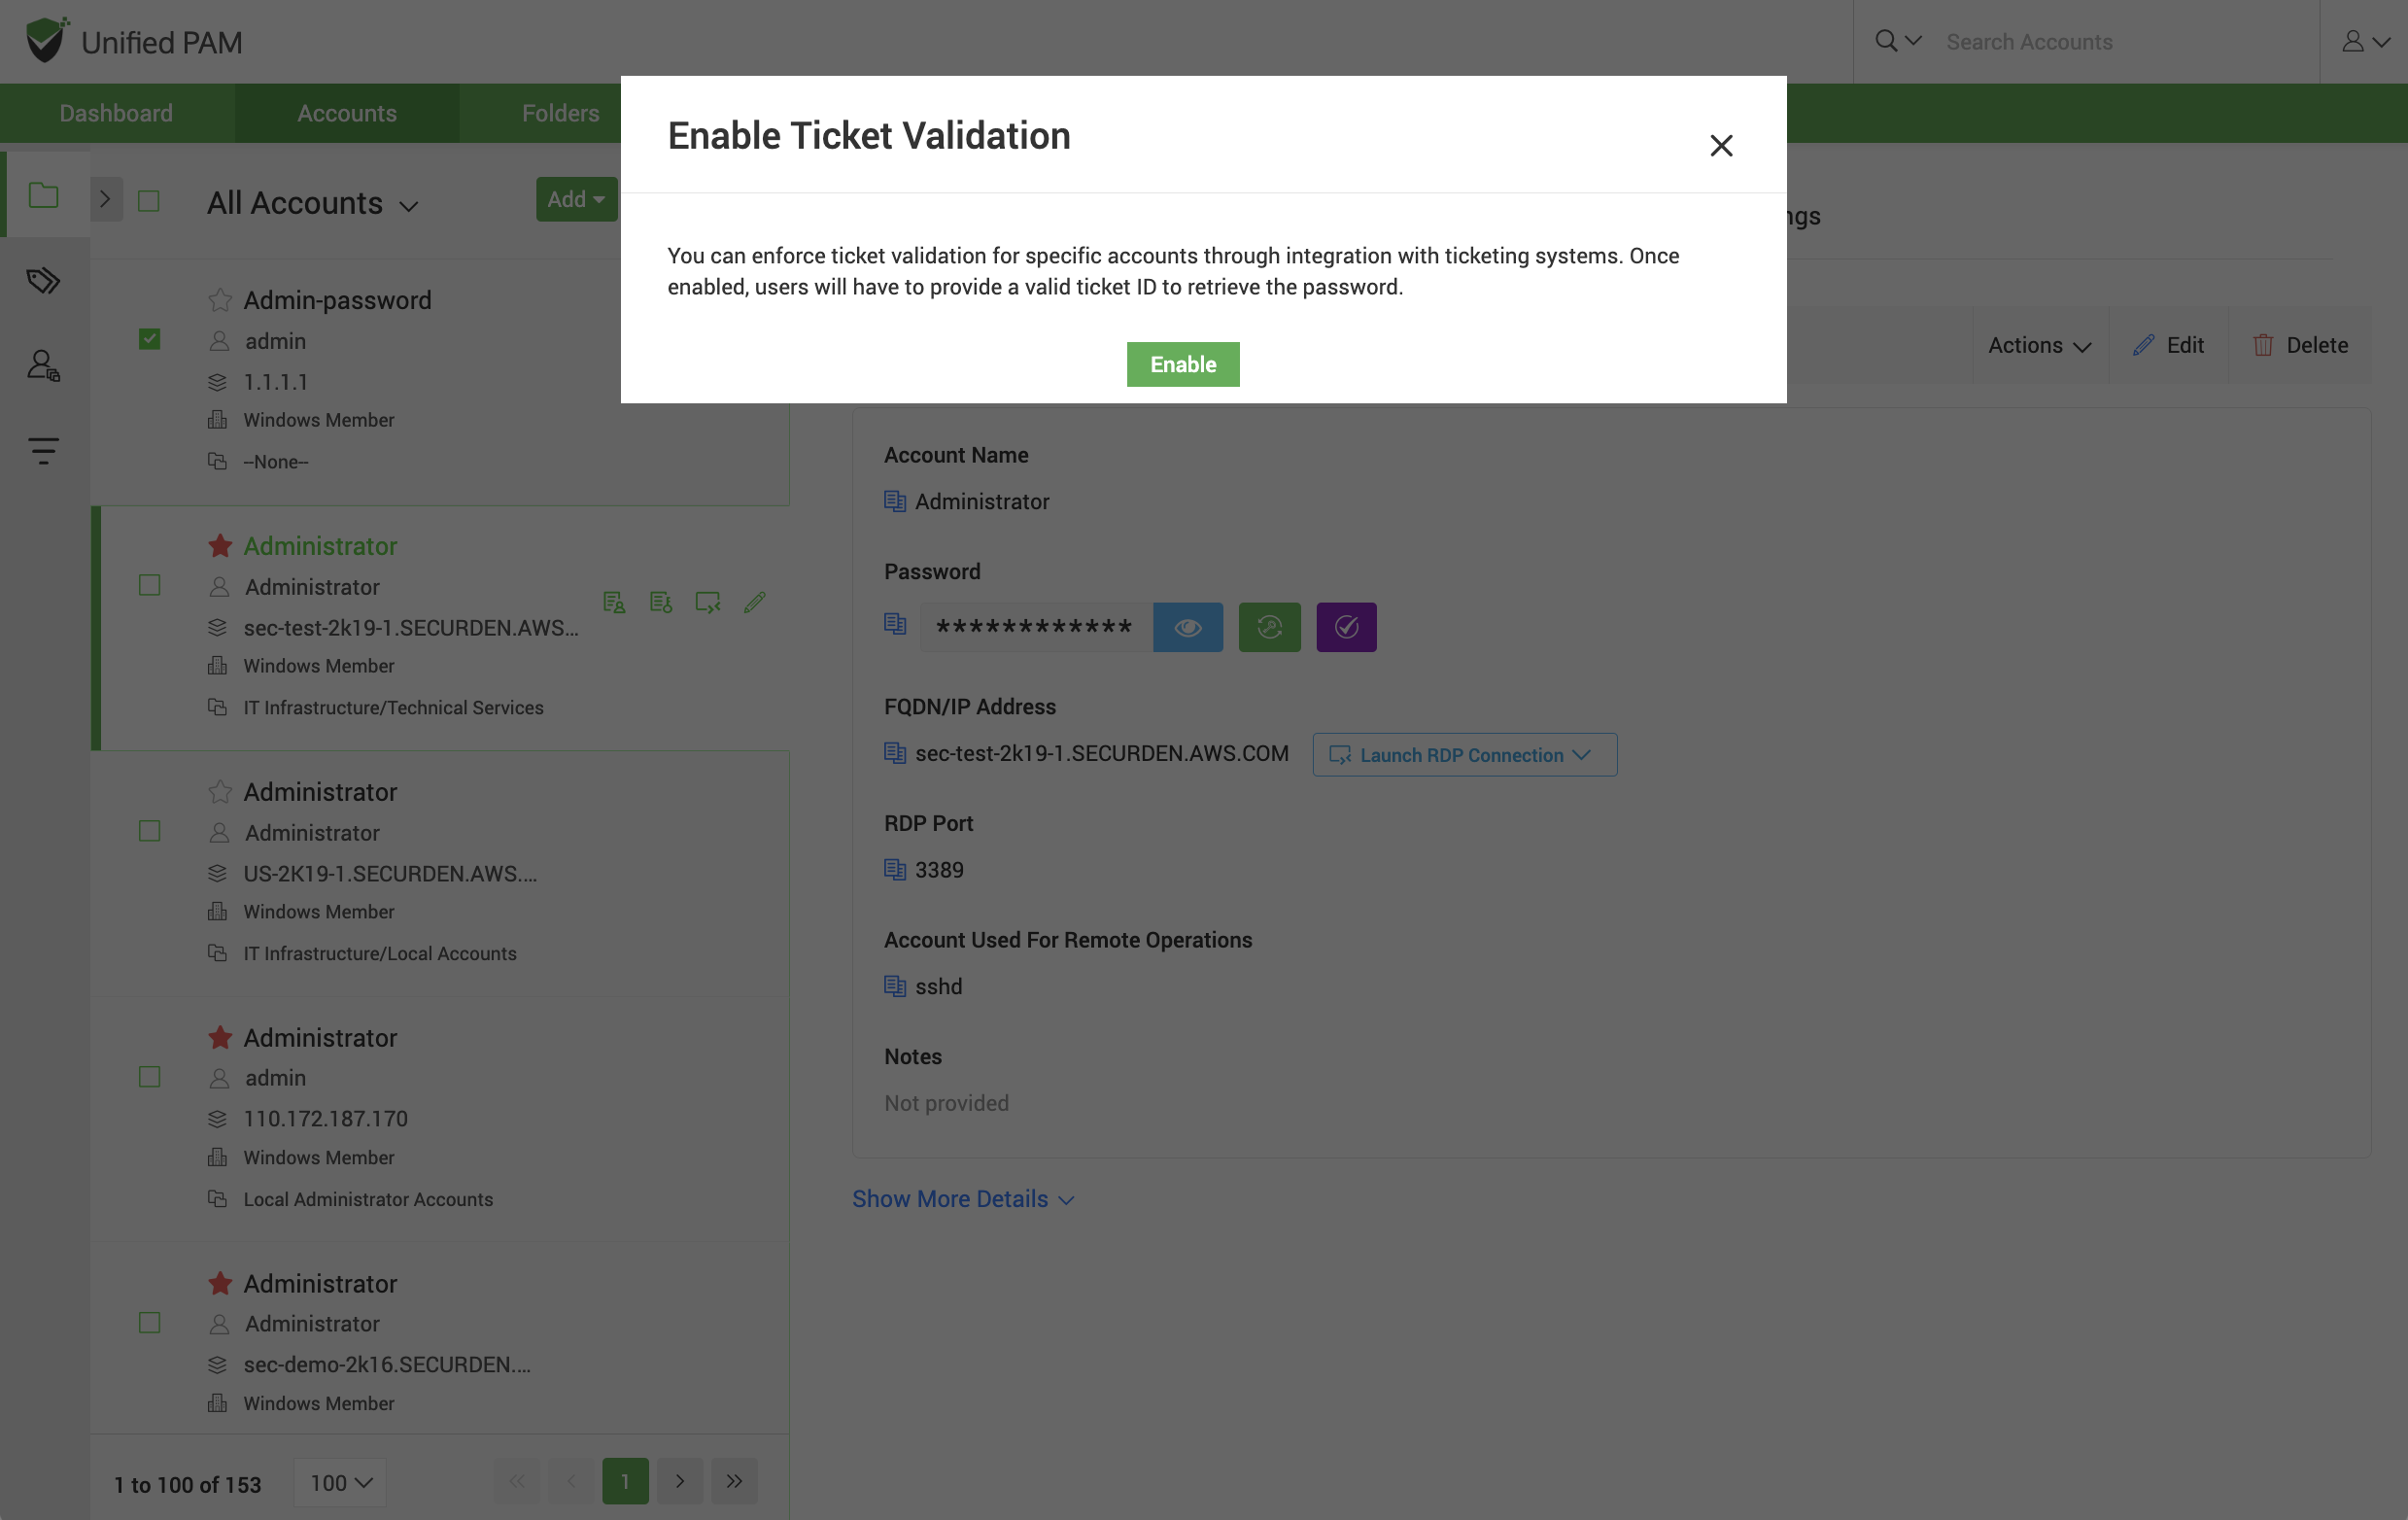
Enable Ticket Validation
Securden integrates with web-based ticketing systems. The integration helps trace specific activities like password retrieval in Securden to corresponding entries in the ticketing system. You can enforce ticket validation for specific accounts through integration with ticketing systems. Once enabled, users will have to provide a valid ticket ID to retrieve the password. Select the accounts for which you want to enforce ticket ID validation. Navigate to Accounts >> More >> Enable Ticket Validation and click Enable.
Disable Ticket Validation
Securden integrates with web-based ticketing systems. The integration helps trace specific activities like password retrieval in Securden to corresponding entries in the ticketing system. You can disable ticket validation for specific accounts. Once disabled, users will not be asked to provide a ticket ID to retrieve the password. Select the accounts for which you want to disable ticket ID validation. Navigate to Accounts >> More >> Disable Ticket Validation and click Disable.

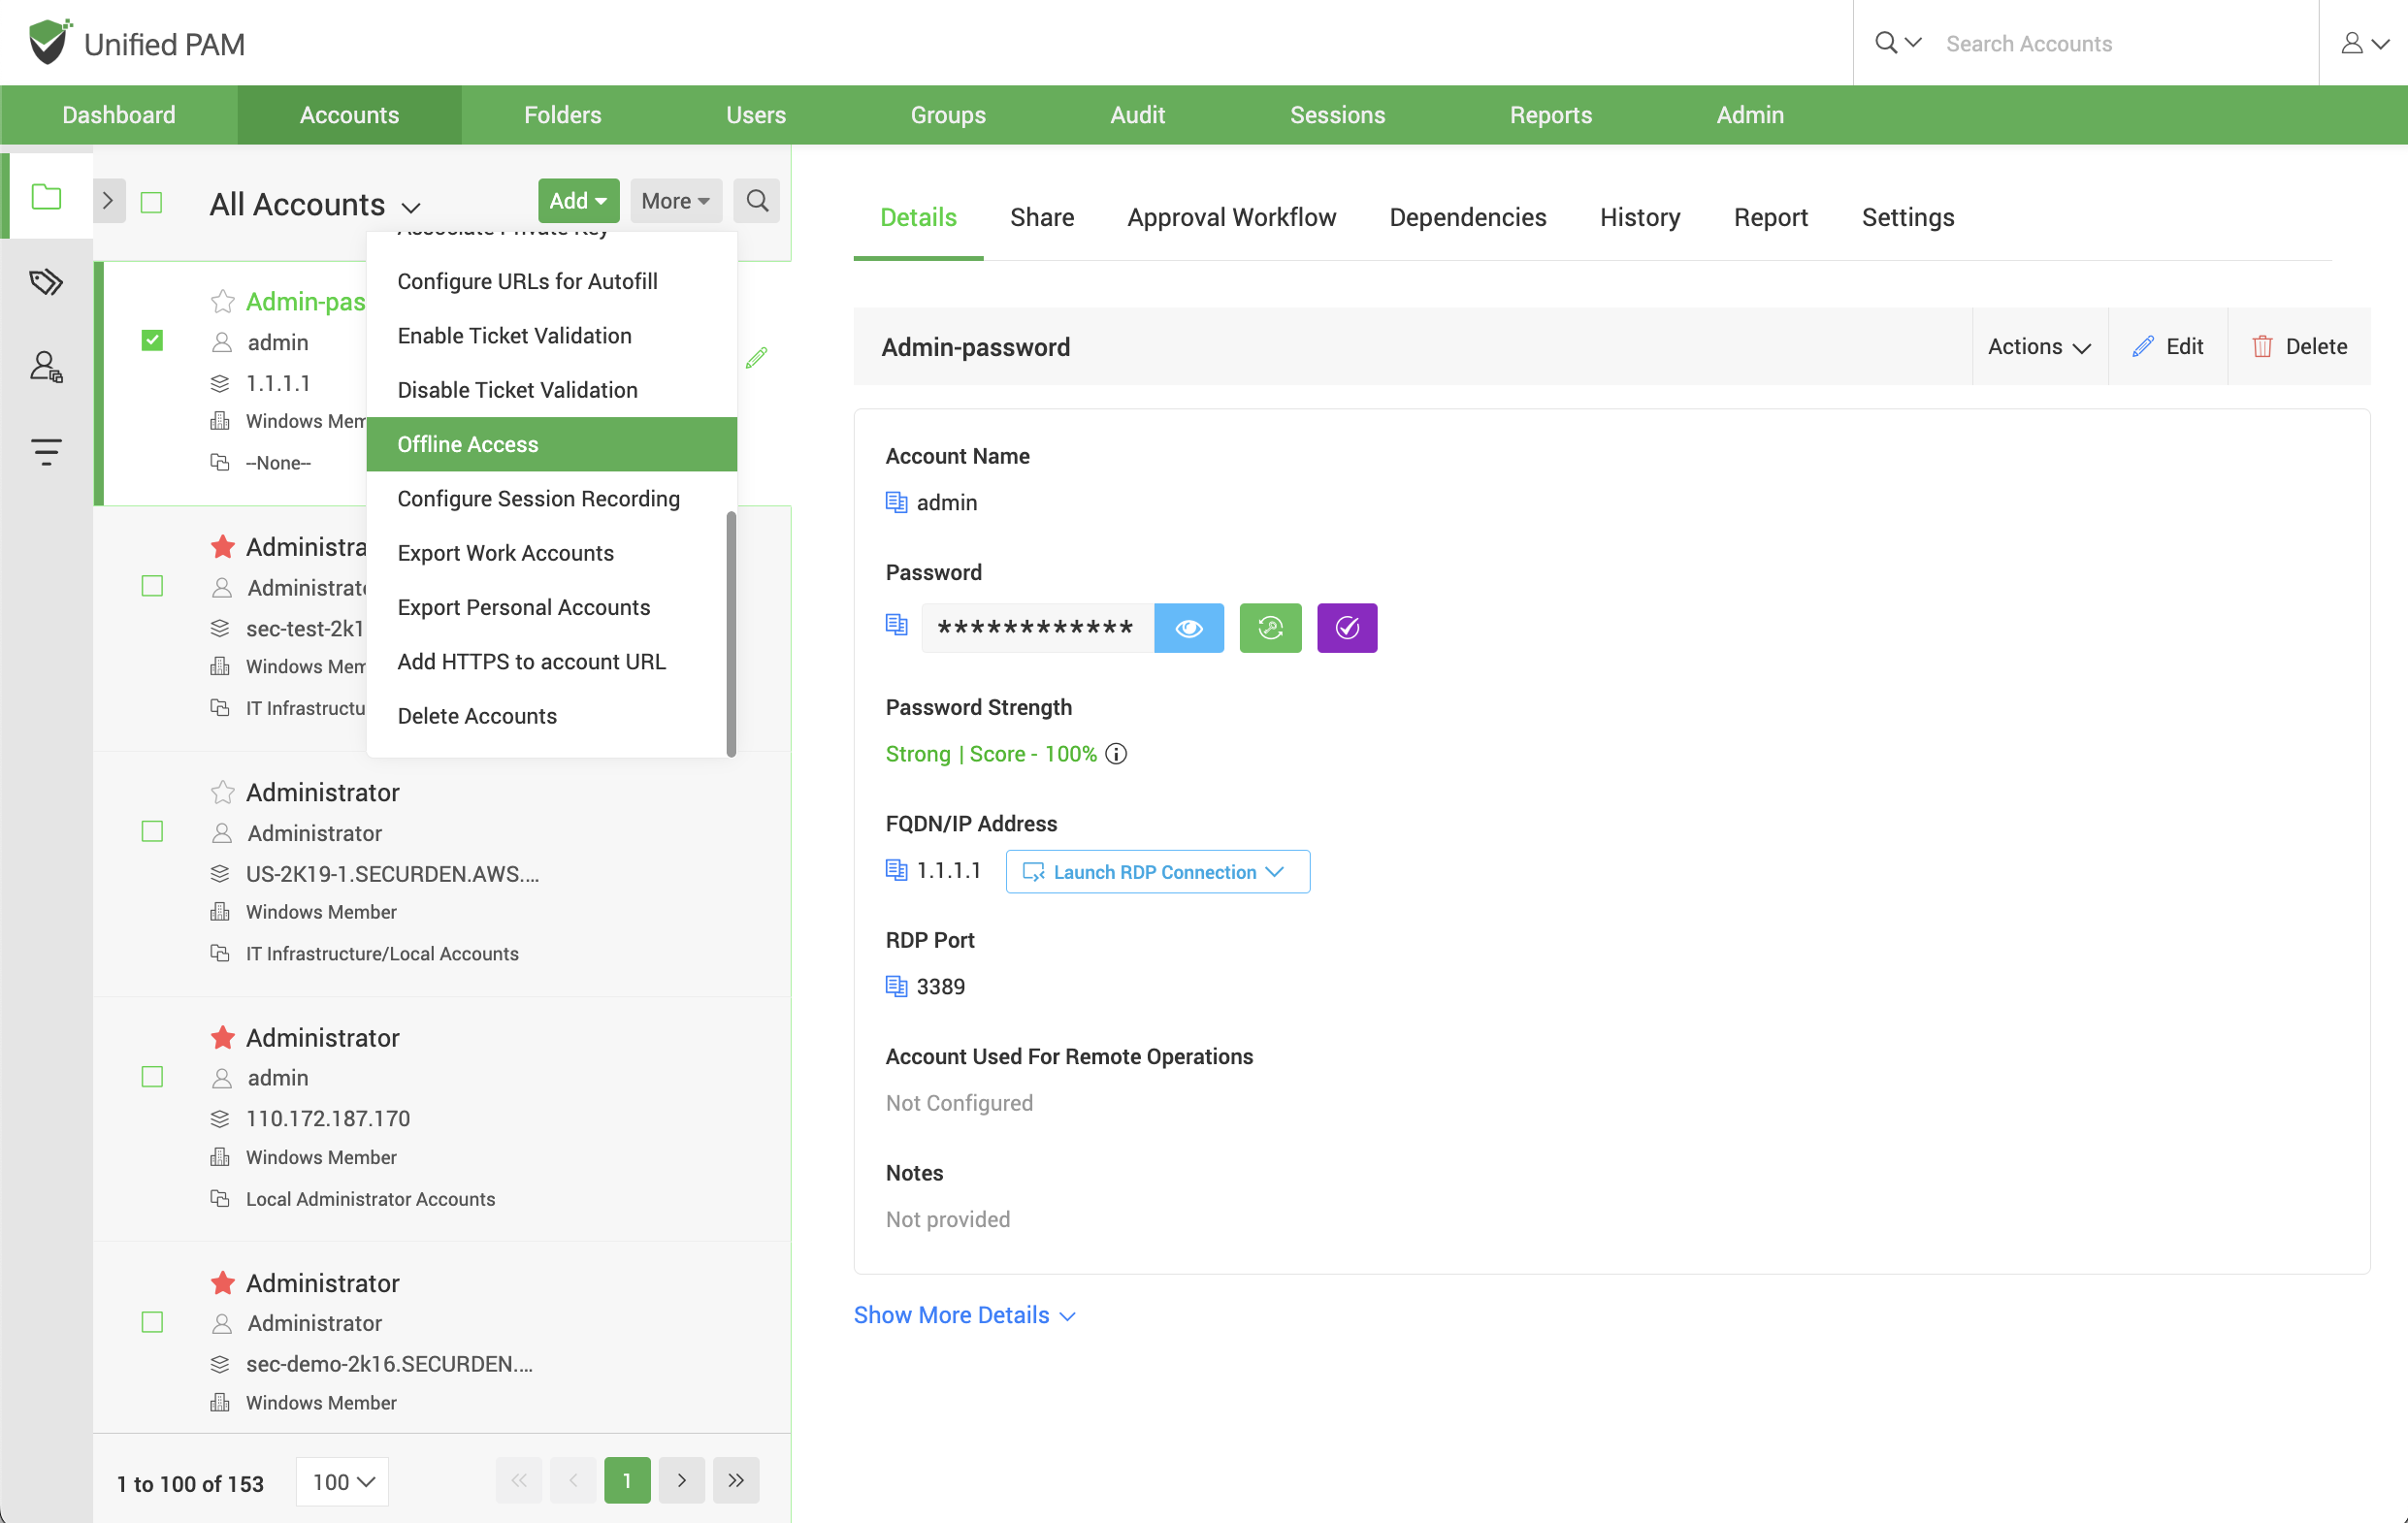
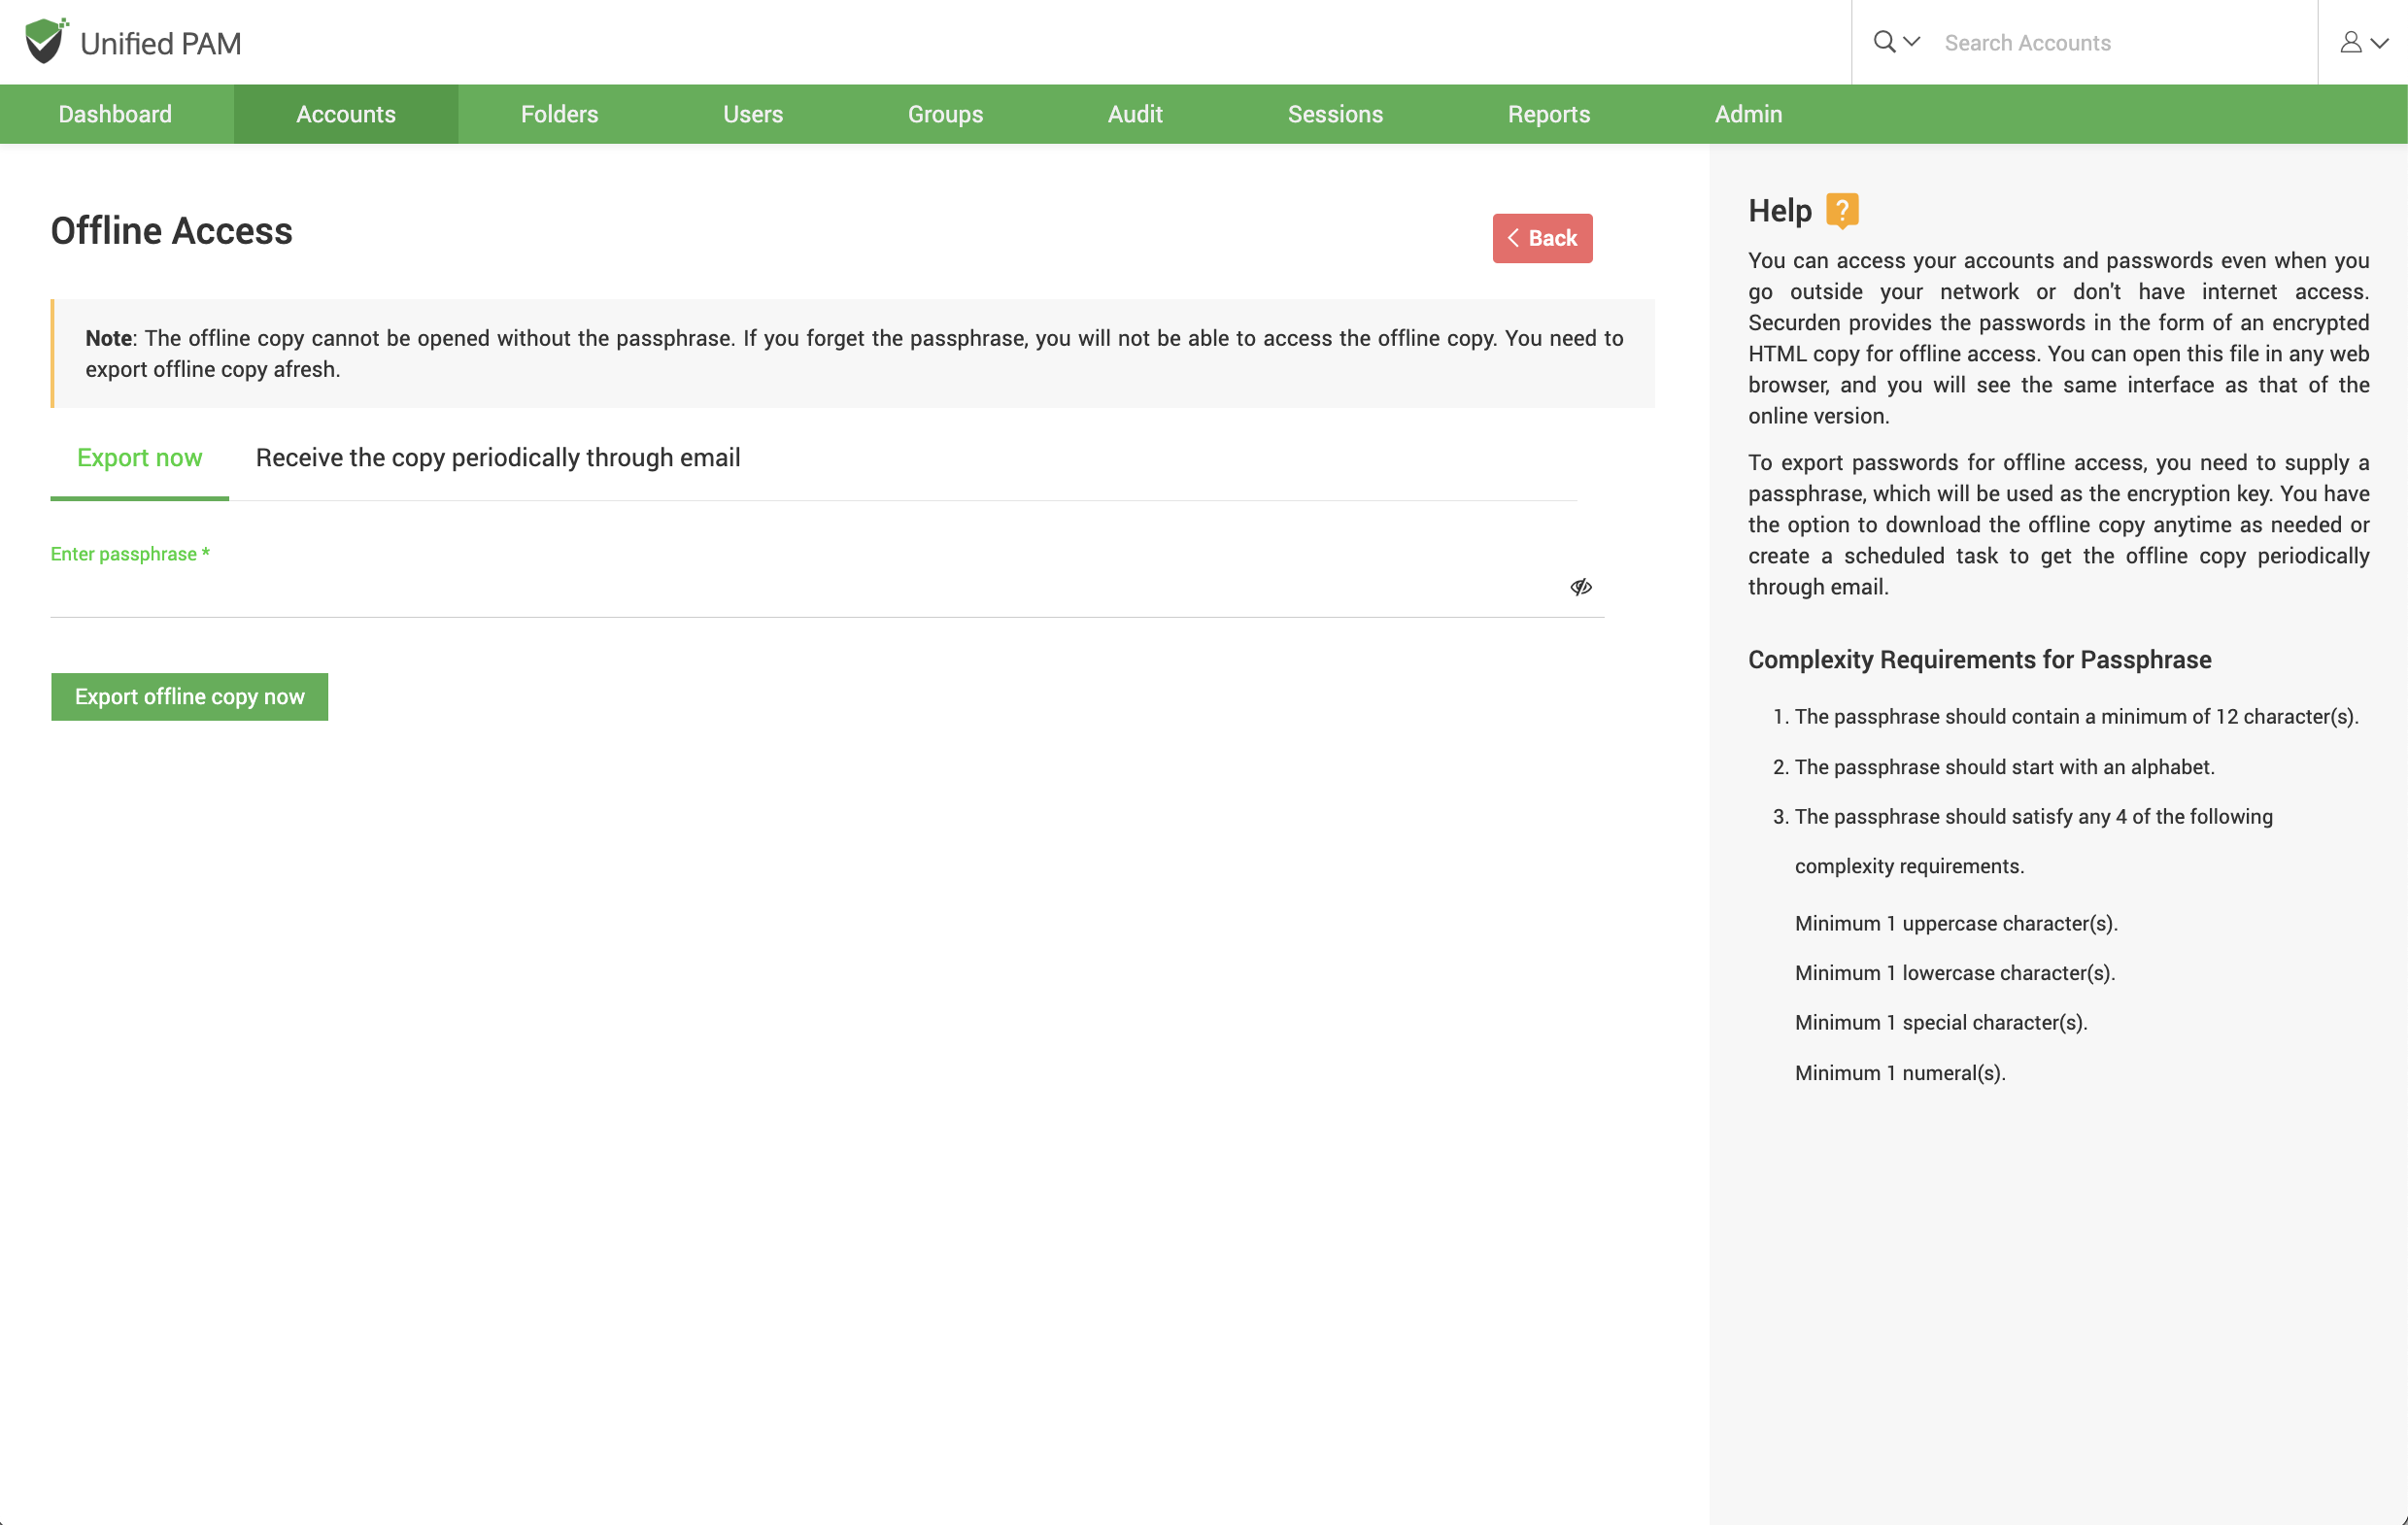
Offline Access
As an end user, you can access your accounts and passwords even when you go outside your network or don't have internet access. Securden provides the passwords in the form of an encrypted HTML copy for offline access. You can open this file in any web browser, and you will see the same interface as that of the online version. To export passwords for offline access, you need to supply a passphrase, which will be used as the encryption key. You have the option to download the offline copy anytime as needed or create a scheduled task to get the offline copy periodically through email.
Note
The offline copy cannot be opened without the passphrase. If you forget the passphrase, you will not be able to access the offline copy. You need to export offline copy afresh.
End-users can save an offline copy of all the accounts they have access to. Users need to navigate to Accounts >> More >> Offline Access.
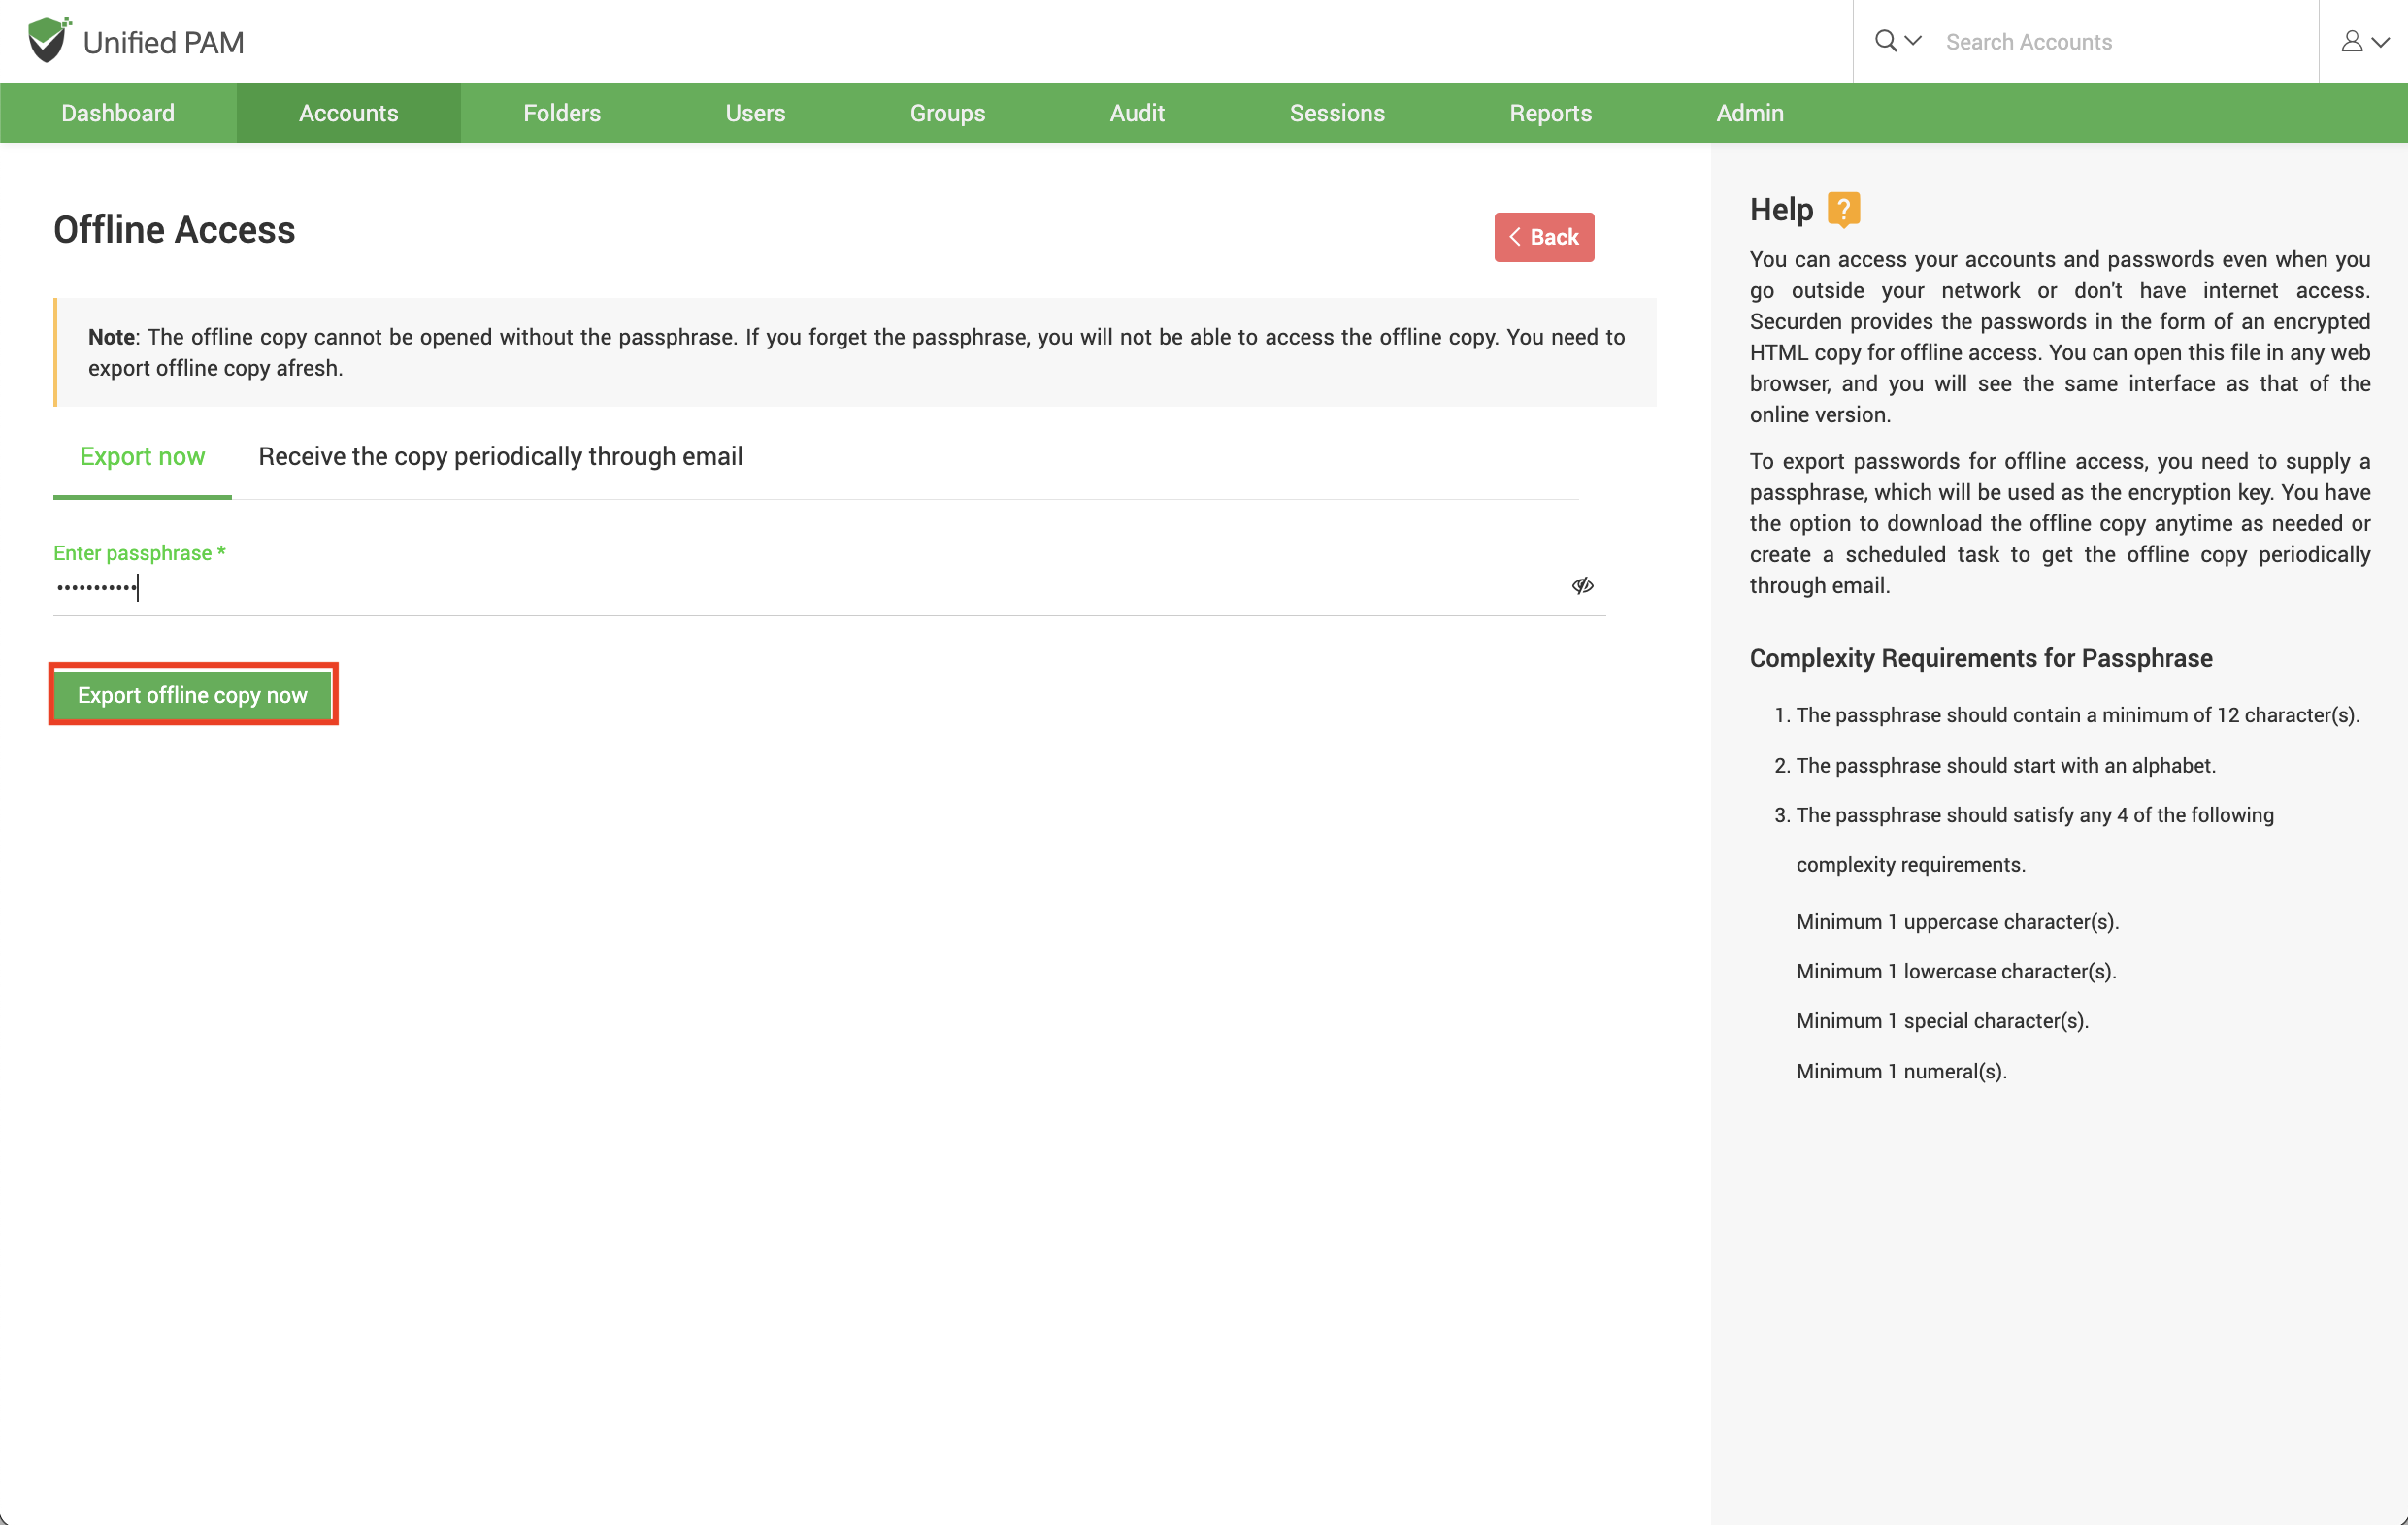
Users can export the account at once from the Export now tab, they need to enter a passphrase while exporting the offline copy. This passphrase will be used to open the offline copy of passwords.
Once you have decided a strong passphrase, key it in and click Export offline copy now.
Receive the offline copy through email
Users can choose to export their passwords in an offline copy to their email id. Users who wish to export a copy once can select Export Once.
They then need to select the date and time at which an offline copy of passwords should be sent to them.
Once all the fields are selected, they can click Save.
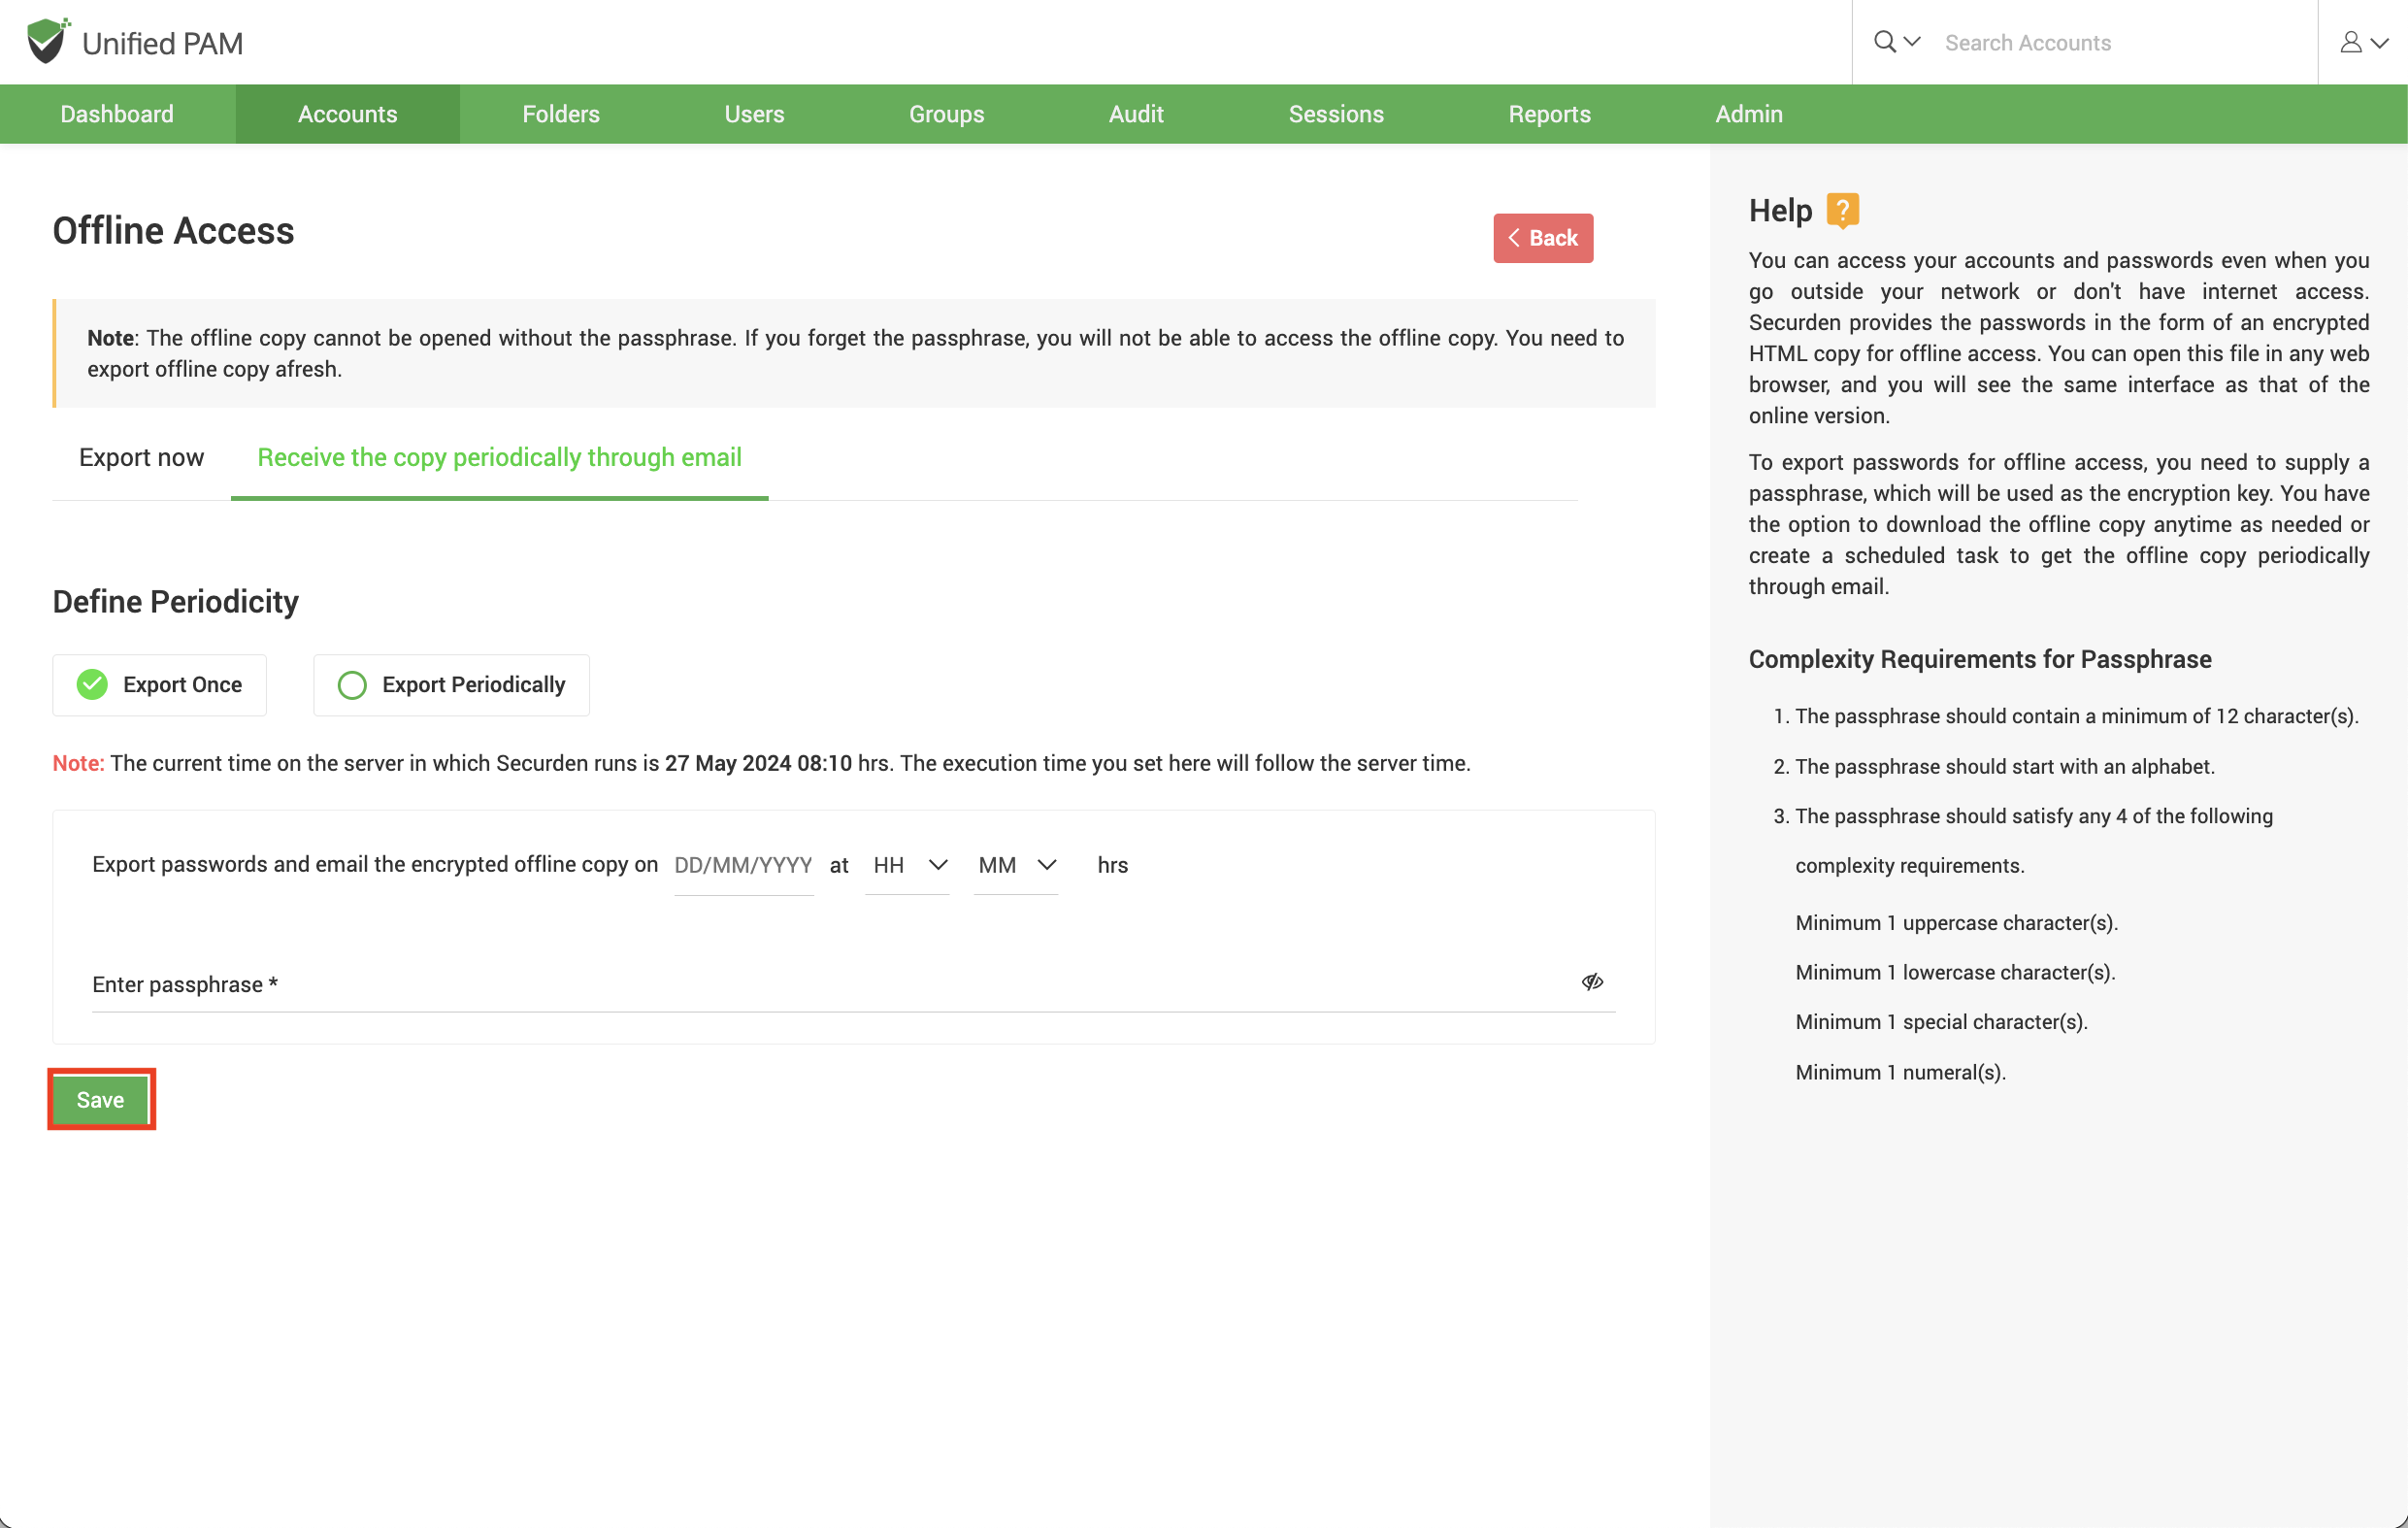
Users who wish to periodically export their passwords can select Export Periodically.
They then need to select the date and time at which they receive the first offline copy of passwords.
Users must then specify the periodicity at which they receive subsequent copies. This can be set as an interval of hours, days, or months.
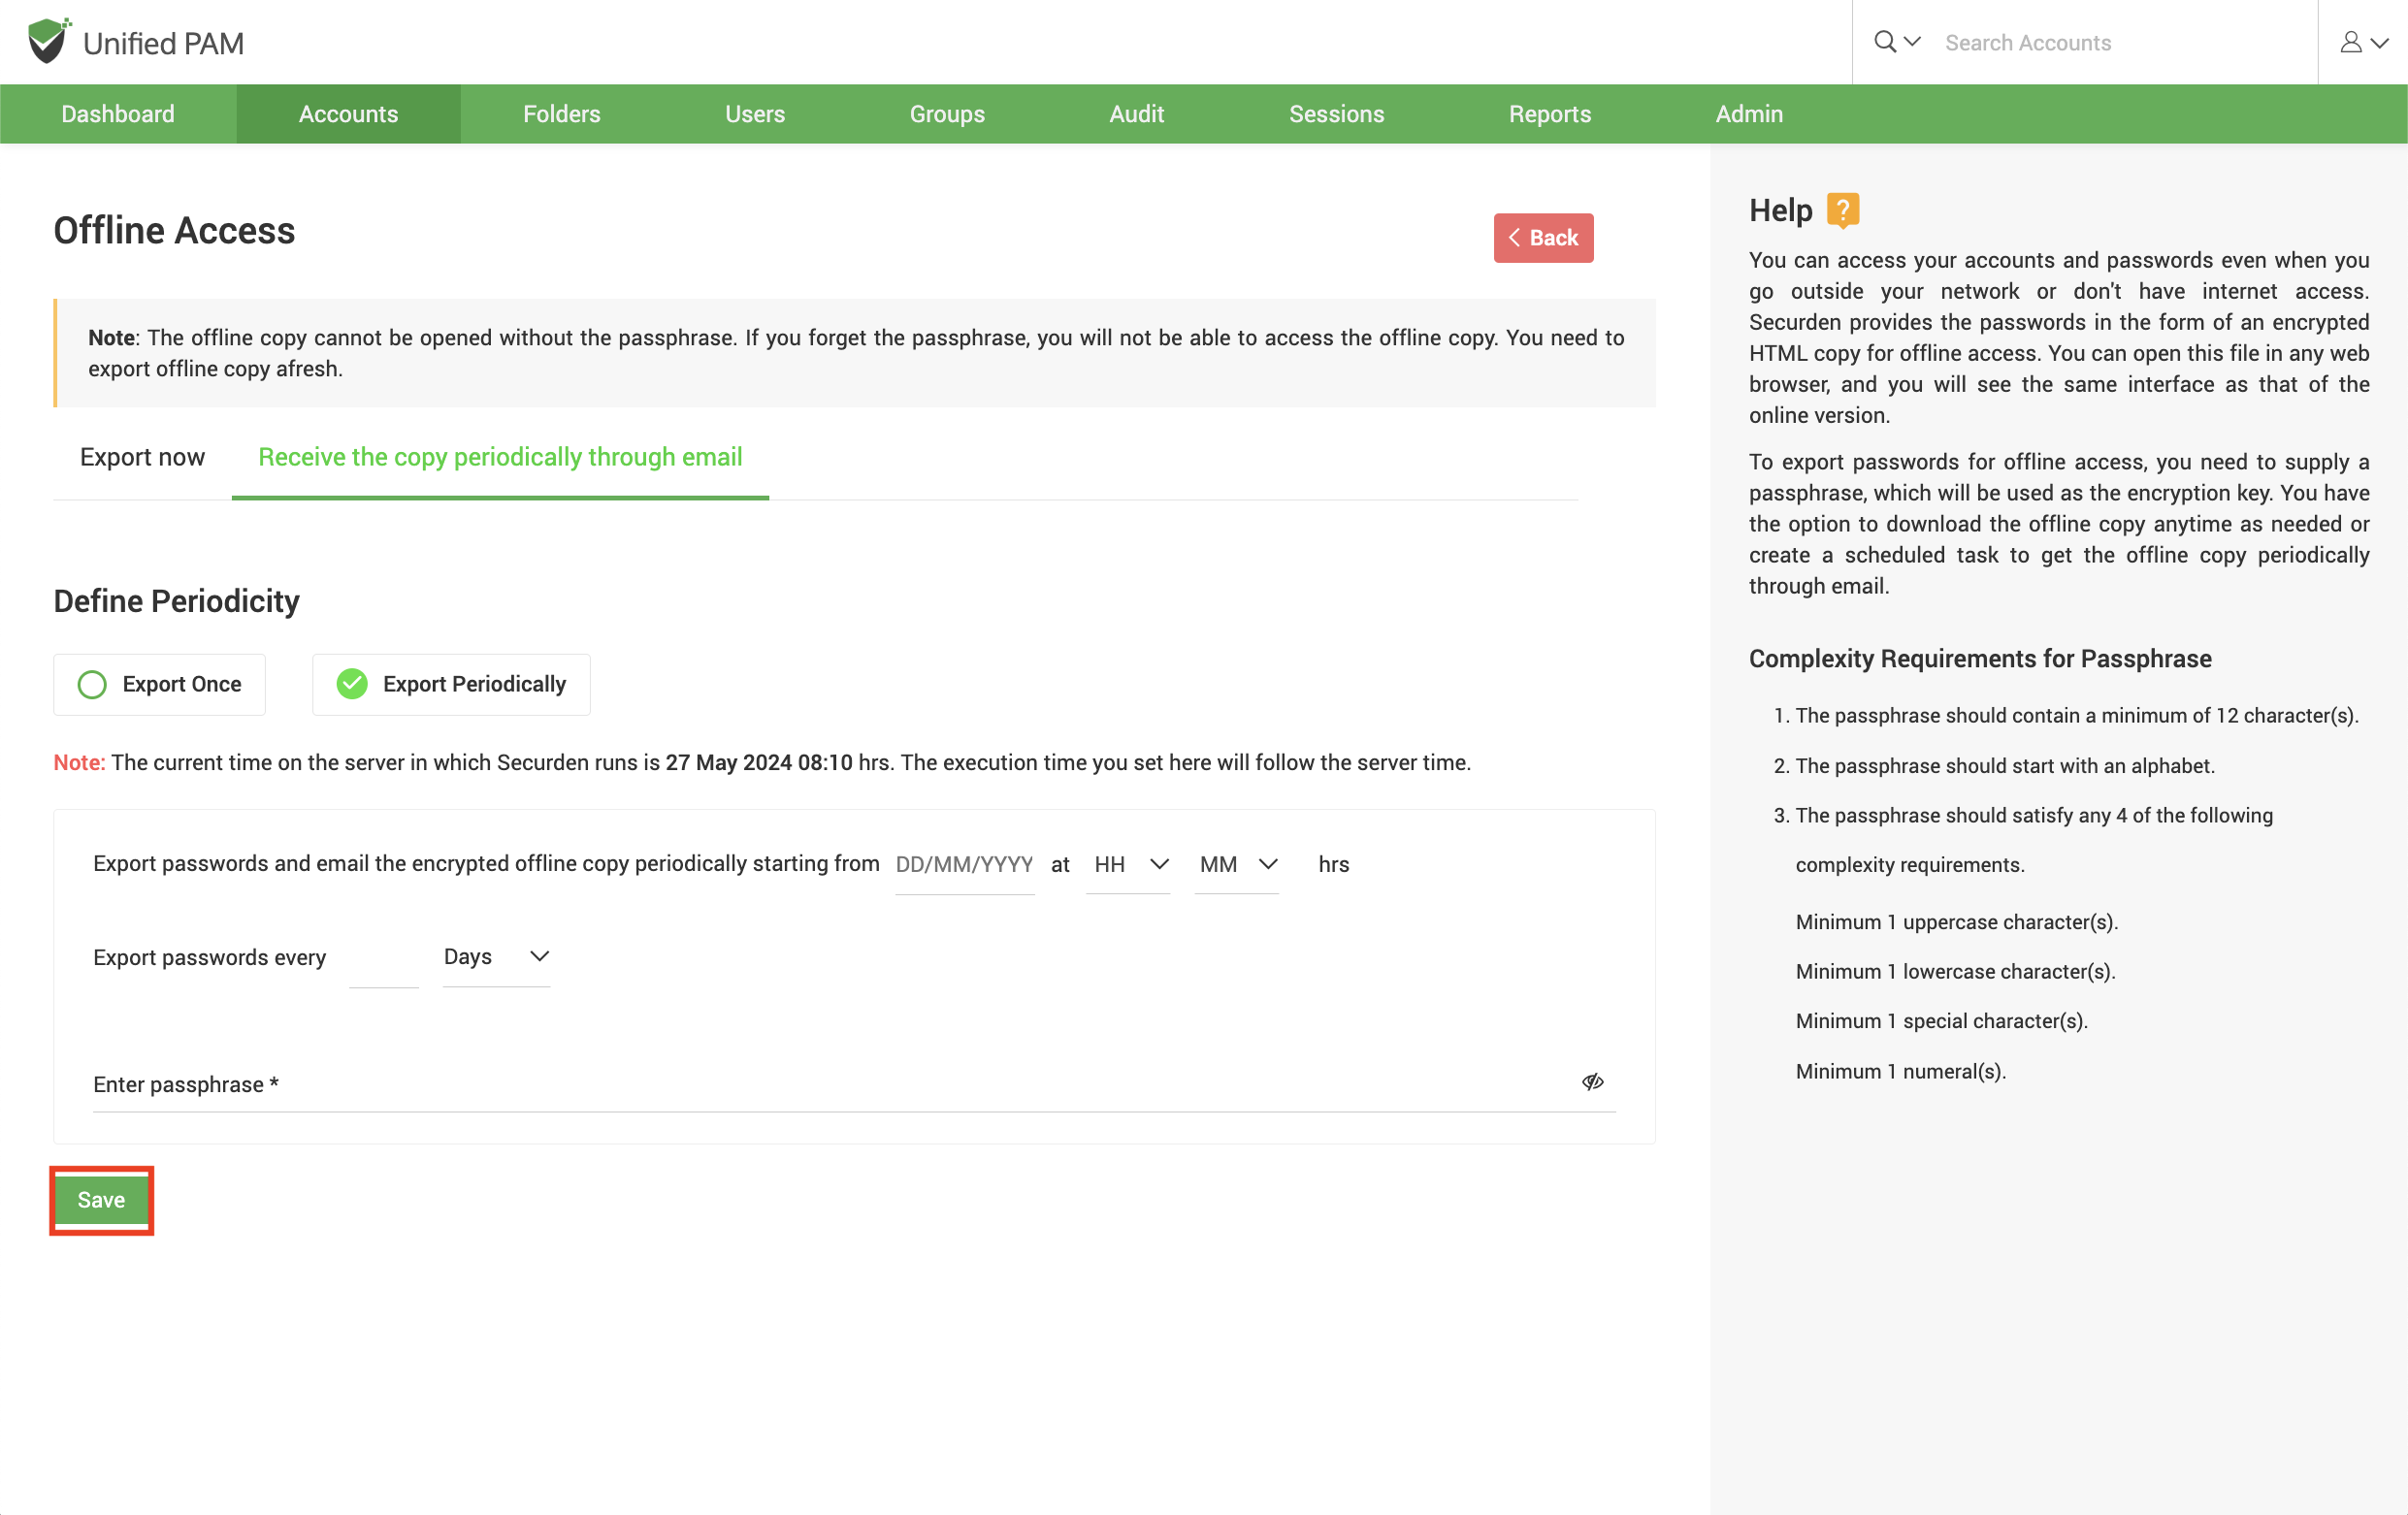
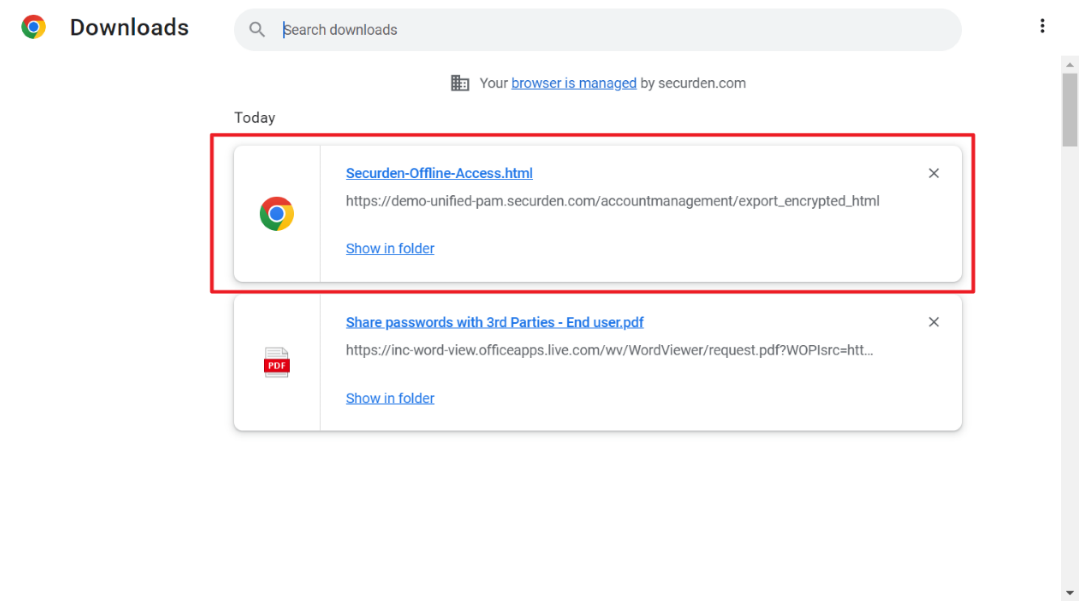
Once all the fields are selected, they can click Save. Users can access the downloaded HTML or access it from their email id.
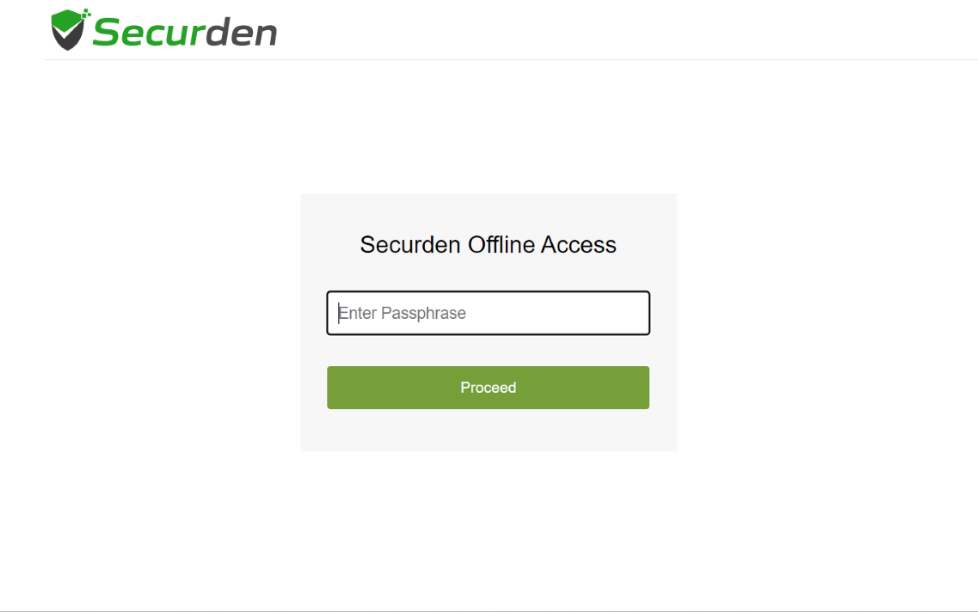
To open the encrypted HTML file, users have to enter the passphrase that they keyed in on configuring offline access.
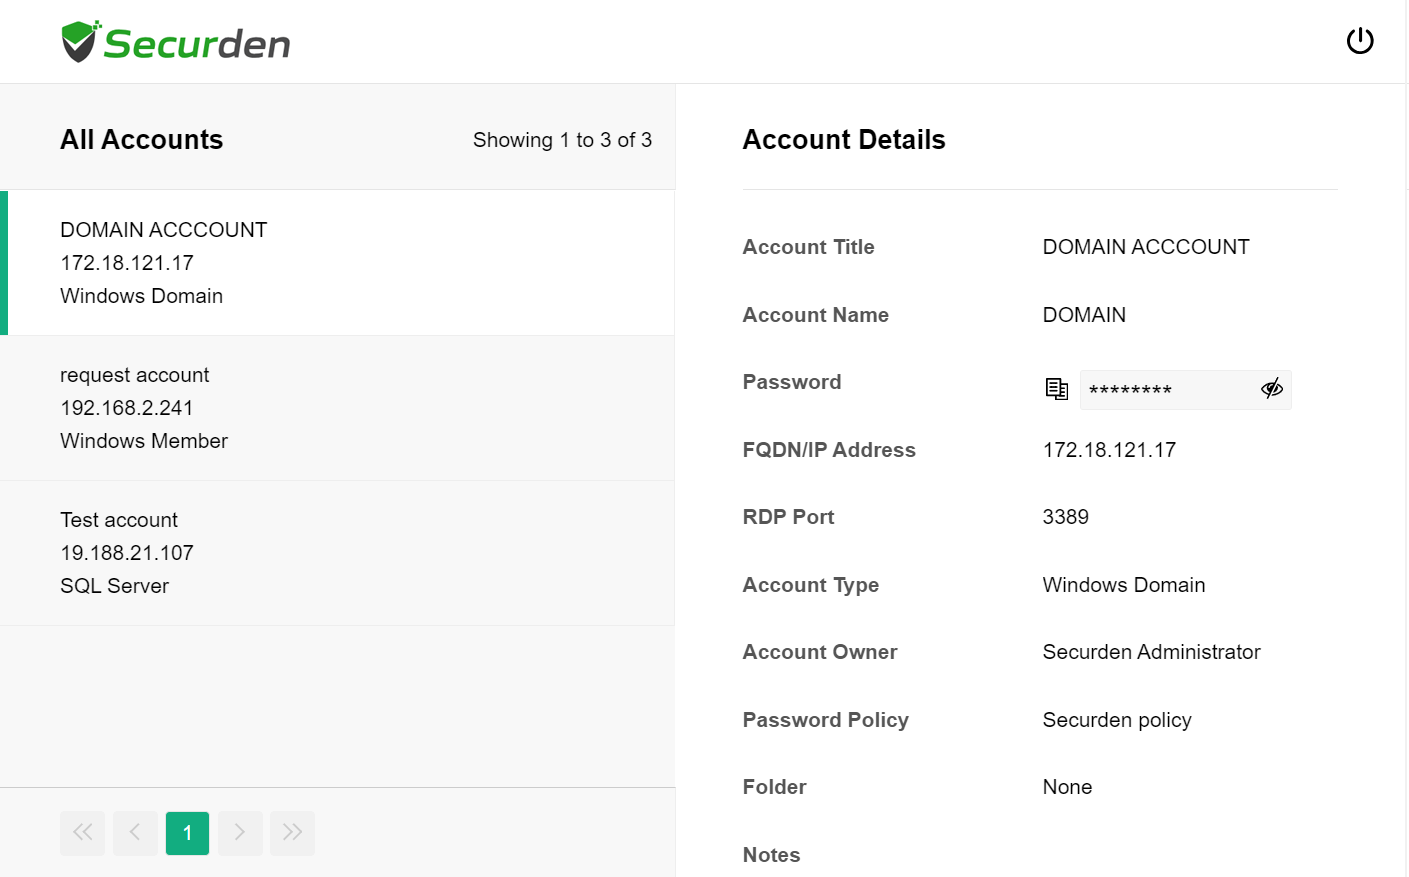
On successfully entering the passphrase, users can access all their passwords offline.
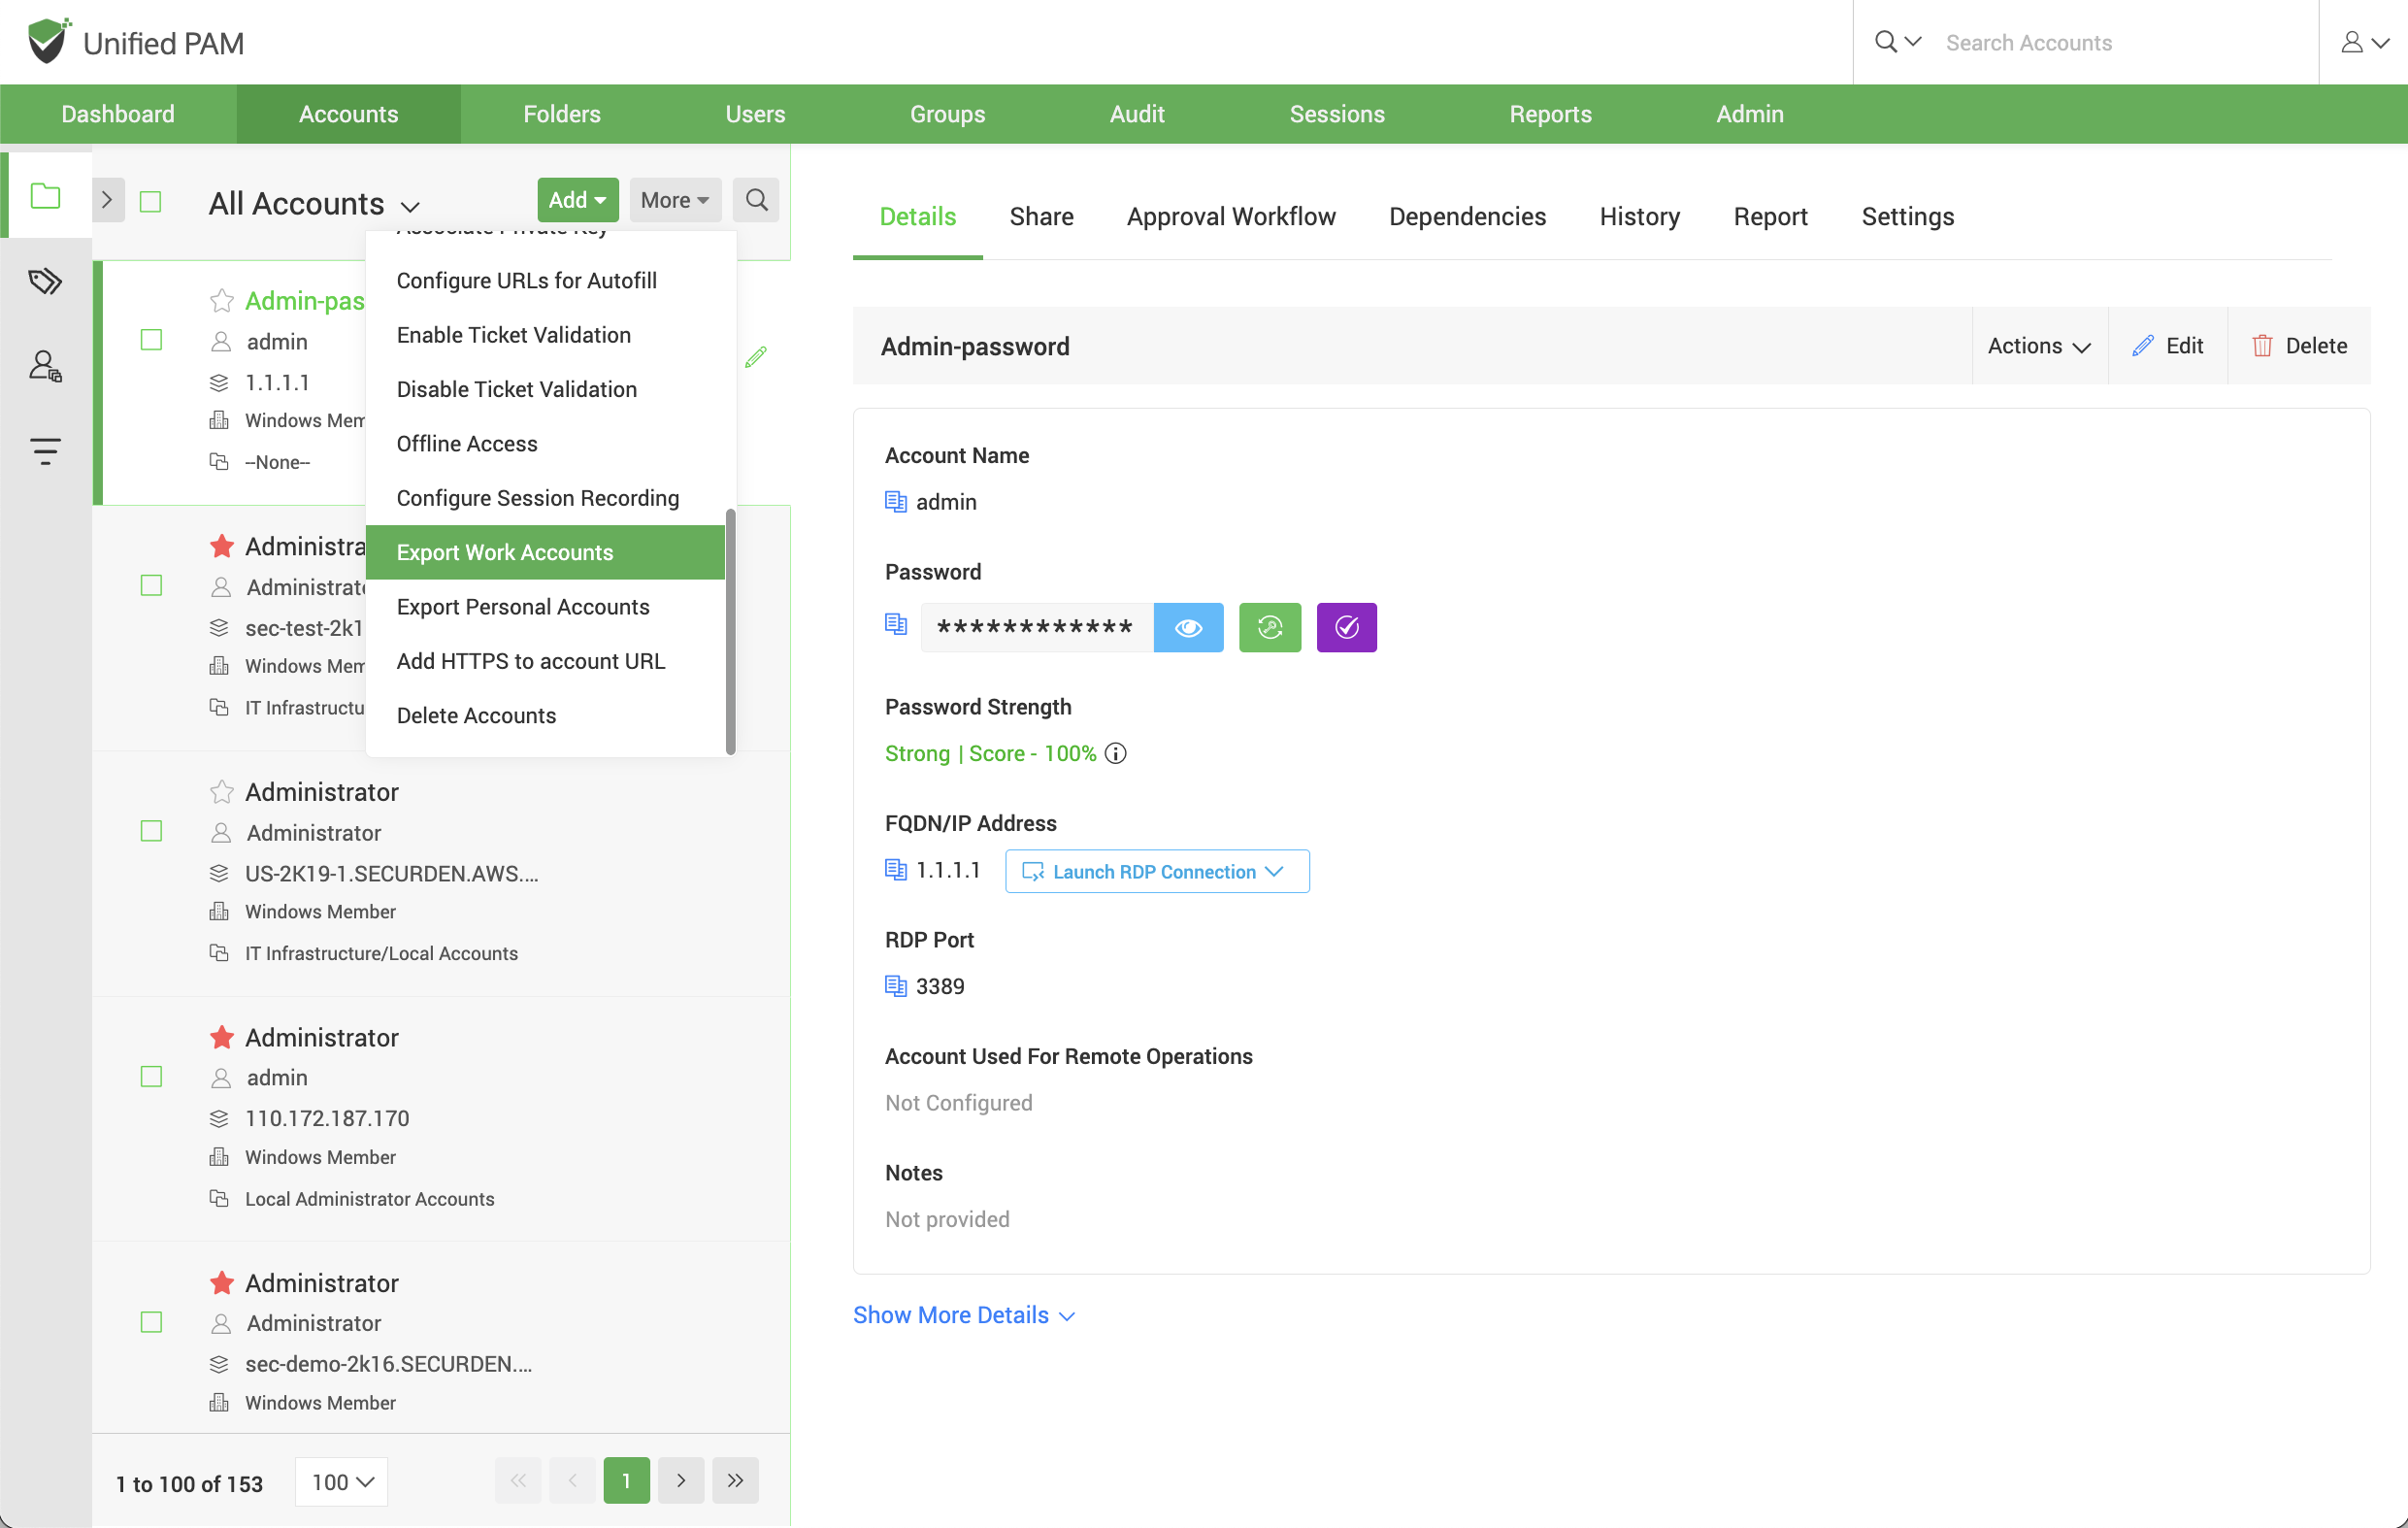
Export Work Accounts
You can export all your accounts (owned and shared) to an XLSX file. You have the option to mask the password column in the exported file. The entries in the XLSX file will be segregated based on account types in separate sheets. Navigate to Accounts >> More >> Export Work Accounts. Choose whether to mask the password column and export.
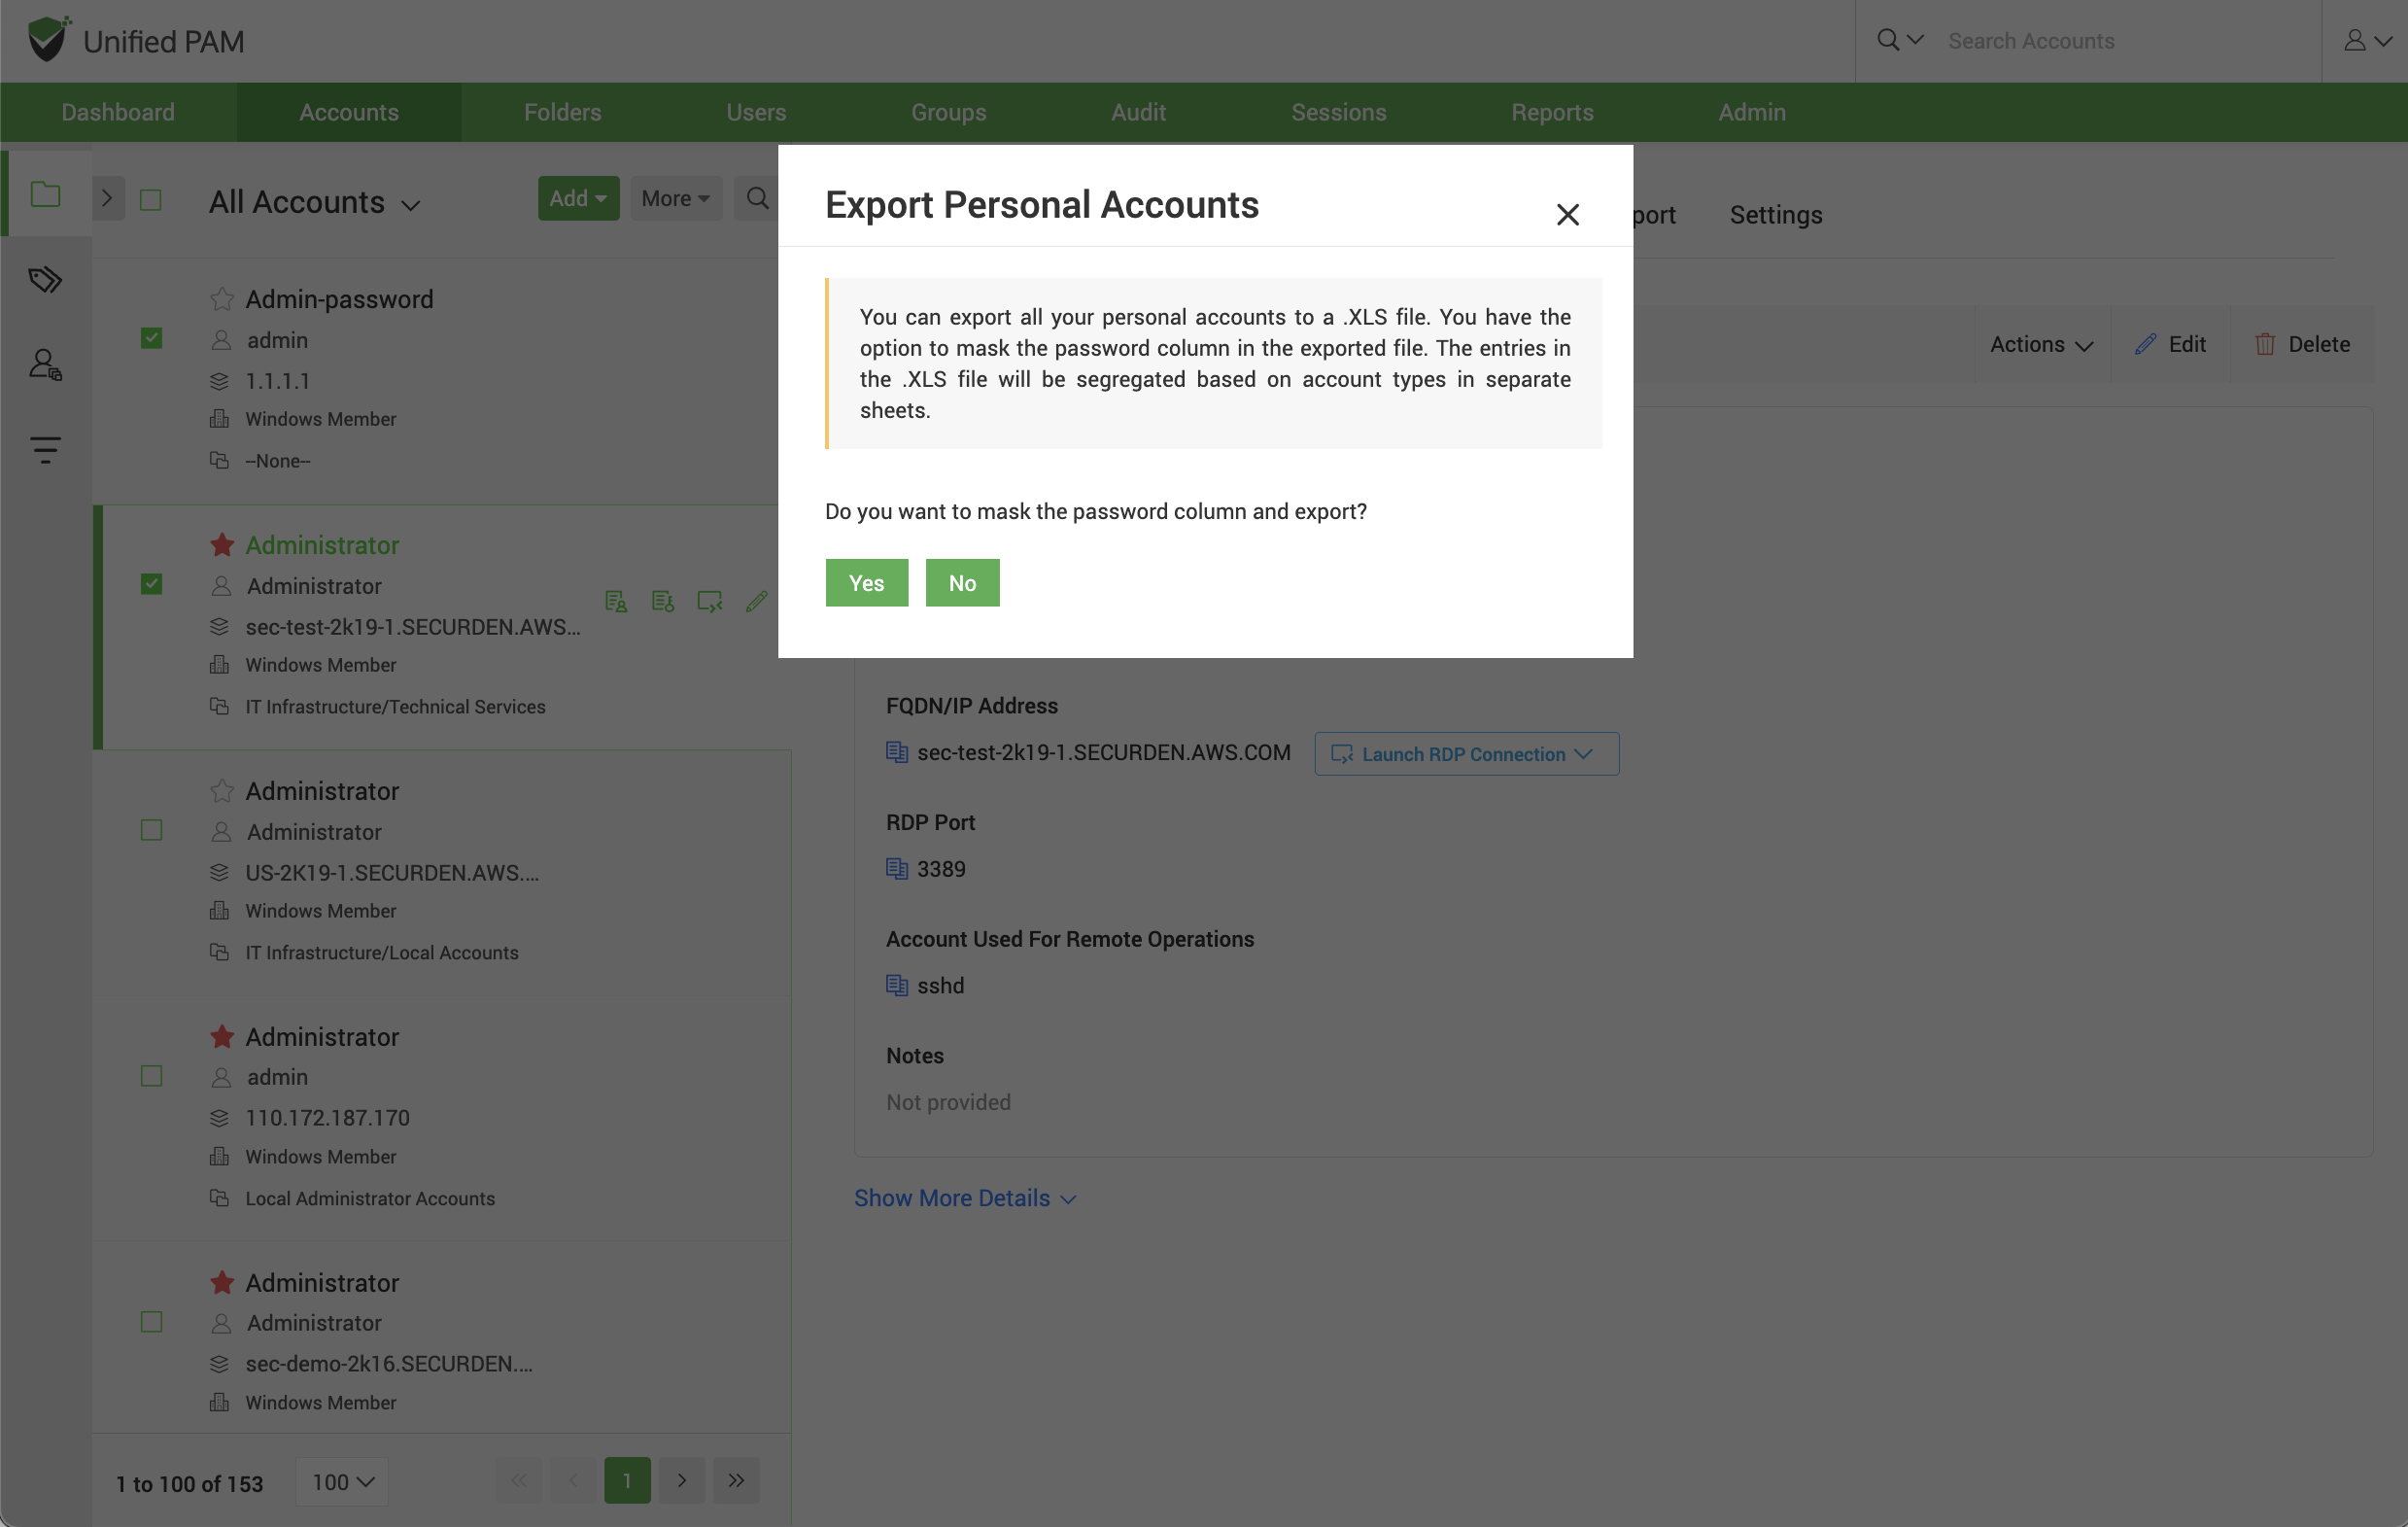
Export Personal Accounts
You can export all your personal accounts to an XLSX file. You have the option to mask the password column in the exported file. The entries in the XLSX file will be segregated based on account types in separate sheets. Navigate to Accounts >> More >> Export Personal Accounts. Click Yes to mask the password column and export.
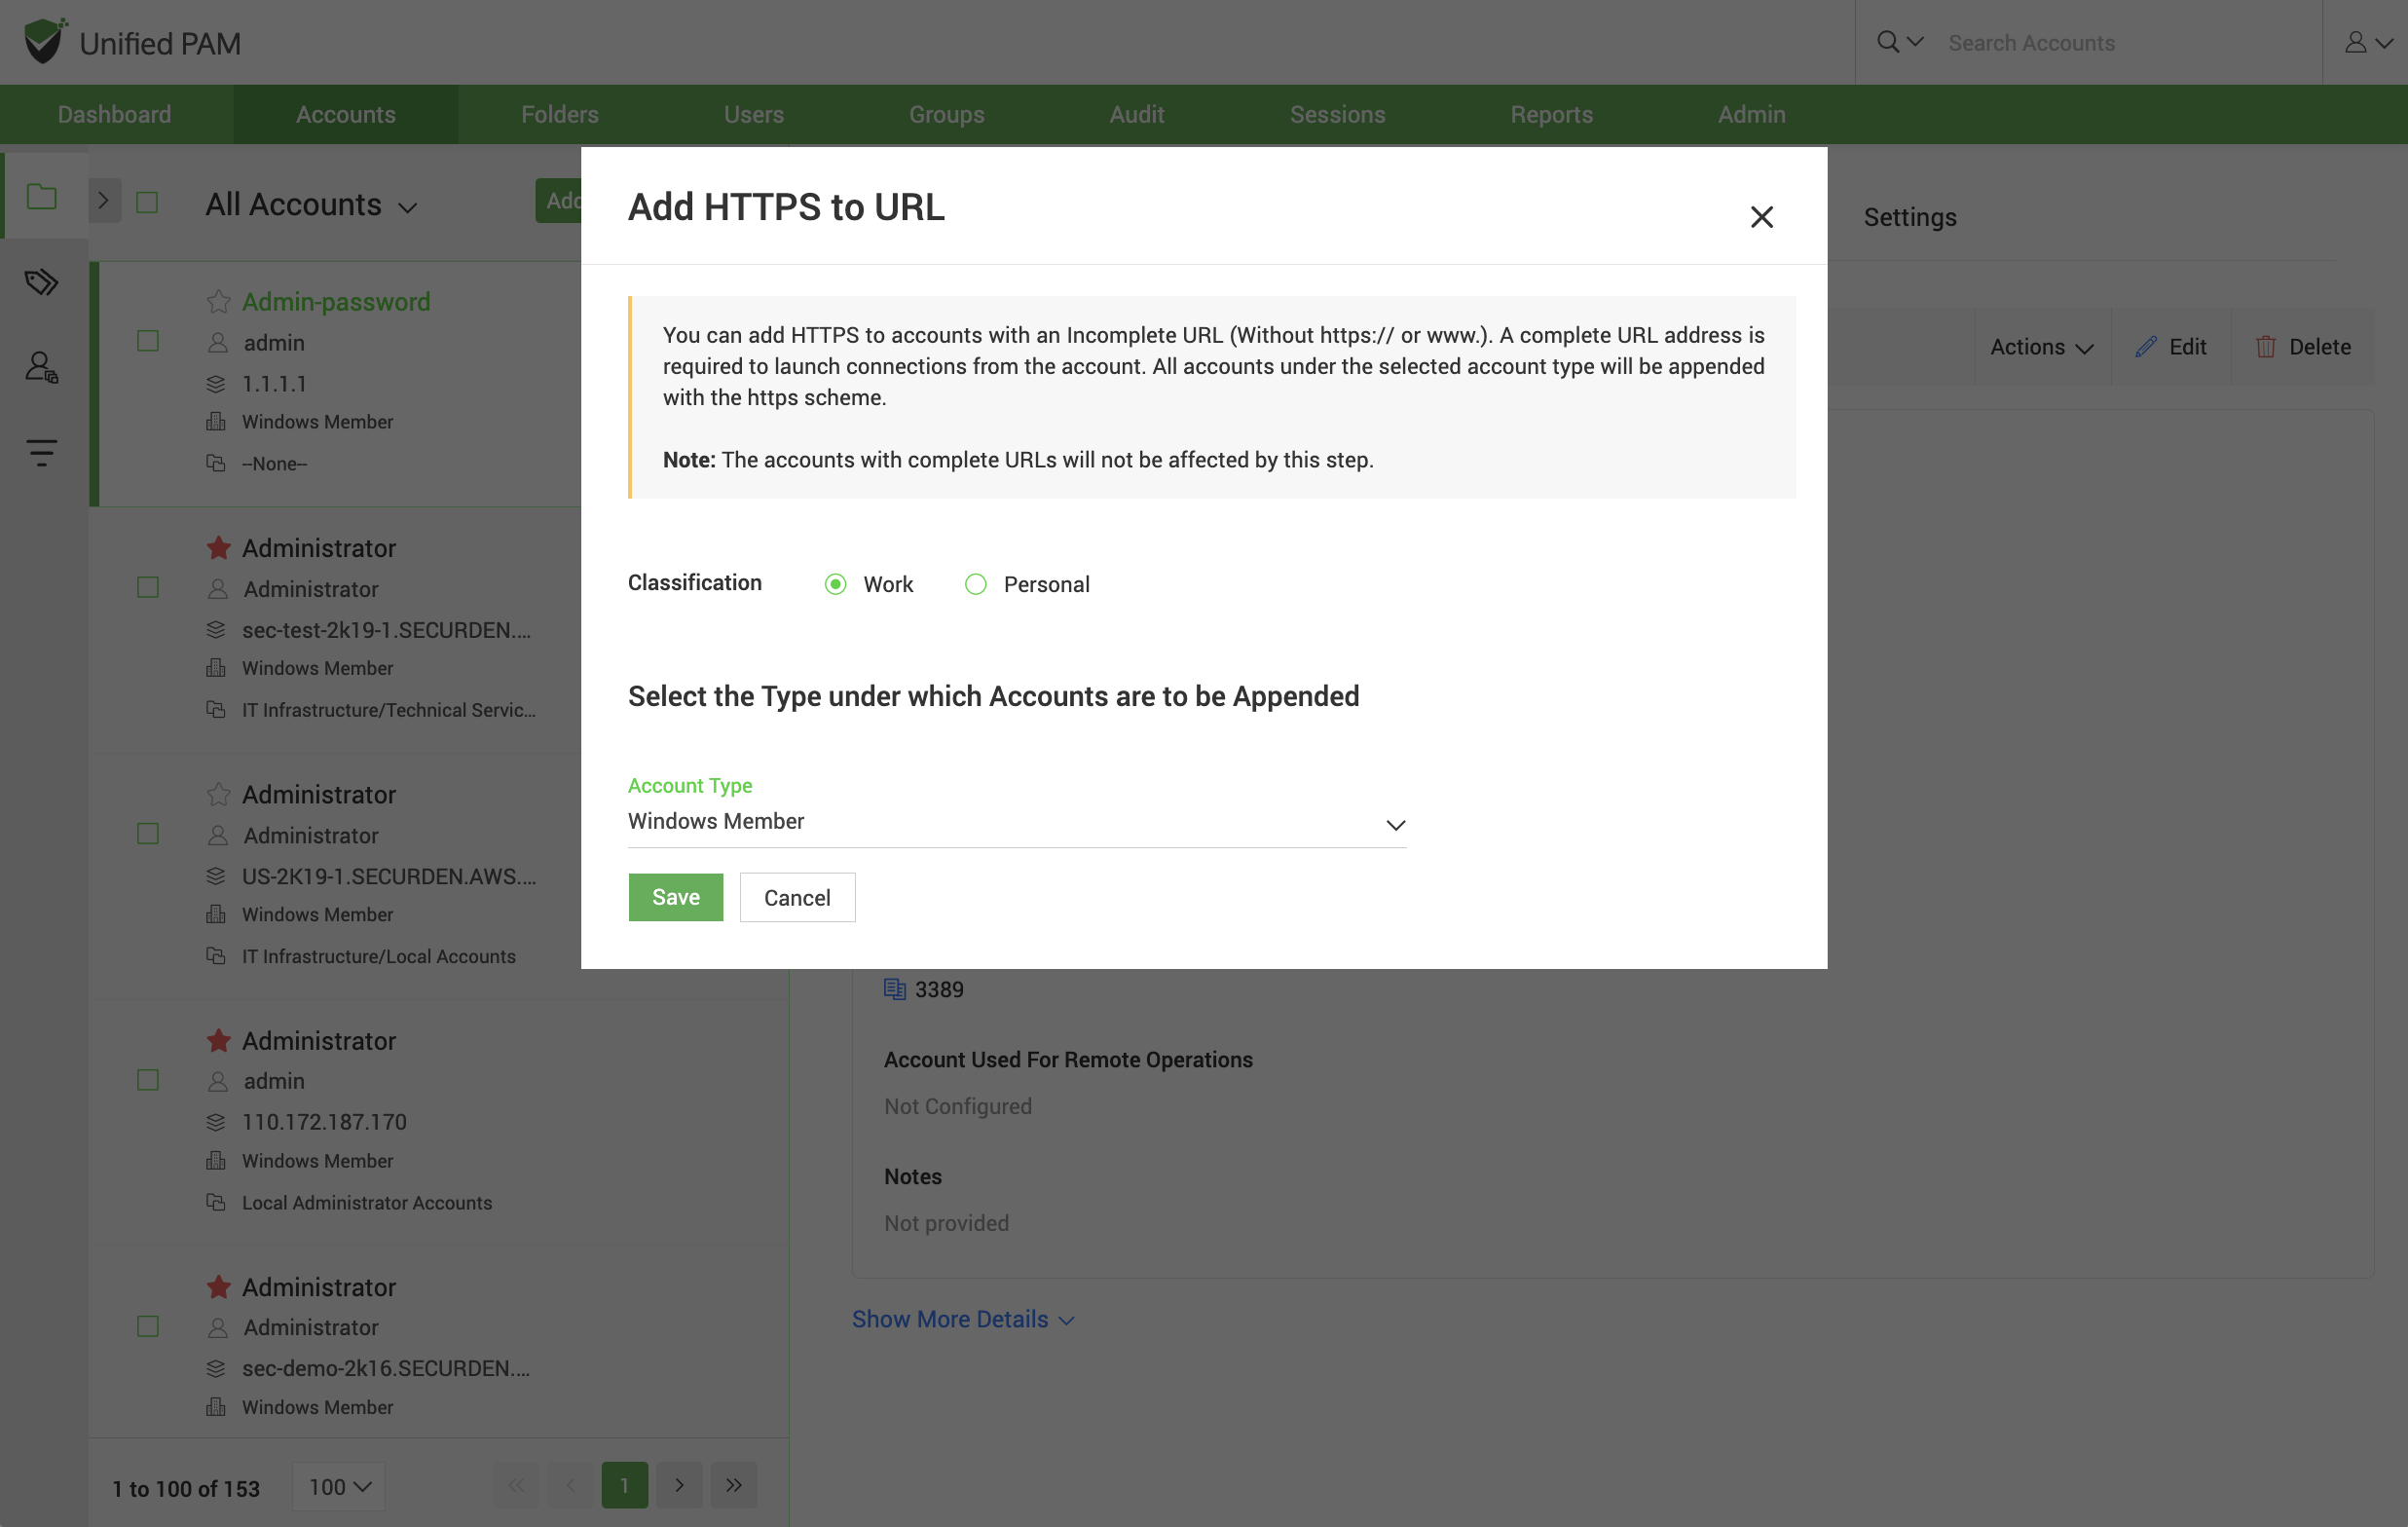
Add HTTPS to account URL
You can add HTTPS to accounts with an Incomplete URL (Without https:// or www.). A complete URL address is required to launch connections from the account. All accounts under the selected account type will be appended with the https scheme.
Note
The accounts with complete URLs will not be affected by this step. Navigate to Accounts >> More >> Add HTTPS to the URL. Select the classification of your accounts (Work or Personal) to which URLs are to be added, choose the account type from the drop-down given, and then click Save.
Delete Accounts
You can delete one or more accounts at once by navigating to Accounts >> More >> Delete Accounts. The selected accounts will be marked as deleted. For 1 day(s) after deletion, you will have the option to restore the deleted accounts. Navigate to Recently Deleted Accounts section in the folders tree to restore or to permanently delete the accounts.