Explore Single Sign-On Options
Securden leverages SAML 2.0 to seamlessly integrate with SAML-compatible federated identity management solutions like Okta, G Suite, Microsoft ADFS, OneLogin, PingIdentity, Azure AD SSO, and others for single sign on. Securden serves as the SAML Service Provider (SP), and it integrates with SAML Identity Providers (IdP). Once this is done, users who log in to solutions like Okta (IdP) will be automatically logged in to Securden. The IdP and Securden exchange validation details are in the background.
Securden integrates with any SAML-based SSO solution. The integration process involves three steps:
Step 1: Add Securden as an application in the IdP (Okta, OneLogin, etc).
Step 2: Configure IdP's details in Securden.
Step 3: Provision access to Securden for your users in the IdP.
To start the integration, you would require certain details about Securden, which you can obtain from the product interface as explained below:
Navigate to Admin >> Integrations >> SAML SSO.
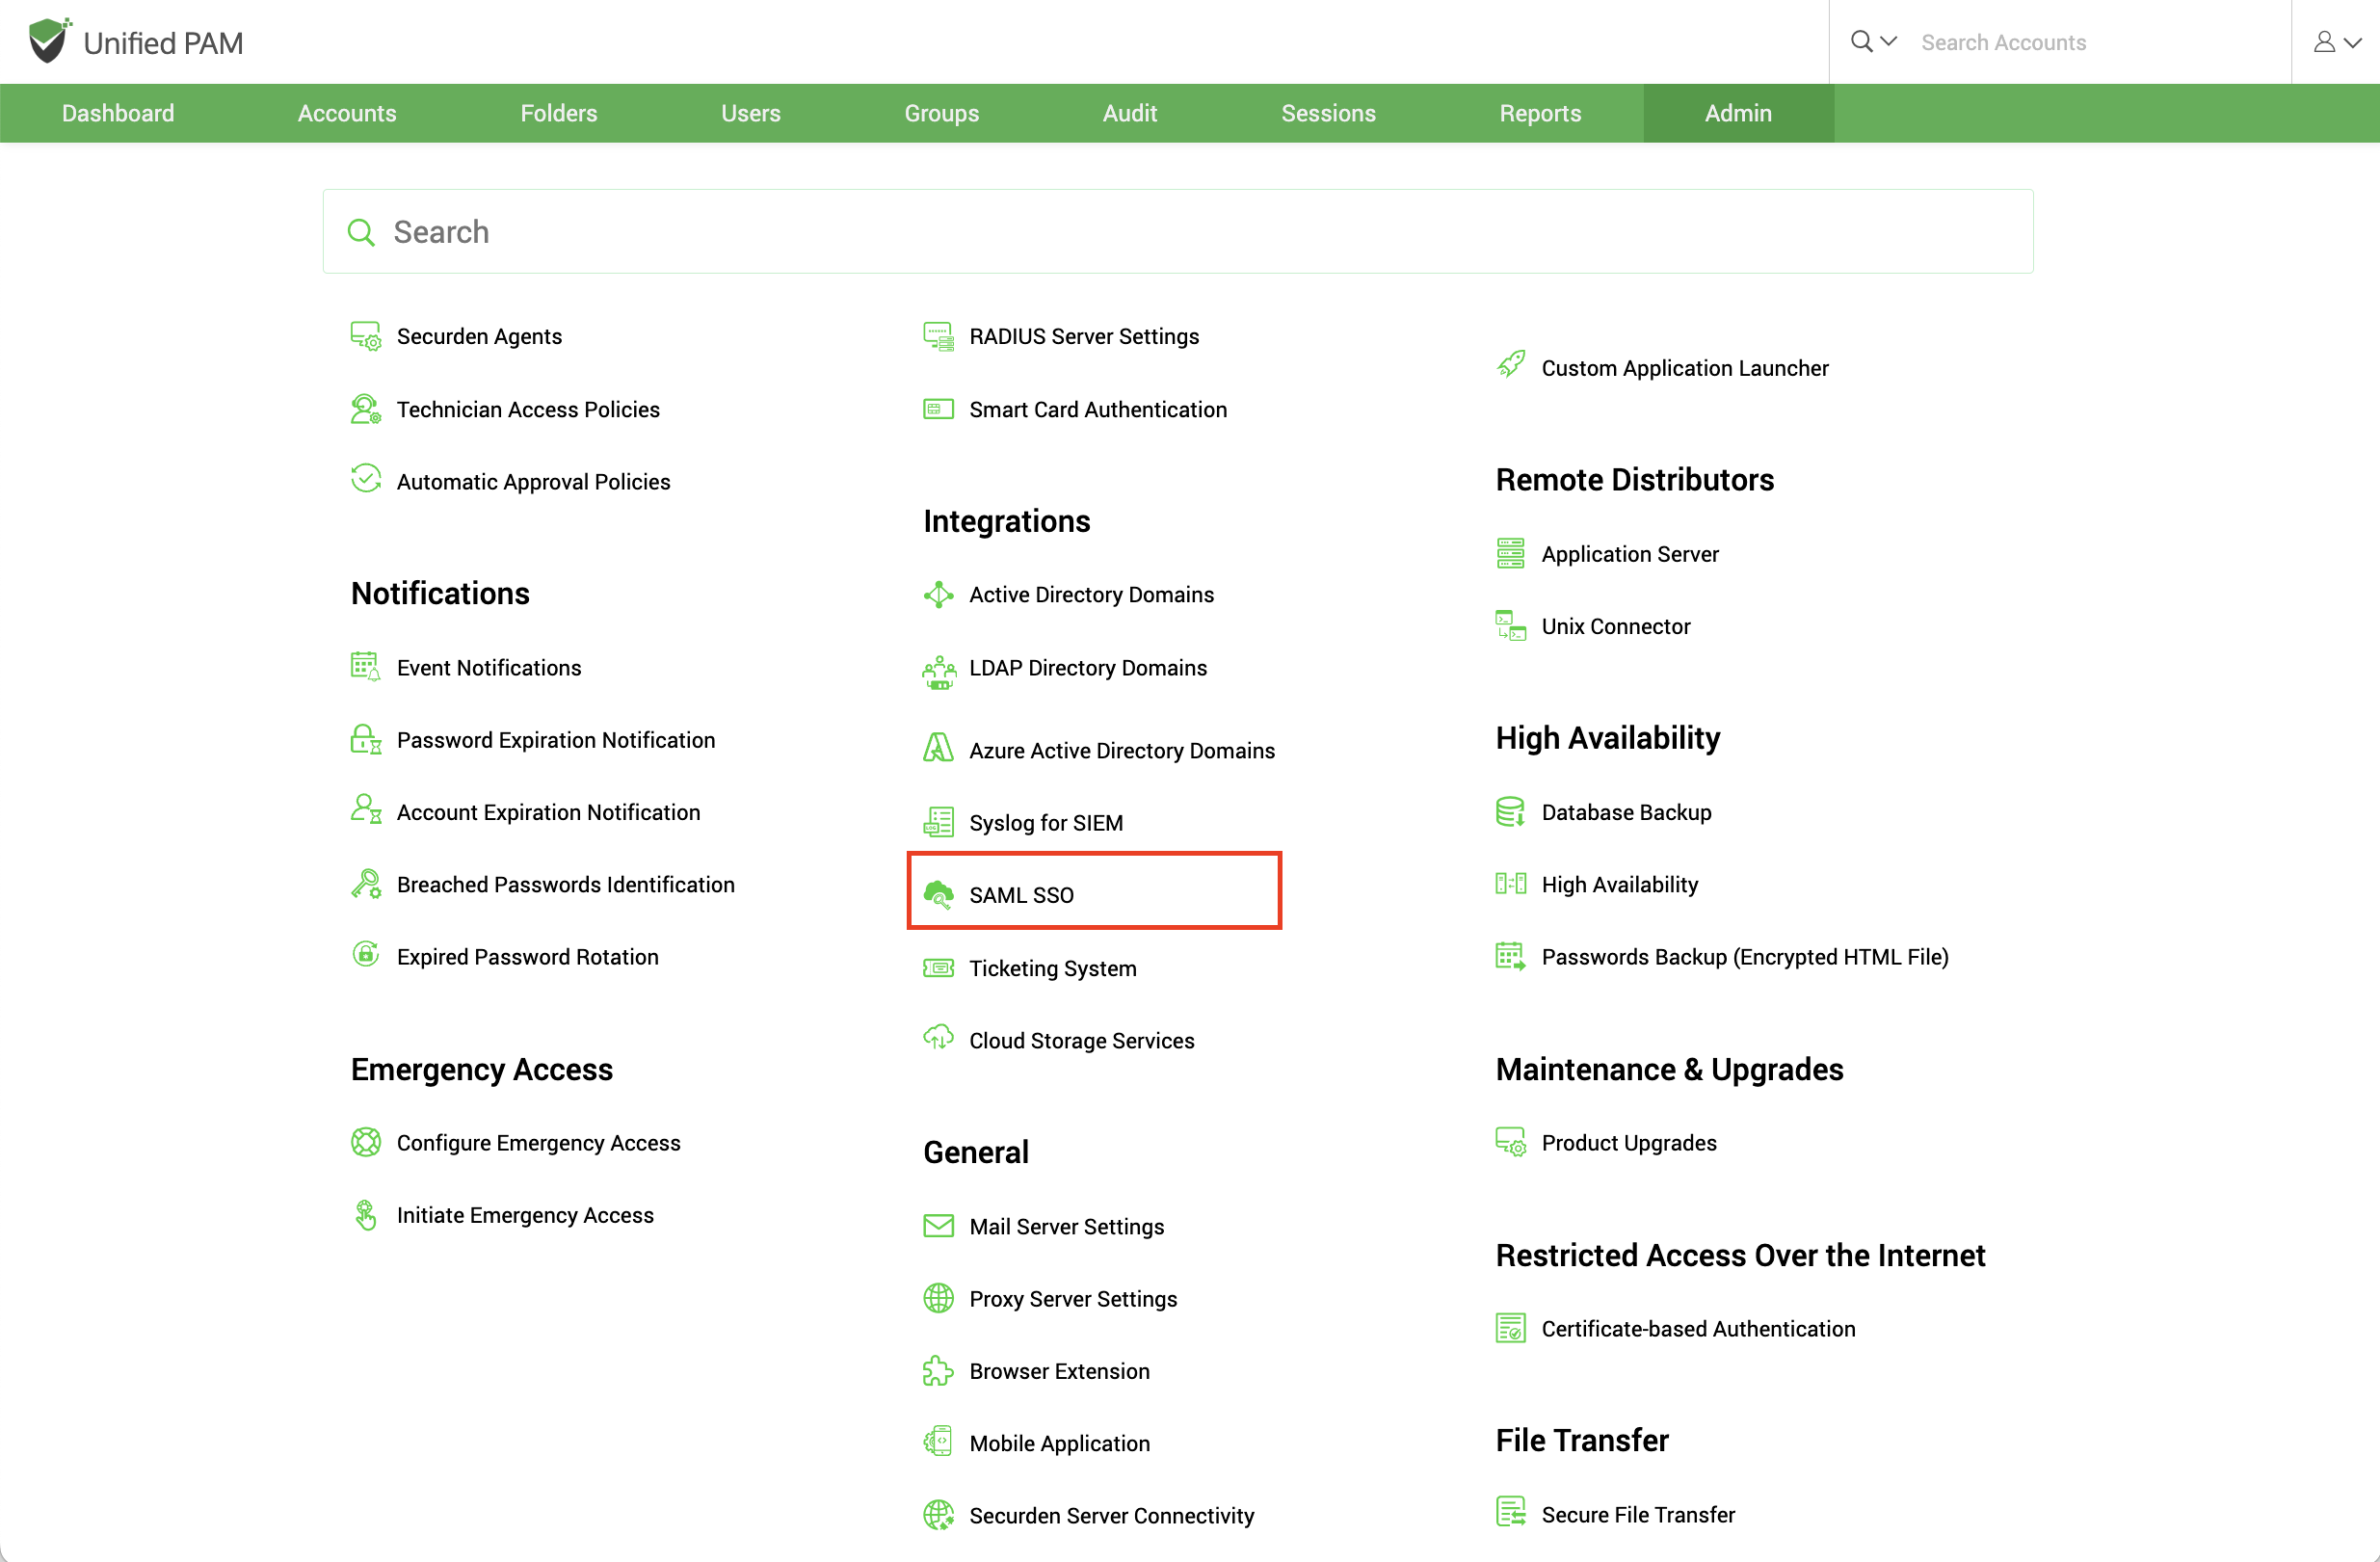
In the GUI that opens, Enable SAML SSO by setting the toggle to green
Step 1: Add Securden as an application in your SSO solution (known as the IdP).
You need to perform this step on your SSO solution.
For adding Securden as an application, you would typically require the following details. Securden is referred to as the Service Provider.
-
Service Provider Entity ID
-
Assertion Consumer URL
-
Service Provider Metadata
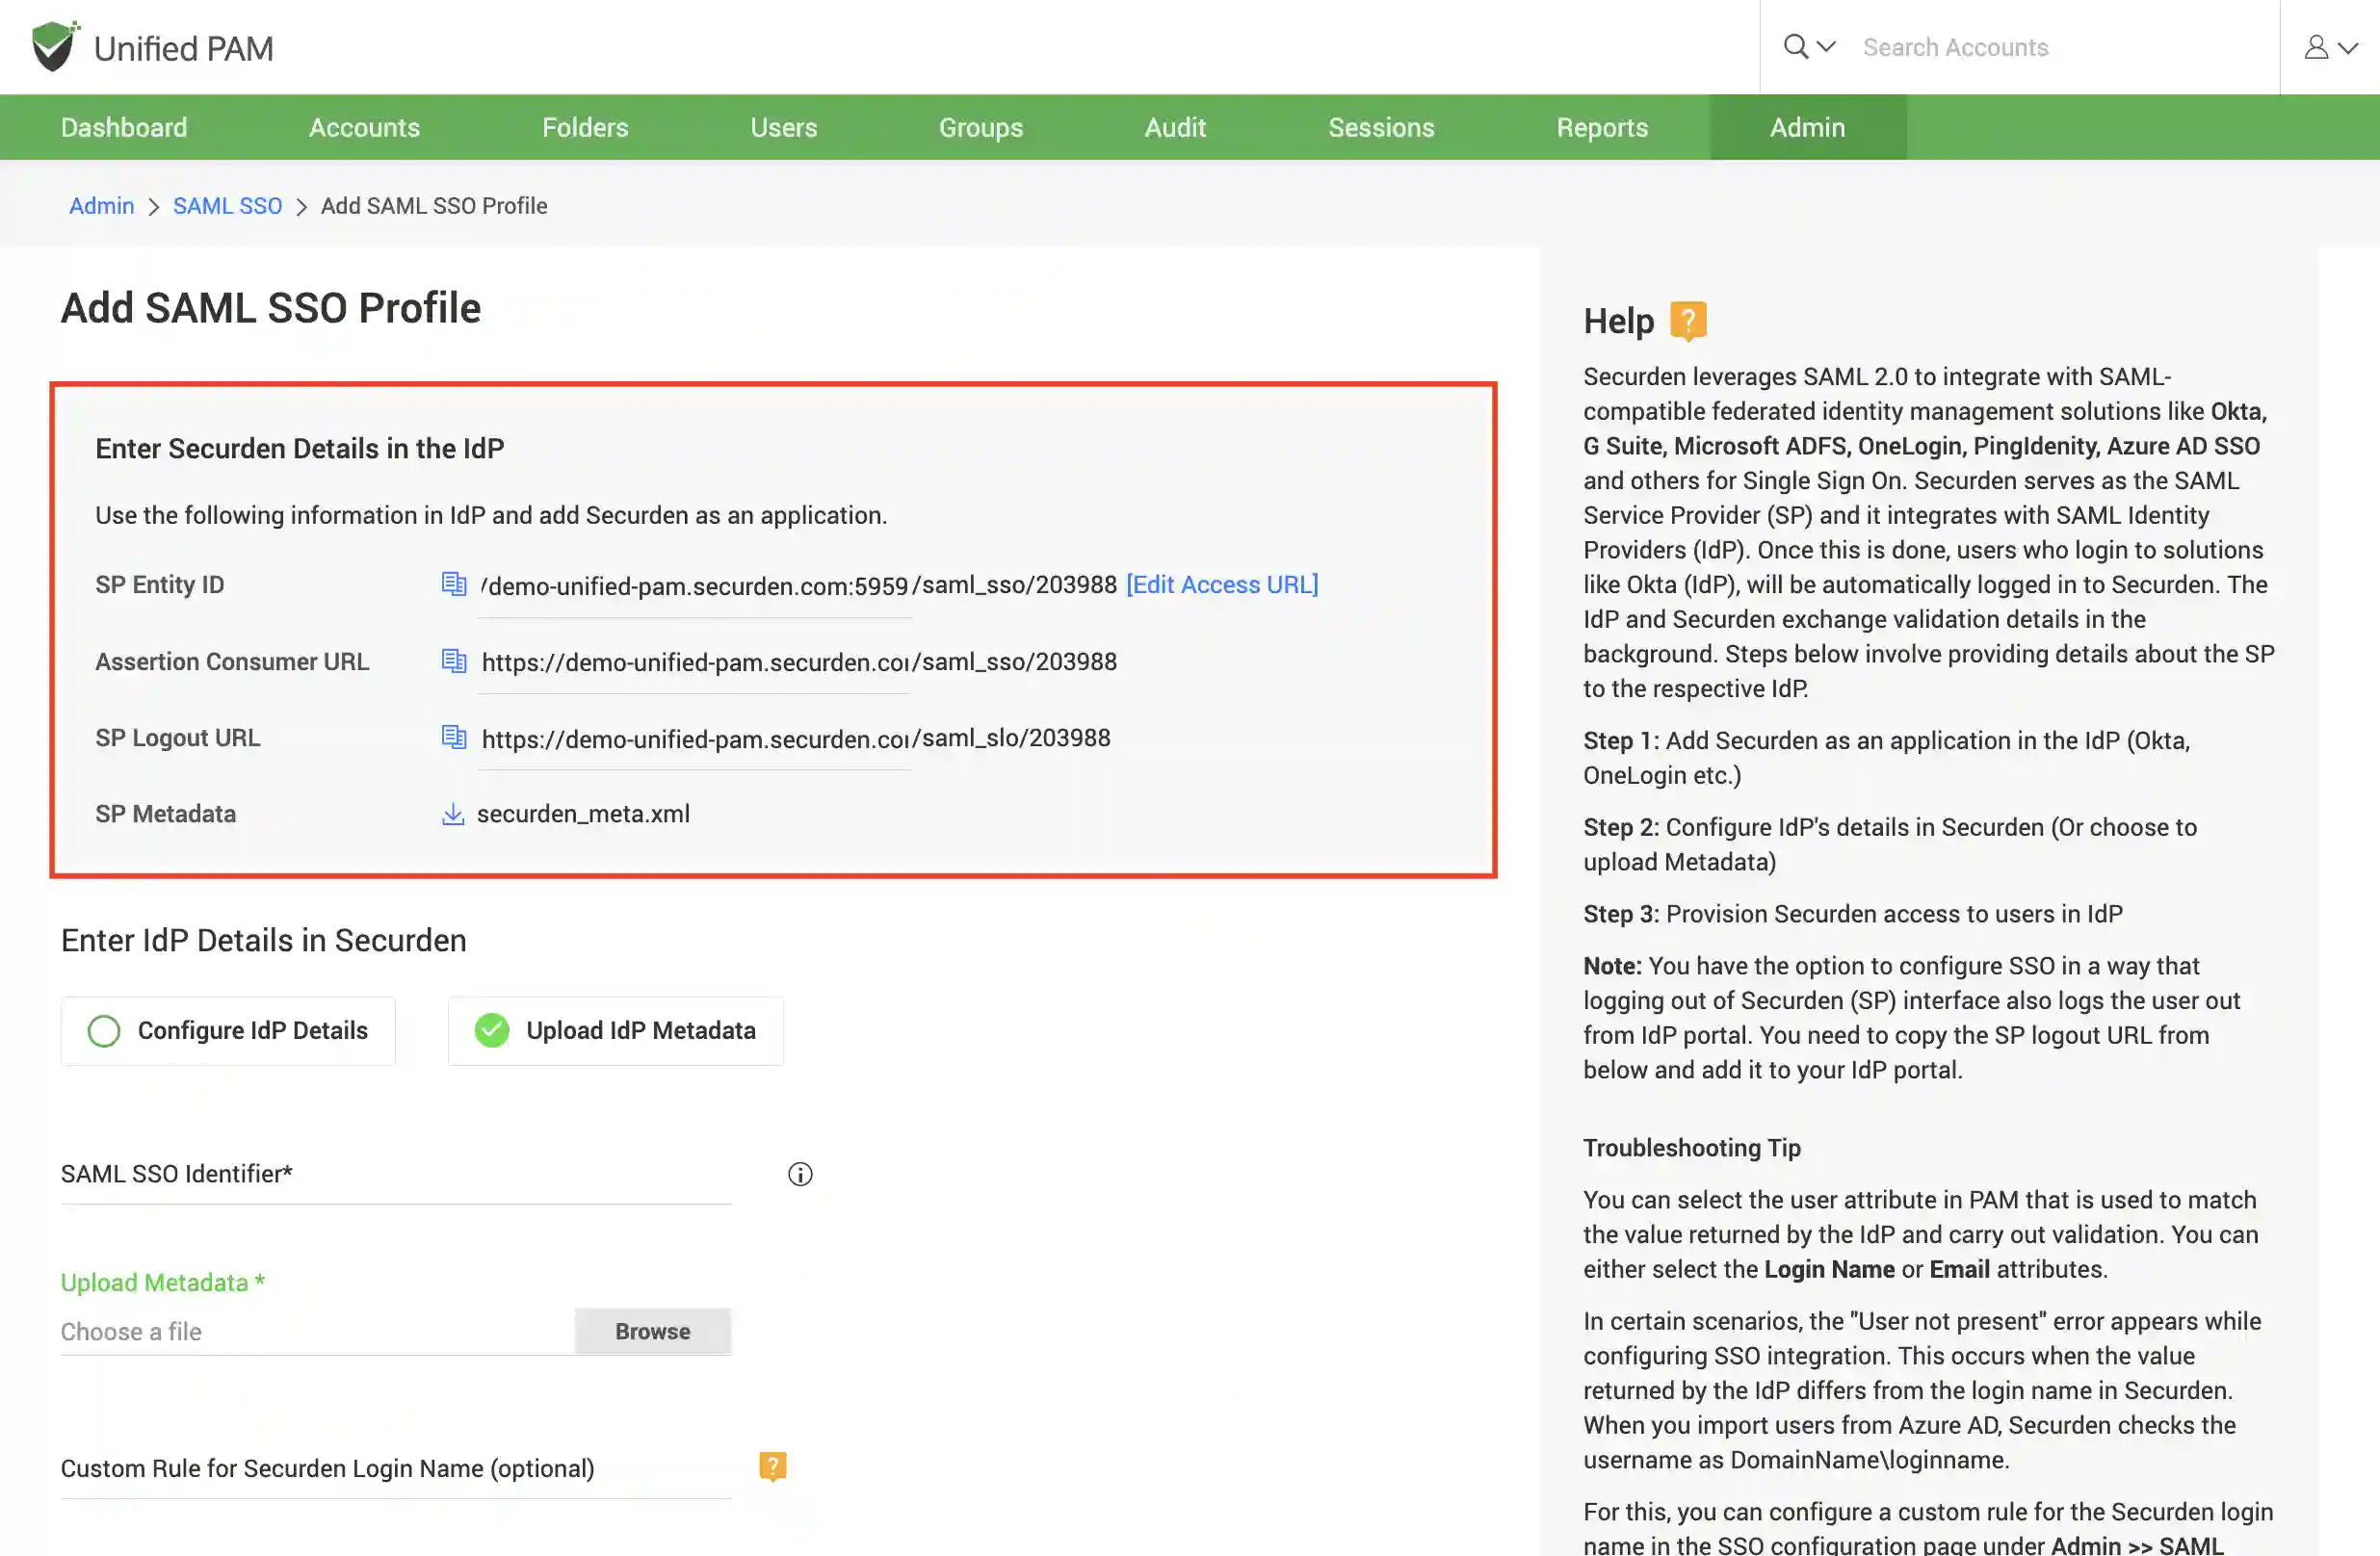
All these details are available in the Configure SAML SSO page as shown below. You may readily copy this information using the icon provided beside each detail.
Step 2: Configure IdP's details in Securden
Once you have completed step 1 and added Securden as an application in your SSO solution, you would have certain details obtained from the IdP like IdP Entity ID, IdP login URL, and protocol type.
You have two options here from which you can select one that is best suited for you.
-
Configure IdP Details (or)
-
Upload IdP’s Metadata file
If you select the option Upload IdP's Metadata, you need to select the xml file downloaded from the SSO provider and upload it to the Securden server.
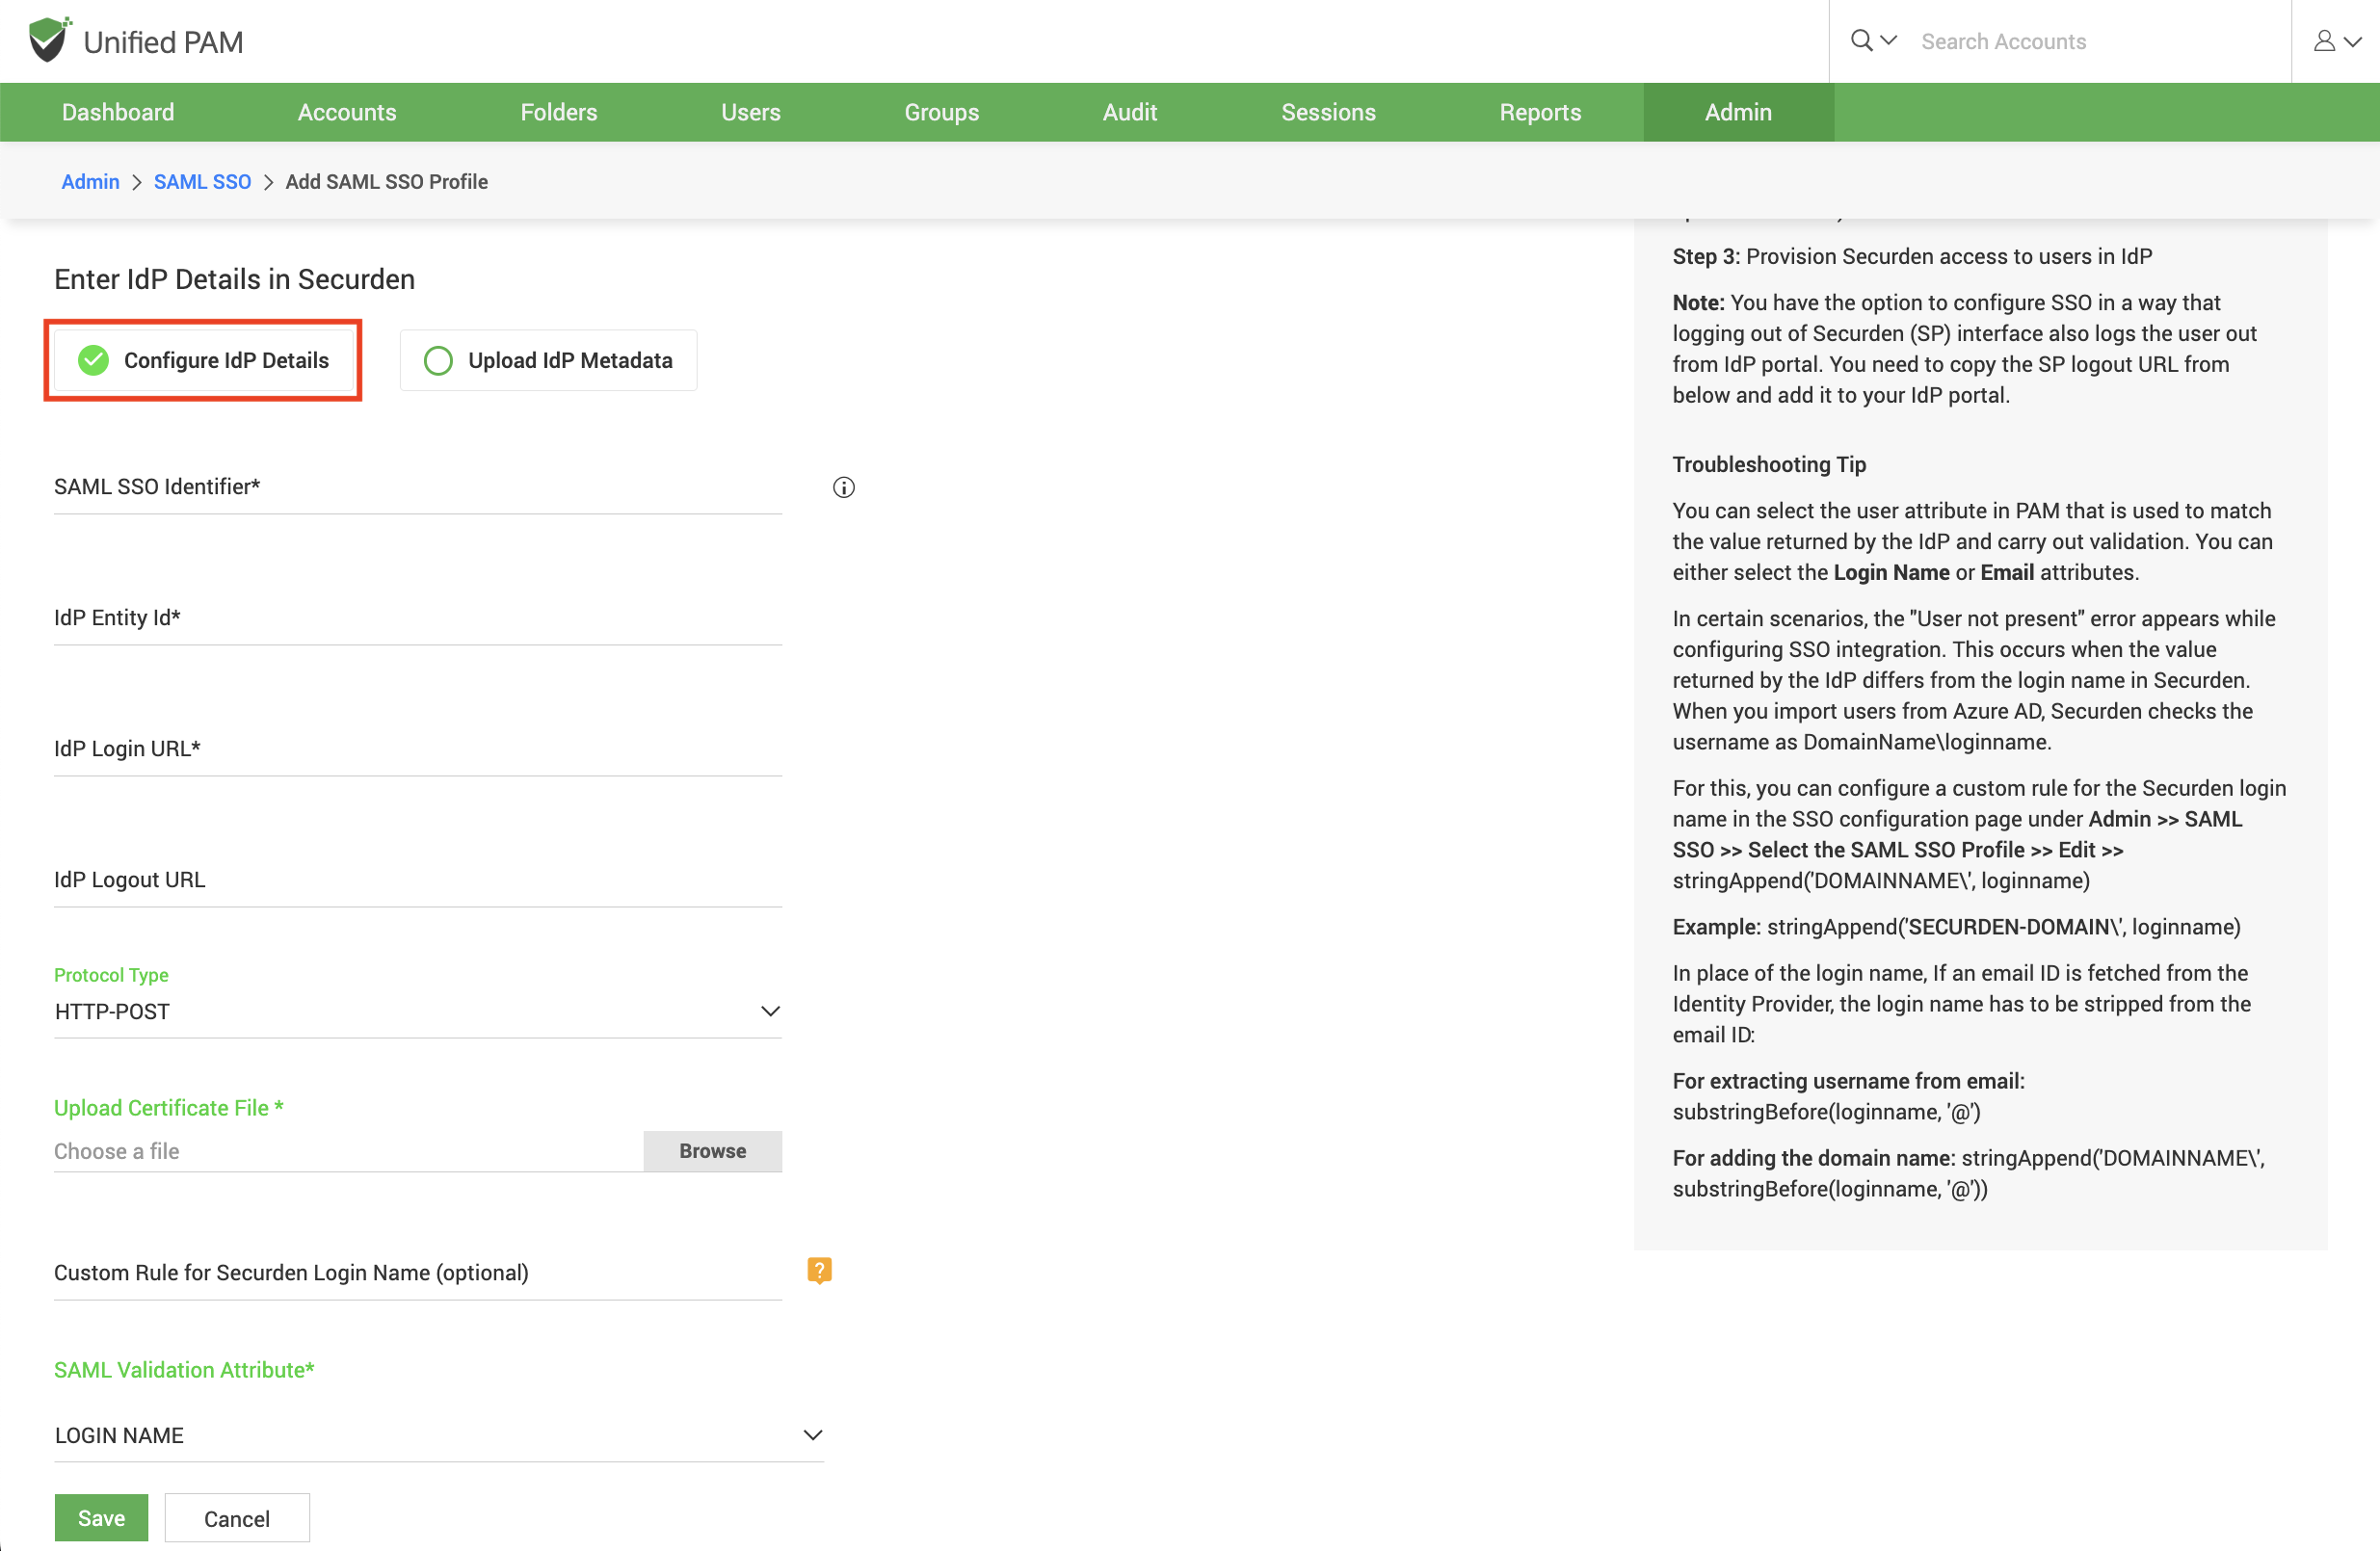
If you select the option Configure IdP Details, enter the IdP details that you get once you complete step 1.
You need to enter the following information:
-
Identifier: Enter an Identifier text that will appear on the Securden login screen to display the SSO option.
-
IdP Entity ID: You need to fetch the Entity ID from your IdP provider and enter it here.
-
IdP Login URL: Enter the URL used to login into your IdP portal.
-
PROTOCOL TYPE: Select the type of protocol to use from the two available options.
- HTTP-POST: Select this if you wish to send data to the server.
- HTTP-Redirect: Select this if you want the server to redirect the response to your request.
-
Upload Certificate file: You can attach the certificate file that you have for your IdP.
- Custom rule for Securden login: As part of the integration, one of the important aspects is the ‘login name’ format. The identity provider returns a login name, which Securden uses as the username for logging in to the application. If you want to map the name returned by the identity provider with a different name, you can create custom rules.
Basically, you can make use of the following string functions to create custom rules to manipulate the login name returned by the identity provider. In the string function, login name denotes the name returned by the identity provider.
Step 3: Provision access to Securden for your users in the IdP
After completing the integration, remember to provision access to Securden to your users in the IdP.