Providing Vendors with Access to Resources
Sharing Accounts
You can securely share accounts with individual vendors or vendor groups in Securden. Follow these steps to set up account sharing:
Steps to Share an Account
-
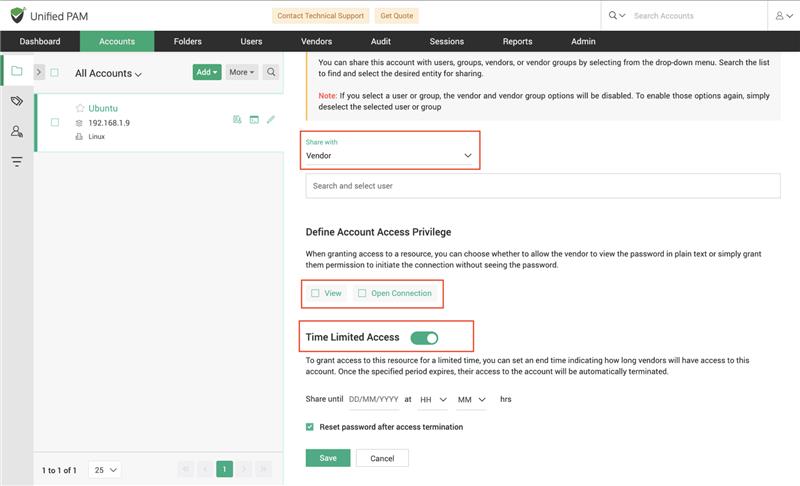
Navigate to the ‘Accounts’ tab and select the account you want to share.
-
On the right side of the screen, locate the ‘Share with’ dropdown.
-
Choose whether to share the account with a Vendor or a Vendor Group.
-
Use the search bar to find the specific vendor or group by entering their username, group name, or email address.
-
Select the vendor or group and define the access privilege:
-
View: Allows the vendor to view the account credentials without the ability to connect directly.
-
Open Connection: Allows the vendor to directly access the account without revealing the credentials.
-
-
You can enable time-limited access for an account by turning on the Time-Limited Access option.
-
Specify the end date and time for the access period. Once this time expires, the vendor’s access to the account will be automatically revoked.
-
If required, check the Reset Password After Termination option to ensure the account password is updated once the access period ends.
-
Click Save to apply the changes.
This setup ensures secure, temporary access to accounts, minimizing exposure while maintaining control over account credentials.


