Configure Single Sign-On for Ping Identity
-
Login to your Ping Identity account.
-
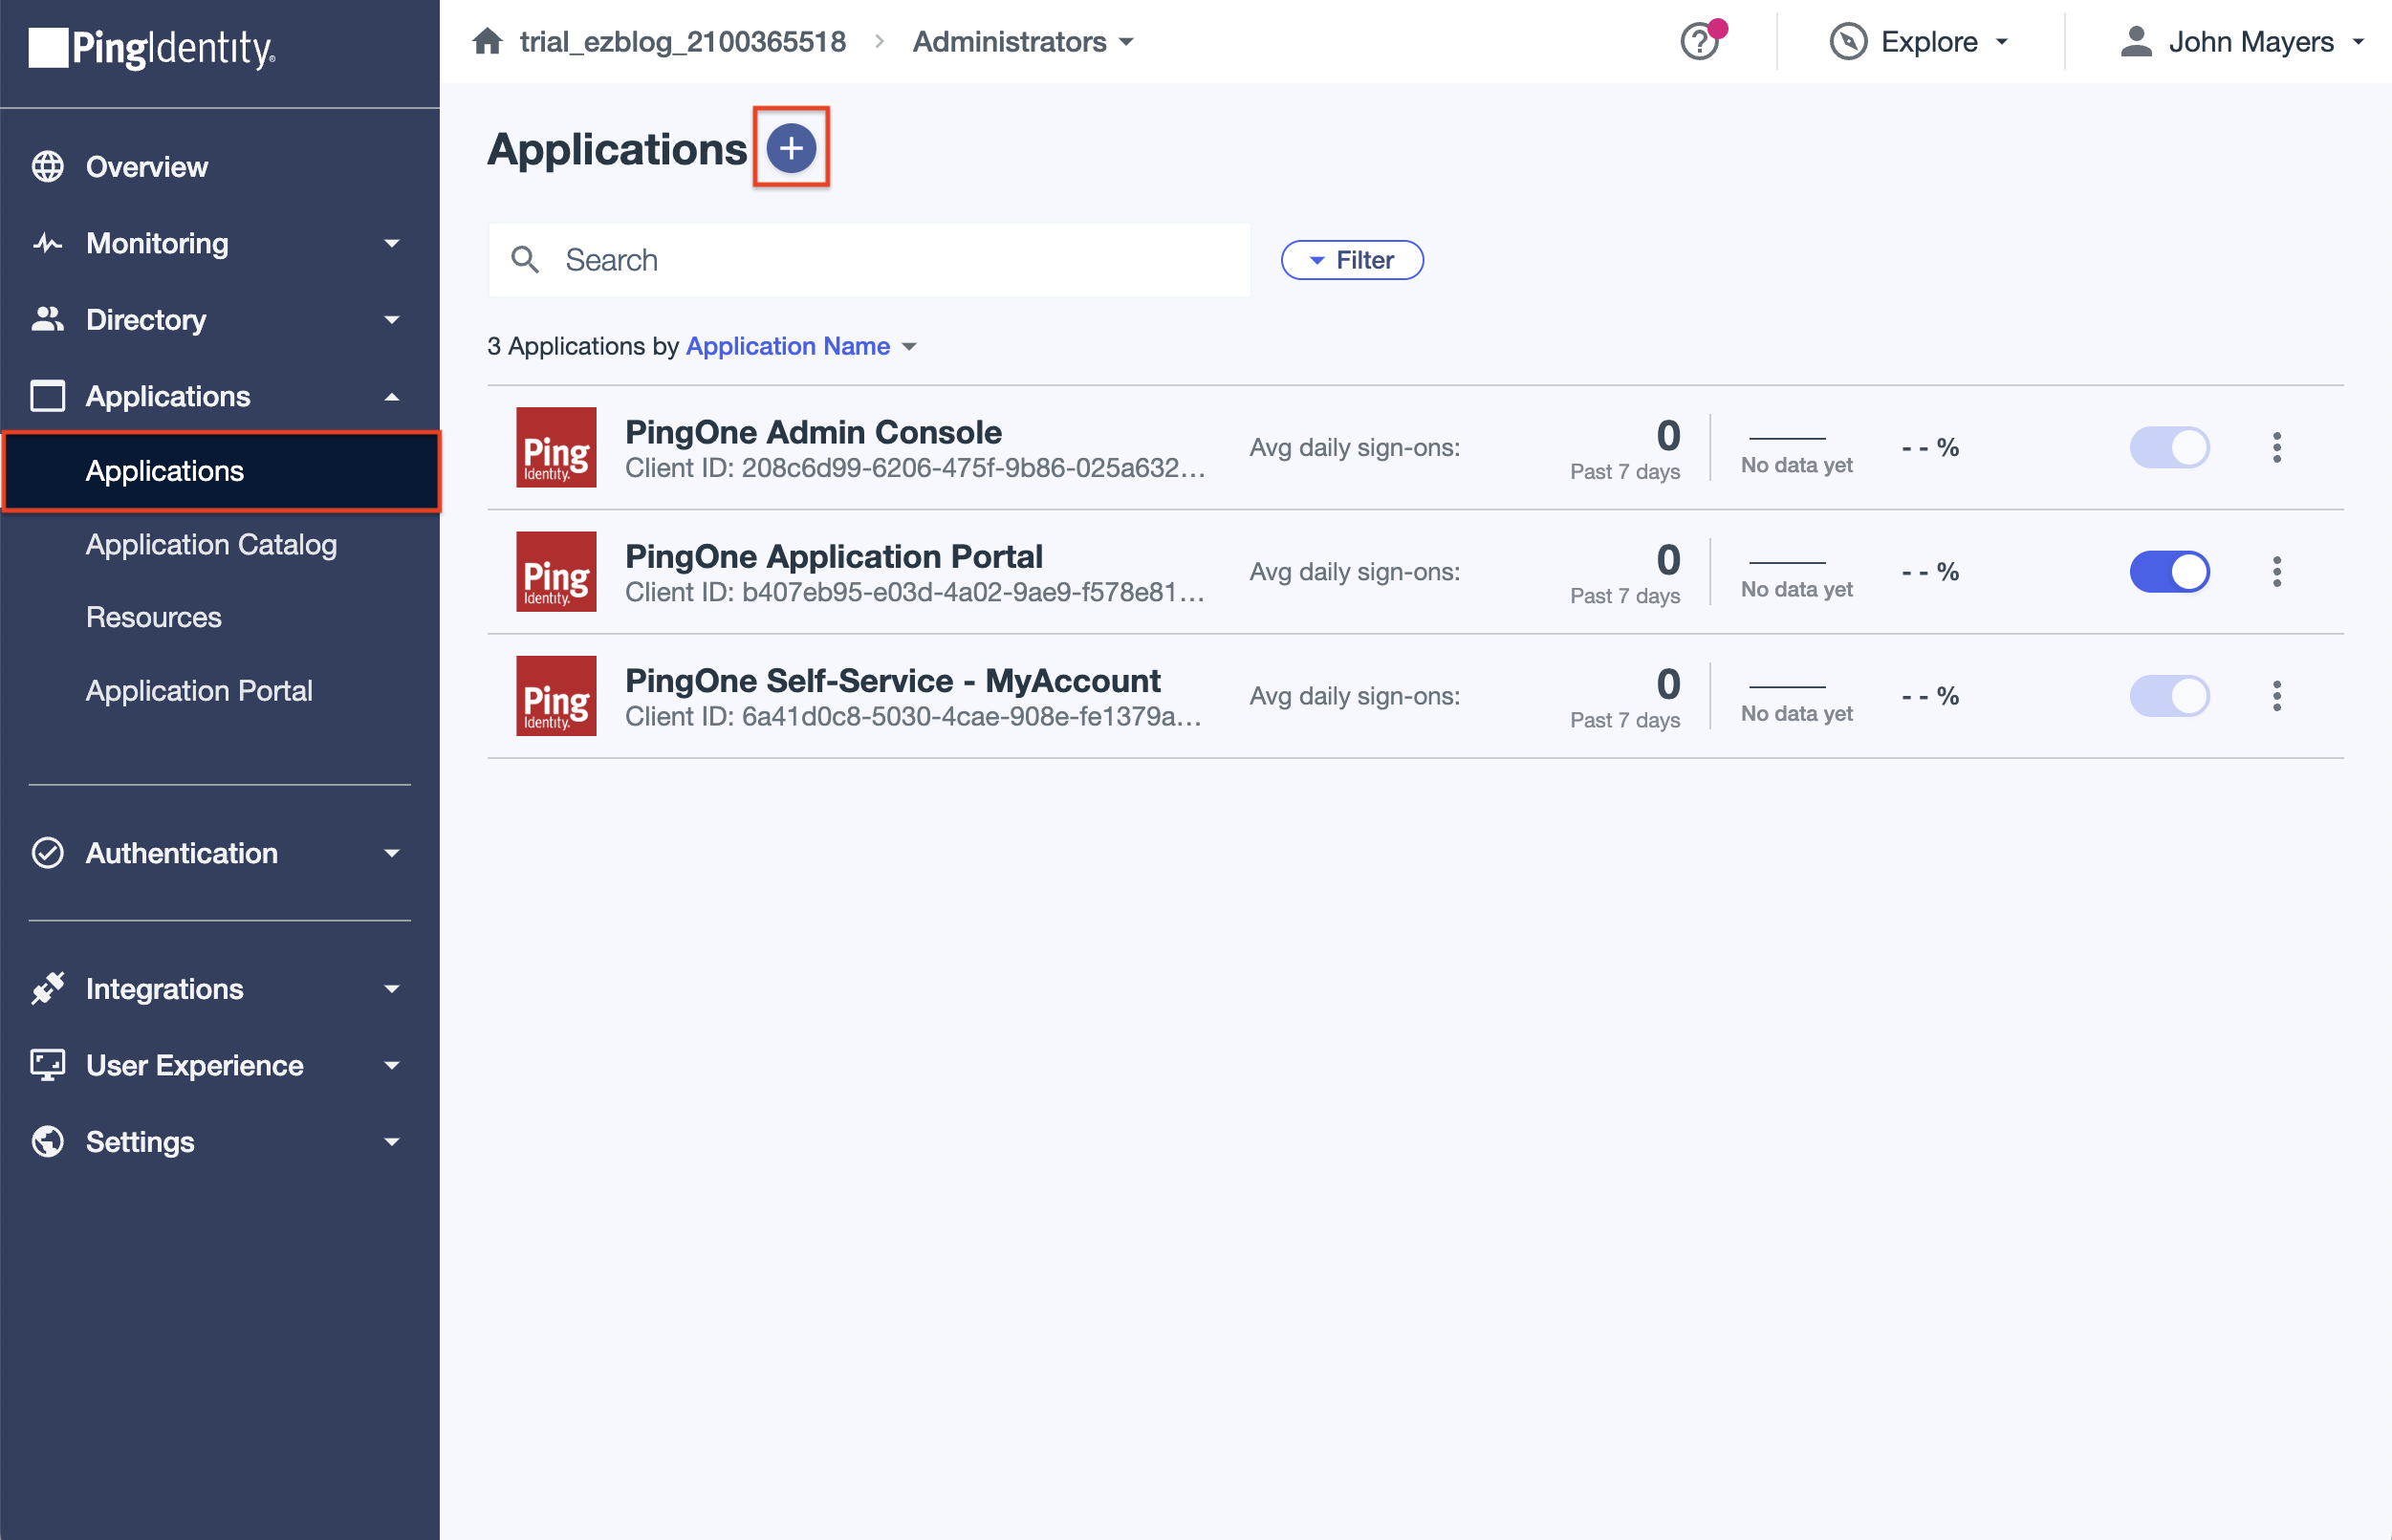
Navigate to Connections >> Applications and click on '+' to create a new app profile.
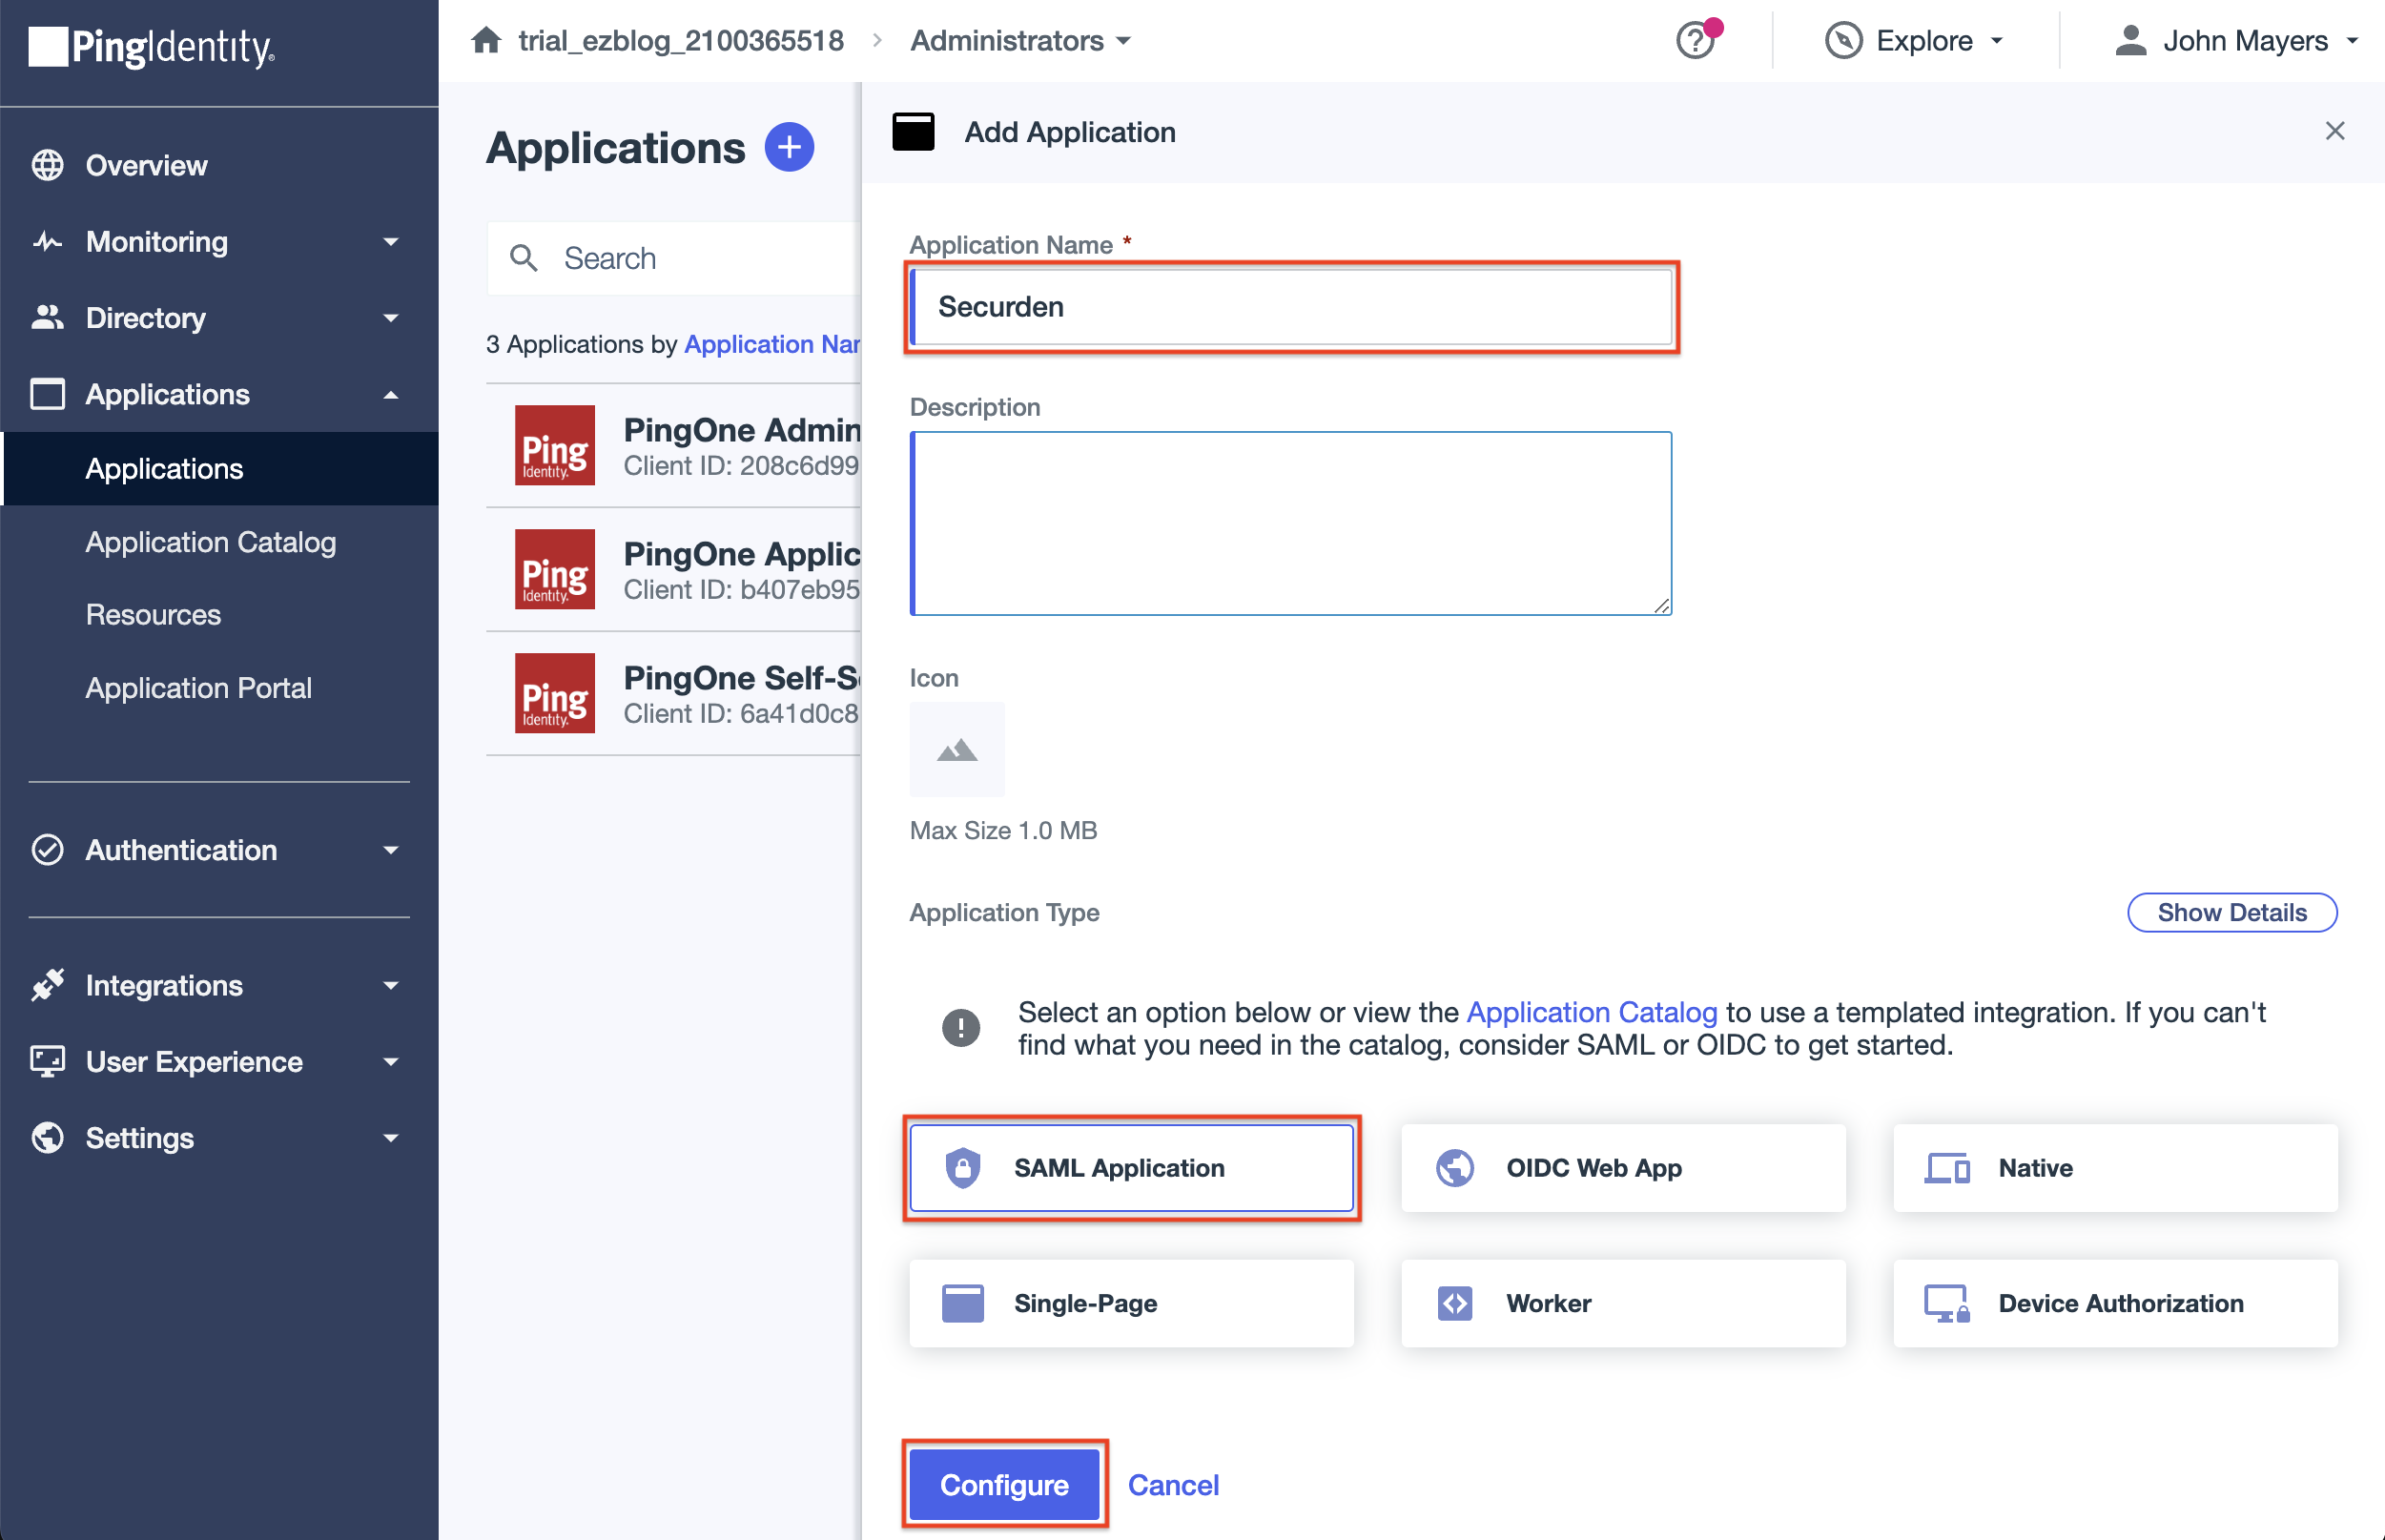
- Create an App profile by personalizing your application with its name, description, and icon (optional). Select SAML Web Application as the type and click on Configure.
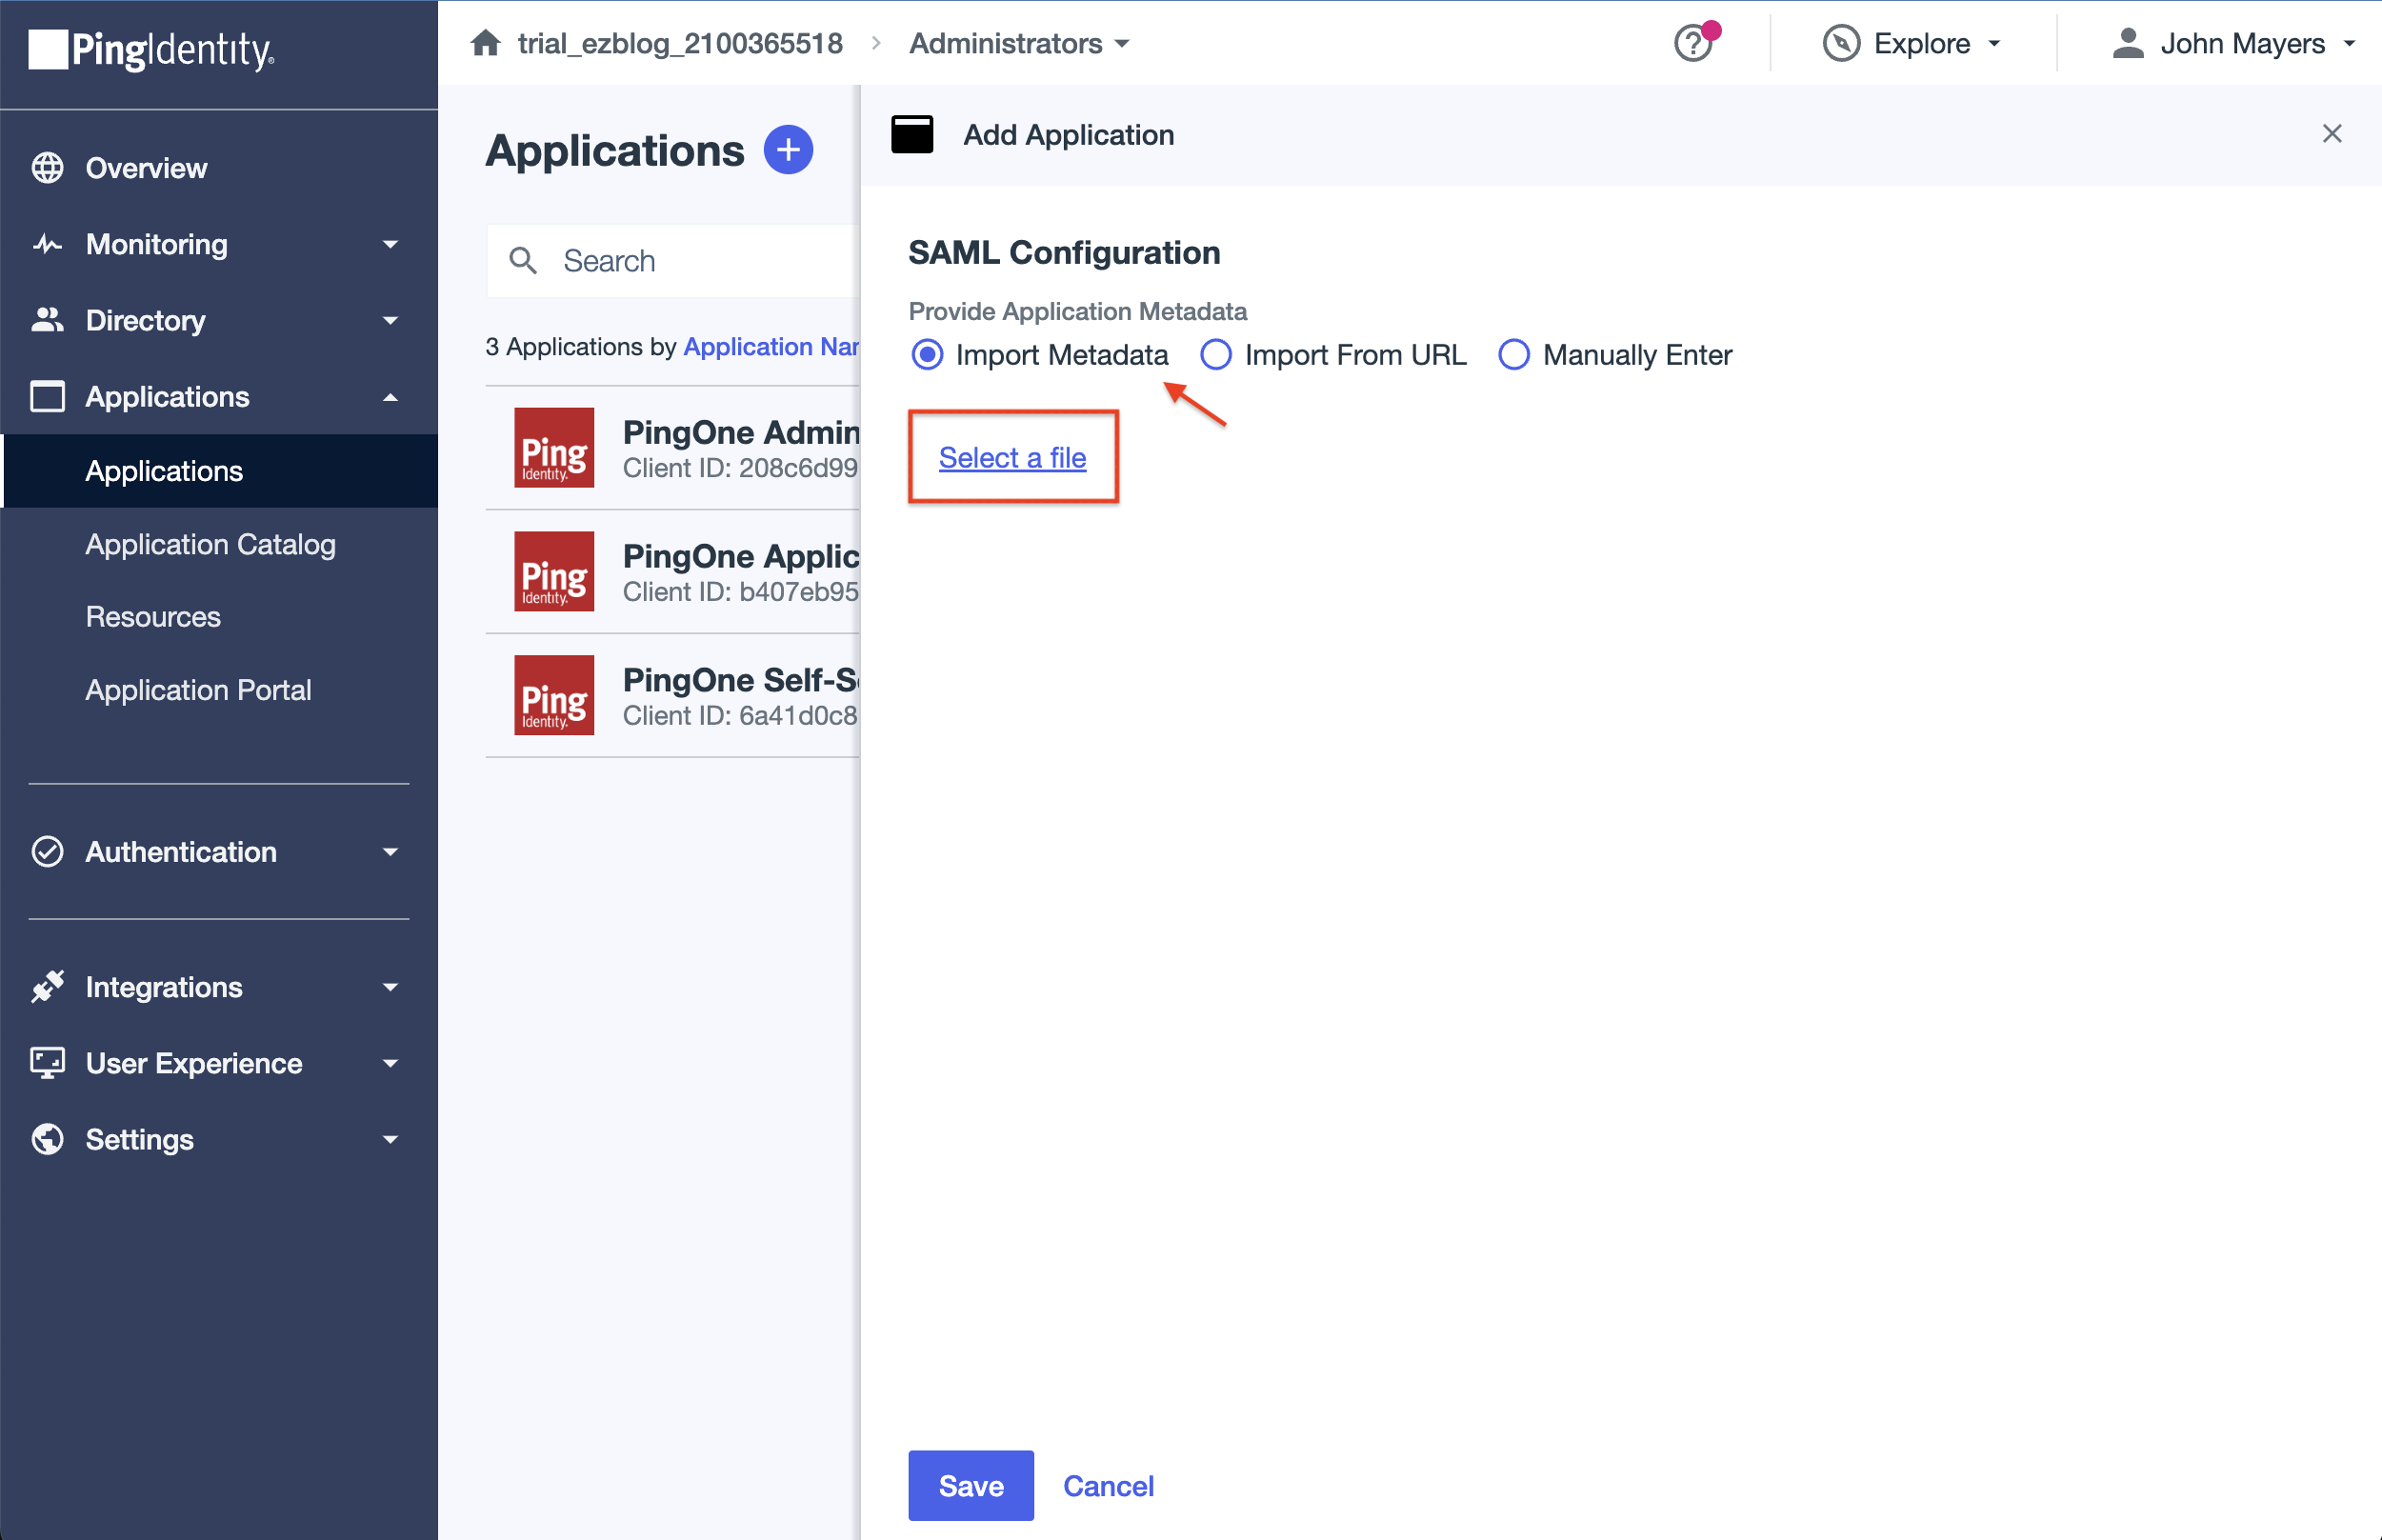
- To configure connection between Securden and PingIdentity, you need to provide the Service Provider’s, a.k.a. Securden’s, details for which you have to navigate to Admin >> Integrations >> SAML SSO. Use the details provided in the to integrate Securden with Ping Identity. Alternatively, you can simply download the Securden metadata file from the page and upload it to Ping Identity as shown.
-
Map attributes to provide access to your application for customers to authenticate.
-
Click on the Finish button to complete the SAML creation process.
-
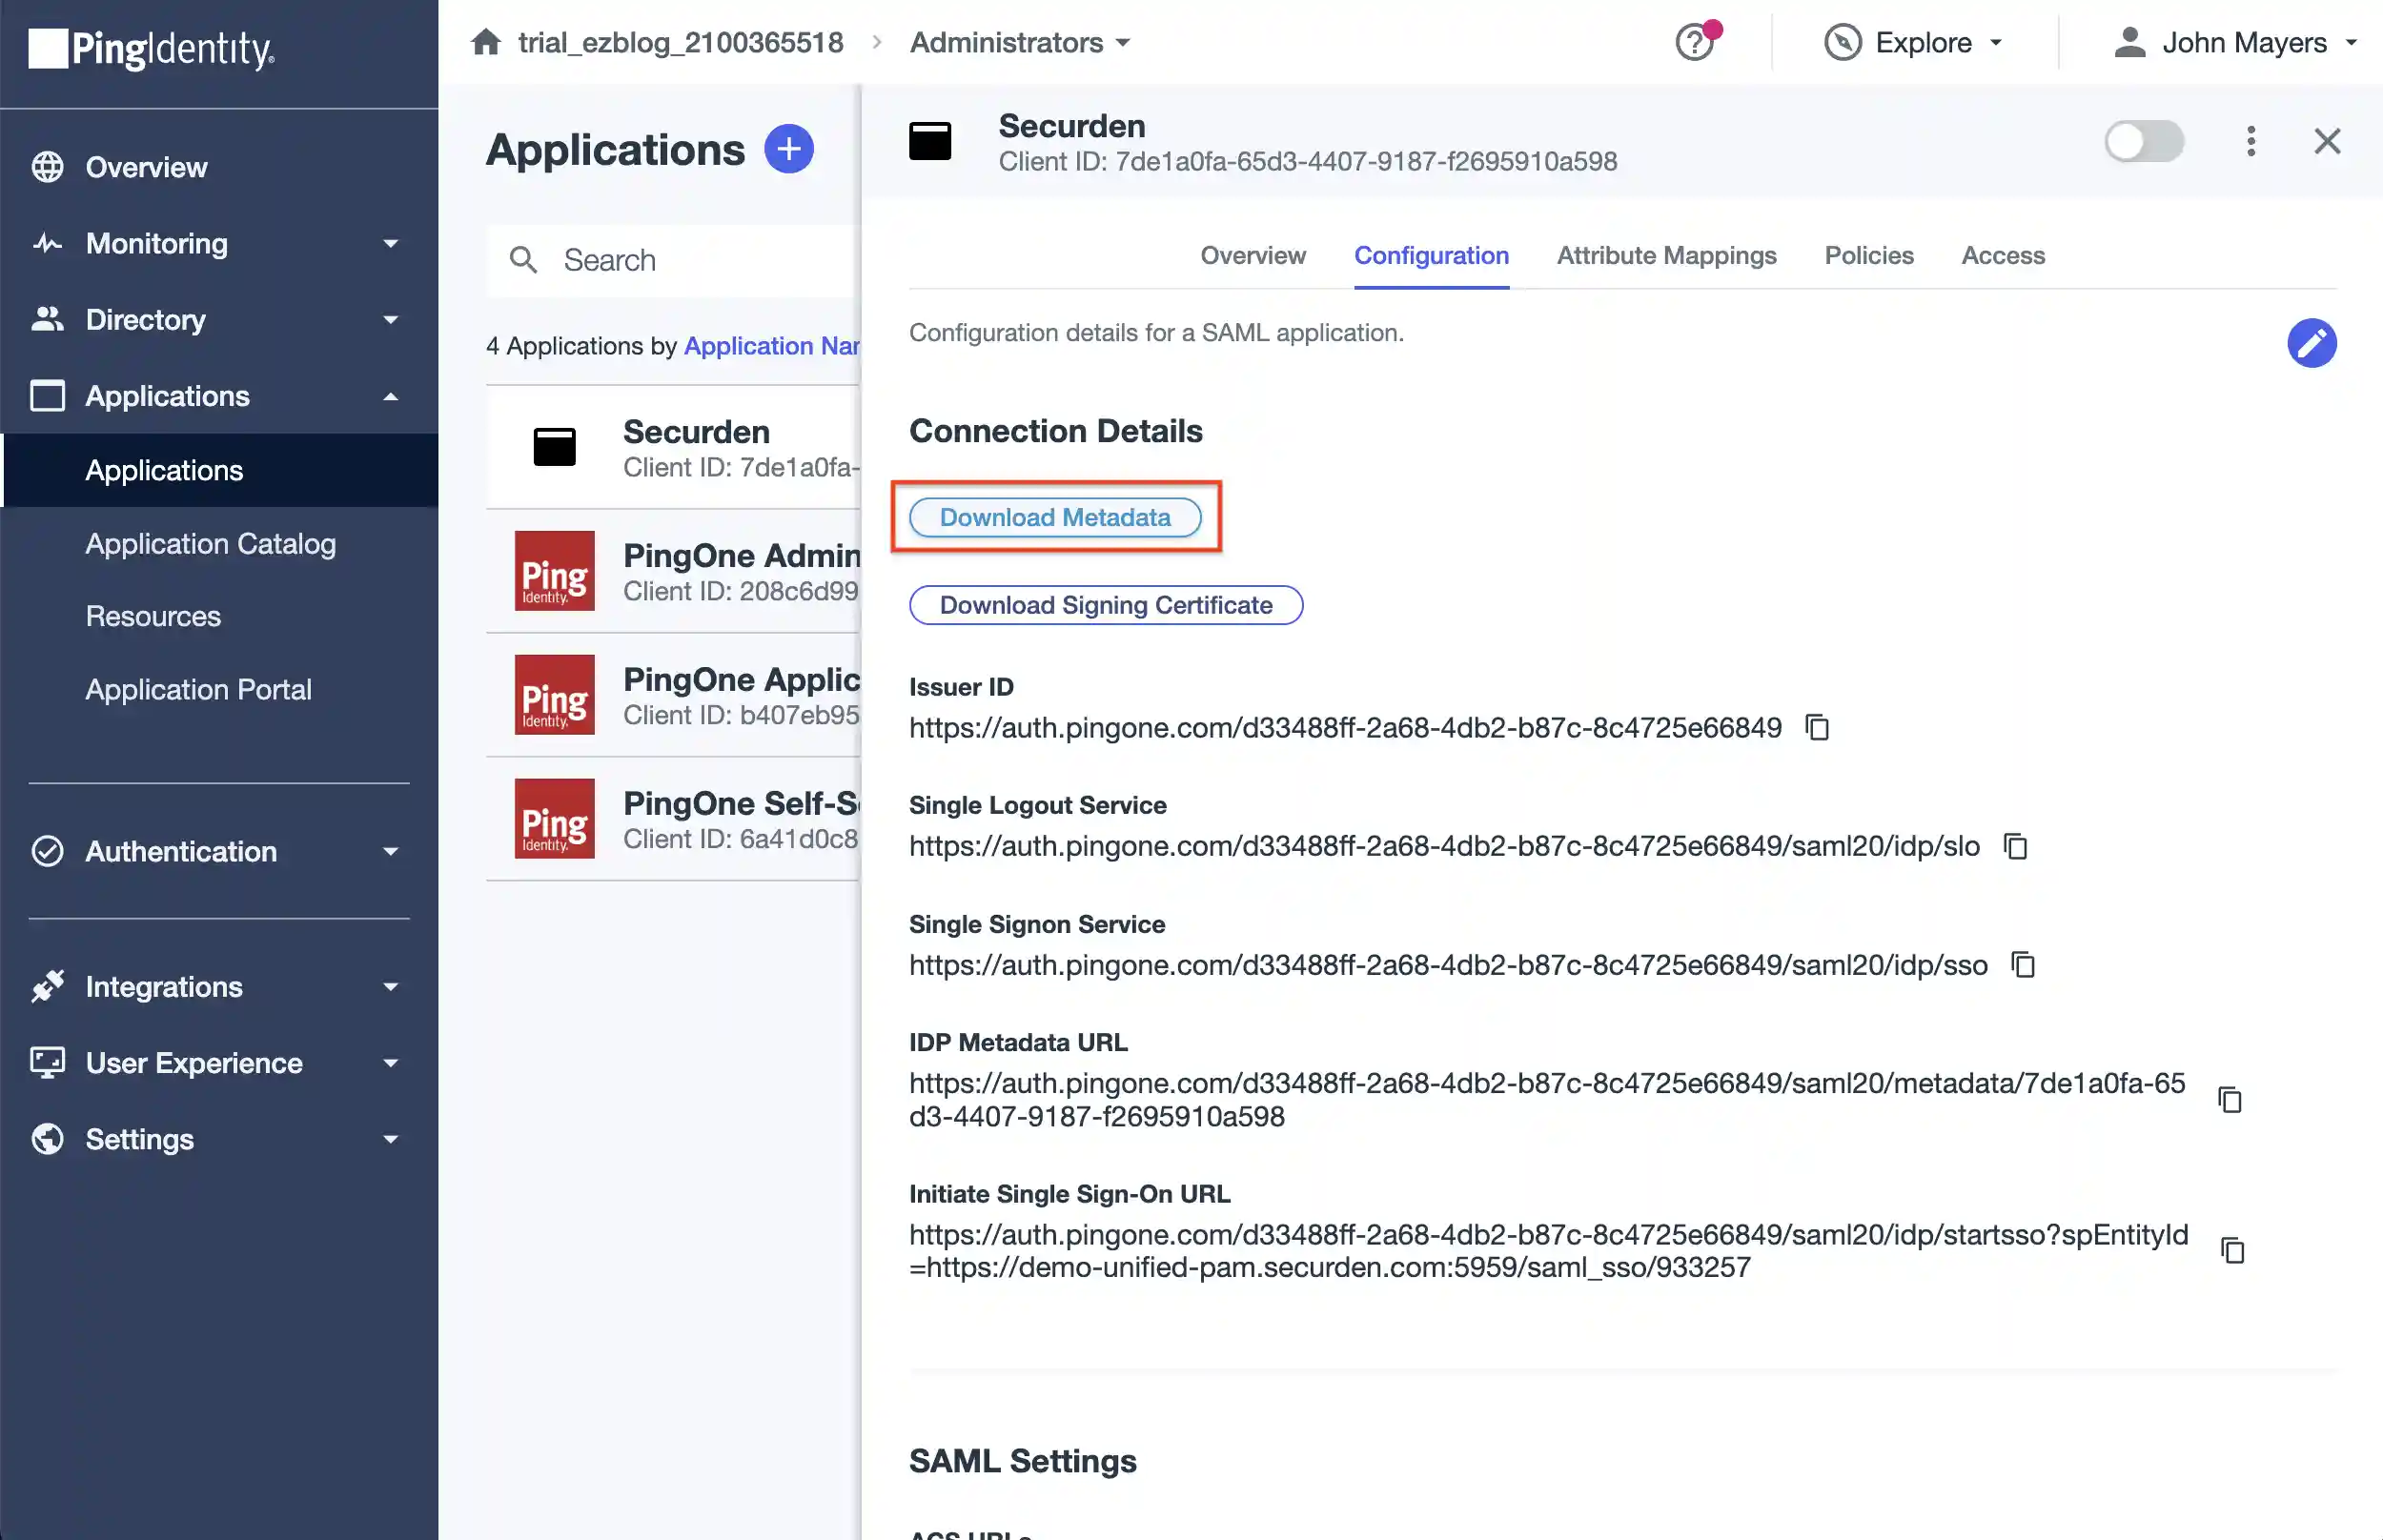
Navigate to Applications >> (Specified App Name) >> Configuration and download metadata or copy the respective Issuer ID (Entity Id) and IDP metadata URL (Login URL).
-
Navigate to Securden >> Admin >> Integrations >> SAML SSO. Click on the Configure IdP Details option to display the IdP options. Here, you need to enter details of your SAML IdP. You can add the details manually or choose to import them from the IdP Metadata file.
-
Click the Save button to complete the setup.
-
Navigate to Ping Identity, Applications >> Securden >> Access and follow the instructions in the GUI to assign Securden to your users. Select the required users and assign them the application.


