Import from Azure AD
Securden allows you to import users from Azure AD. This is a two-step process. In the first step, you need to supply certain connectivity details to enable Securden to scan the members in the domain. This step requires integration with Azure AD and some configuration steps. For details, refer to Securden-Azure-AD-Guide.pdf available in the user interface (Navigate to User Groups >> Add >> Import from Azure AD).
Step 1: Establish Connectivity
Prerequisites: Azure AD import requires internet connectivity. If your organization makes use of a proxy server to regulate internet traffic, you should have configured Proxy Server Settings (Admin >> General >> Proxy Server Settings).
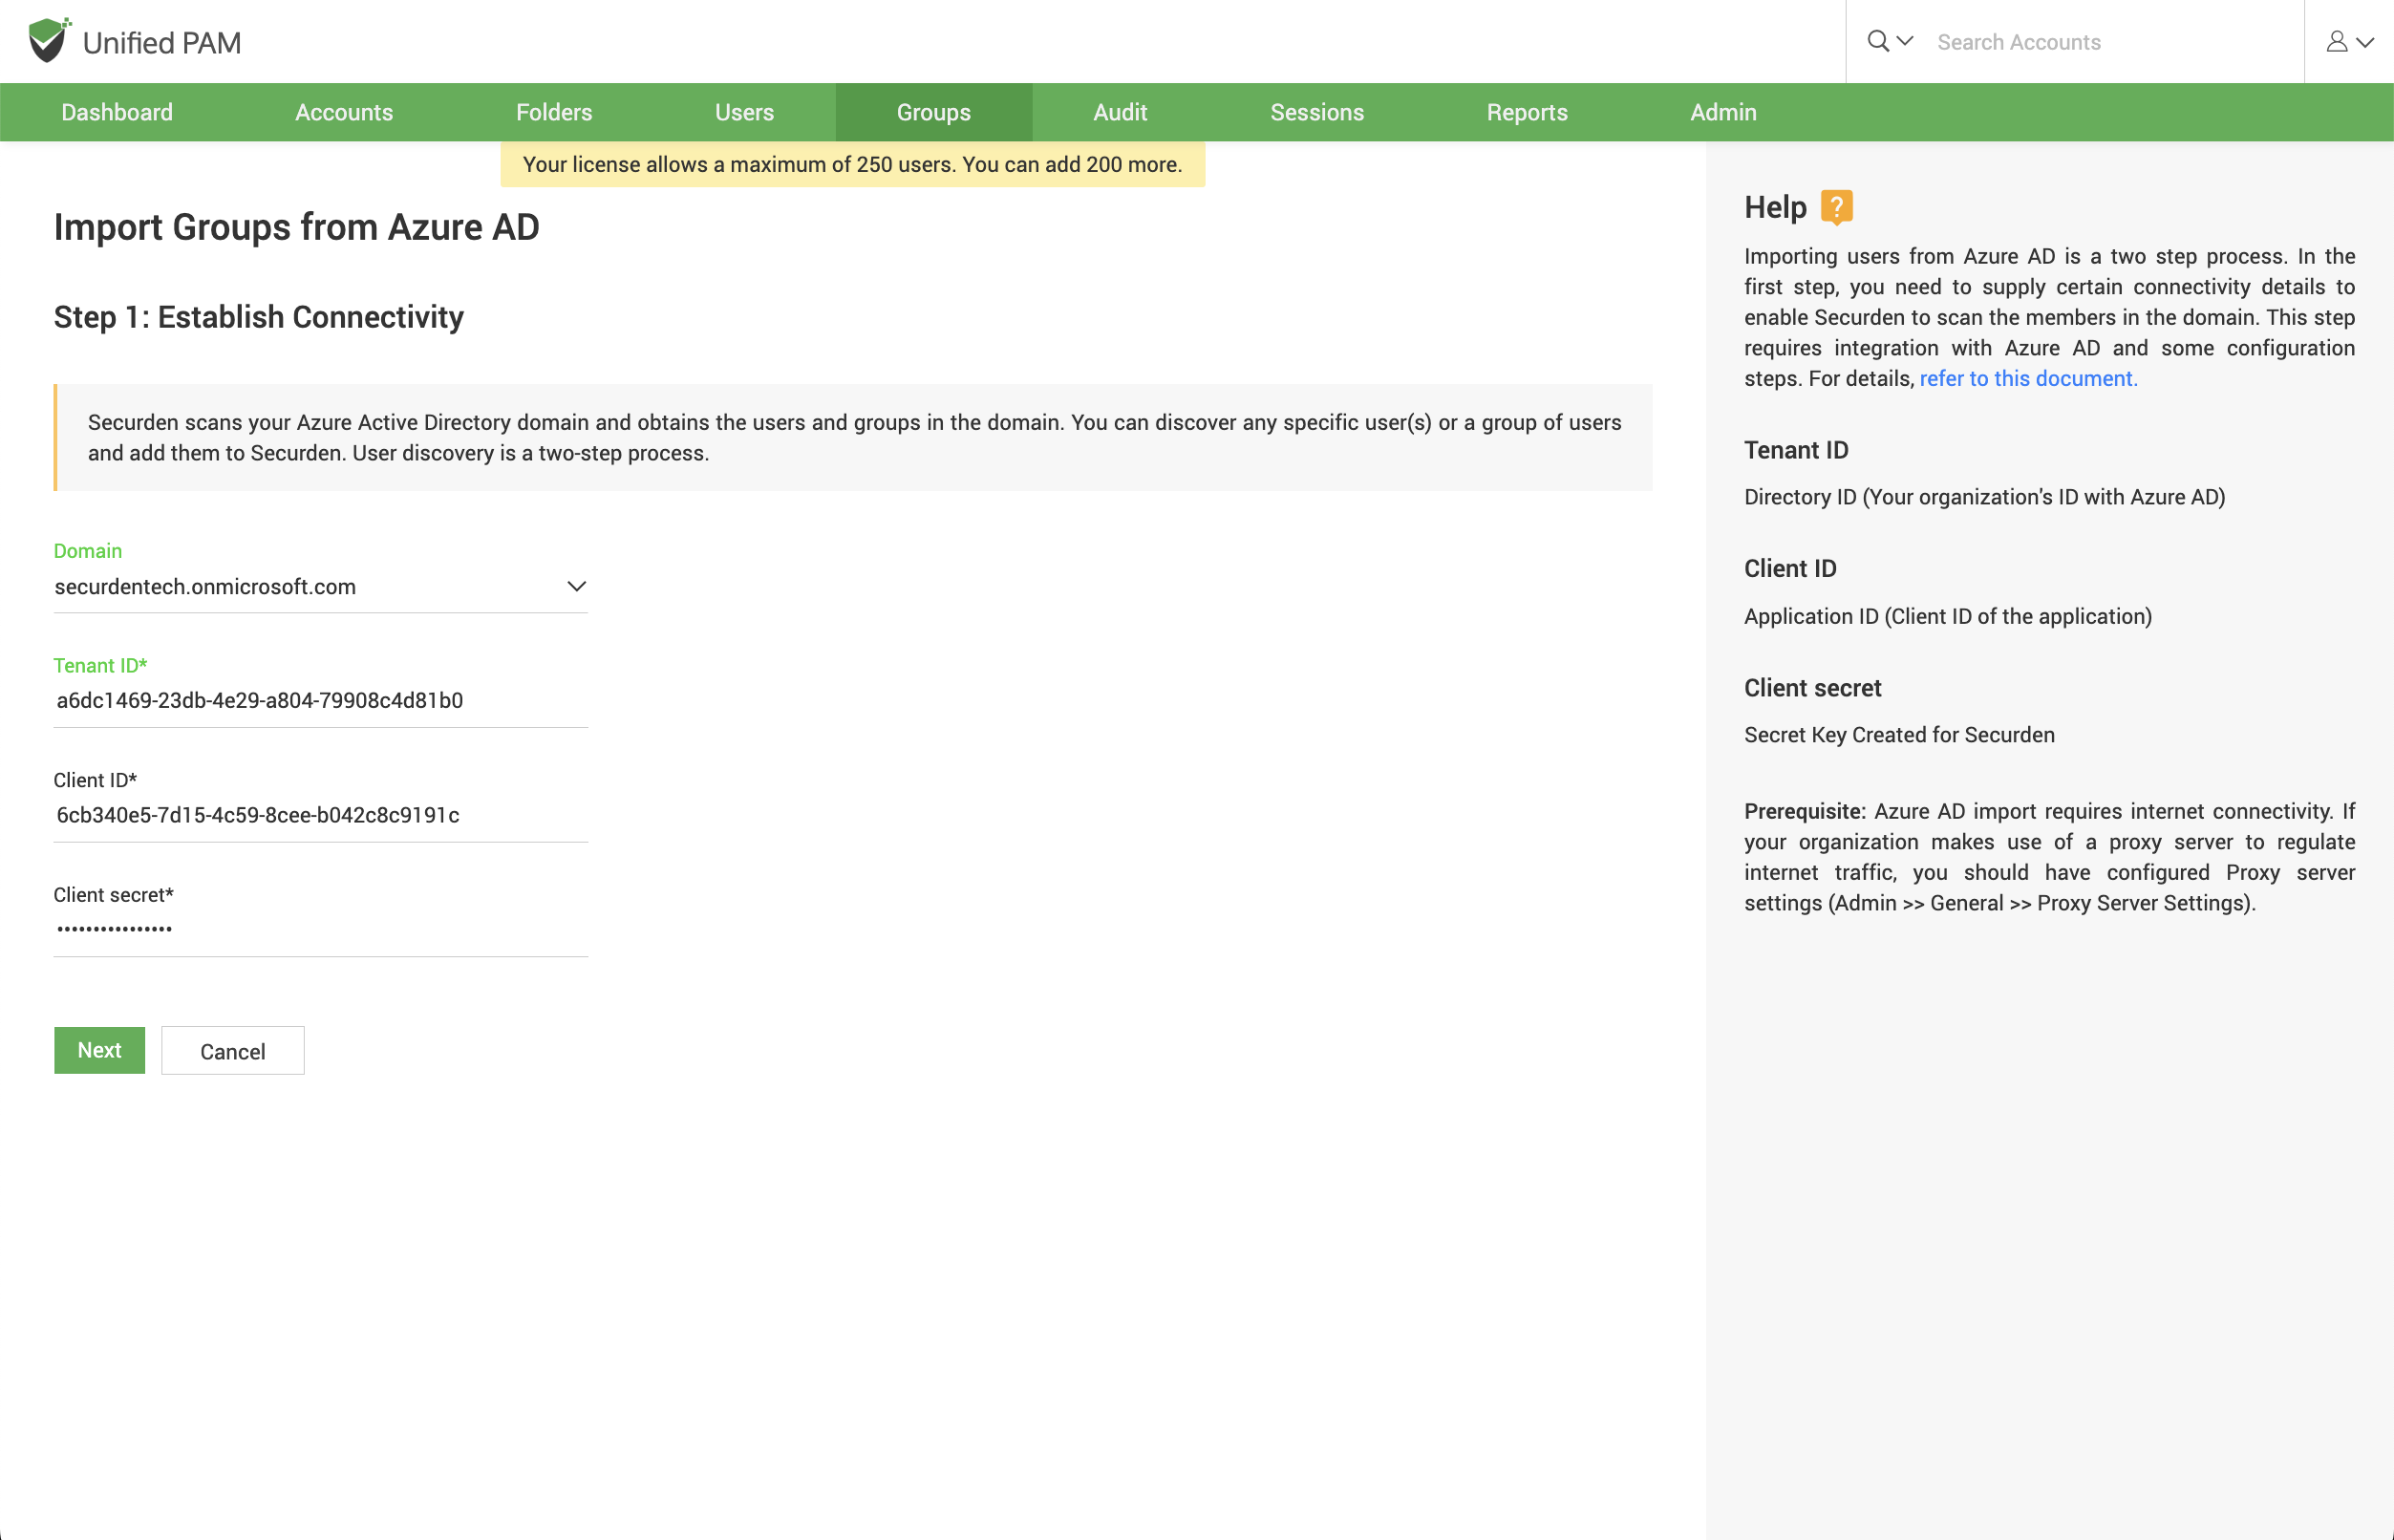
In the GUI page that appears, enter the following details:
Tenant ID: Enter the Directory ID i.e., Your organization's ID with Azure AD.
Client ID: Enter the Client ID of the application.
Client Secret: This is the Secret Key created for Securden.
Step 2: Import Users
This step is to fetch the required users and groups from the AD domain specified.
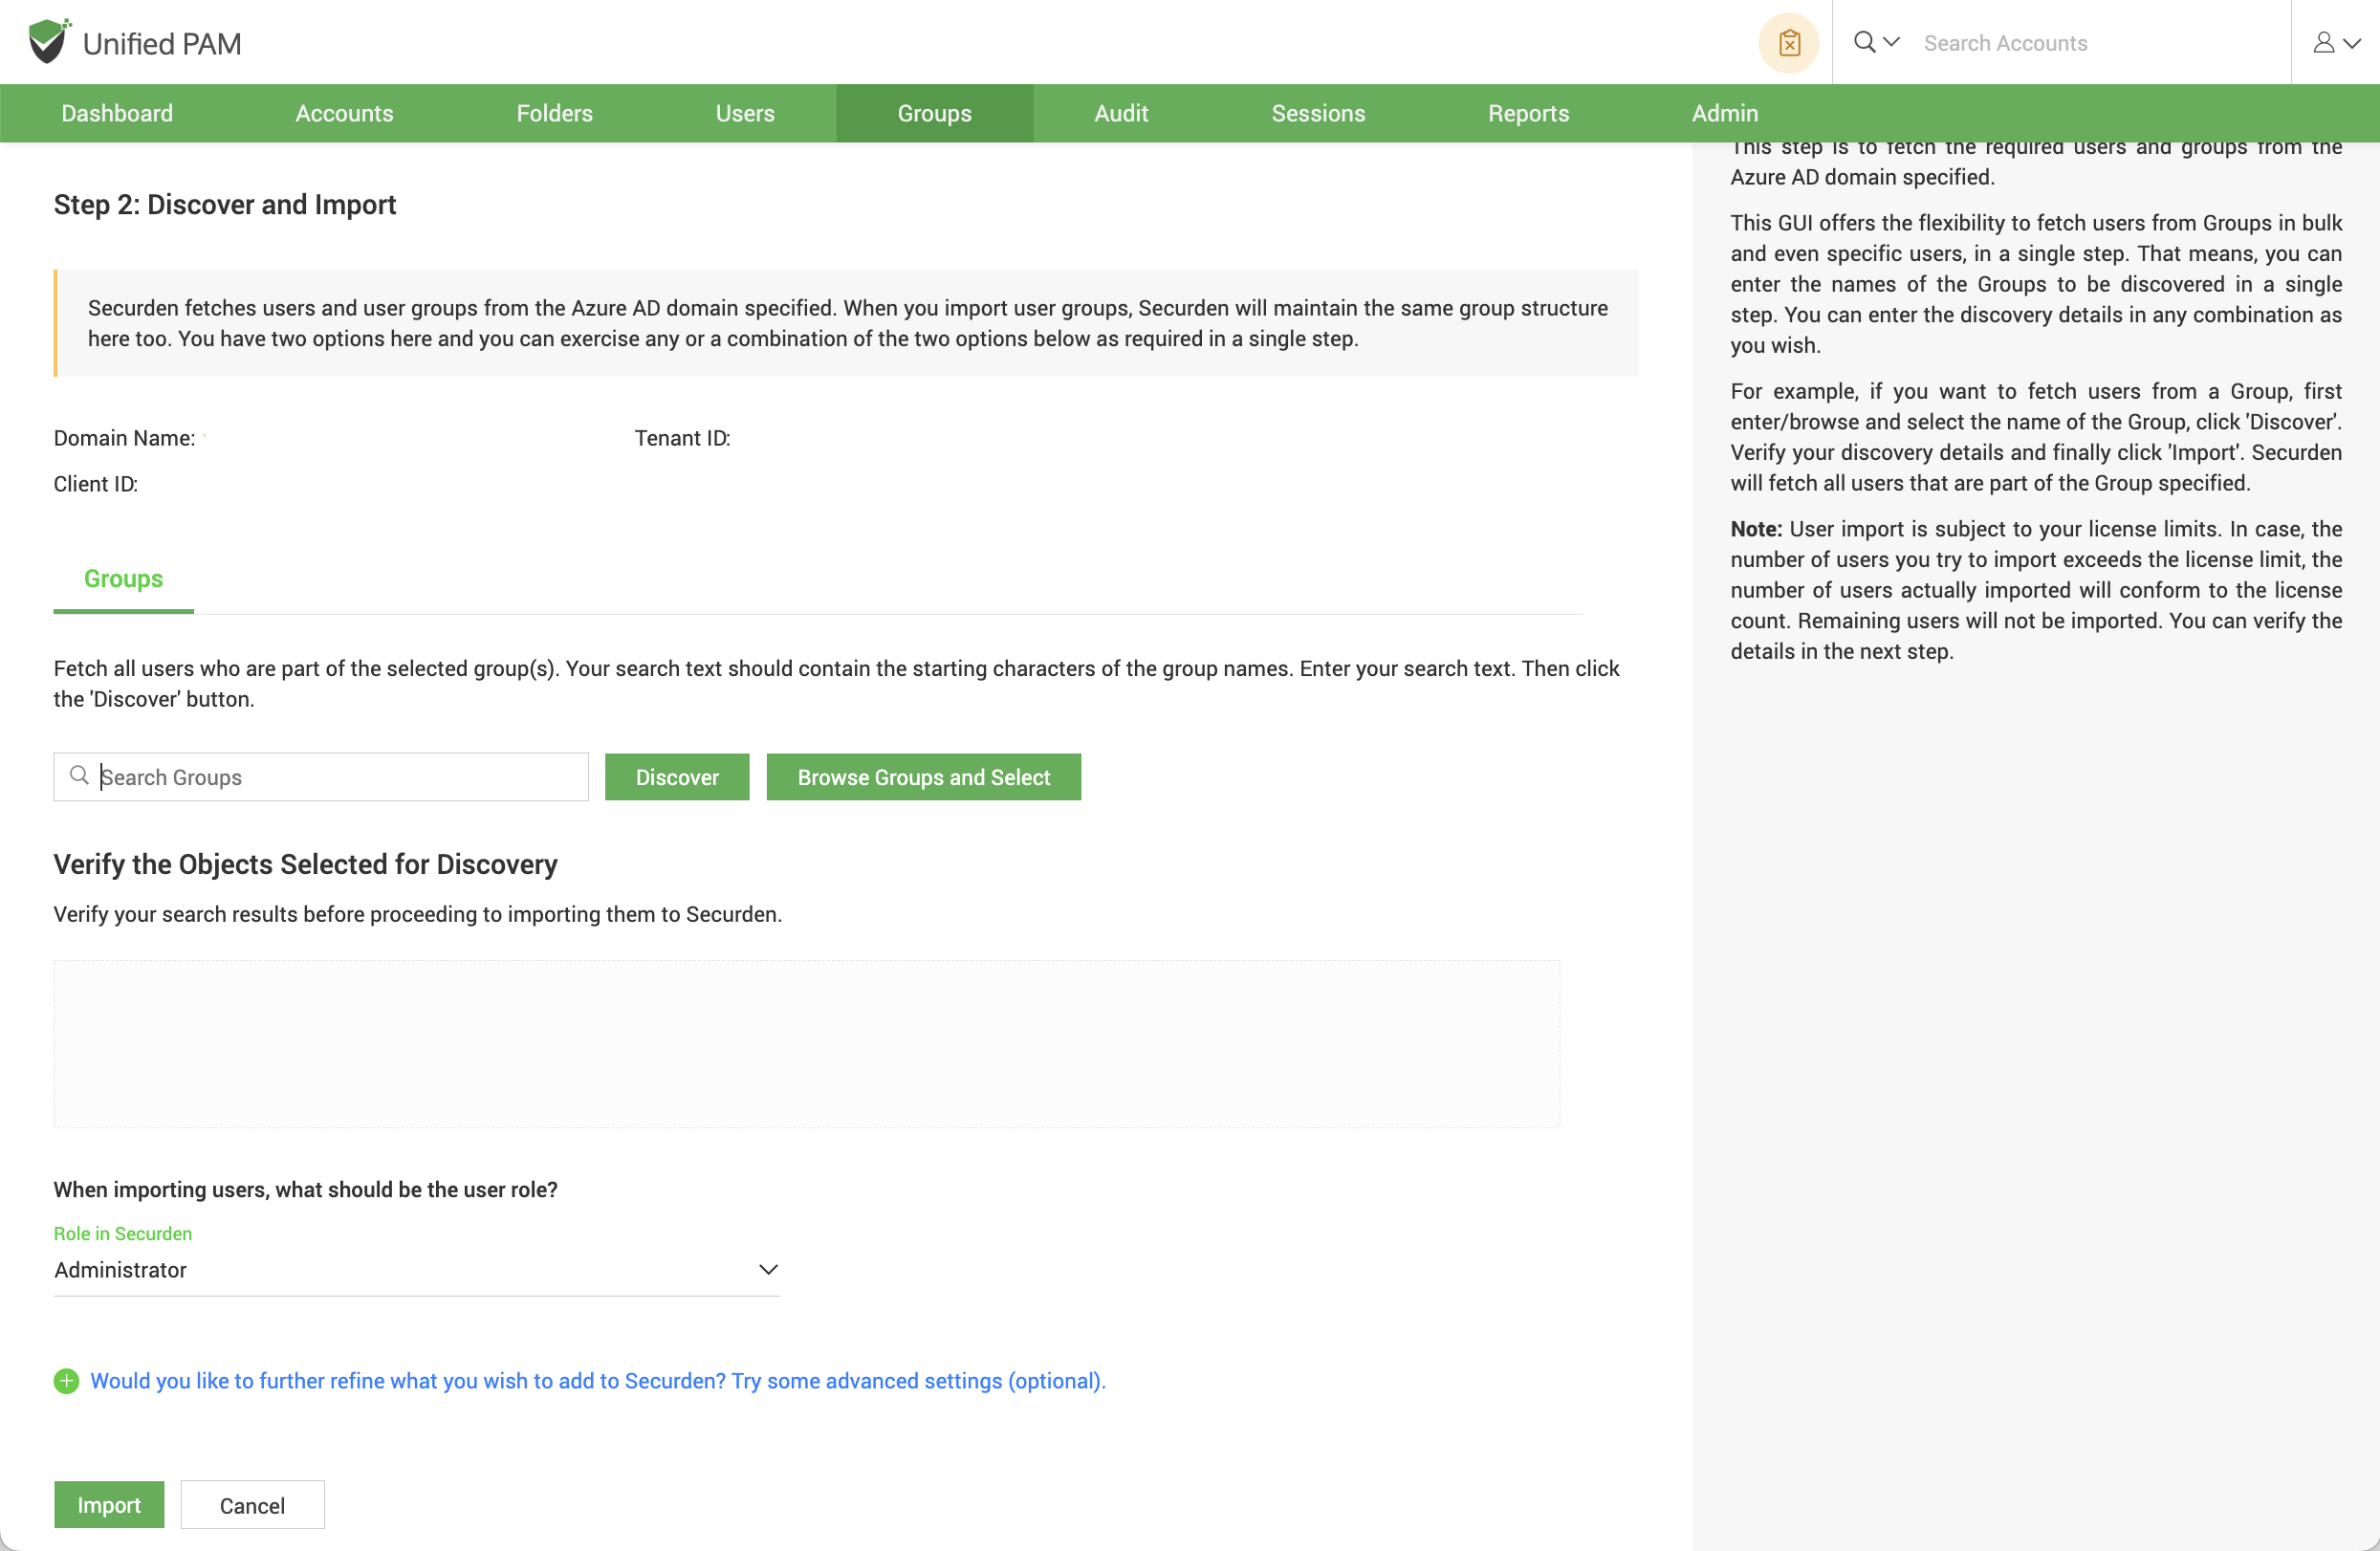
This GUI offers the flexibility to fetch user groups from OUs/Groups in bulk and even specific users, in a single step. That means you can enter the names of the OU/Groups to be discovered in a single step. You can enter the discovery details in any combinations (OUs and Groups) as you wish.
To import OUs, select the OU tab
-
Enter the OU name and select Discover.
-
You can also browse from the OU tree by clicking on the Browse OU Tree and Select option. You can select one or multiple OUs and select Add.
-
You can then verify your selection in the Verify the Objects Selected for Discovery.
-
You can then select the role for the OUs imported using the Role in Securden dropdown.
Note: Before selecting the import button, you can look into the additional settings which are explained below.
-
Select Import.
To import Groups, select the Groups tab
-
Enter the Group name and select Discover.
-
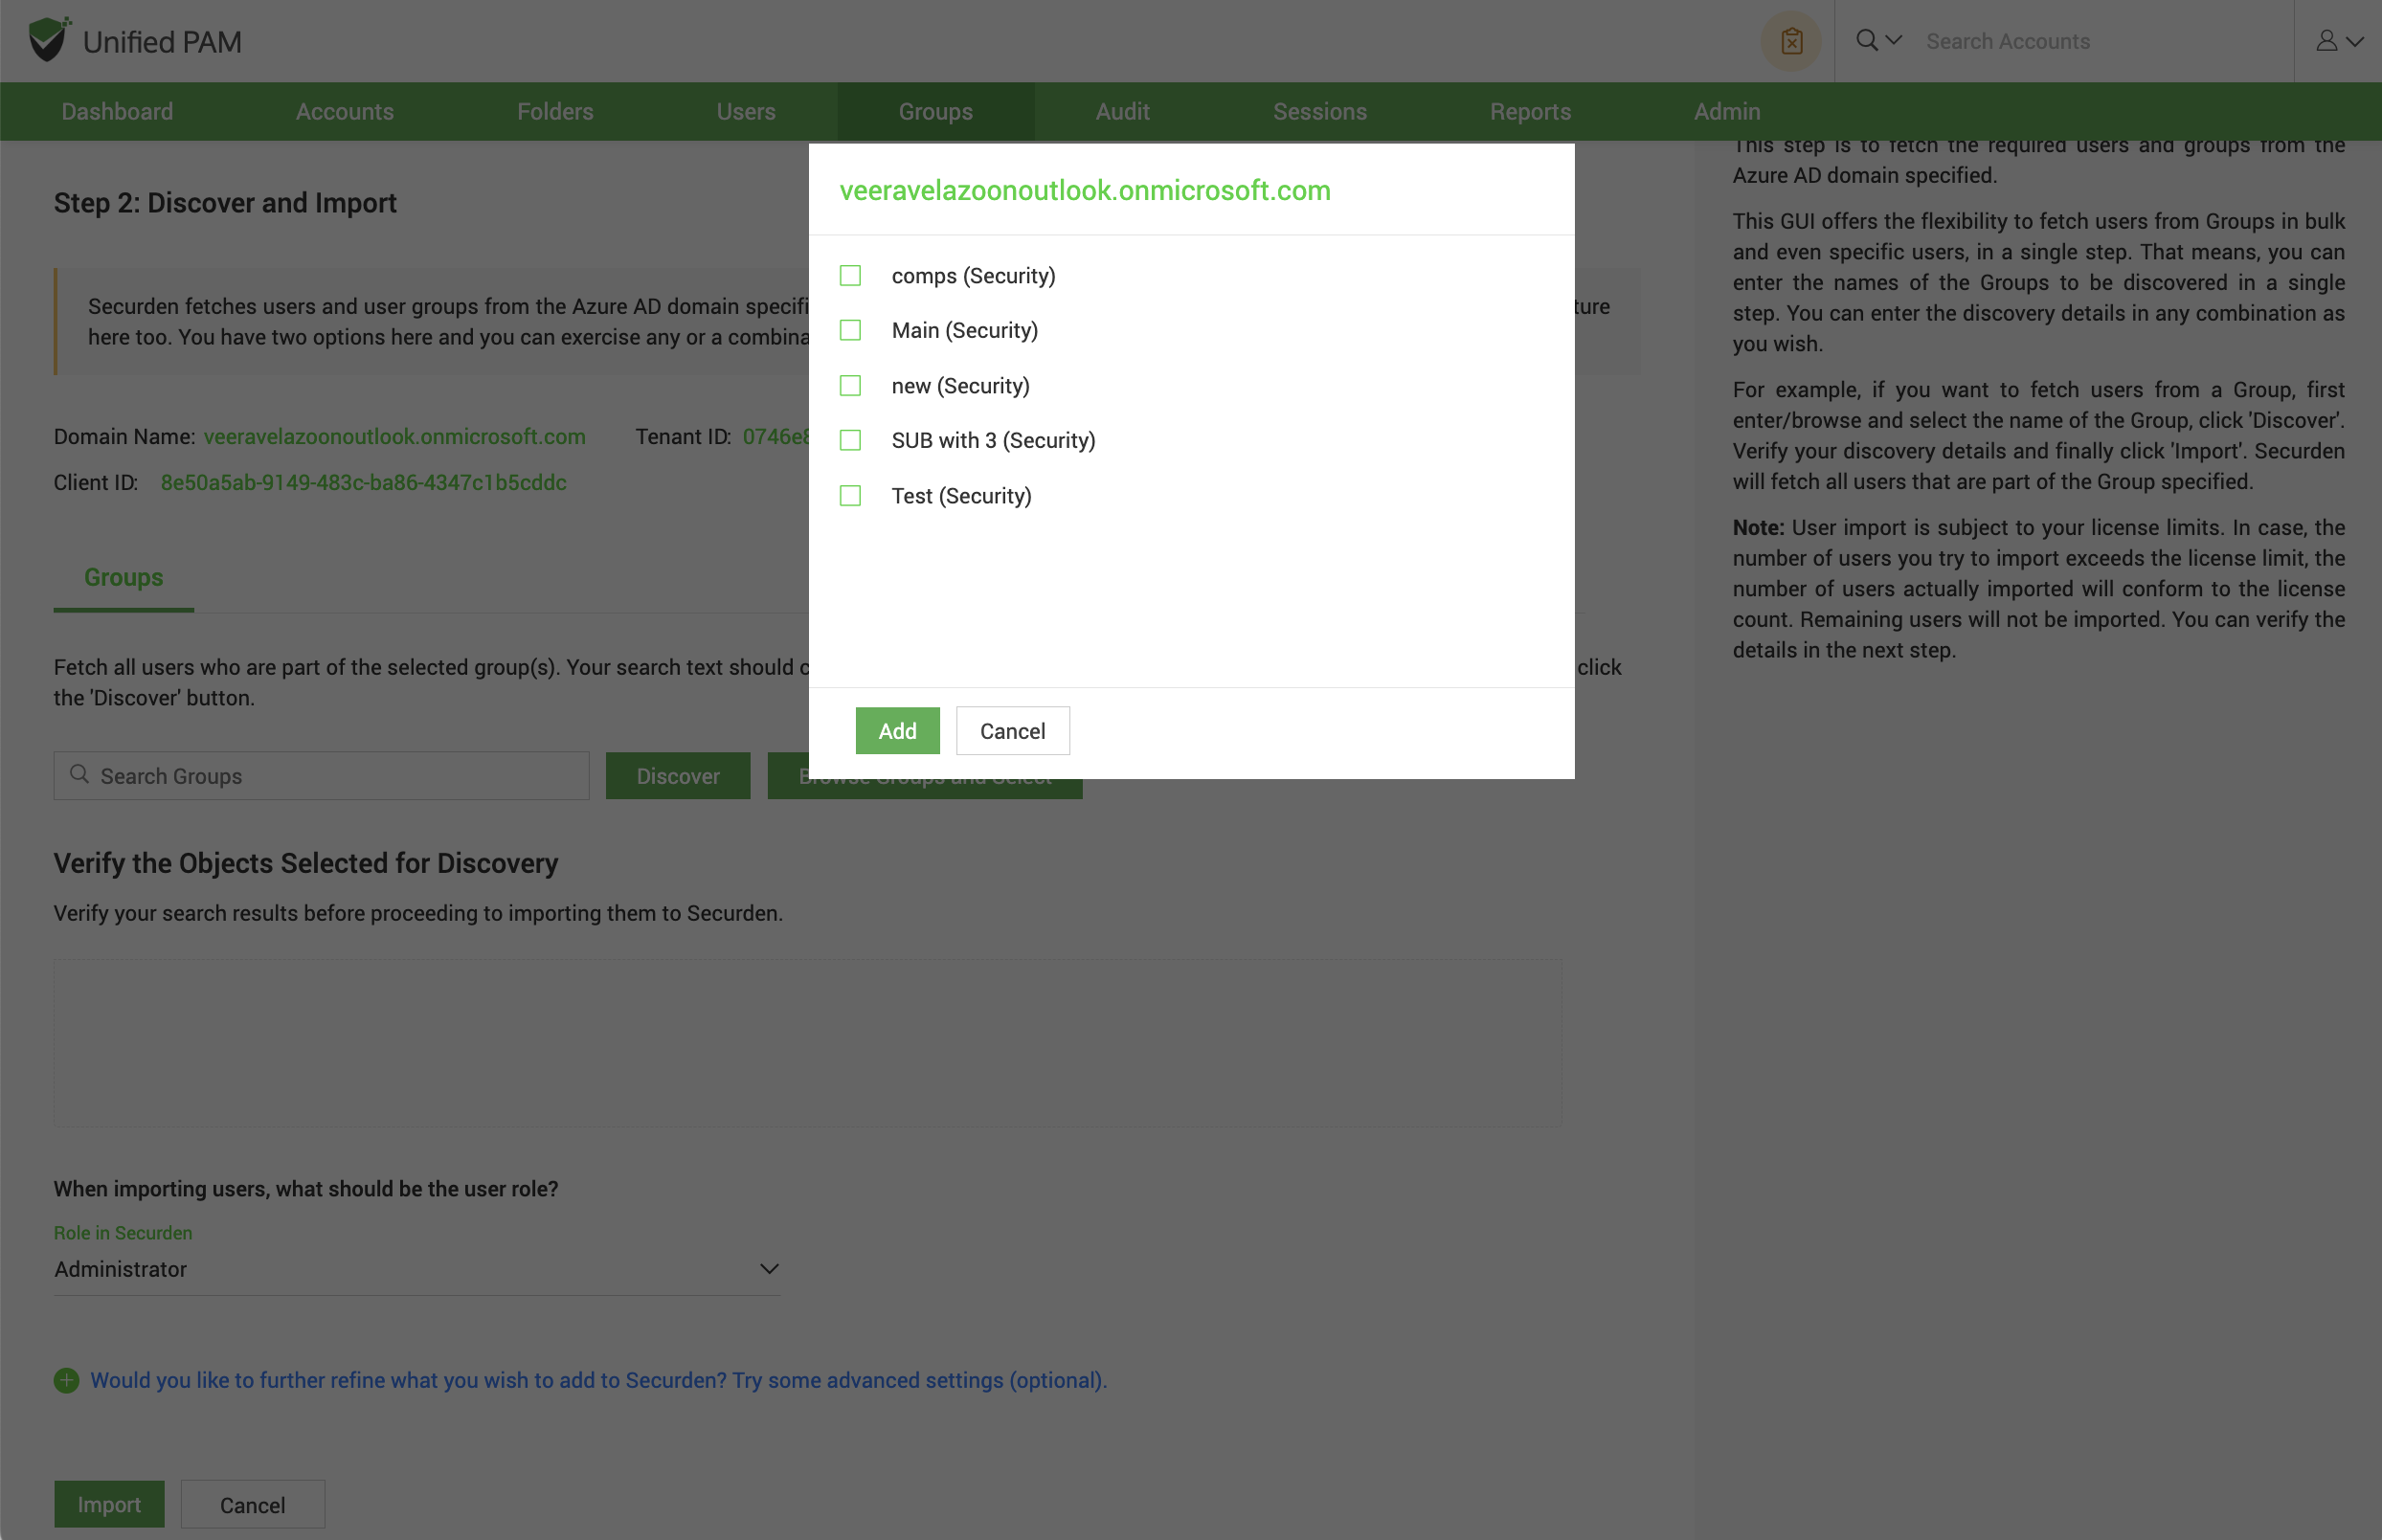
You can also browse from the OU tree by clicking on the Browse Groups and Select option. You can select one or multiple OUs and select Add.
-
You can then verify your selection in the Verify the Objects Selected for Discovery. If there are multiple groups for the provided search term, you need to select the required group and click Add.
-
You can then select the role for the OUs imported using the Role in Securden dropdown.
Note: Before selecting the import button, you can look into the additional settings which are explained below.
-
Select Import.
Advanced Settings:
This option allows you to either include domain users of all subgroups to the group being imported or ignore the subgroups and import only the users of the first level group.
User Groups to Import: You can import all or specific user groups to import, depending on your requirements. You can type in the names in the respective text fields in comma separated form.
Configure Synchronization: Securden also allows periodic synchronization with AD. After you import the required user groups, you can configure periodic synchronization with AD. This helps you import the groups automatically. Click Save to save the domain details.