Create a Client ID and Client Secret in Google
Google lets you utilize its API services to generate and make use of OAuth to create the Client ID and Client Secret. The steps to create the Client attributes are as follows:
Step 1: Navigate to the link provided and login with your account - Google Cloud Console - https://console.cloud.google.com/
Step 2: Once you log in into the console, click on Select a project >> NEW PROJECT

Step 3: Give a project name and click Create

Once you’ve created a project, you need to enable API services that Google provides.
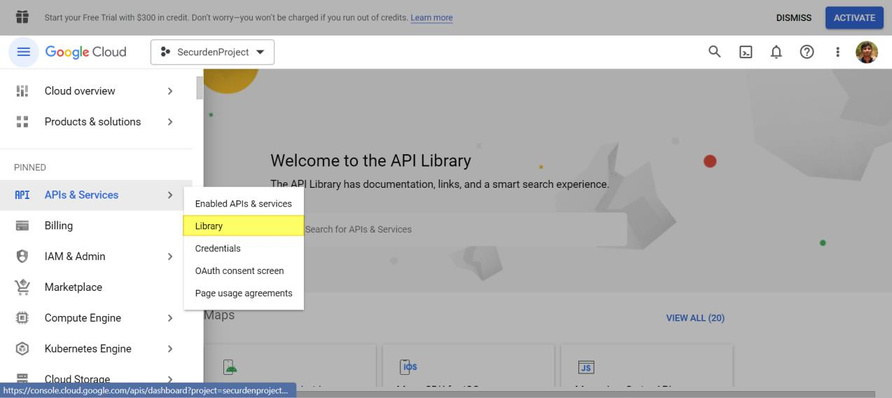
Step 4: Click the navigation menu on the left of the Google cloud console and select APIs & Services >> Library
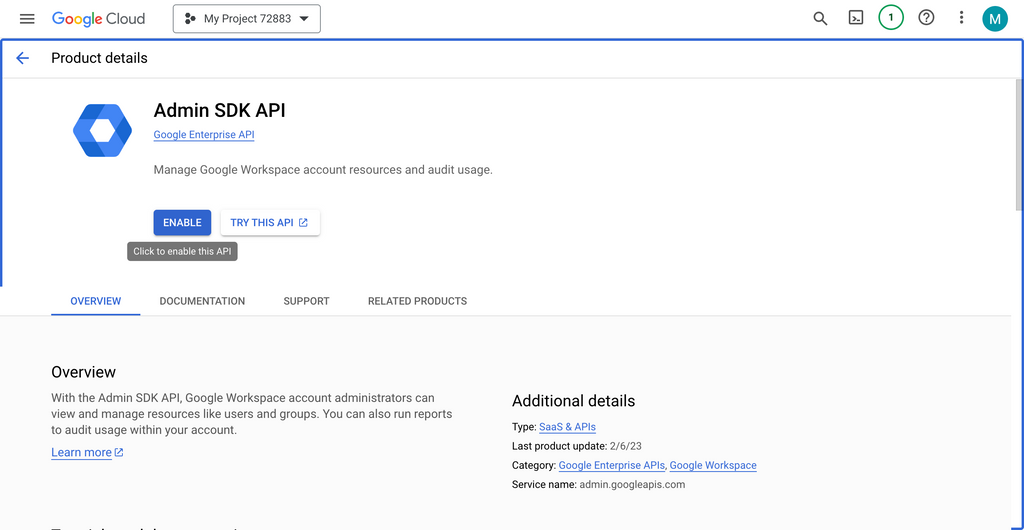
Step 5: Click on Admin SDK API and Enable the API (Specific to Discovery requirements)

Step 6: You can now search and enable the Admin SDK API
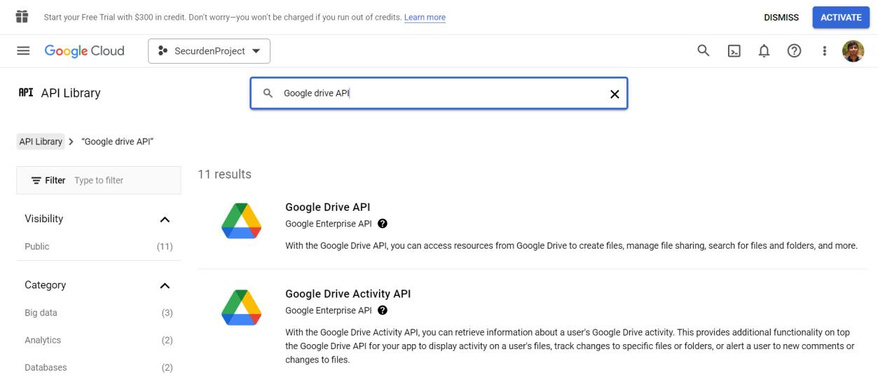
Step 7: You can now search the API library to find Google Drive API
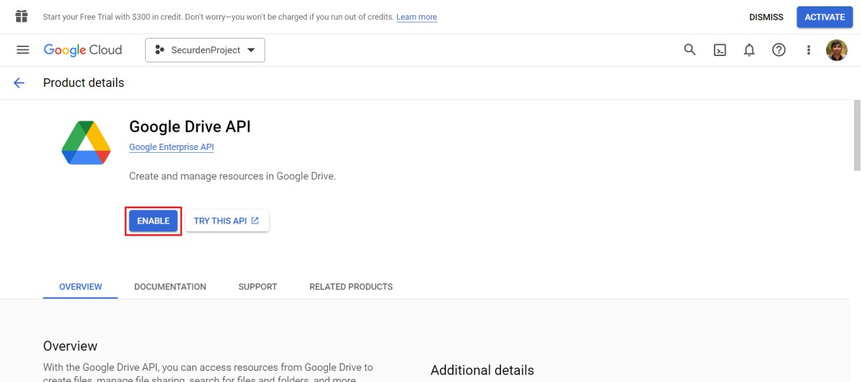
Step 8: Click on Google Drive API and Enable the API (Specific to Cloud storage requirements)
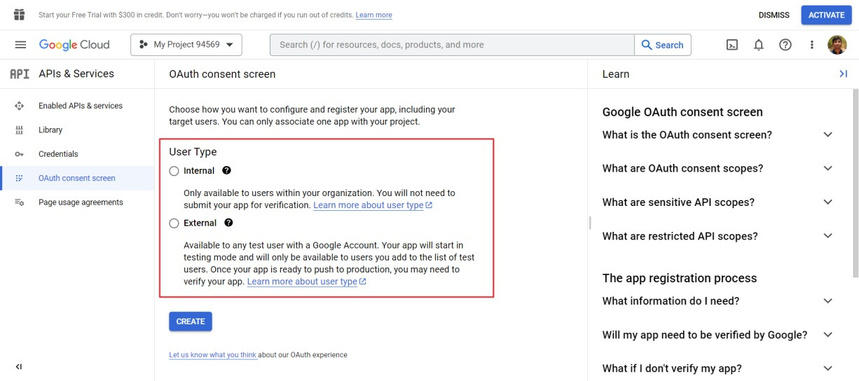
Step 9: Once you’ve enabled the API, click on OAuth consent screen available to the left of the console in the navigation menu.
Then, click on one of Internal/External User Type and CREATE an application to associate with your project.
If you select Internal, the application registered will be available only to users within your organization. If you select External, other users will be able to access the application.
The steps that follow apply to both Internal and External user types
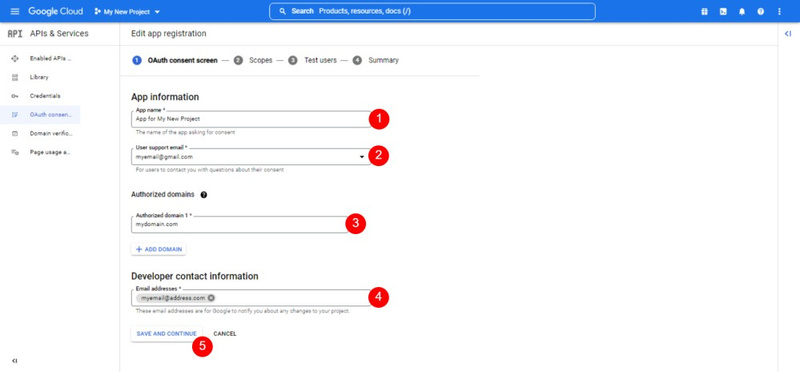
Step 10: In the Application registration page, you need to enter the following details: App Name, User support email (personal mail id), Authorized domain, Email addresses (personal mail id) and click Save and Continue.
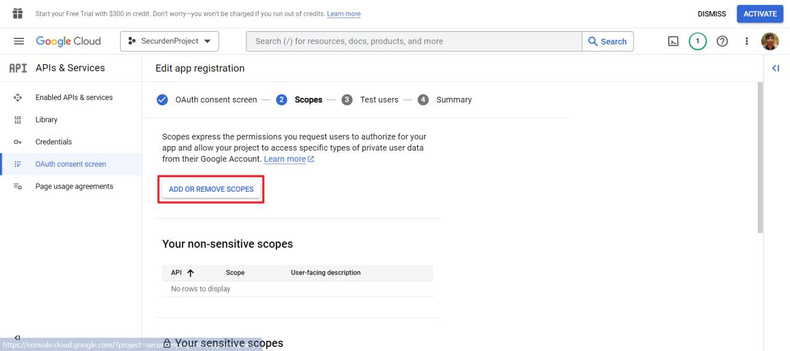
Once you’ve filled in the details on the OAuth consent screen, you need to define the Scope. Click on Add or remove scopes.
Step 11: Search and find the required scopes and select it.
Discovery Scopes
../auth/userinfo.email to let the app view the Google Account email address.
../auth/userinfo.profile to let the app see your personal information including any personal information that was explicitly made publicly available.
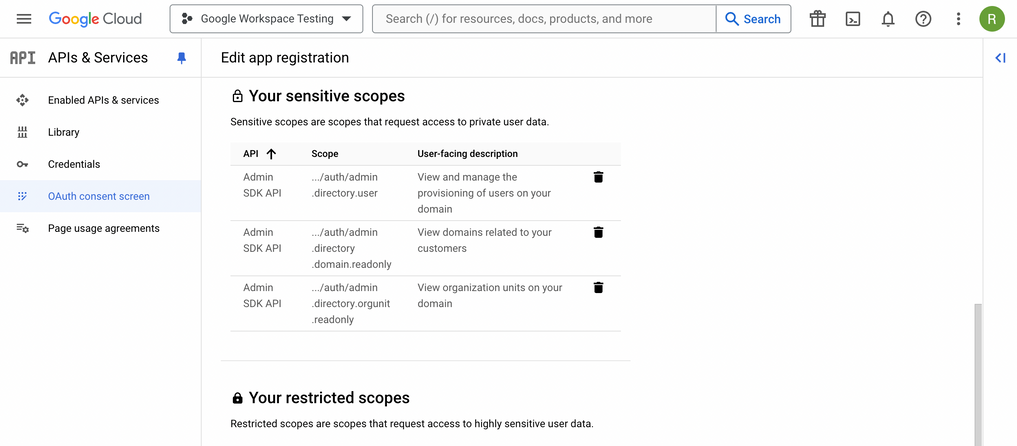
../auth/admin.directory.user to view and manage provisioning of users on your domain.
../auth/admin.directory.orgunit.readonly to view organization units on your domain.
../auth/admin.directory.domain.readonly to view domains related to your users.
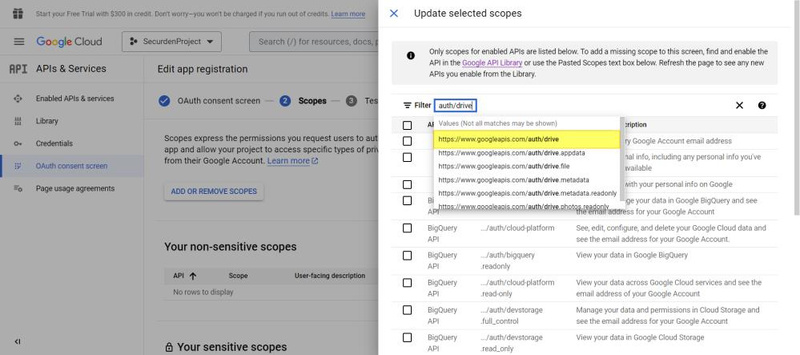
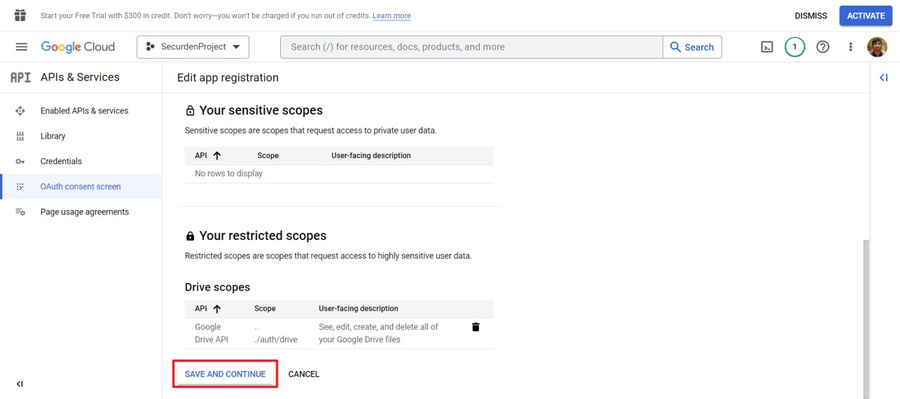
Cloud Storage Scope: ../auth/ .scope to let Securden store recording/reports etc on Google.

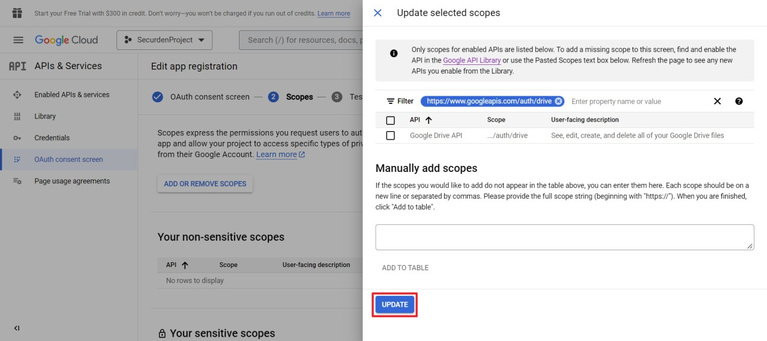
You can check the added scopes and save them.

Step 12: Click on Save and Continue
Note
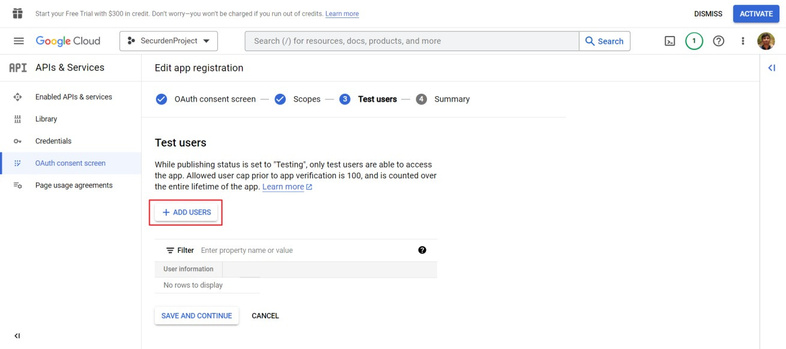
For Internal User Type, the app registration ends here, and you can skip to Step 16. For External User Type follow steps 13, 14, and 15
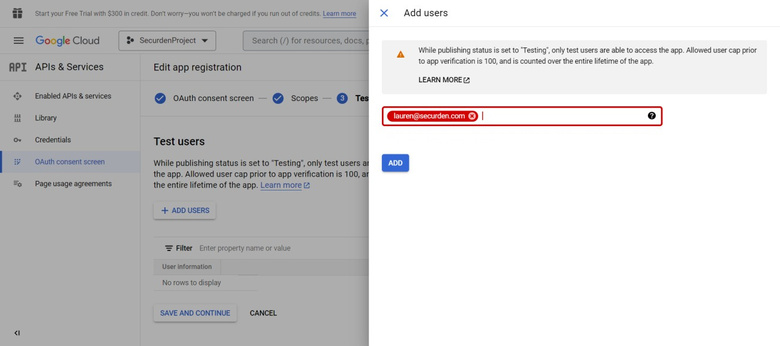
Step 13: Click on Add Users
Step 14: Enter your email address and click Add
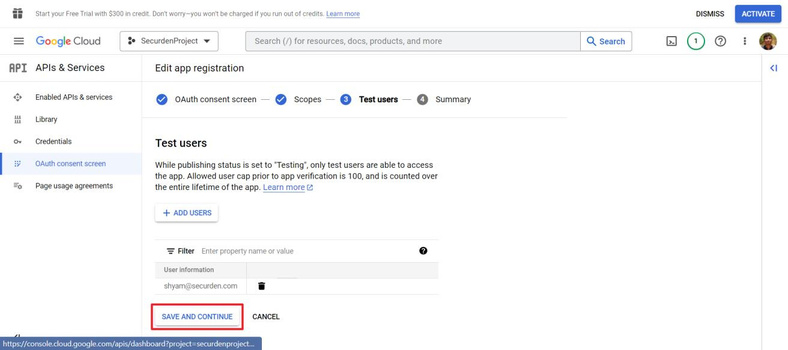
Step 15: Save and continue with the changes made
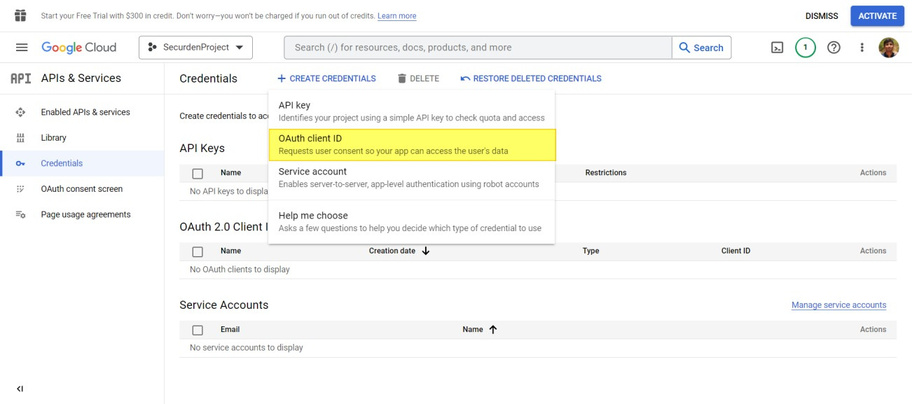
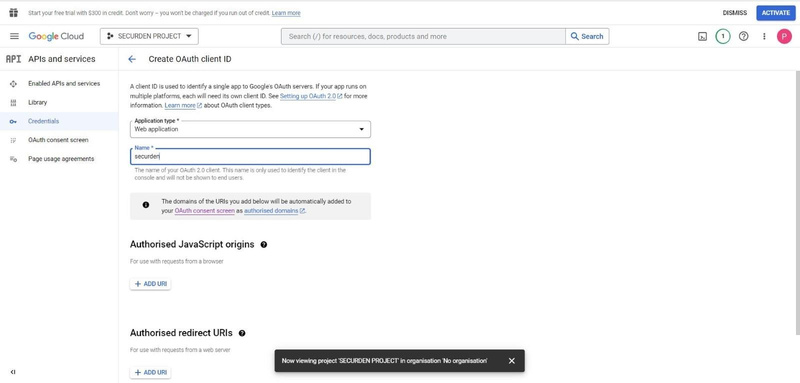
Step 16: Once you’ve checked the summary of the application, navigate to Credentials on the navigation bar and click on Create Credentials and select OAuth client ID.
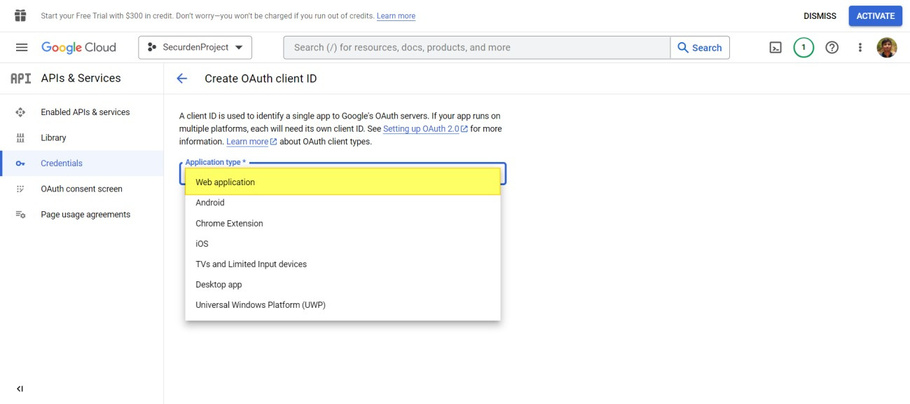
Step 17: Select the Application Type Web Application from the drop-down
Step 18: Enter a Name for the application
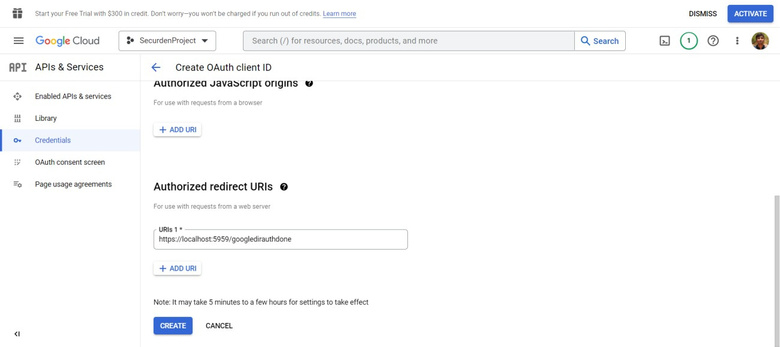
Step 19: Enter the URL used to access the Securden server, example: https://
Step 20: Copy the Client ID and Client Secret that are generated.
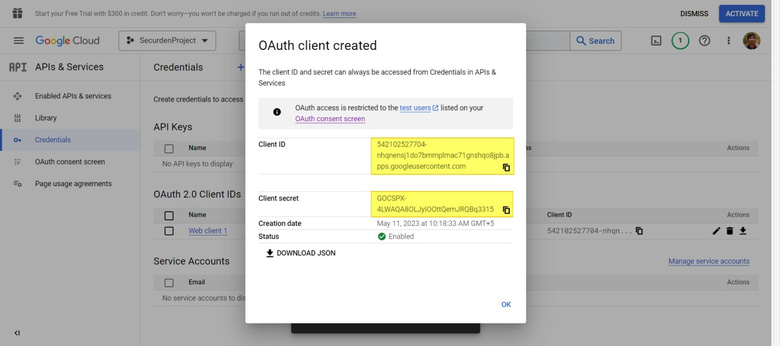
You can now utilize the Client ID and Client Secret attributes in Securden.