Import Users from Active Directory
When you integrate with AD, Securden scans your AD domain and obtains the users and groups in the domain. You can discover any specific user(s) or a group of users and add them to Securden.
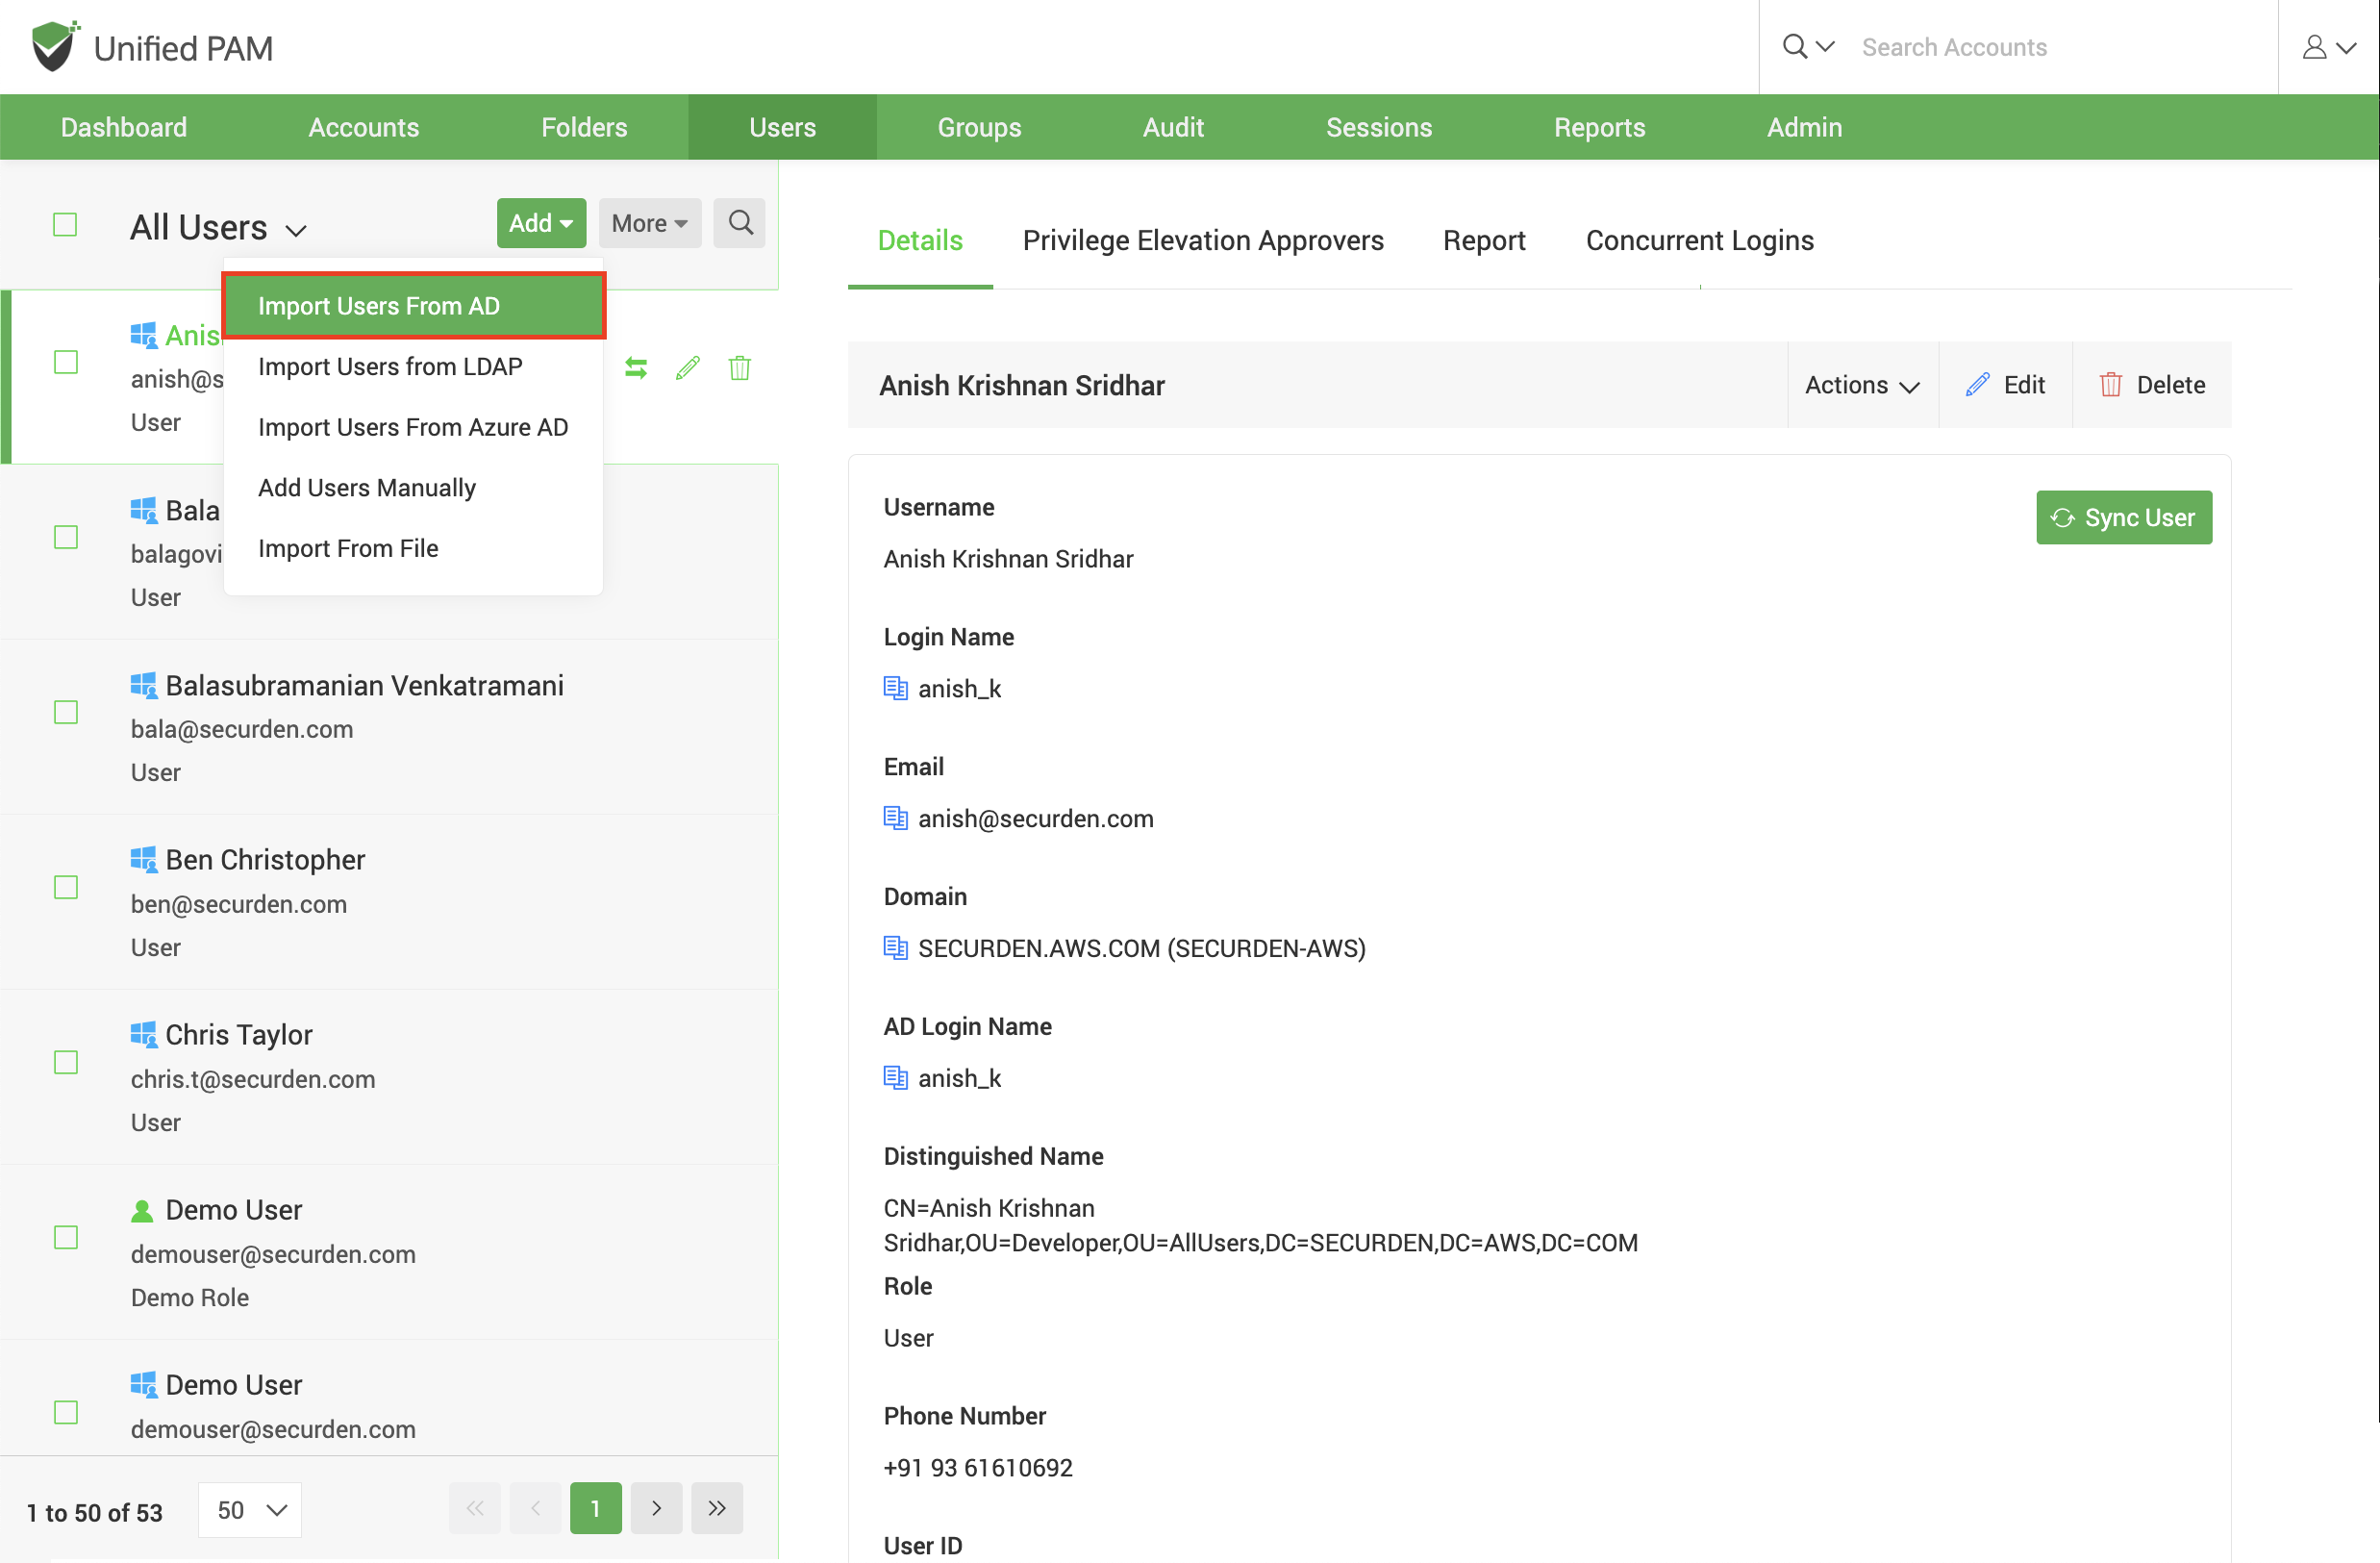
Navigate to Users >> Add >> Import Users From AD in the GUI to perform this step.
Importing from AD is a two-step process. In the first step here, you need to supply certain details to enable Securden to scan the members in the domain.
Step 1: Establish Connectivity
This step requires you to provide certain details to enable Securden to scan members of the domain.
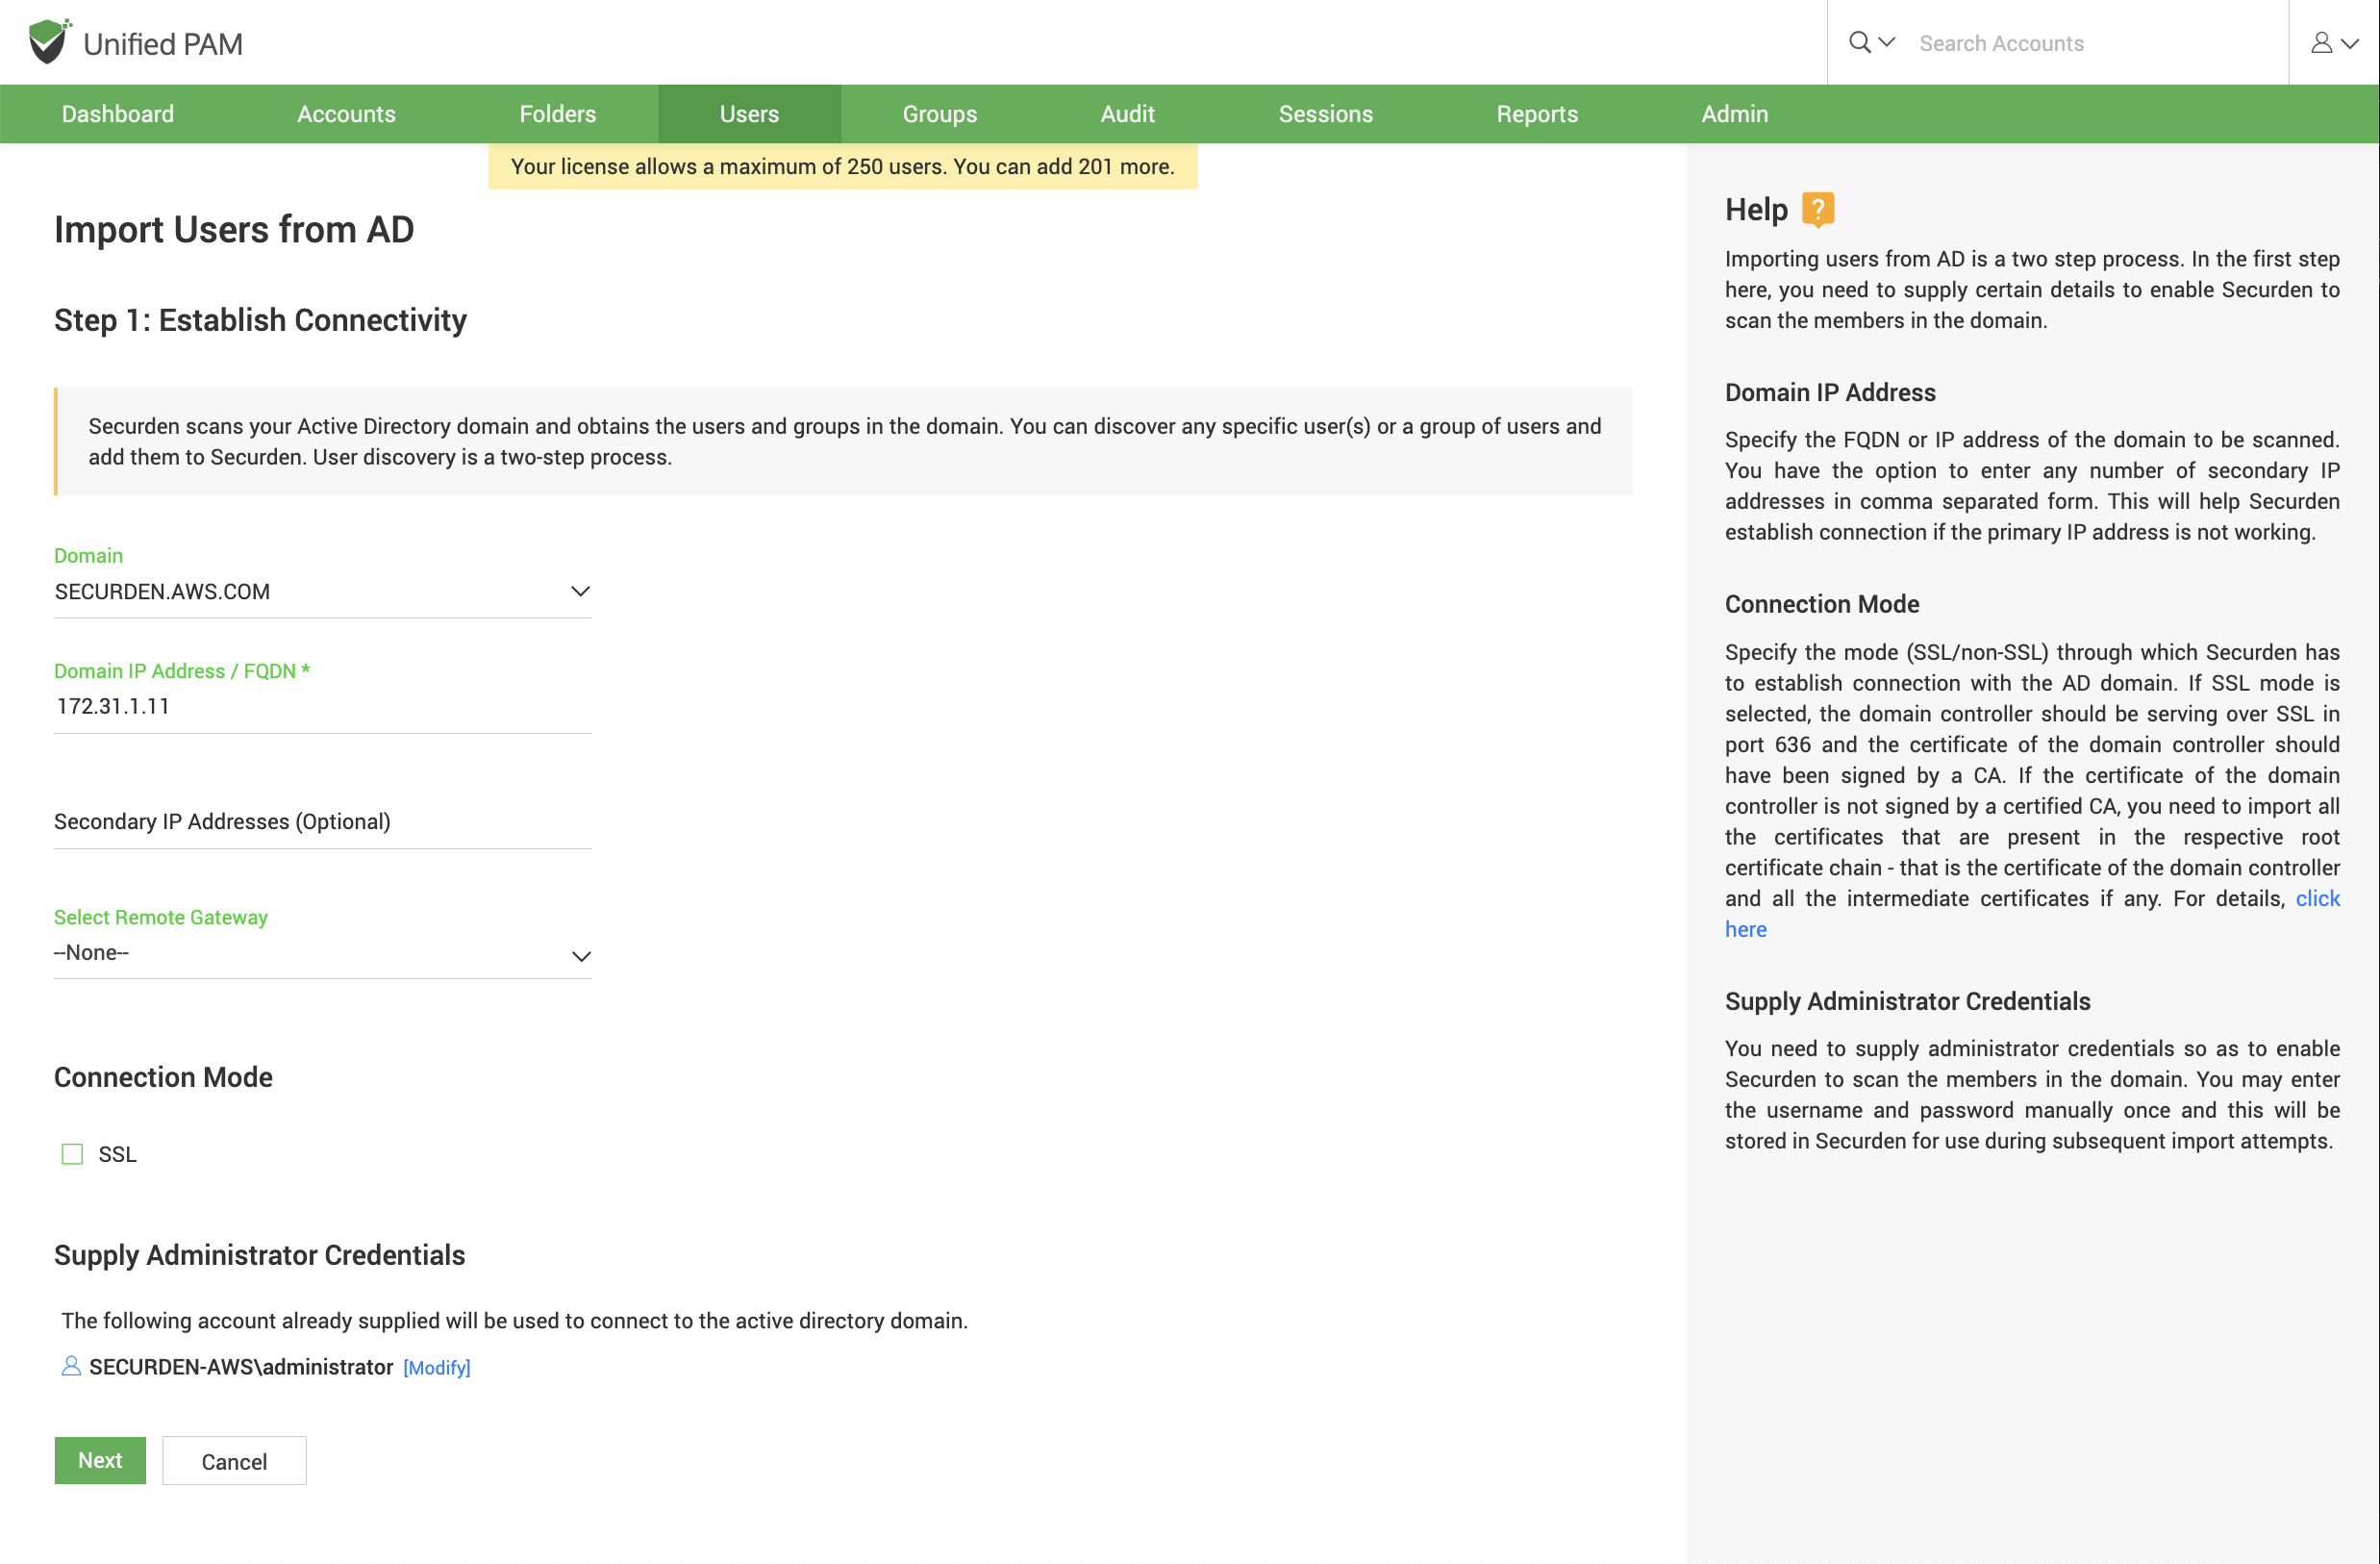
Domain IP Address: Specify the FQDN or IP address of the domain controller to be scanned. You have the option to enter any number of secondary IP addresses (secondary domain controllers) in comma separated form. This will help Securden establish a connection if the primary is not accessible.
Connection Mode: Specify the mode (SSL/non-SSL) through which Securden has to establish a connection with the AD domain.
Note
If SSL mode is selected, the domain controller should be serving over SSL in port 636 and the certificate of the domain controller should have been signed by a CA. If the certificate of the domain controller is not signed by a certified CA, you need to import all the certificates that are present in the respective root certificate chain - that is the certificate of the domain controller and all the intermediate certificates if any. You can follow the example given below to import the domain controller's certificate into the certificate store of the Securden server machine. (However, you may use any procedure that you would normally use to import the SSL certificates to the machine's certificate store).
Note
- In the Securden server machine, launch Microsoft Edge and navigate to Tools >> Internet Options >> Content >> Certificates.
- In the GUI that pops up, click Install Certificate and then choose Local Machine in the next step.
- Browse and locate the root certificate issued by the CA.
- Click Next and choose the option Automatically select the certificate store based on the type of certificate and install.
- Click Import again.
- Browse and locate the domain controller certificate.
- Click Next and choose the option Automatically select the certificate store based on the type of certificate and install.
- Apply the changes and close the wizard.
- Repeat the procedure to install other certificates in the root chain.
Supply Administrator Credentials: You need to supply administrator credentials to enable Securden to scan the members in the domain. You may enter the username and password manually once and this will be stored in Securden for use during subsequent import attempts.
Once you’ve entered the administrator credentials, click Next. This is the end of step 1.
In the next step, you can discover any specific user(s) or a group of users and add them to Securden.
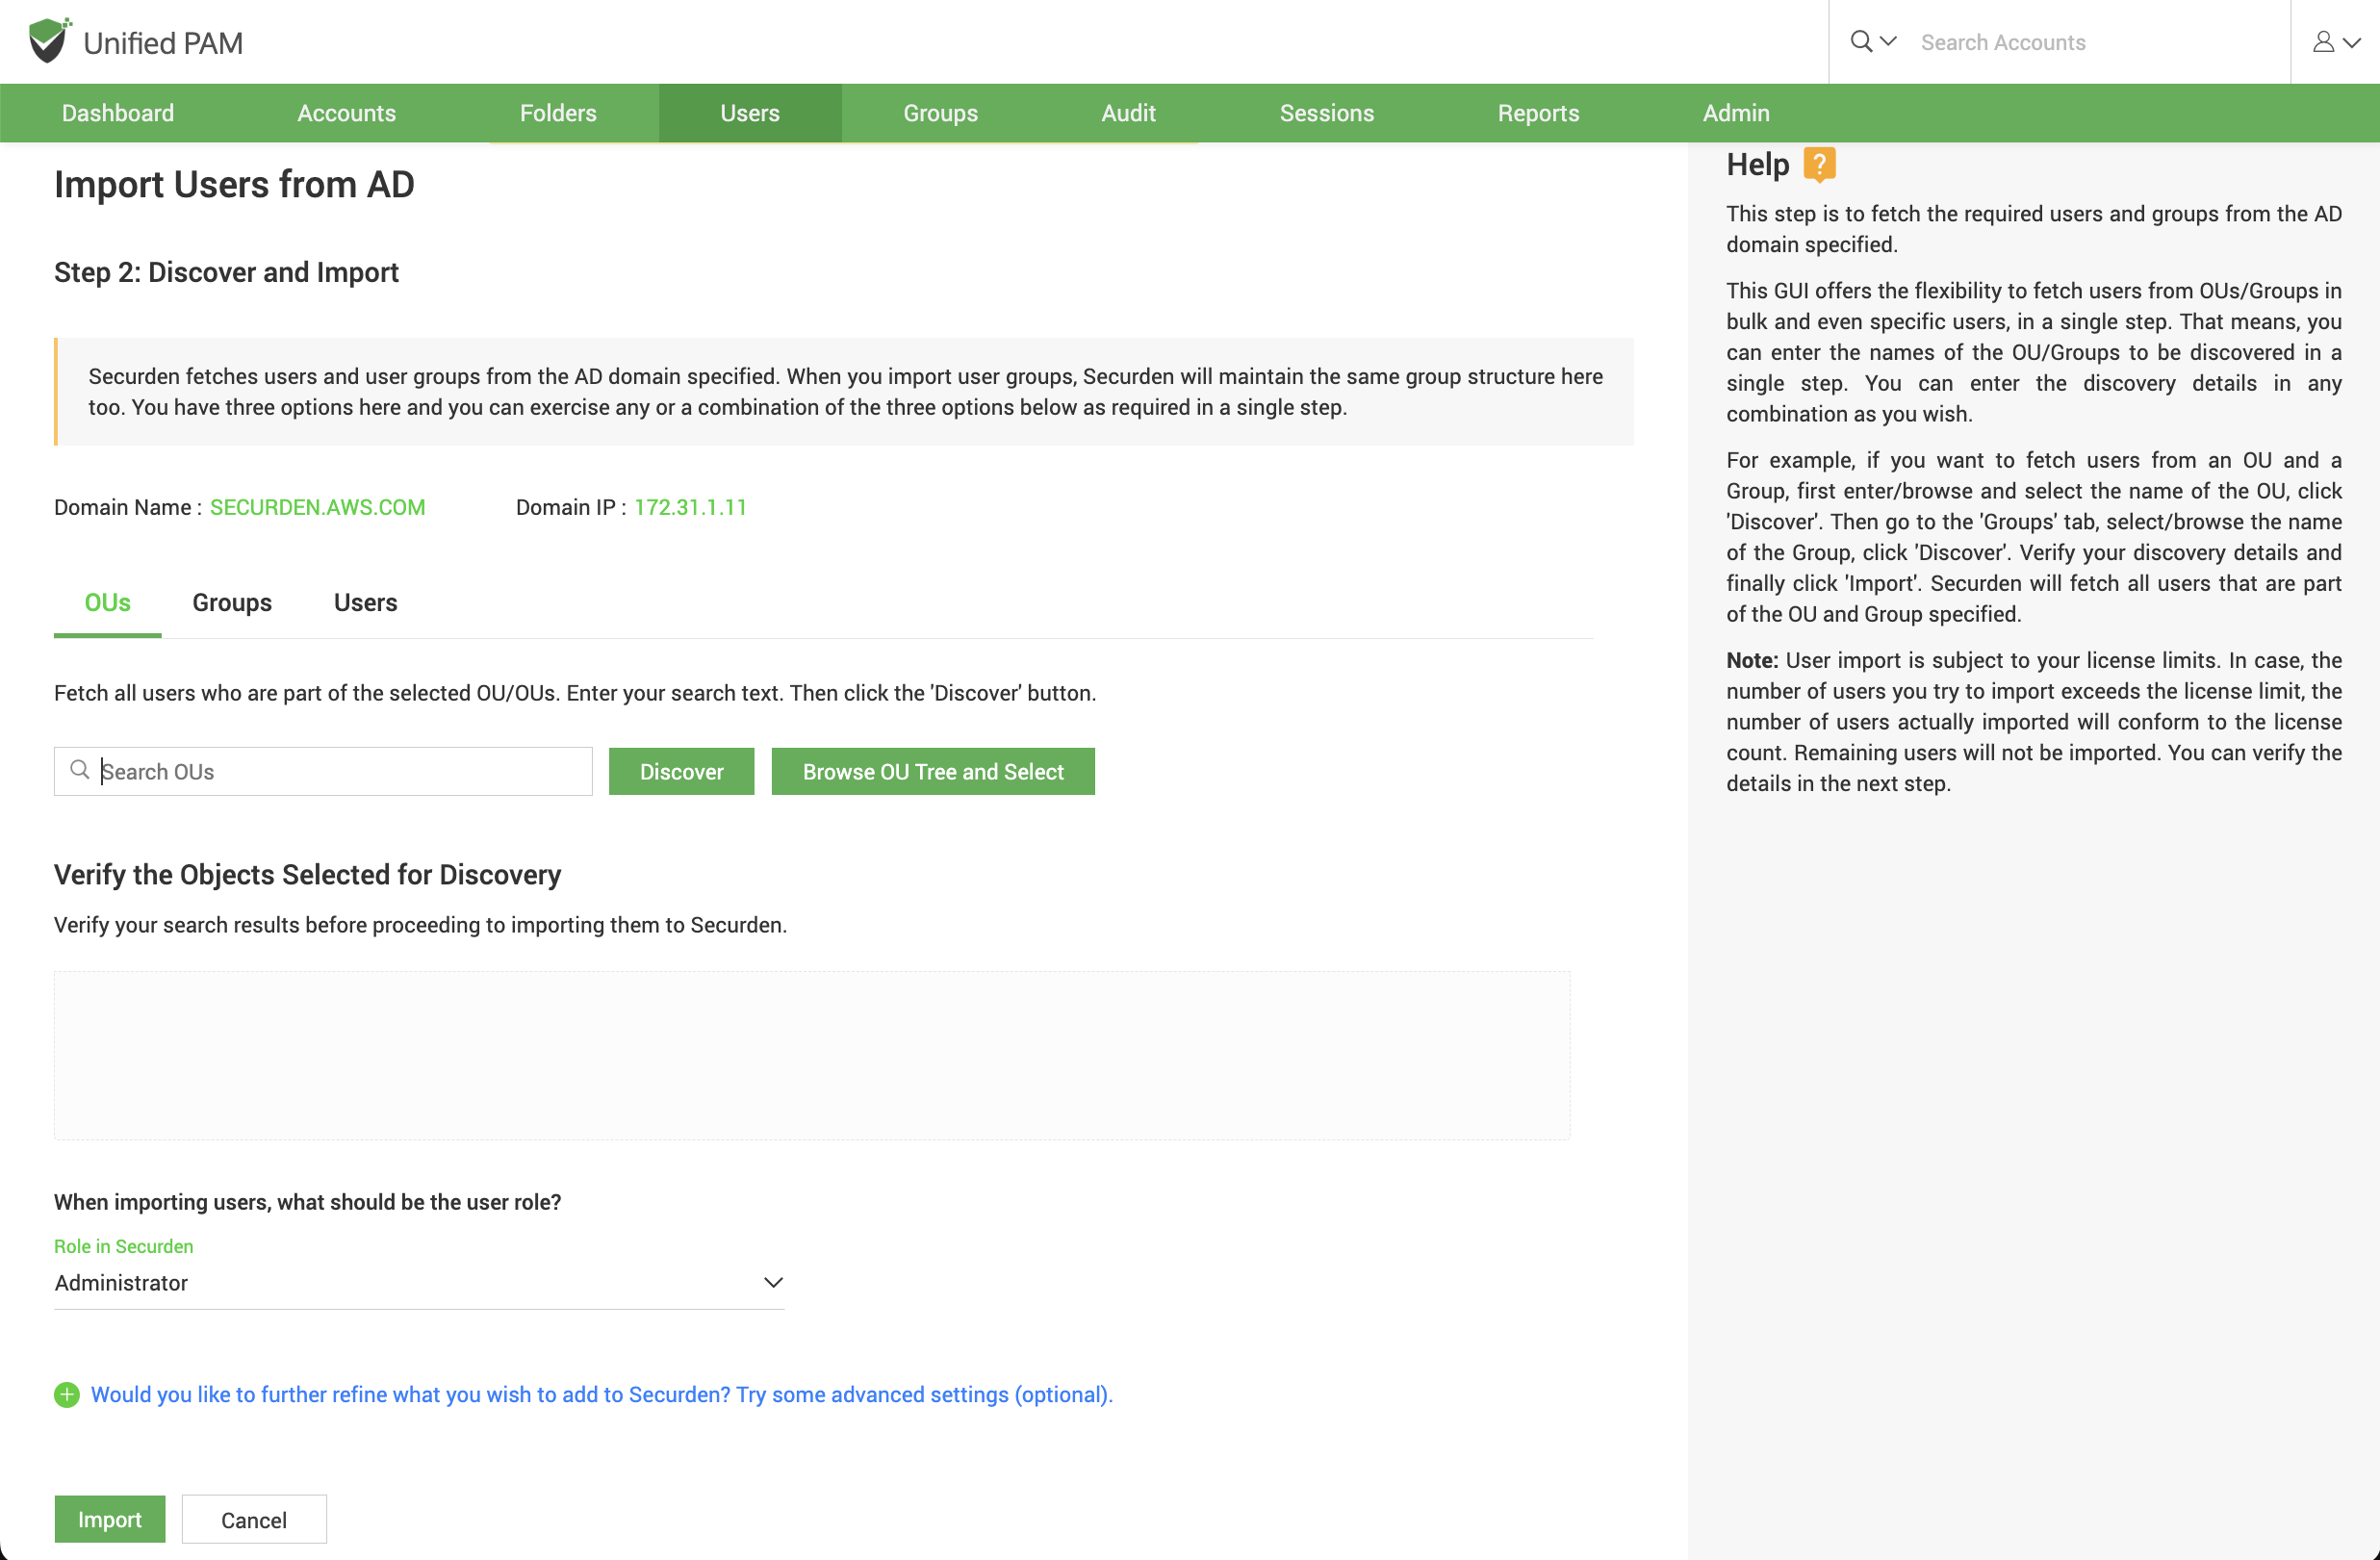
Step 2: Select Users to Import
This step is to fetch the required users and groups from the AD domain specified. When you import user groups from AD, Securden maintains the same group structure here too.
This GUI offers the flexibility to fetch users from OUs/Groups in bulk and even specific users, in a single step. That means you can enter the names of the OU/Groups to be discovered in a single step. You can enter the discovery details in any combinations (OUs, Groups, Users) as you wish.
To import OUs, select the OU tab.
-
Enter the OU name and select Discover.
-
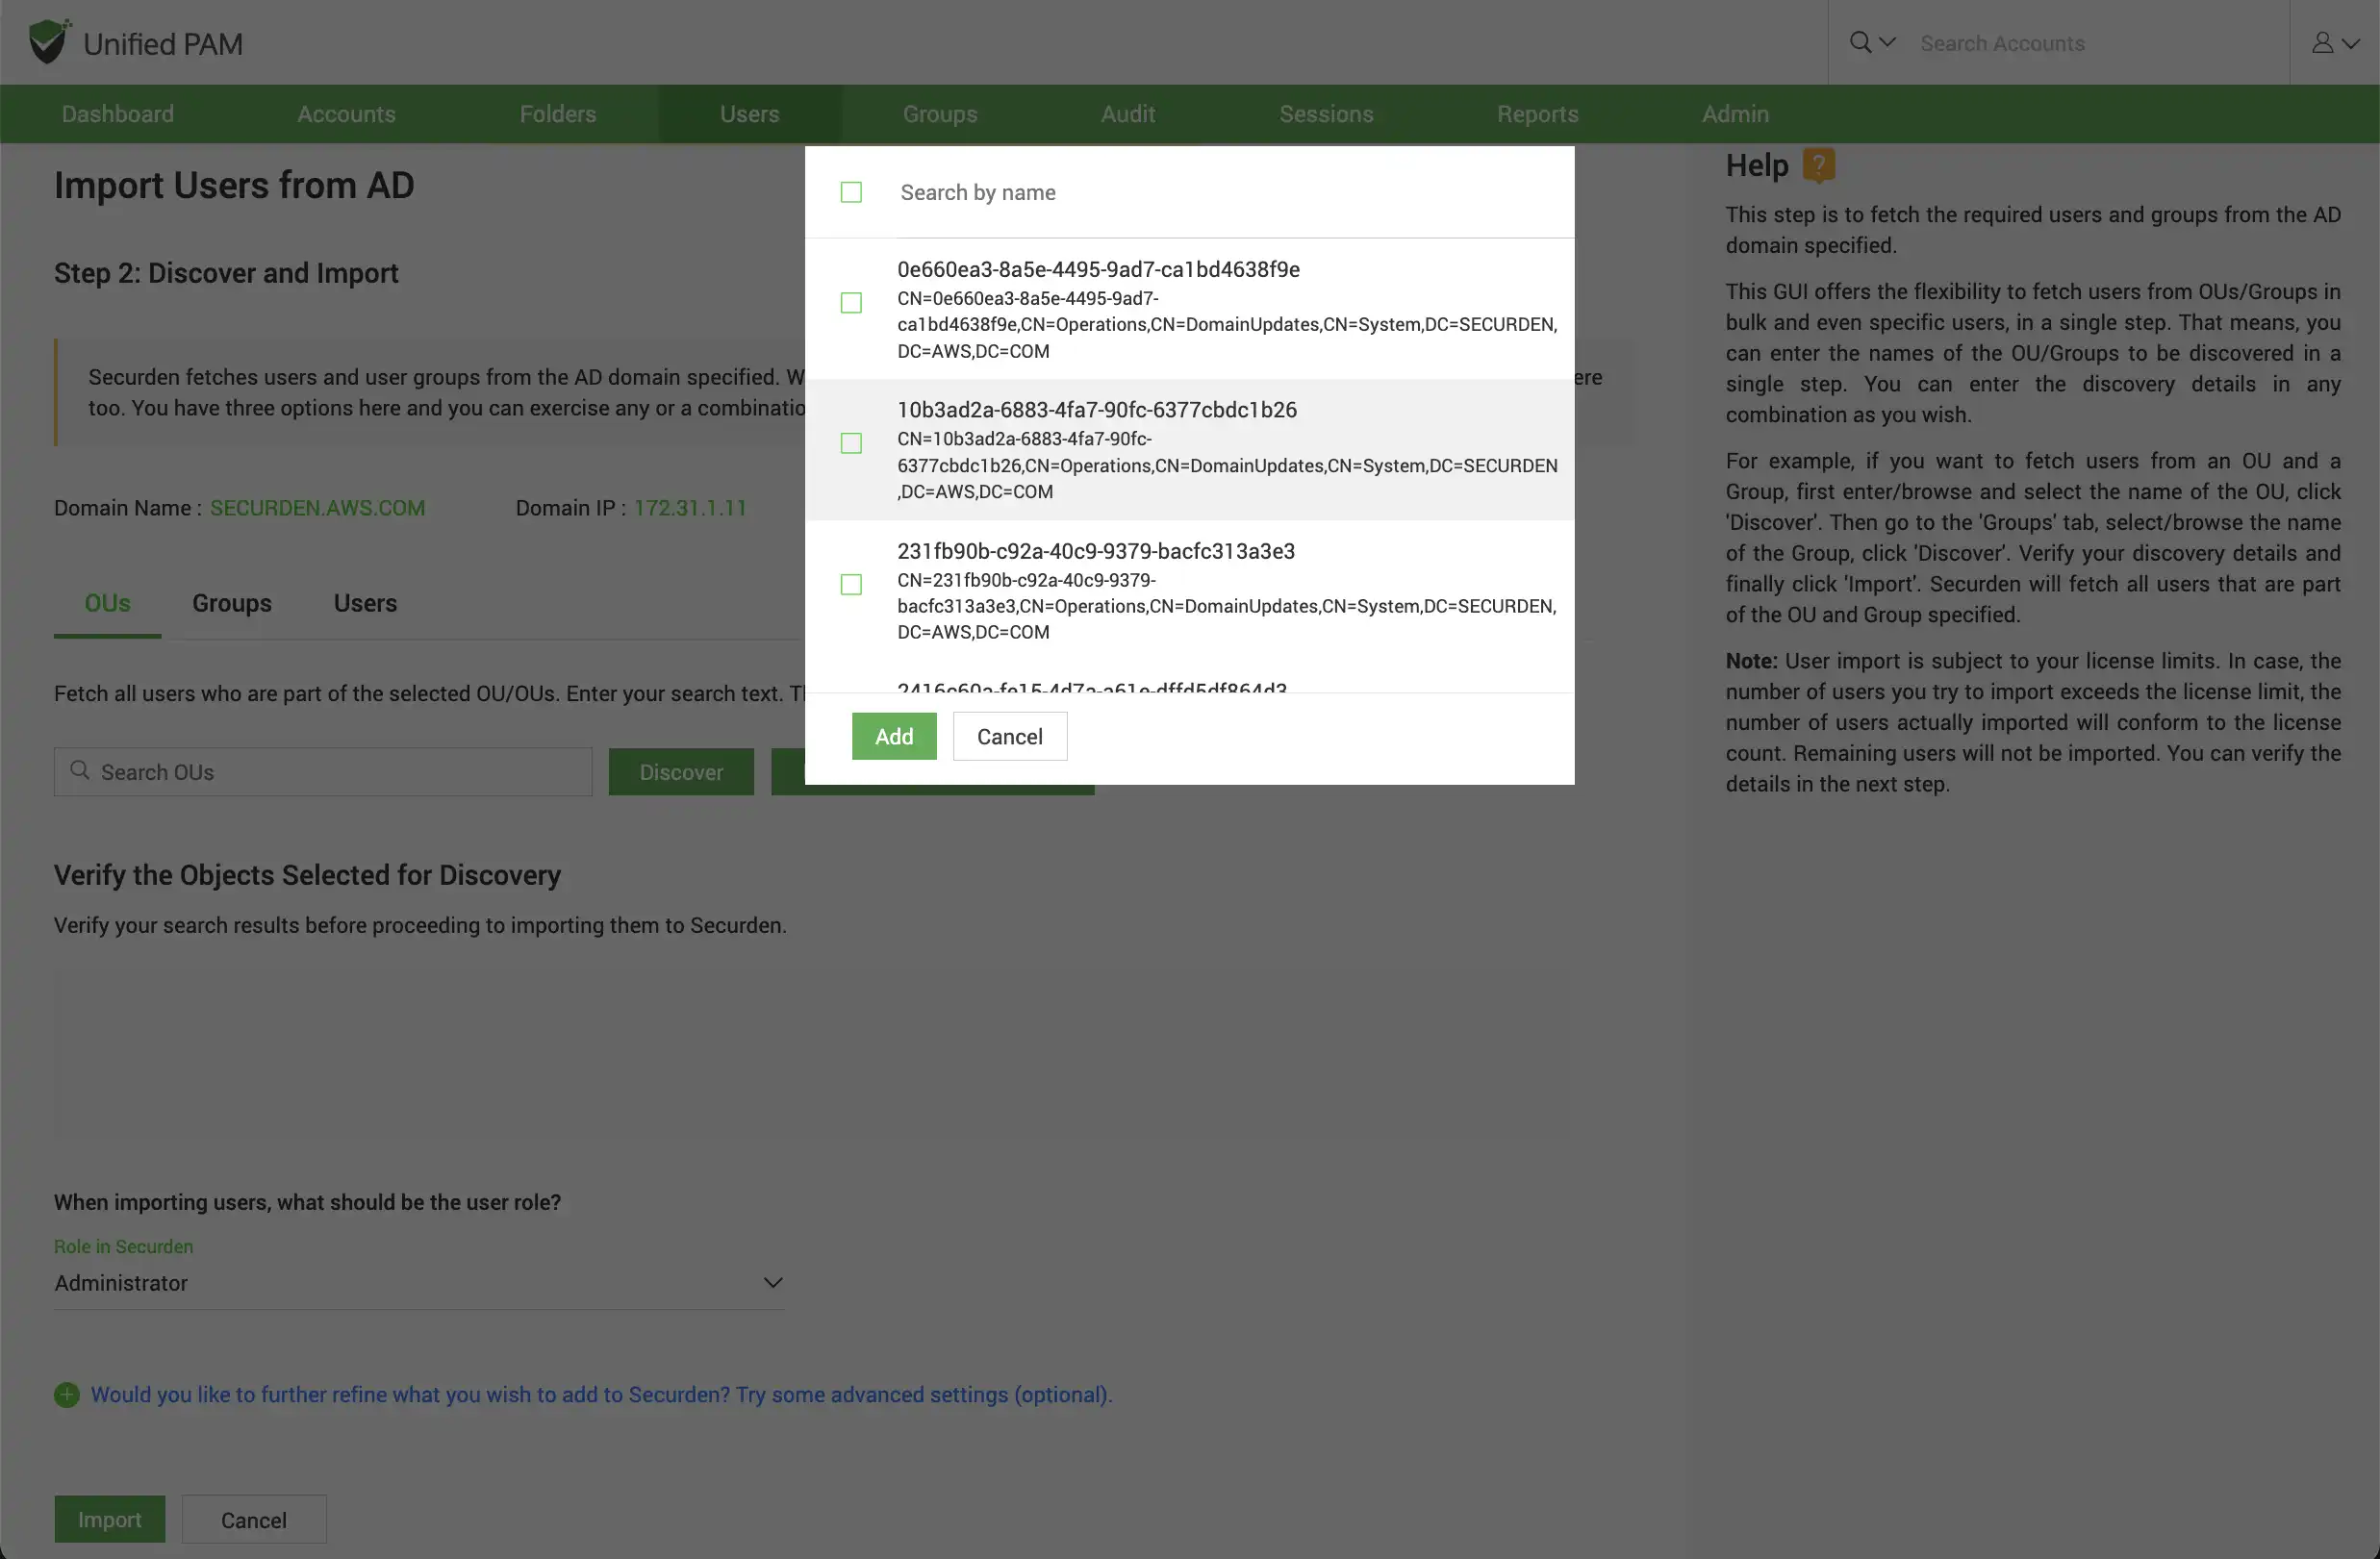
You can also browse from the OU tree by clicking on the Browse OU Tree and Select option. You can select one or multiple OUs and select Add.

-
You can then verify your selection in the Verify the Objects Selected for Discovery.
-
You can then select the role for the users in OUs using the Role in Securden dropdown.
Note
Before selecting the import button, you can look into the additional settings which are explained below.
- Select Import.
To import Groups, select the Groups tab.
-
Enter the Group name and select Discover.
-
You can also browse by clicking on the Browse Groups and Select option. You can select one or multiple groups and select Add.
-
You can then verify your selection in the Verify the Objects Selected for Discovery.
-
You can then select the role for the imported users in groups using the Role in Securden dropdown.
Note
Before selecting the import button, you can look into the additional settings which are explained below.
- Select Import.
To import Users, select the Users tab.
-
Enter the user name and select Discover.
-
You can then verify your selection in the Verify the Objects Selected for Discovery.
-
You can then select the role for the individual users imported using the Role in Securden drop down. This is set to the User role by default.
Note
Before selecting the import button, you can look into the additional settings which are explained below.
- Select Import.
Advanced Settings:
This option allows you to either include domain users of all subgroups to the group being imported or ignore the subgroups and import only the users of the first level group.
Note
User import is subject to your license limits. In case, the number of users you try to import exceeds the license limit, the number of users actually imported will conform to the license count. The remaining users will not be imported. You can verify the details in the next step.
User Groups to Import: You can import all or specific user groups to import, depending on your requirements. You can type in the names in the respective text fields in comma separated form.
Configure Synchronization: Securden also allows Periodic Synchronization with AD. After you import the required users, you can configure periodic synchronization with AD. This helps you import users automatically. Click Save to save the domain details.
Troubleshooting tips:
- Trying to fetch local admin accounts from a PC gets the error -
The username/password does not exist (or) the user does not have the remote launch or remote
This might be due to insufficient account permissions. Try to to re-run the discovery by providing a domain admin credential.
Navigate to Accounts >> Discover Accounts >> Windows. Click Modify and Enter username and password.
You can enter a domain admin credential and try to discover the computers again to fetch local accounts. If it still fails, you can try disabling the firewall and check once again.
If the issue persists, you may write to us at support@securden.com