Create a Remote Gateway
By default, all remote sessions launched from end user machines are tunneled through the Securden server, which acts as the gateway. There will not be any direct connectivity between the end user machines and the target device.
For enhanced security, you may route all remote operations originating from Securden through a single, dedicated gateway (instead of Securden server acting as the gateway). Once configured, Securden will route all operations, including remote connections, session recording, and password resets through the gateway.
When should you consider deploying a remote gateway?
You should consider deploying a remote gateway in the following scenarios:
- If you want to manage the IT assets/accounts that are distributed across multiple networks with interconnectivity.
- If you want to route all remote operations through a common gateway instead of direct connections to target devices from endpoints.
- If you want to record remote sessions
The remote gateway comprises two components:
1) Securden Session Manager (Handles remote connections and session recording) 2) Securden Application Server (Handles remote password reset operations and serves as a remote broker)
How to configure a remote gateway?
Gateway configuration is a four-step process:
- Create a remote gateway in Securden
- Deploy Securden Session Manager and/or Securden Application Server
- Associate devices with the remote gateway
- Associate domains with the remote gateway
Summary: You need to create an entity called the remote gateway in Securden, deploy one or both the Securden Session Manager/Application Server and then associate the gateways with the required devices/domains in Securden. The steps are explained in detail in the sections that follow.
Step 1: Create a remote gateway
Prior to carrying out any configuration, you first need to add the required gateway as an entity giving it a name and description. Securden remote gateway is a virtual entity - something similar to a folder that holds files. So, you will first give it a name and description. In the next step, you will go about carrying out the actual configuration of the gateway.
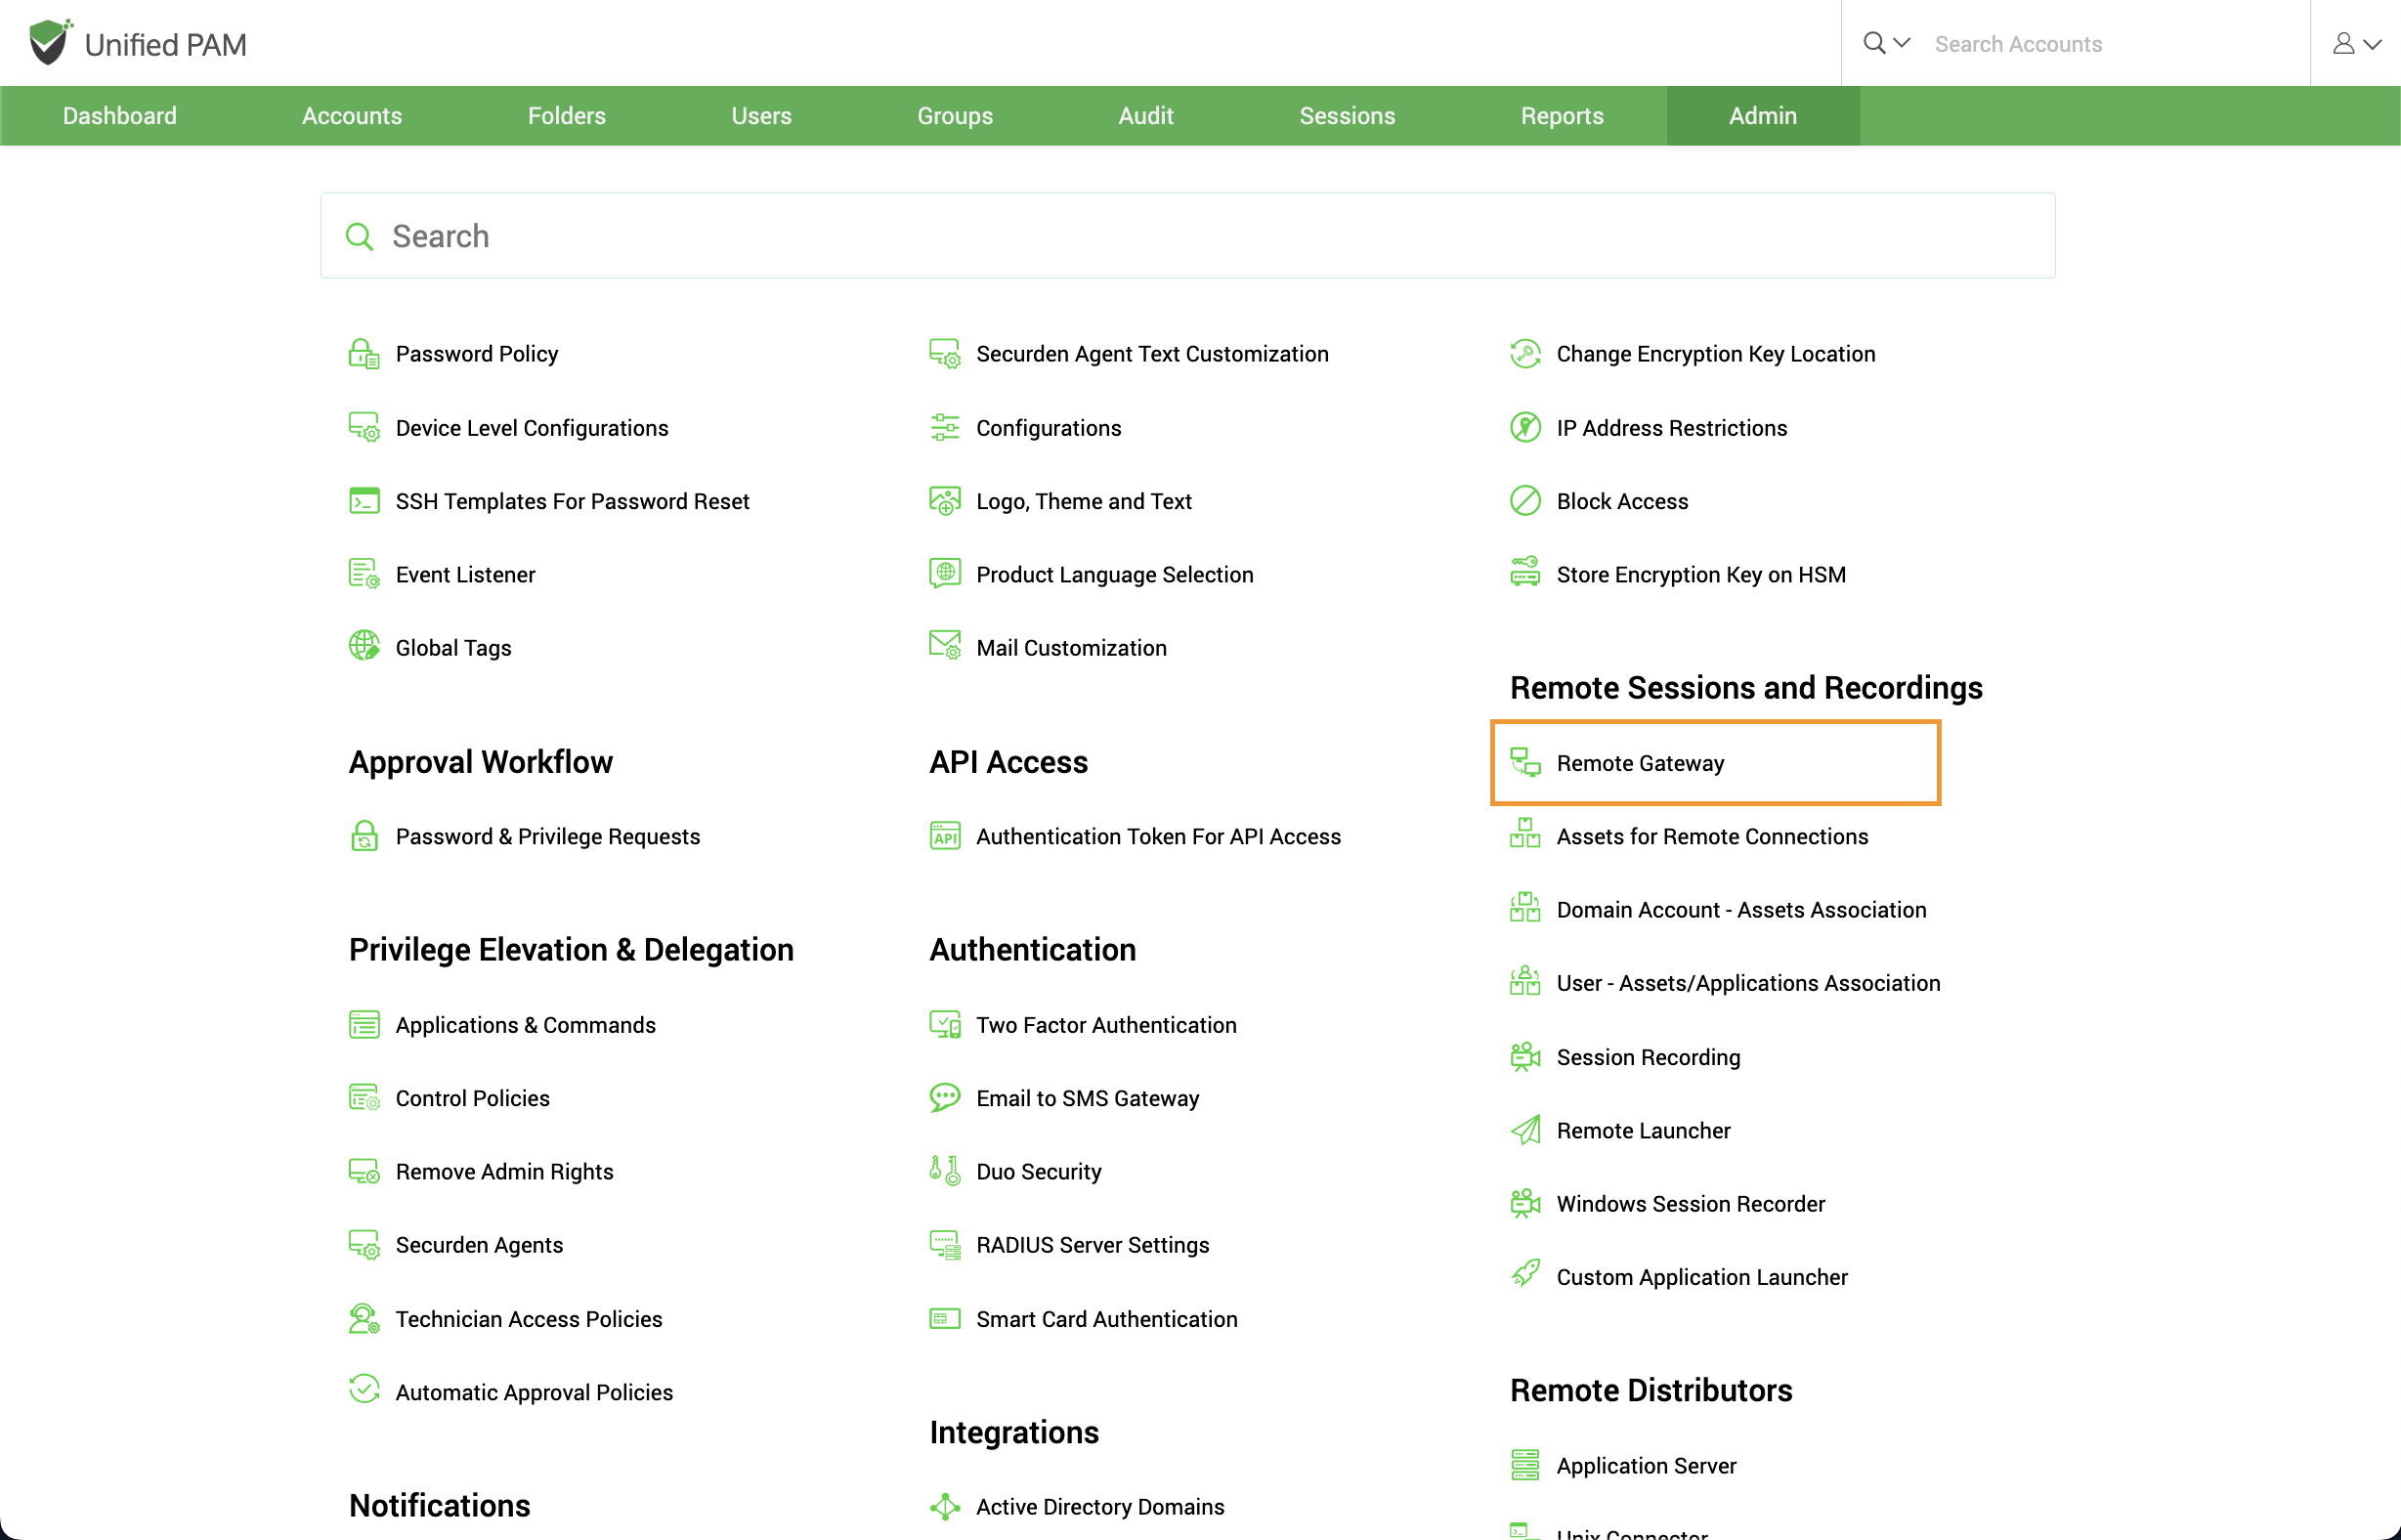
To add a gateway, navigate to Admin >> Remote Sessions and Recordings >> Remote Gateway.
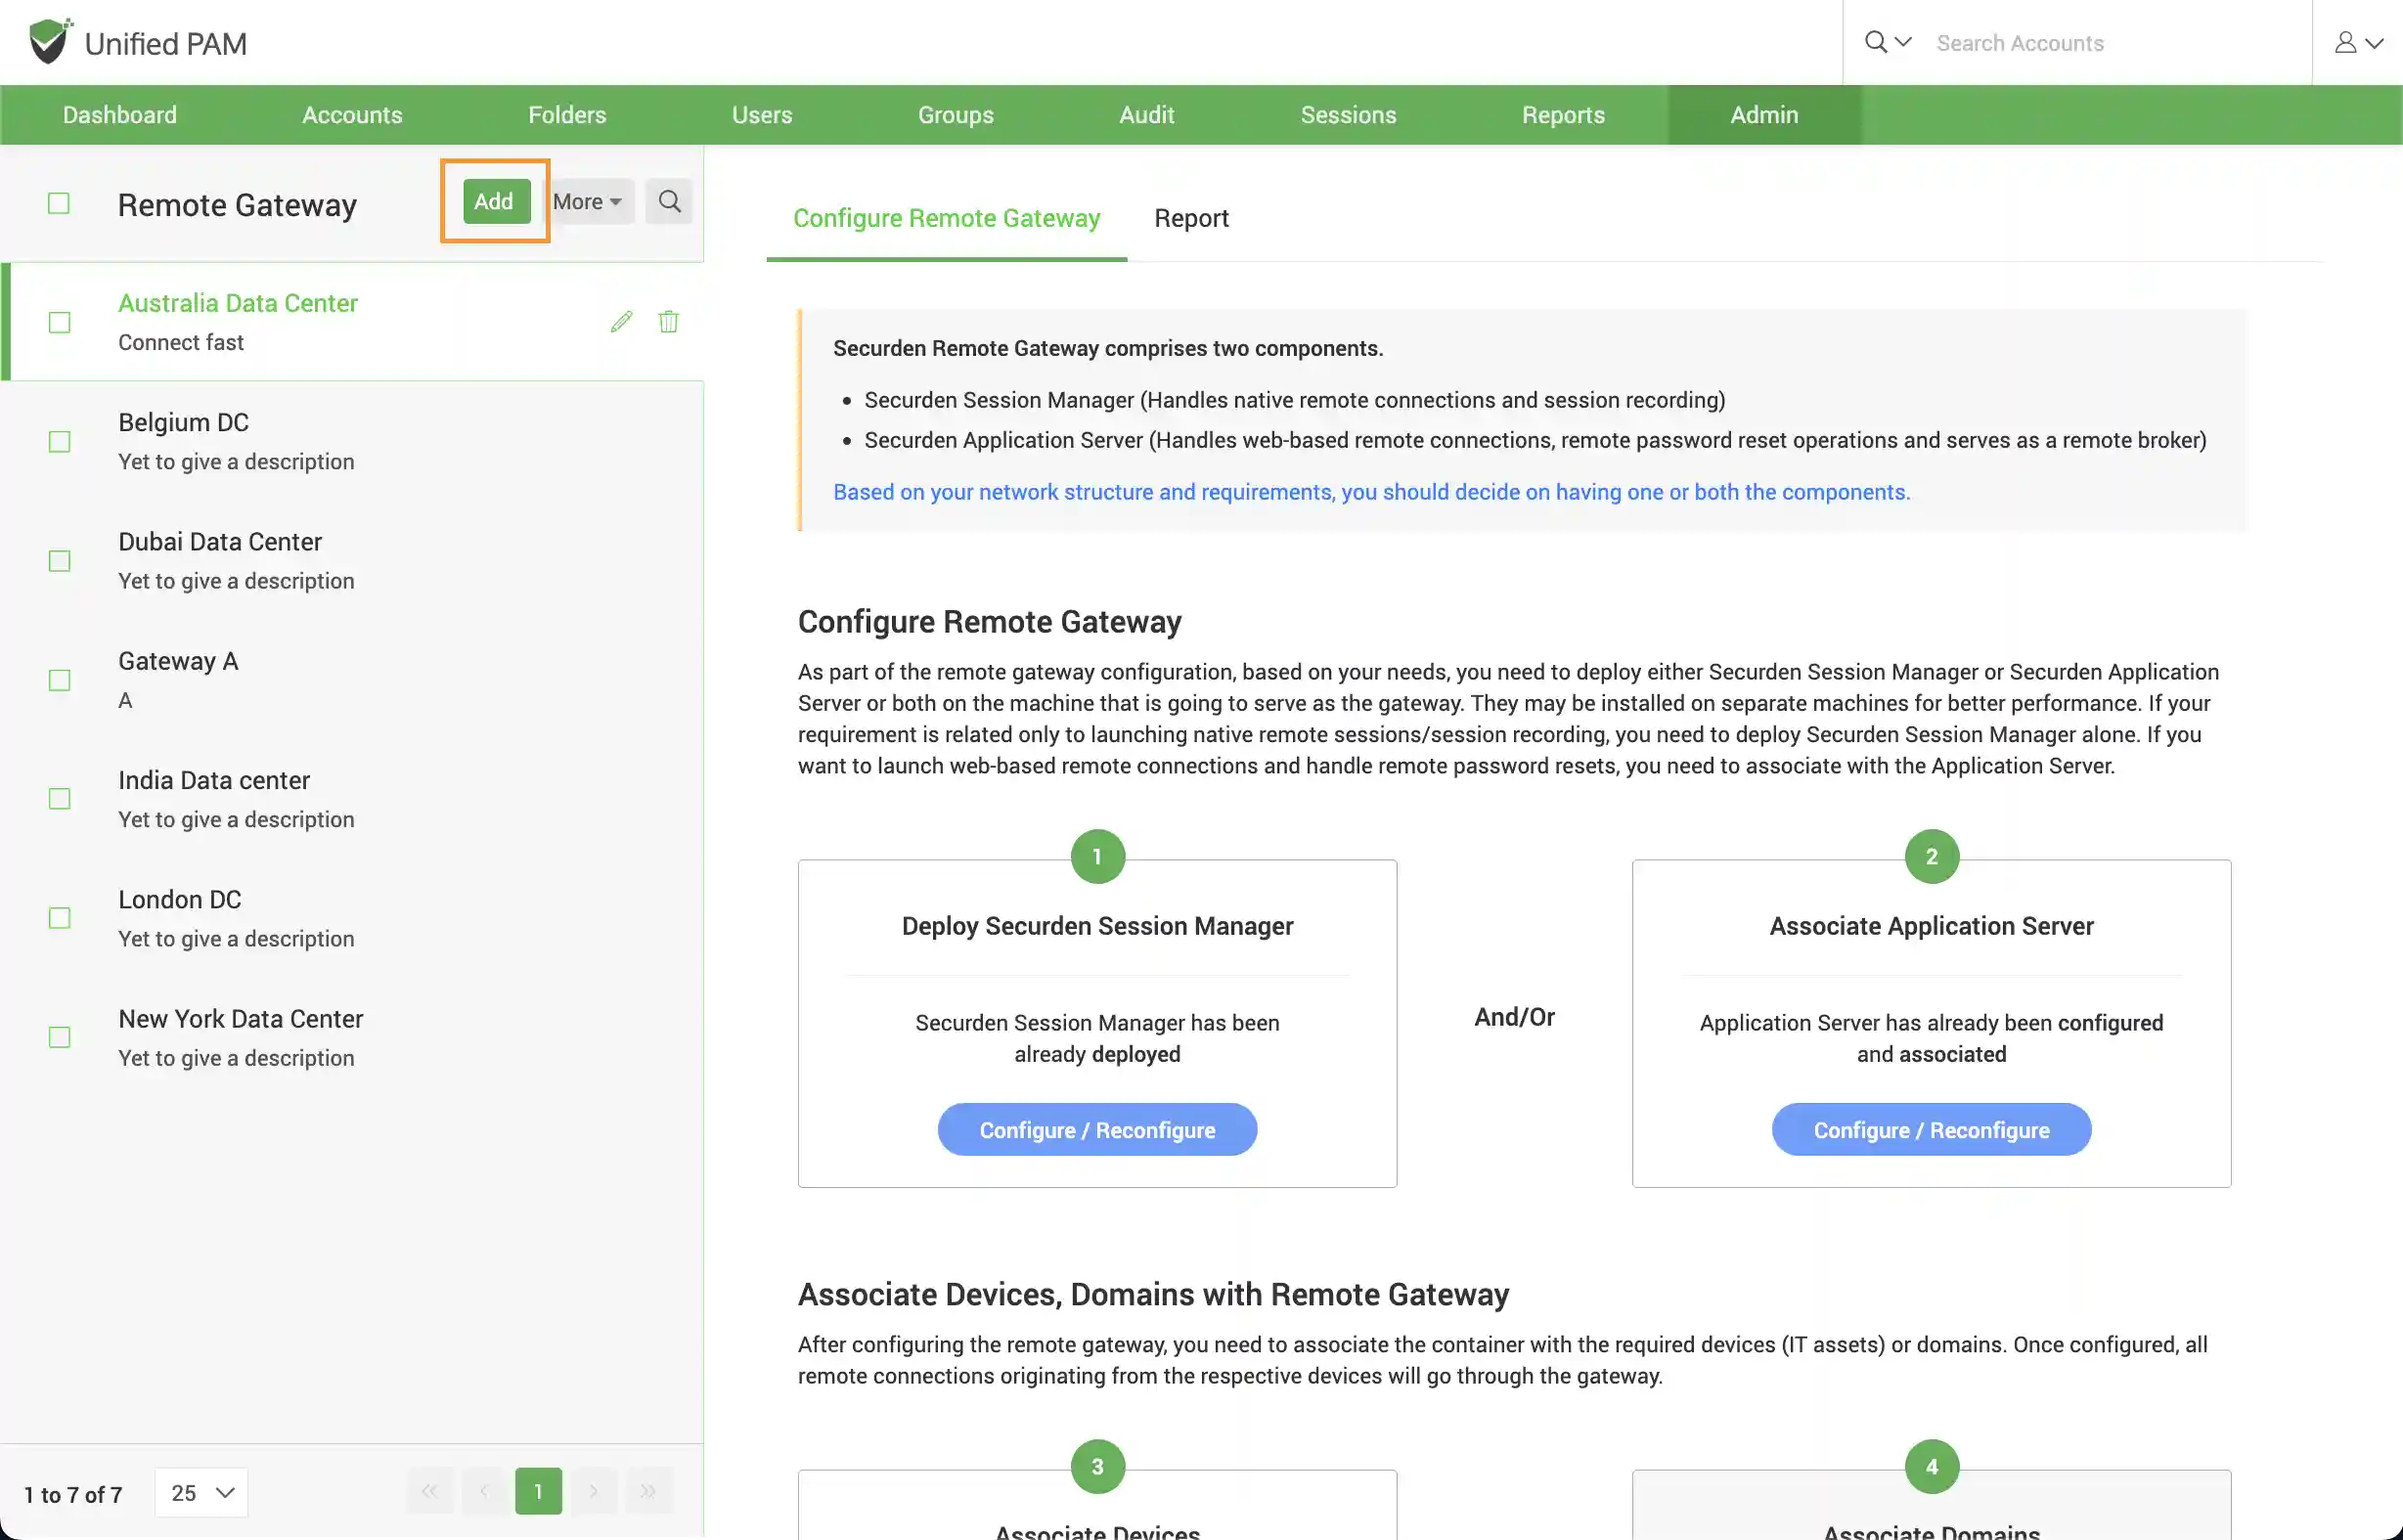
In the Remote Gateway page that opens, click on Add to create a new remote gateway.
In the GUI that opens, enter the following details:
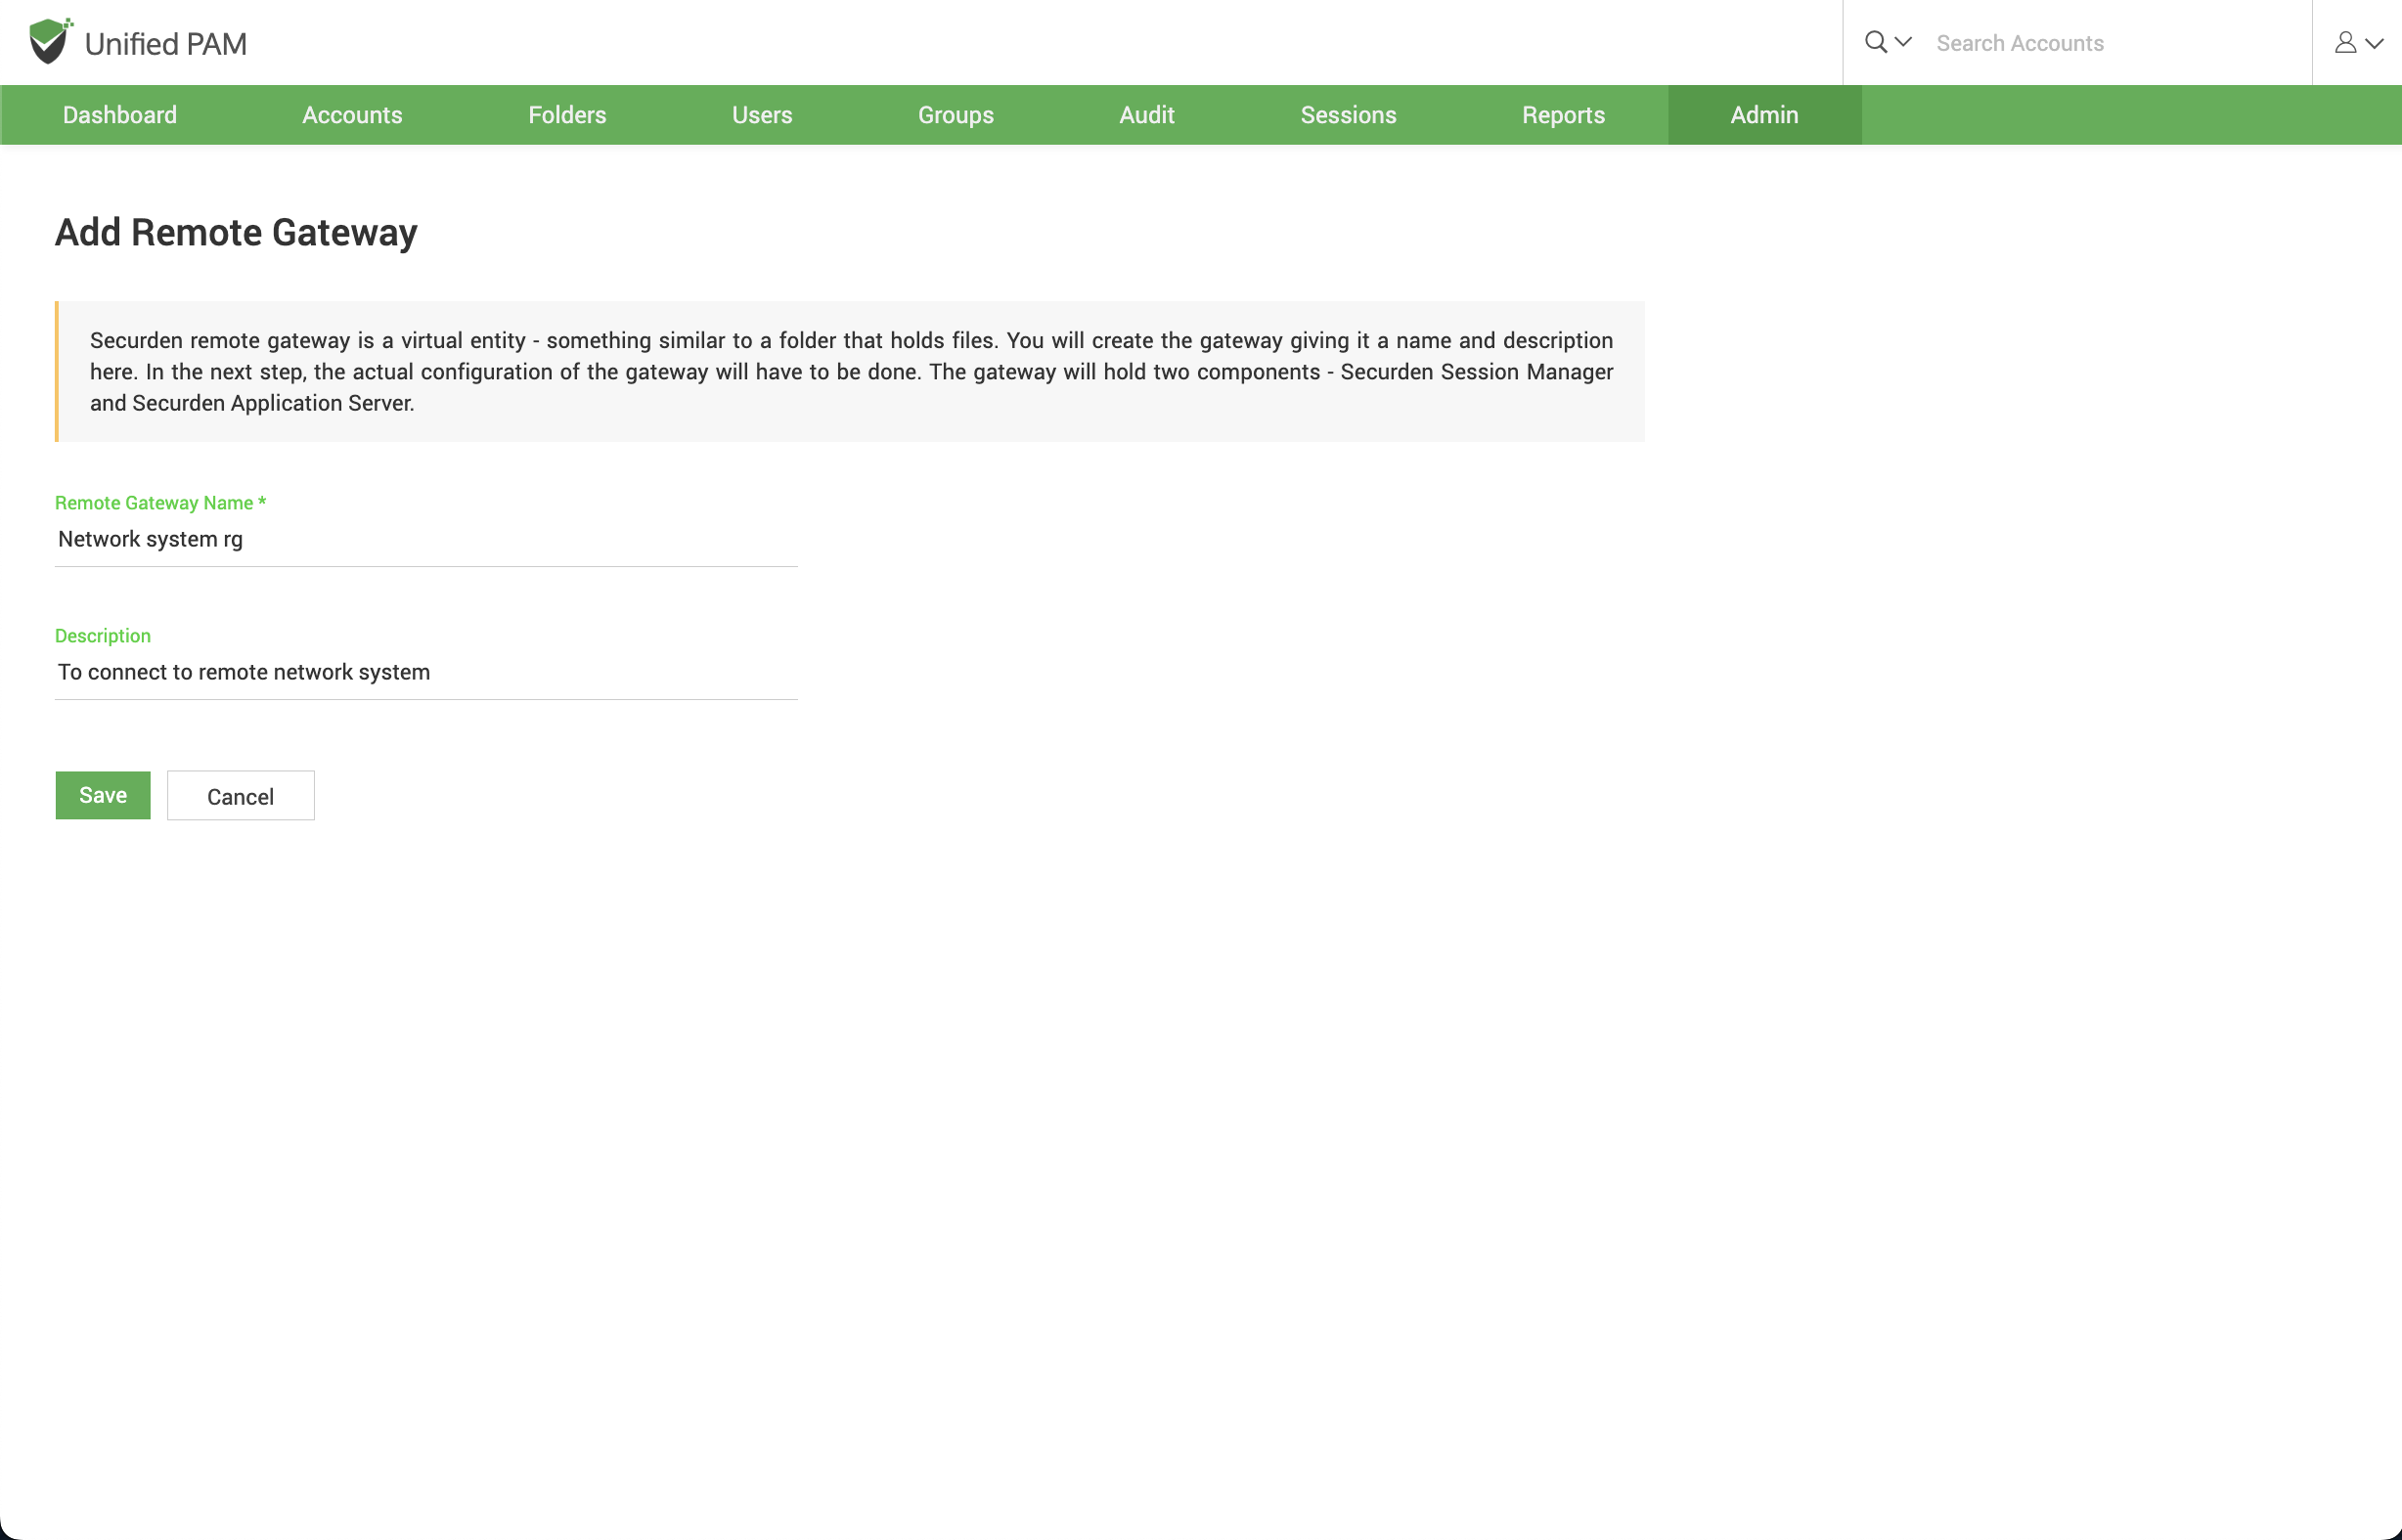
Remote Gateway Name: Helps you to uniquely identify the gateway you create.
Description: A brief explanation of the purpose of that specific remote gateway.
On filling in the name and description fields, click ‘Save’ to add the remote gateway in Securden.
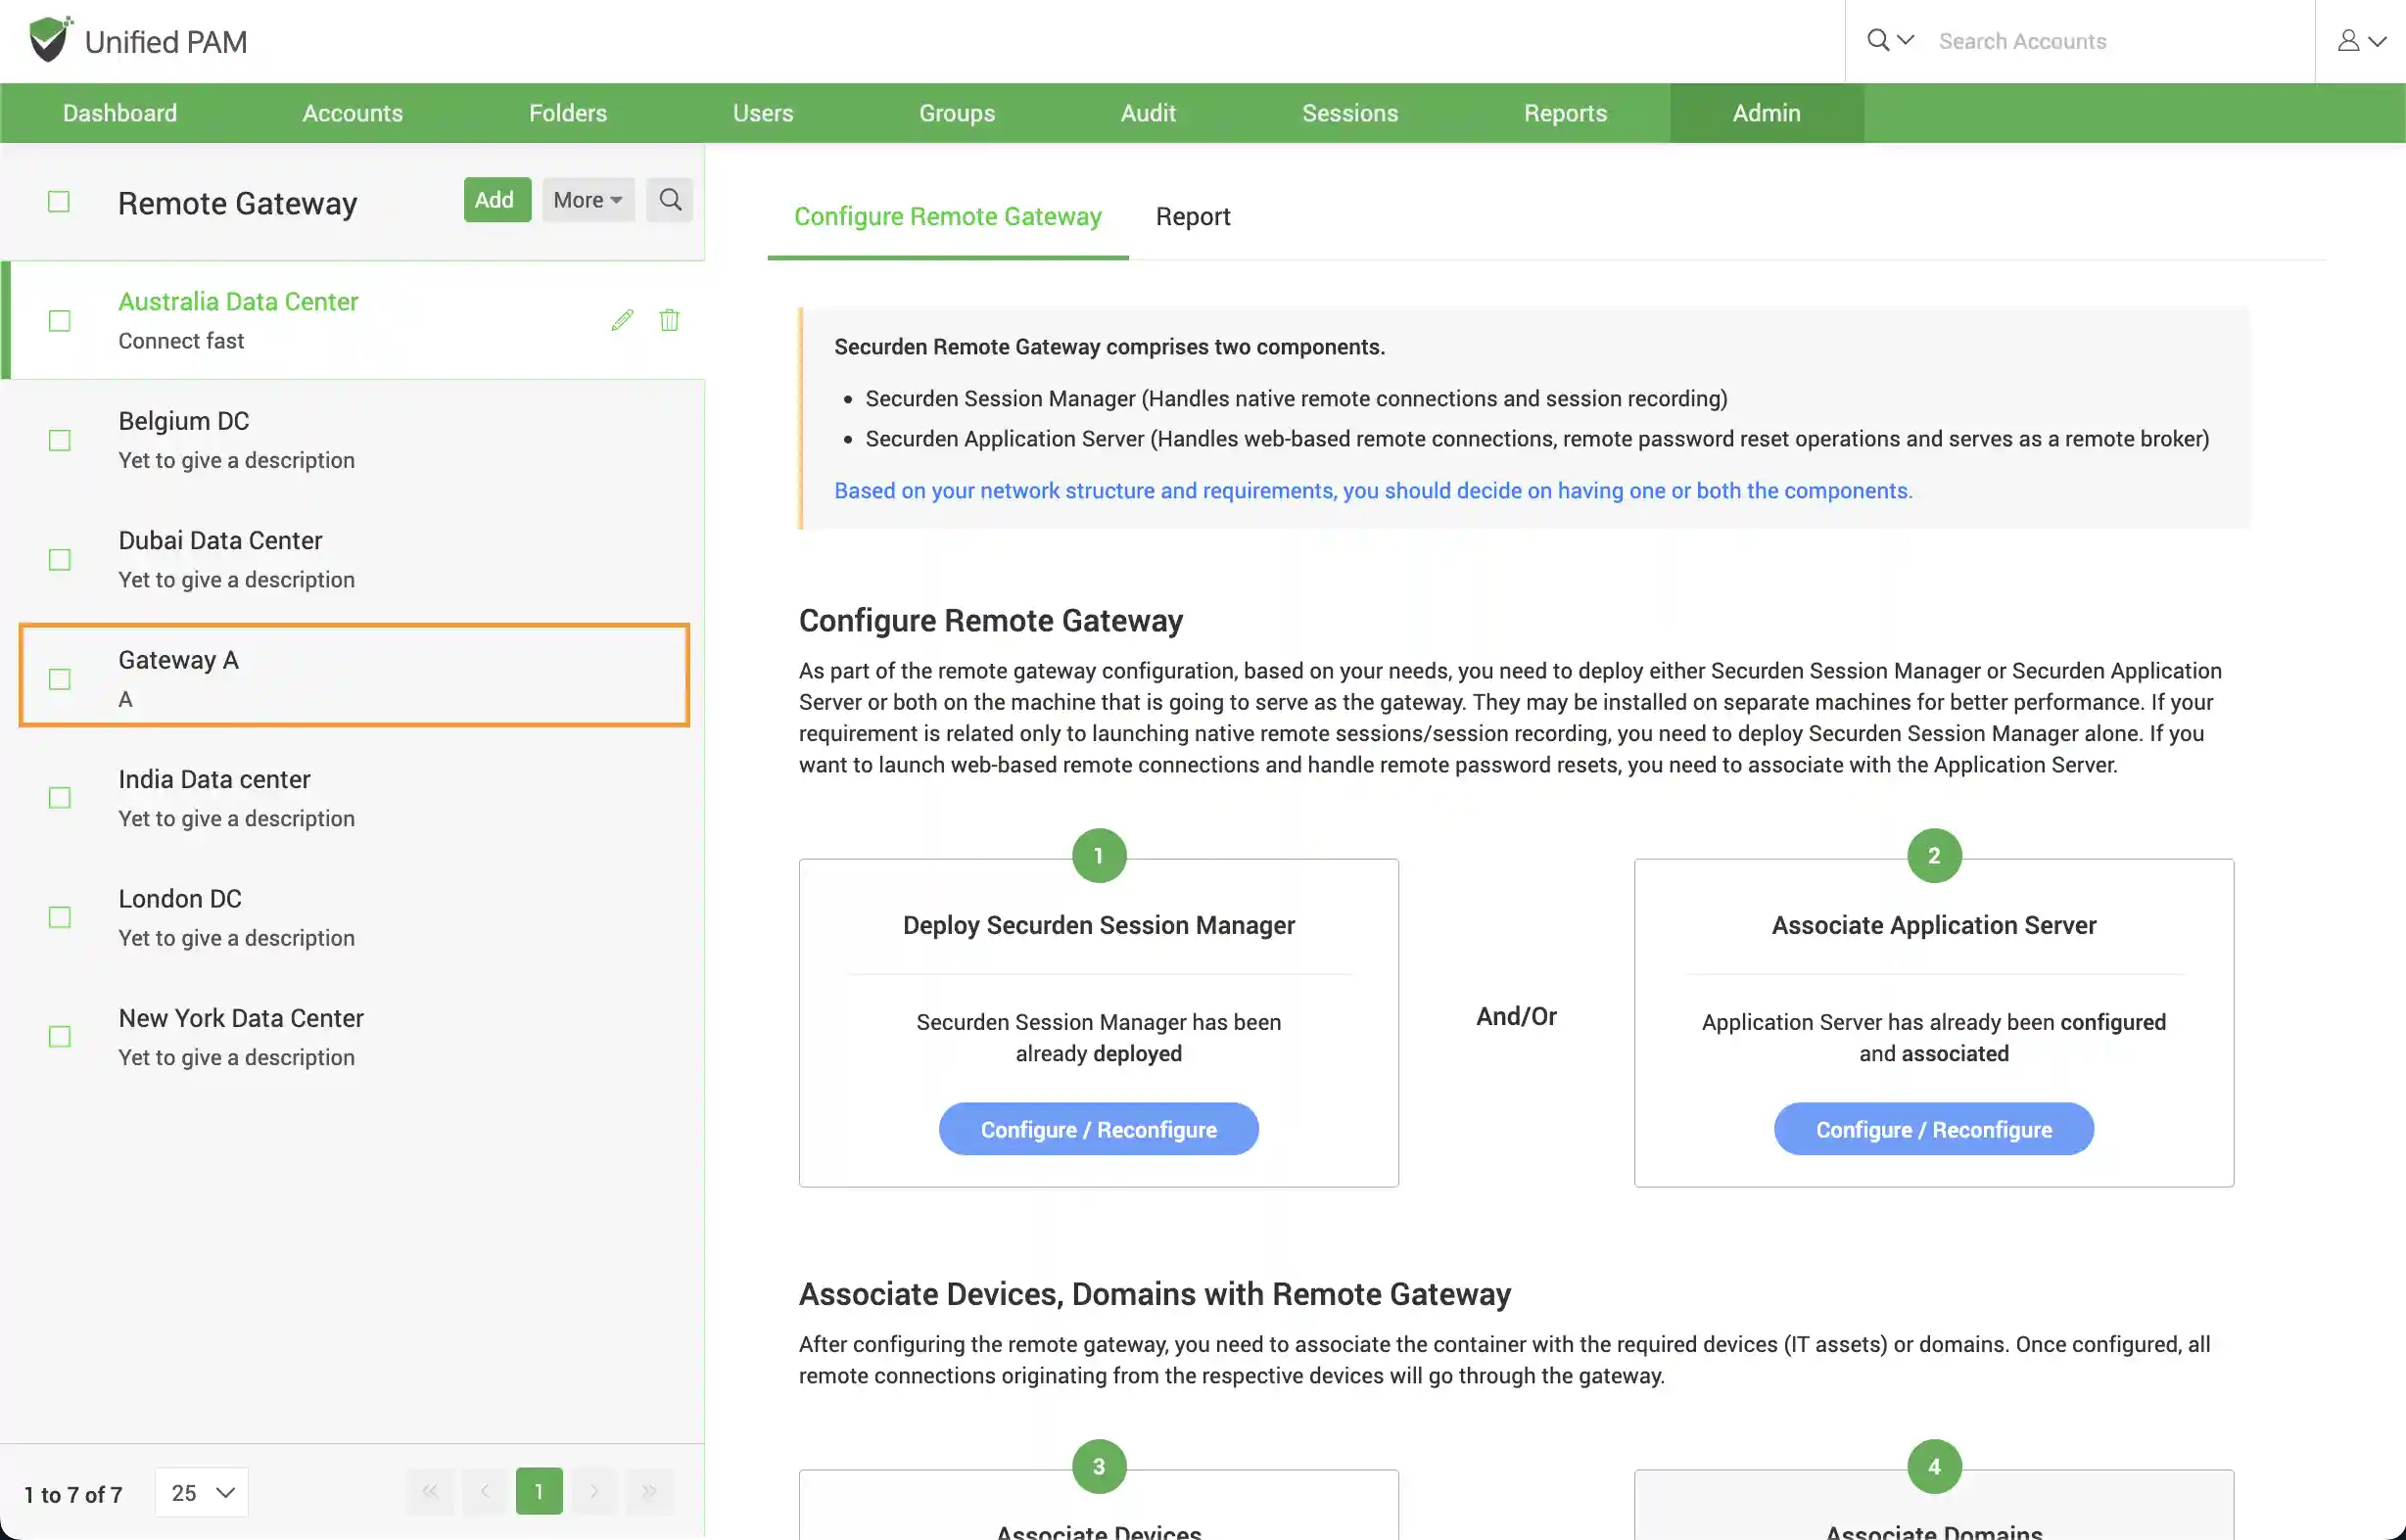
Step 2: Configure the Remote Gateway
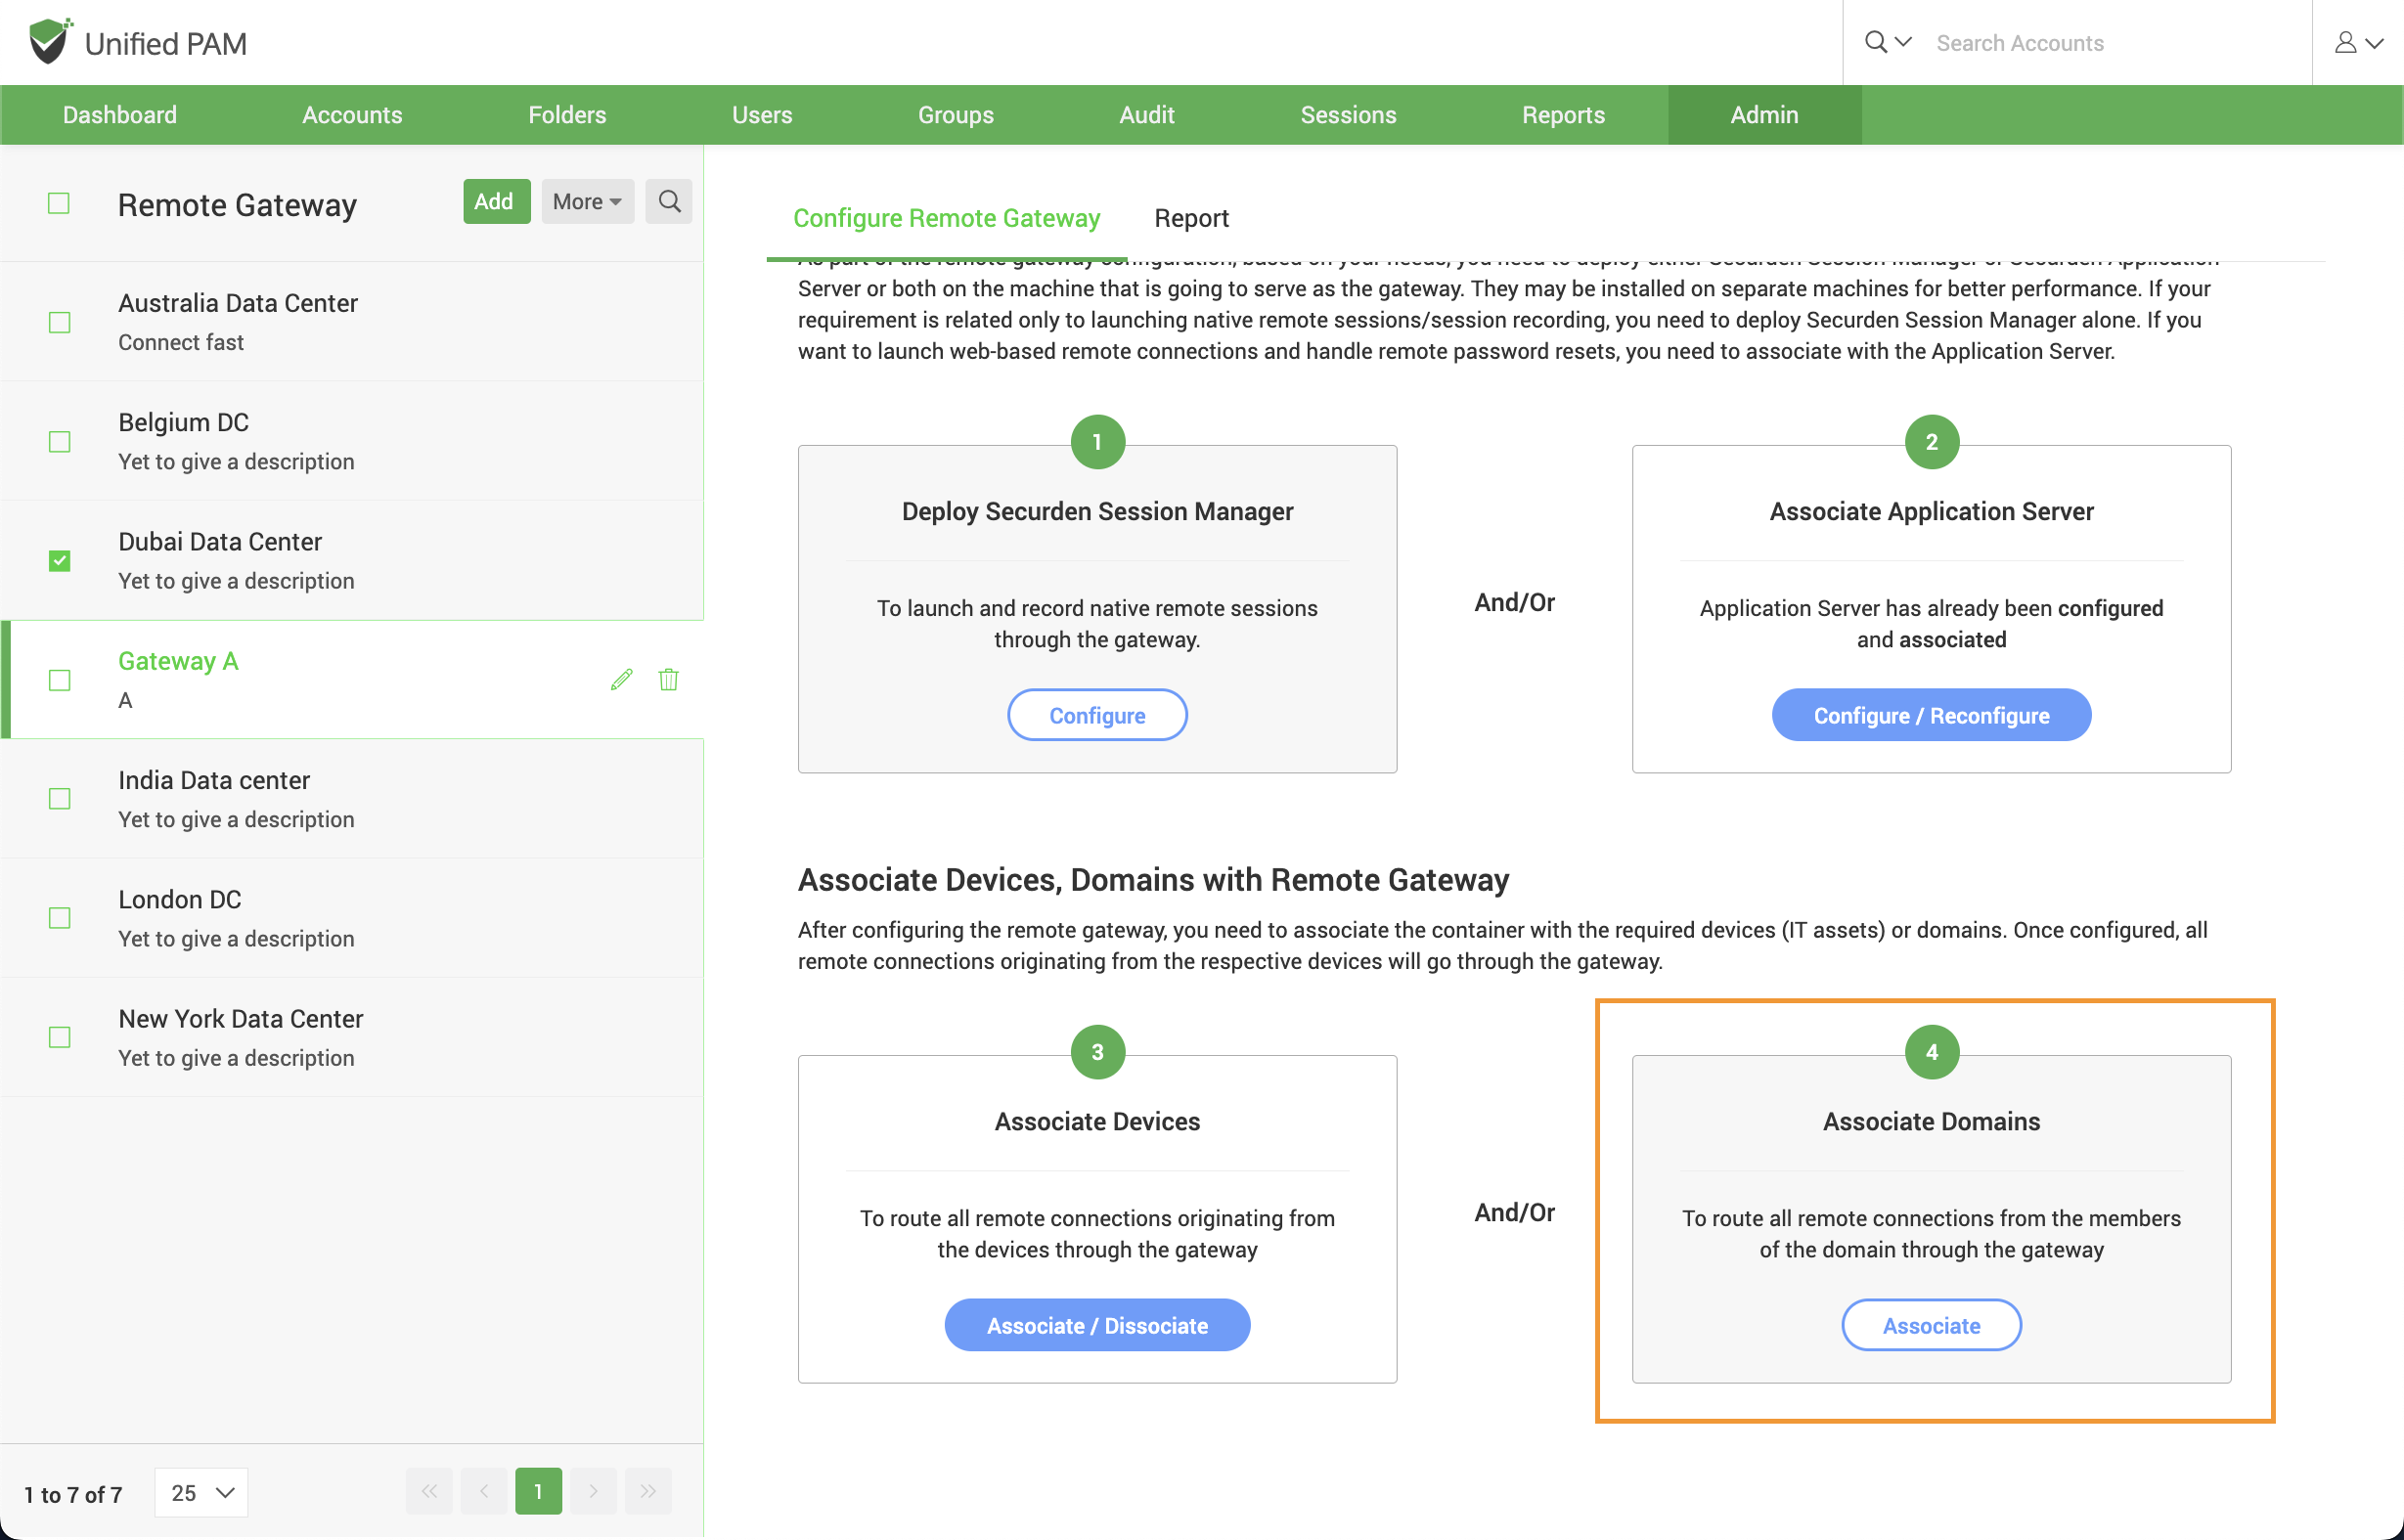
As part of the remote gateway configuration, based on your needs, you need to deploy either Securden Session Manager or Securden Application Server or both on the machine that is going to serve as the gateway. They may be installed on separate machines for better performance.
Based on your network structure and requirements, you should decide on having one or both of the components.
- If your IT assets/accounts are distributed across multiple networks with interconnectivity, you should deploy both the above components on the remote gateway.
- On the other hand, if all your devices are present in the same network and if you want to handle only remote connections and session recording through a common gateway, install Securden Session Manager alone.
- If you want to handle remote connections as well as remote password resets through a common gateway, deploy both.
Deploy Securden Session Manager (SSM)
To launch remote sessions and record them, you need to deploy Securden Session Manager (SSM), a lightweight tool on the machine that is identified to serve as the gateway. You need to choose the machine first and then deploy the SSM package.
Prerequisite: The server in which you want to deploy SSM should have already been discovered/added to Securden. In the interface, you can only choose from the already available accounts. If the server has not yet been added to Securden, add/discover and then follow the step below.
To deploy SSM, navigate to Admin >> Remote Sessions and Recordings >> Remote Gateway and select the required gateway.
In the RHS, you will see the GUI consisting of the steps to Deploy Securden Session Manager.
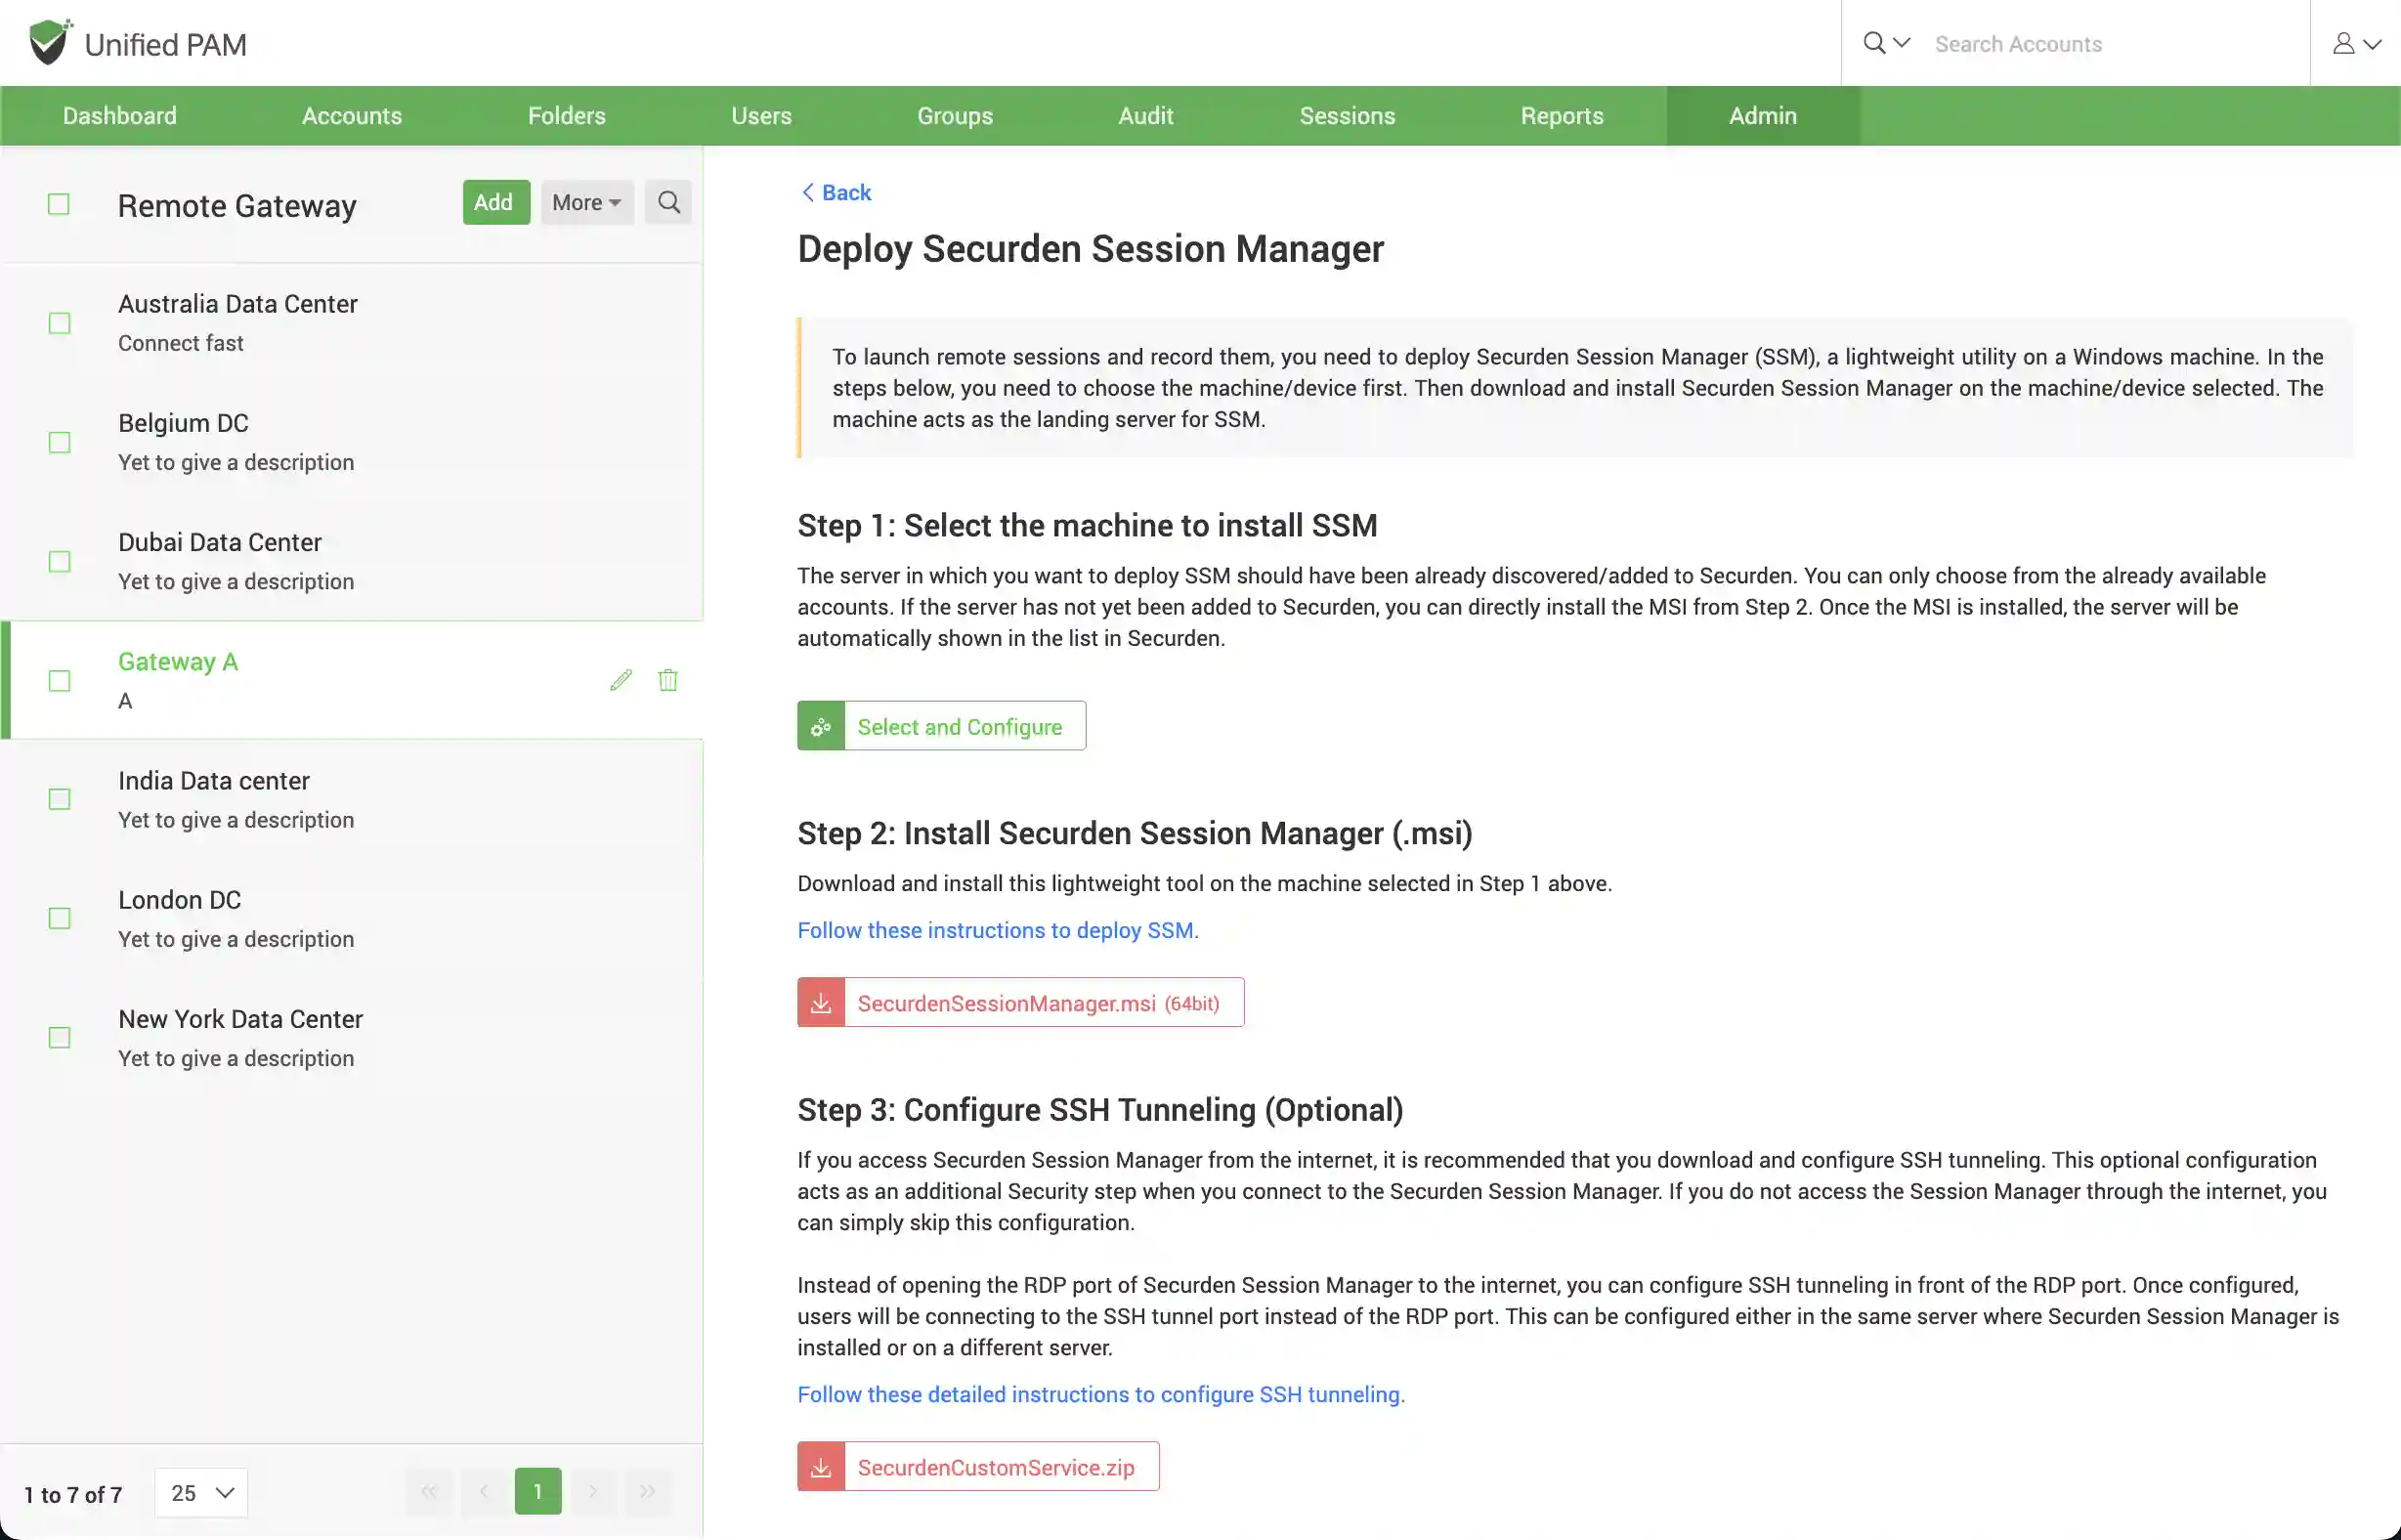
In the GUI that opens, you need to perform the following actions:
- Select the machine in which you will be deploying SSM
- Download the SSM package and deploy it on the machine selected. Select the machine to install SSM
- (Optional) Configure SSH tunneling
1: Select the machine in which you will be deploying SSM
In this step, you need to select a machine where you would like to install the Securden Session Manager. In addition, you need to specify an account using which connections are to be established with the machine.
Pre-requisite: The machine/server in which you want to deploy SSM should have been already discovered/added to Securden. You will only be able to select from the machines/servers that are listed in the drop-down.
If you are not able to discover or add a server, you can directly install the MSI from Step 2. Once the MSI is installed, the server will be automatically shown in the list in Securden and you can select it here.
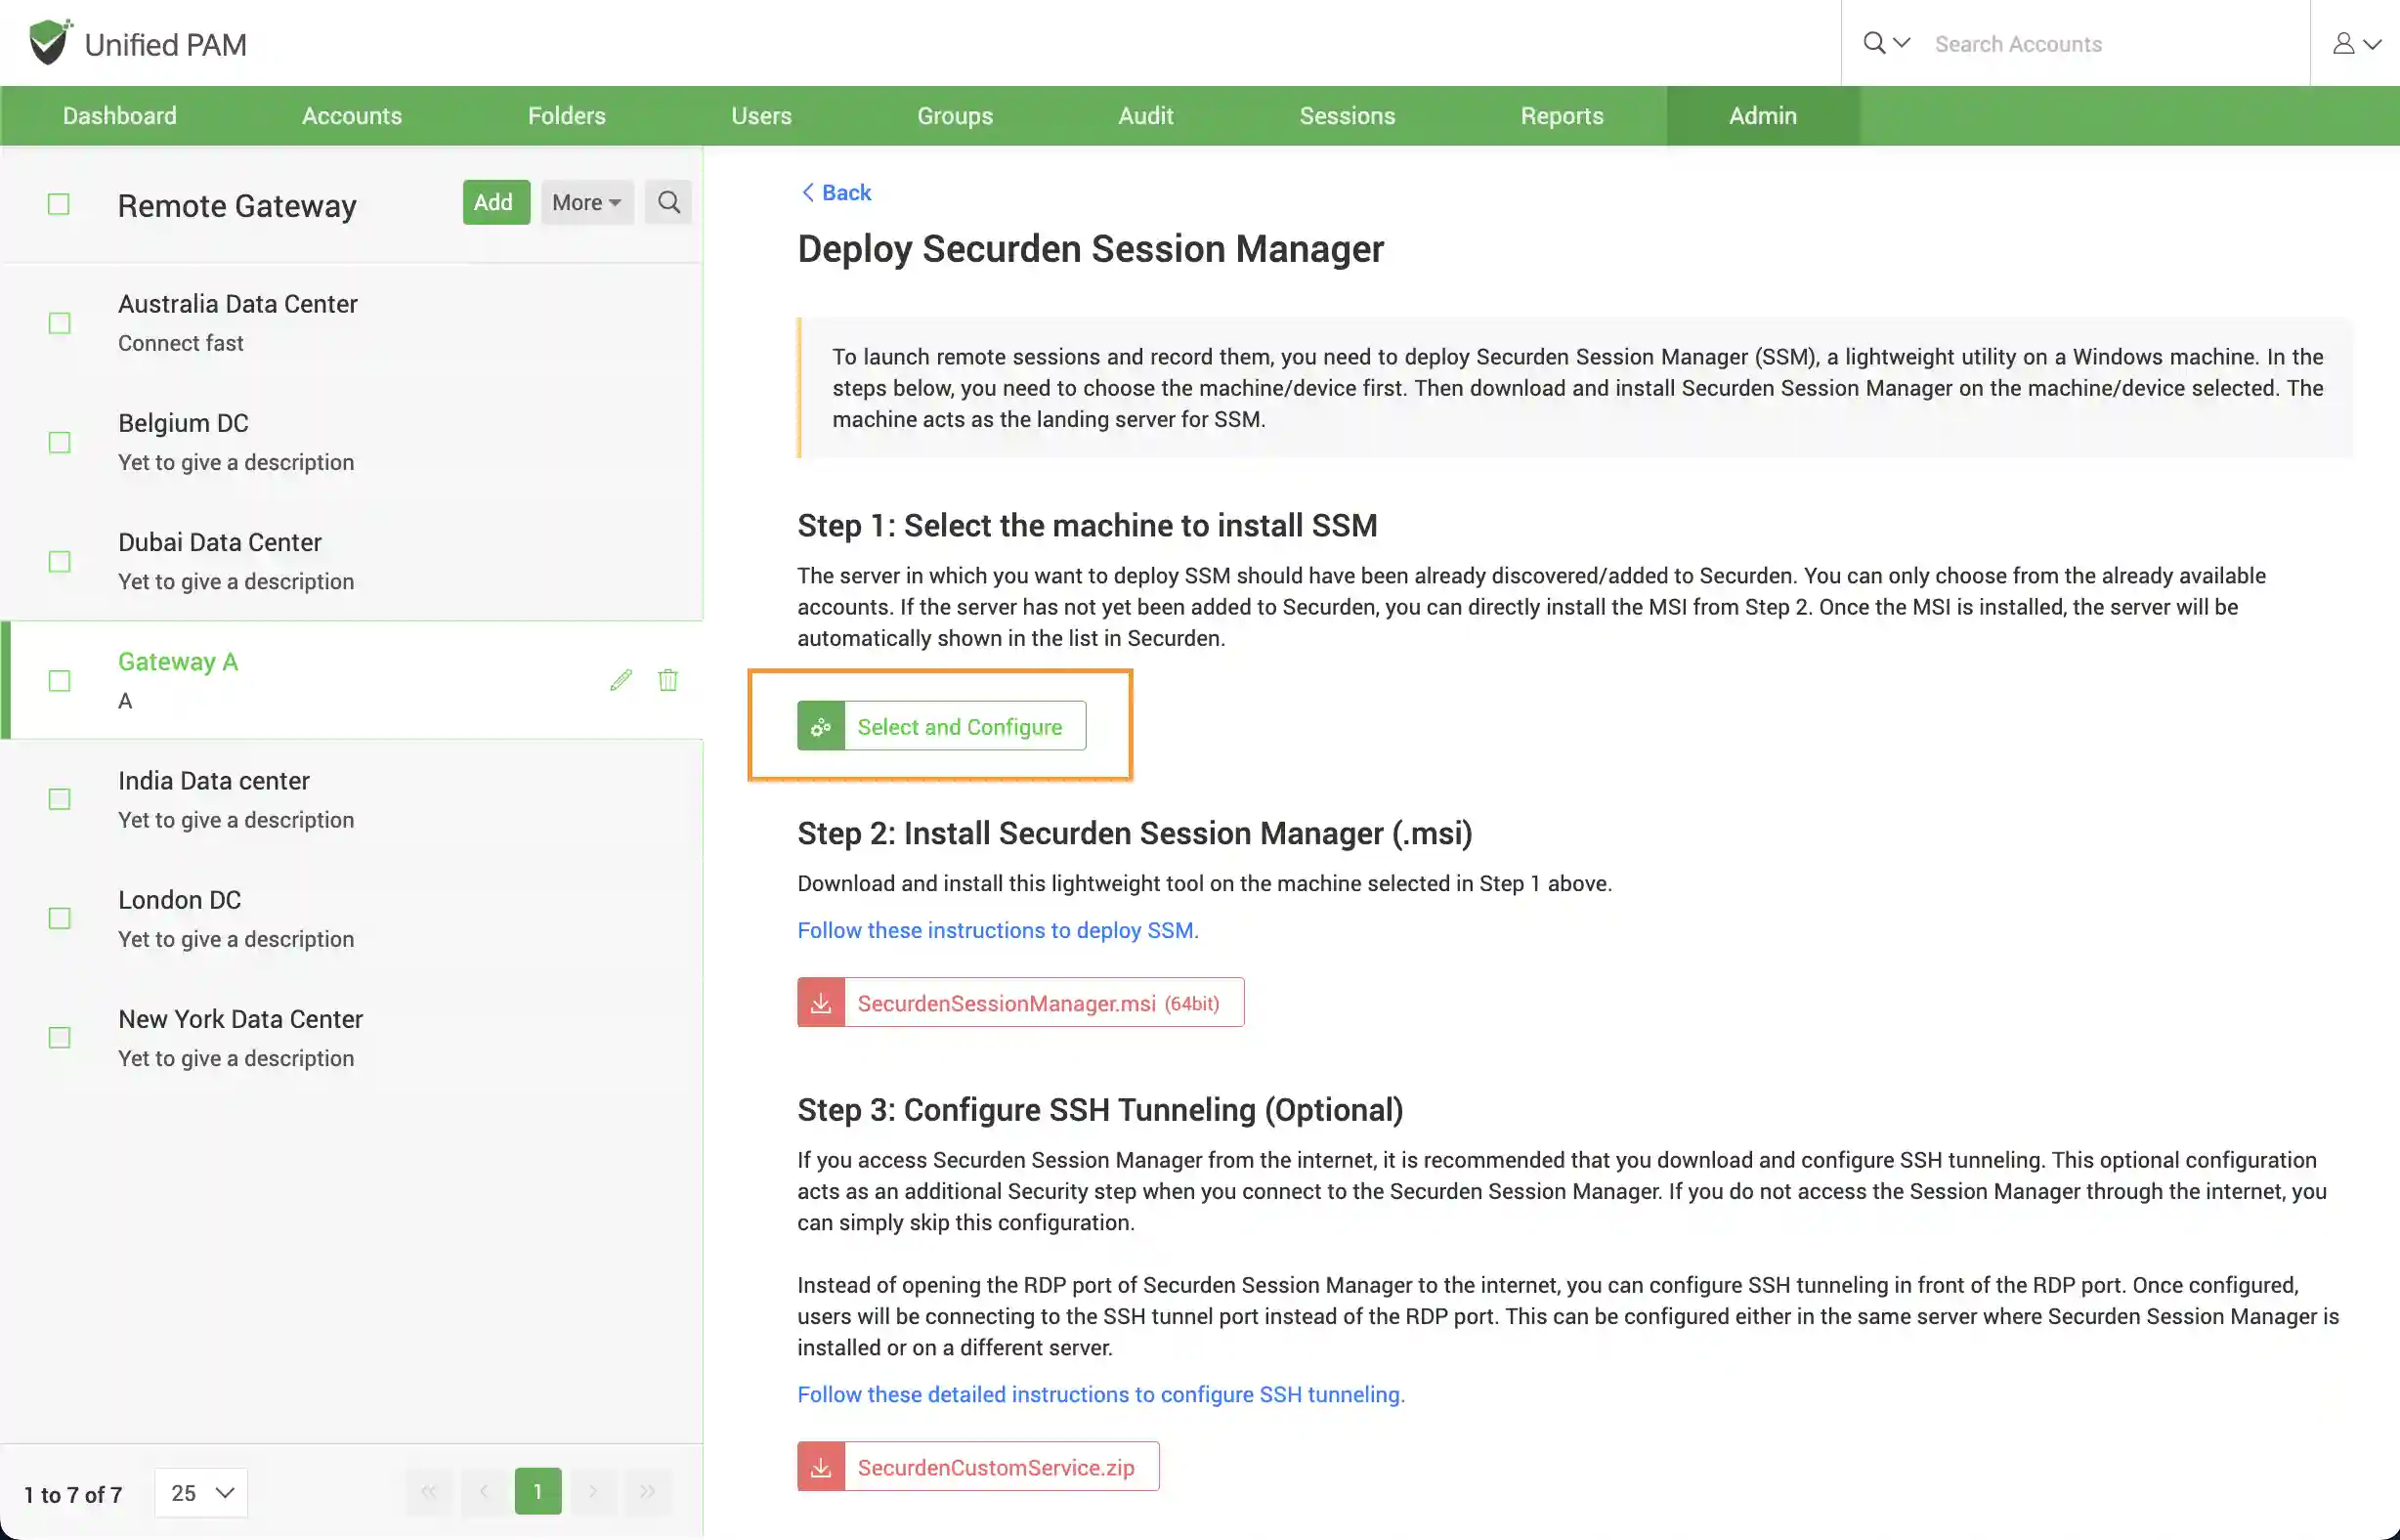
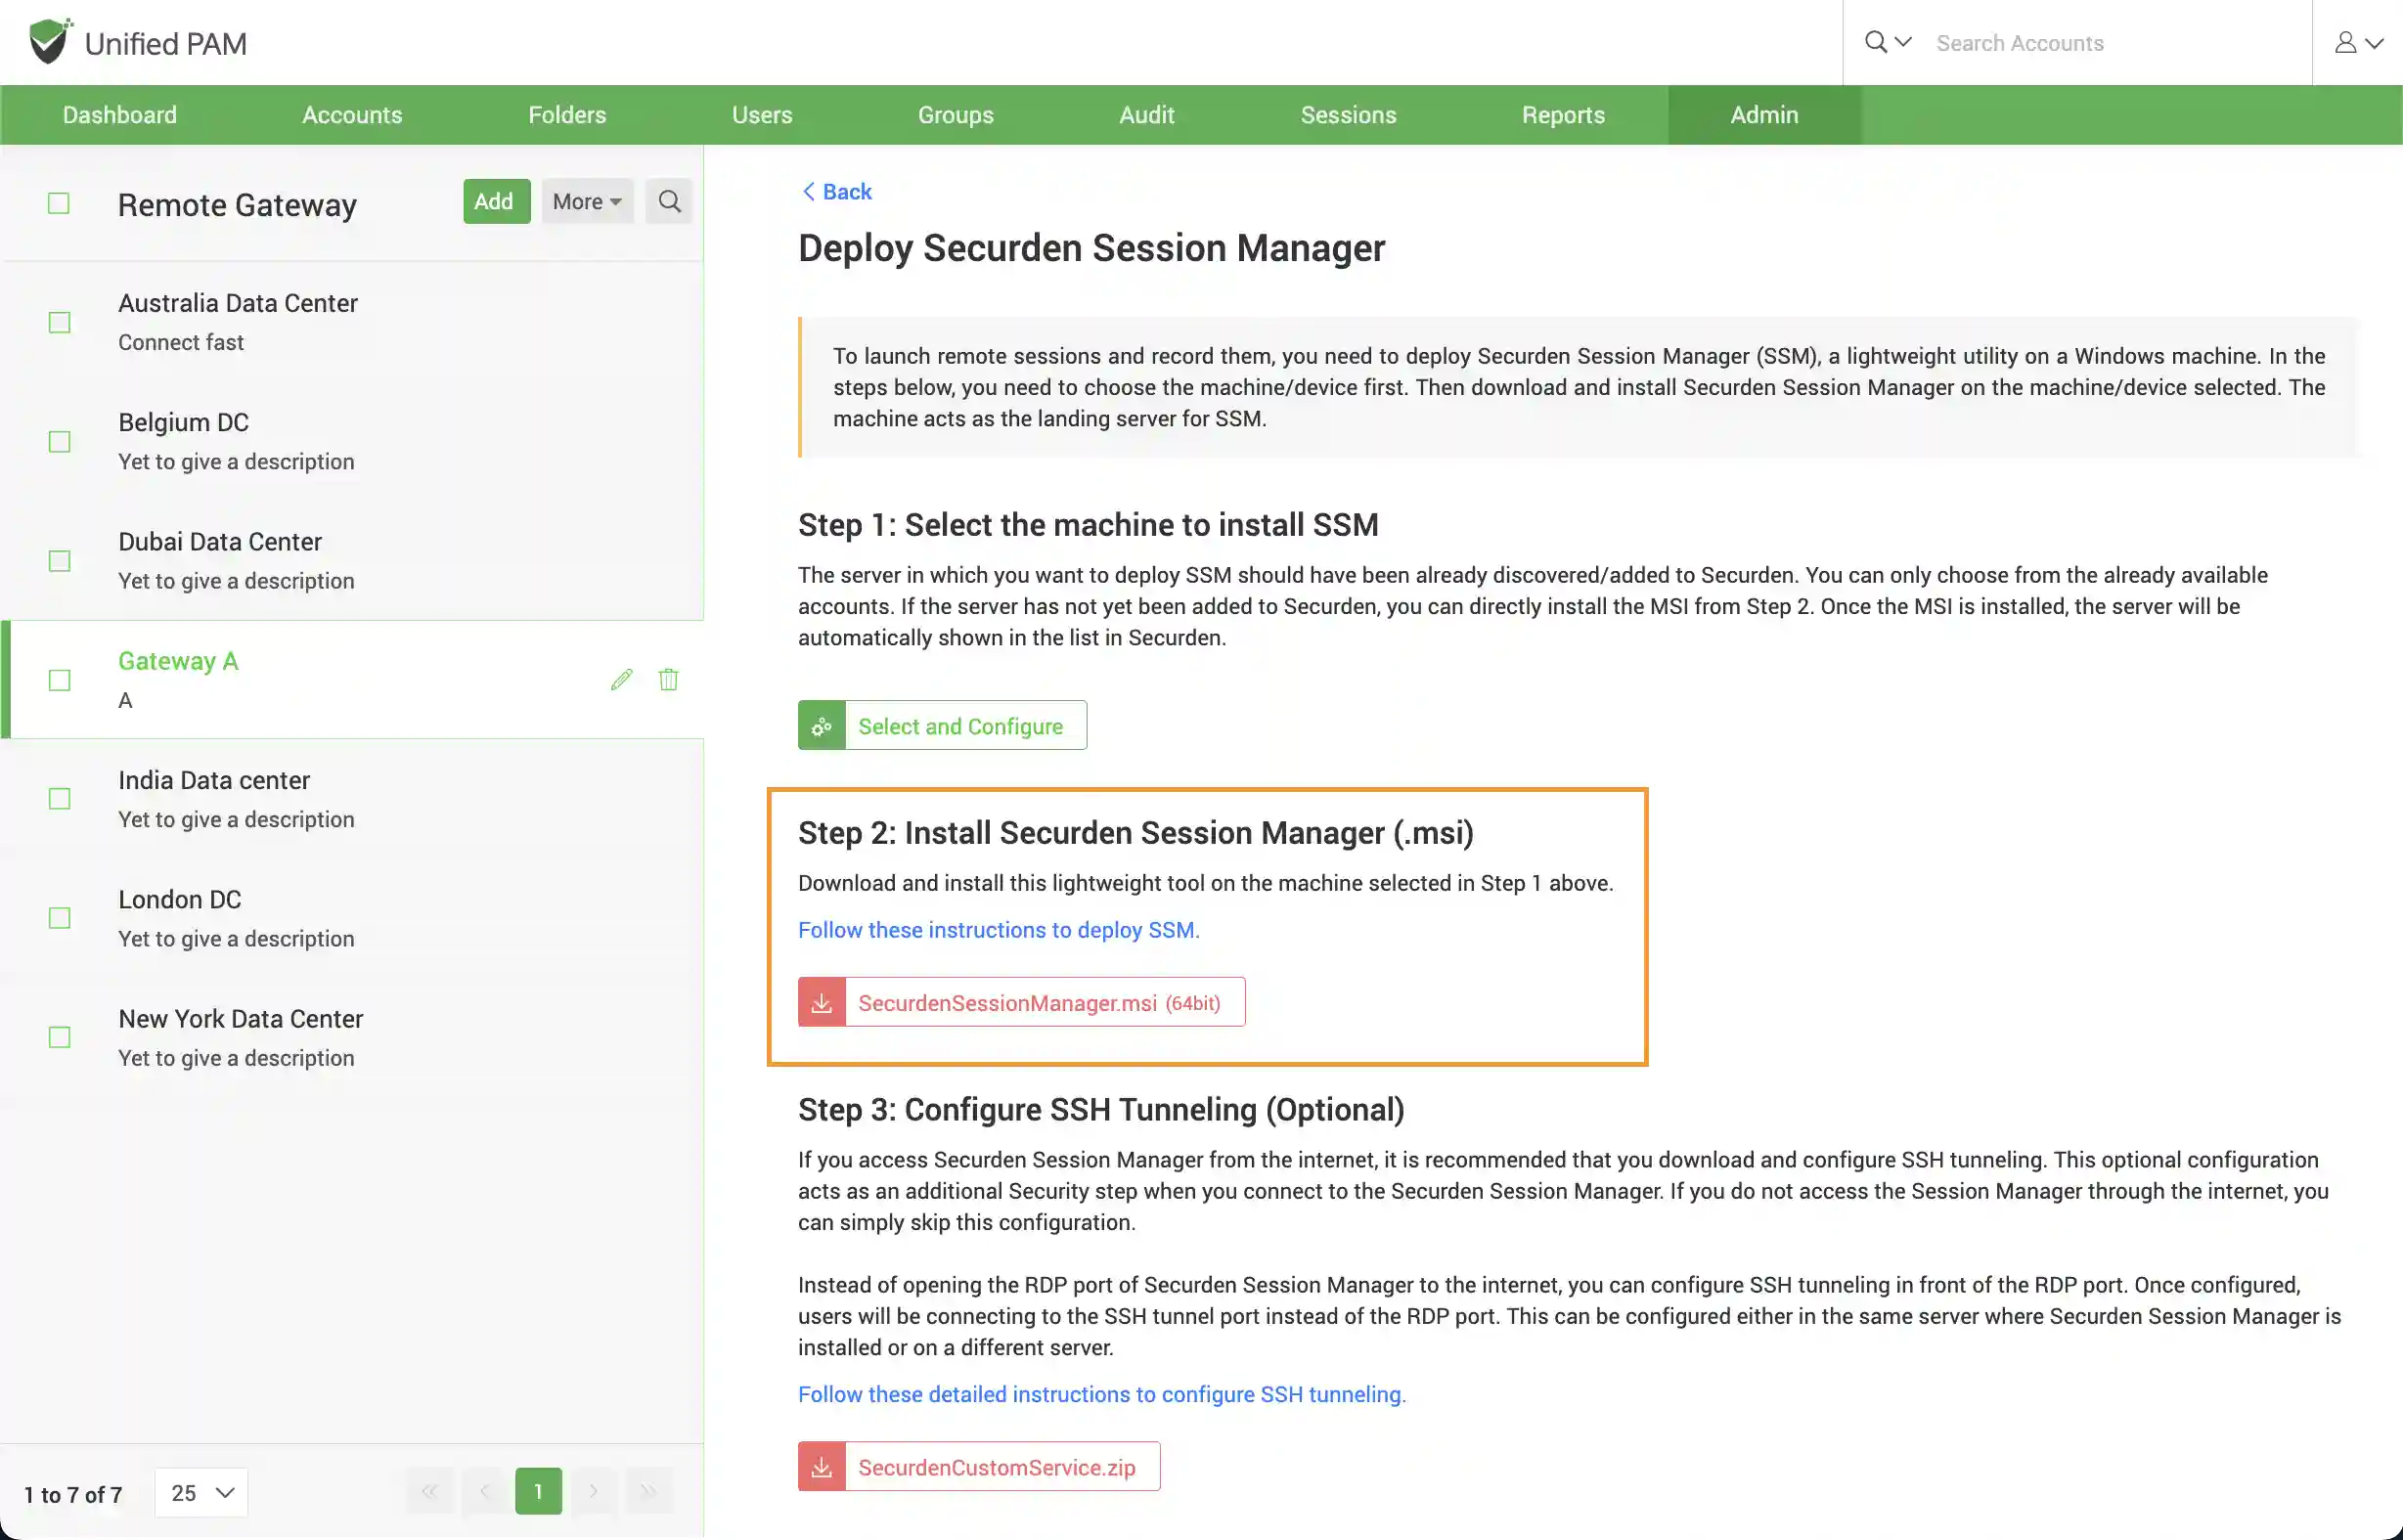
To select the machine where SSM should be deployed, click “Select and Configure” as shown in the screenshot below.
In the GUI that opens up, you need to select a machine discovered and added to Securden. Once you select the intended machine, you need to enter its IP address or DNS to enable Securden to connect to the device.
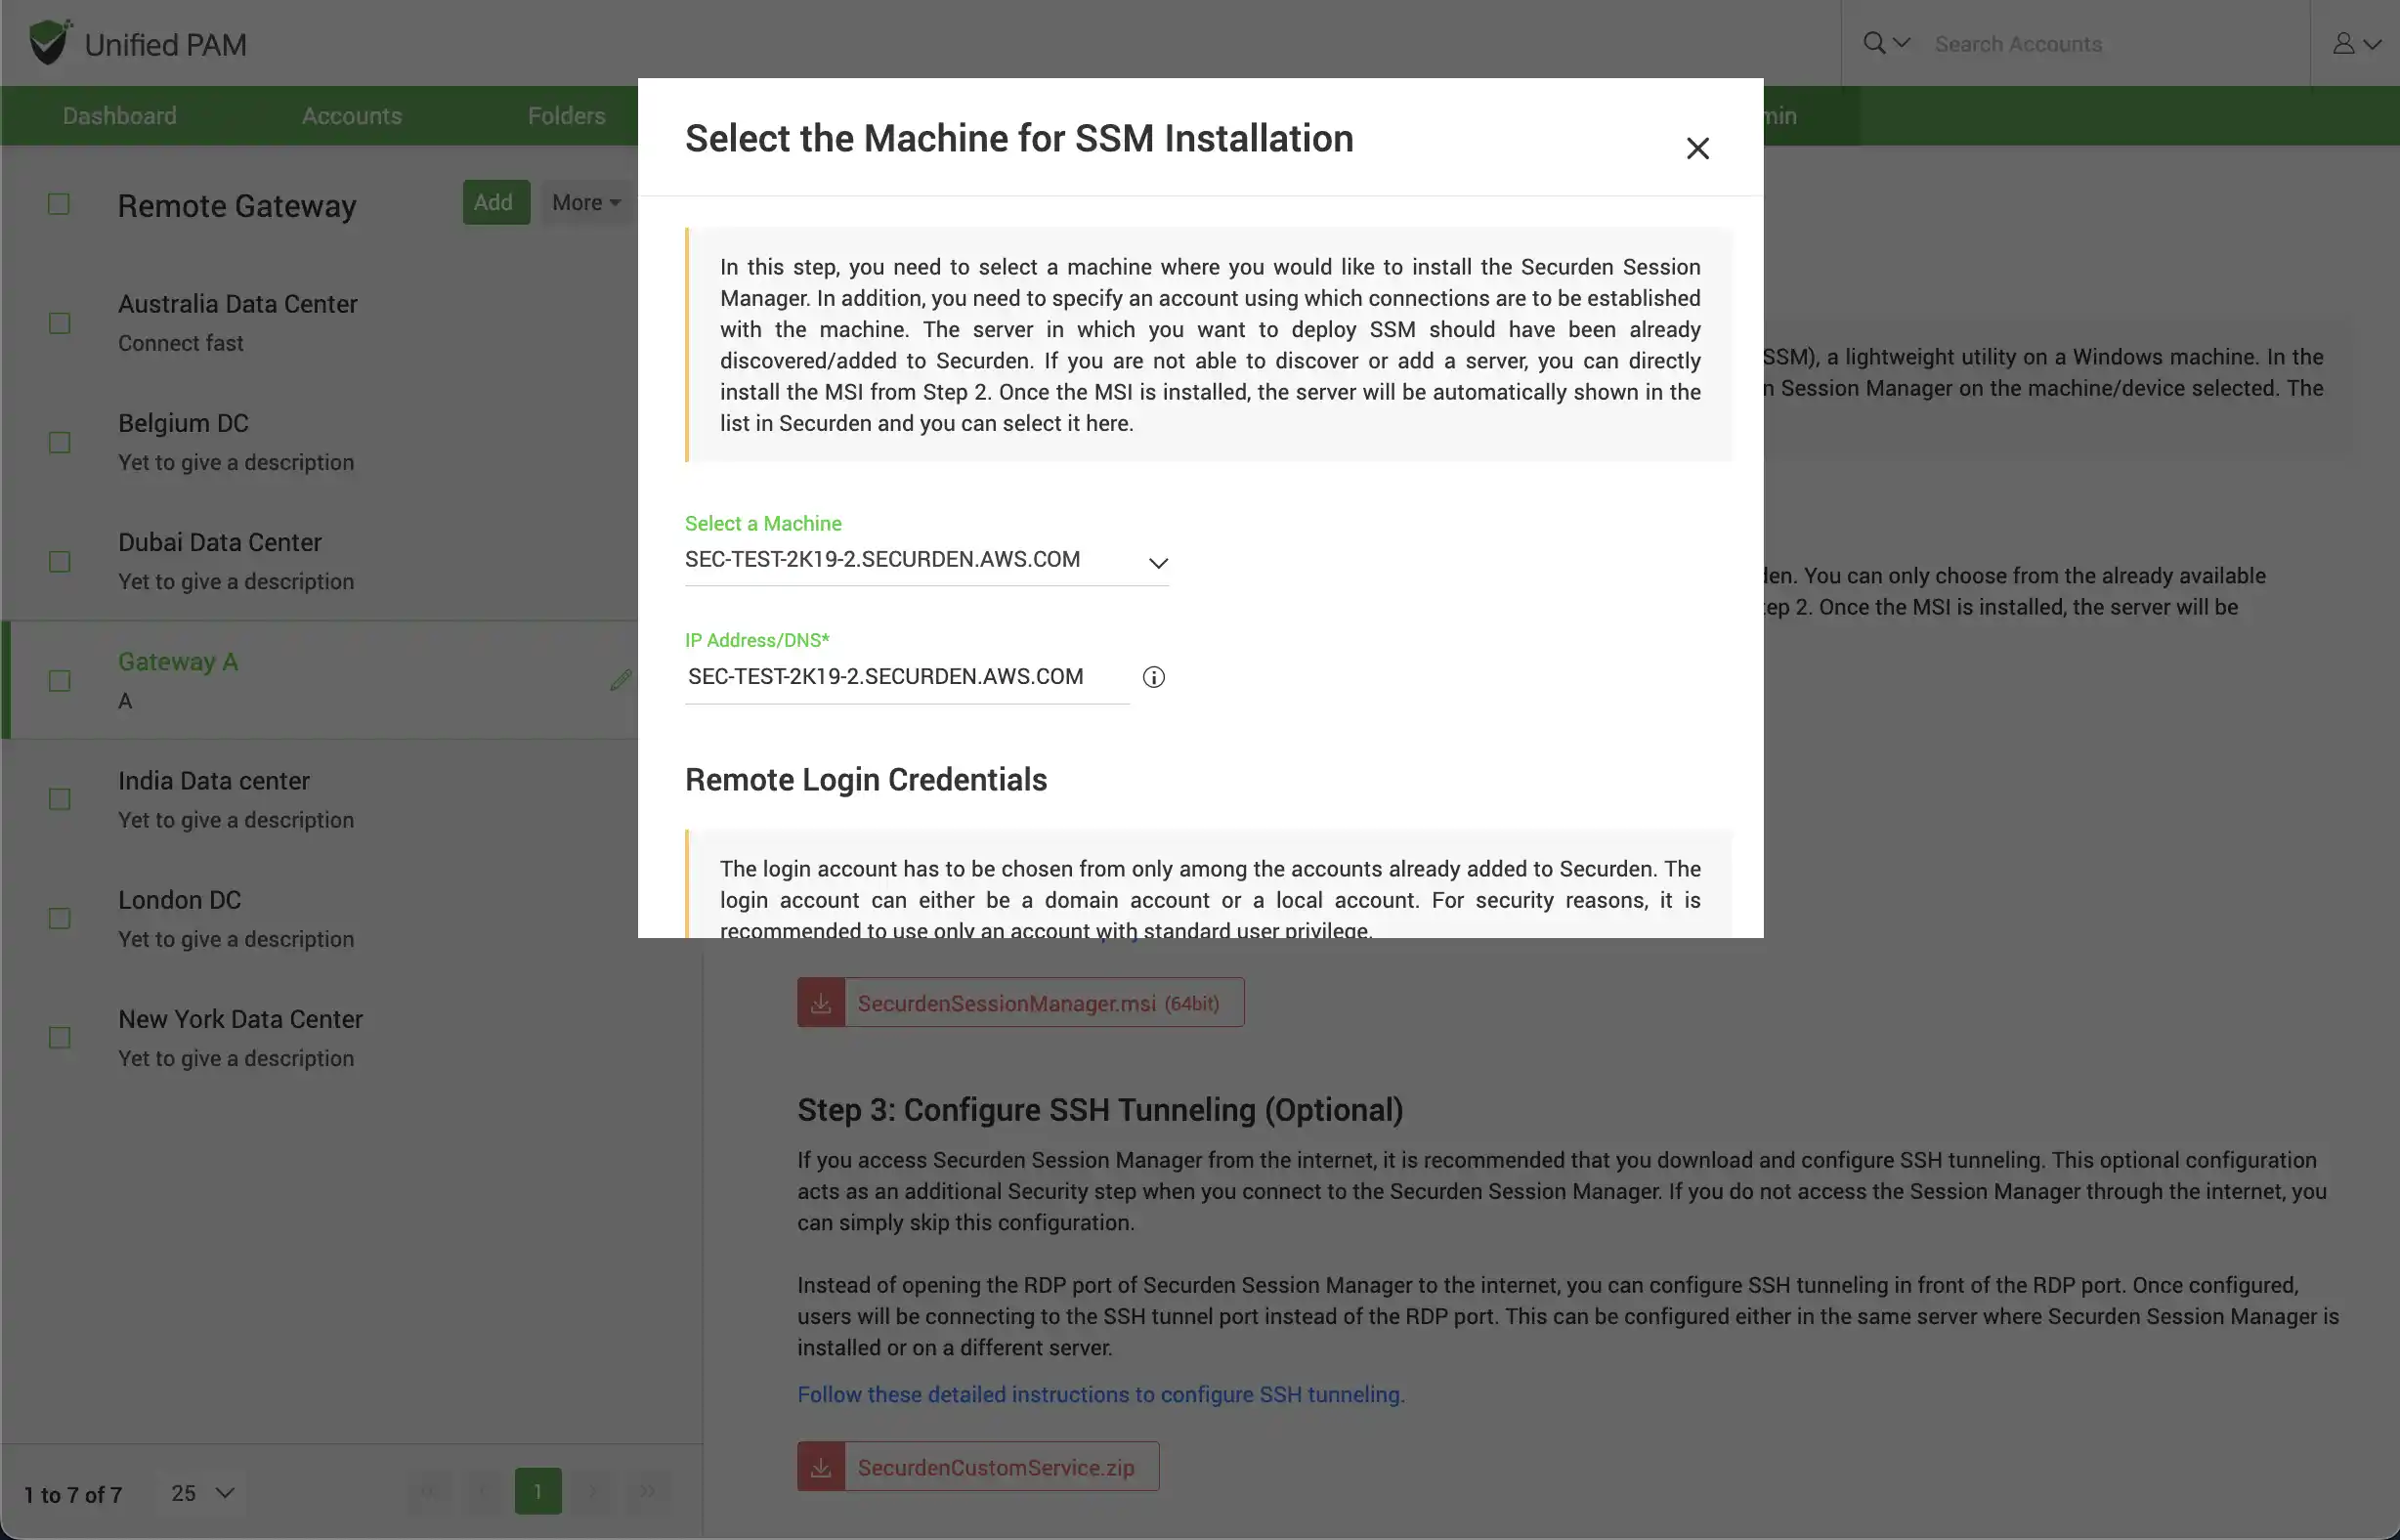
Input remote login credentials - In addition to the IP address, you need to specify an account using which connections are to be established with the machine.
Typically, when a user tries to launch a remote connection with a target resource, Securden first logs into the machine where SSM is installed using
the login account selected here. From there, it connects to the target machine using the target machine's credentials.
The remote login account has to be chosen from only among the accounts already added to Securden. The login account can either be a domain account or a local account.
Note
For security reasons, it is recommended to use only an account with standard user privilege.
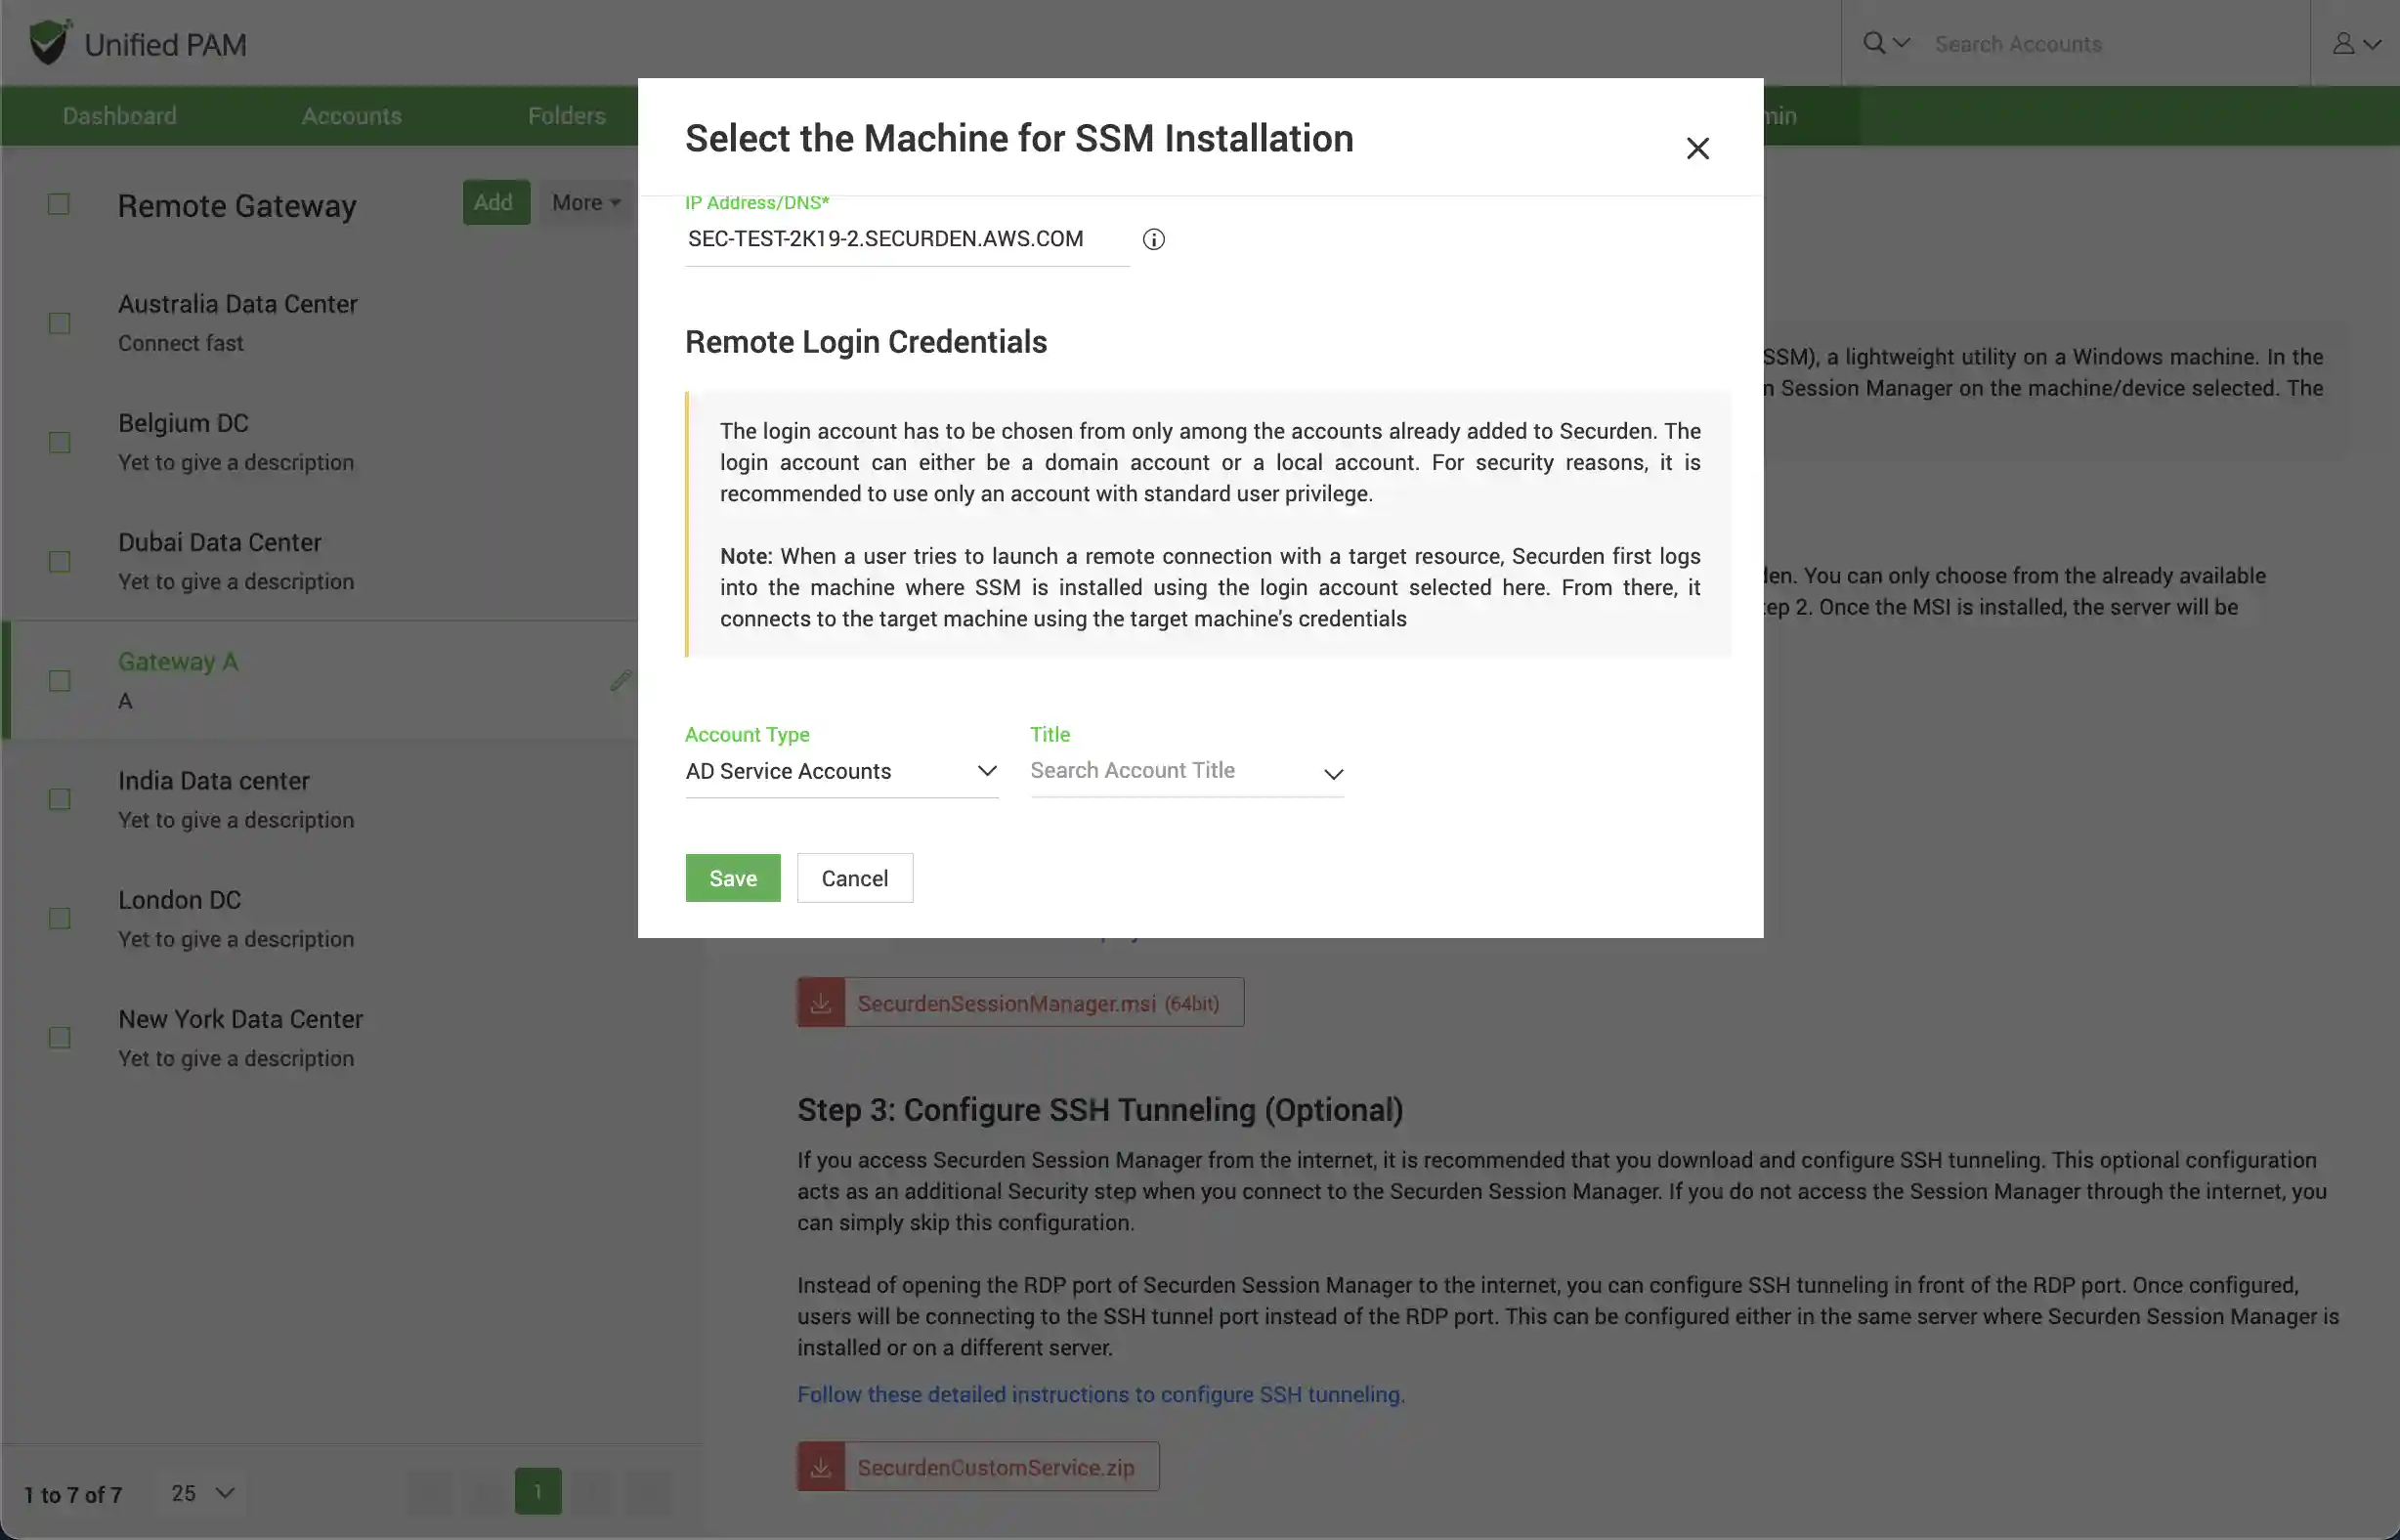
You need to select the Account Type, the Account title for the required account and click “Save”.
2: Install the Securden Session Manager (.msi)
After completing Step 1, you are ready to install the SSM package on the machine identified above. Download the .msi package from the GUI and follow the instructions given in the document link provided in the interface.
3: Configure SSH Tunneling (Optional)
If you do not access the Session Manager through the internet, you can simply skip this configuration.
If you access Securden Session Manager from the internet, it is recommended that you download and configure SSH tunneling. This optional configuration acts as an additional Security step when you connect to the Securden Session Manager.
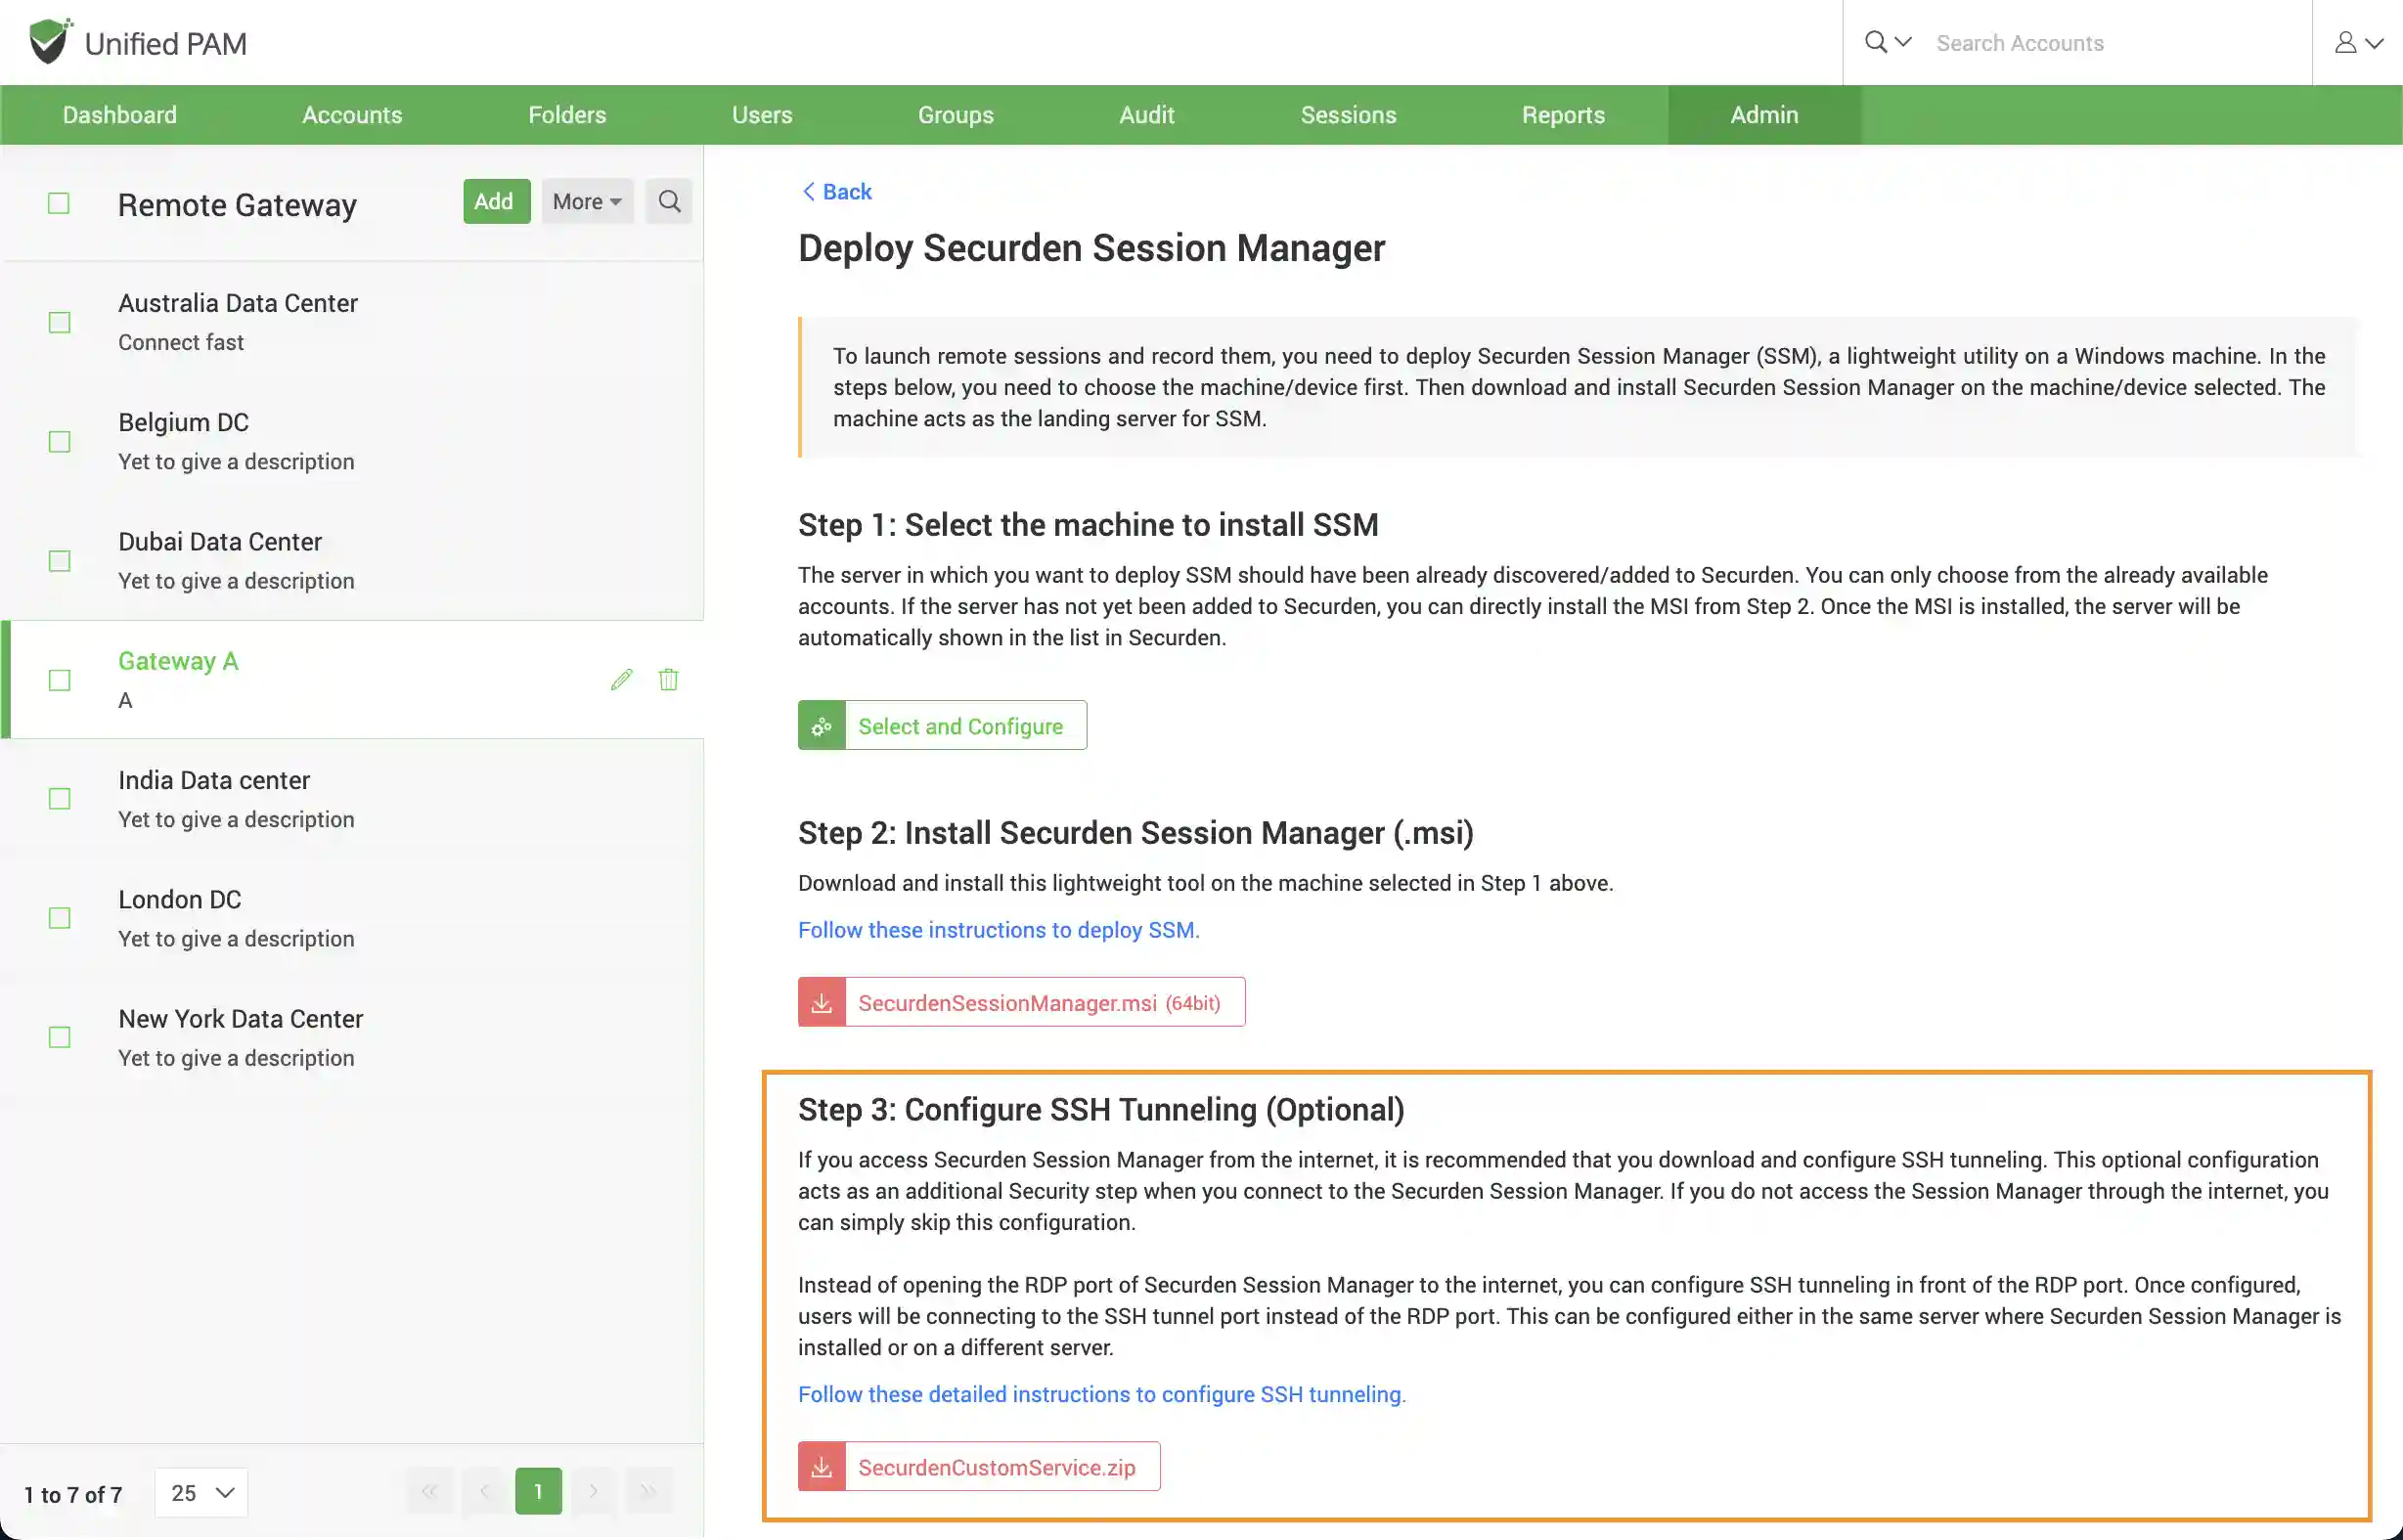
Instead of opening the RDP port of Securden Session Manager to the internet, you can configure SSH tunneling in front of the RDP port. Once configured, users will be connecting to the SSH tunnel port instead of the RDP port. This can be configured either in the same server where Securden Session Manager is installed or on a different server.
Follow the detailed instructions available on the GUI to configure SSH tunnelling.
Associate an Application Server
If you have decided to deploy a Securden application server as well (for reasons explained on components selection above), you need to associate each such application server with a remote gateway. Once the association is done, all remote connections originating from the application servers will be routed through the gateway.
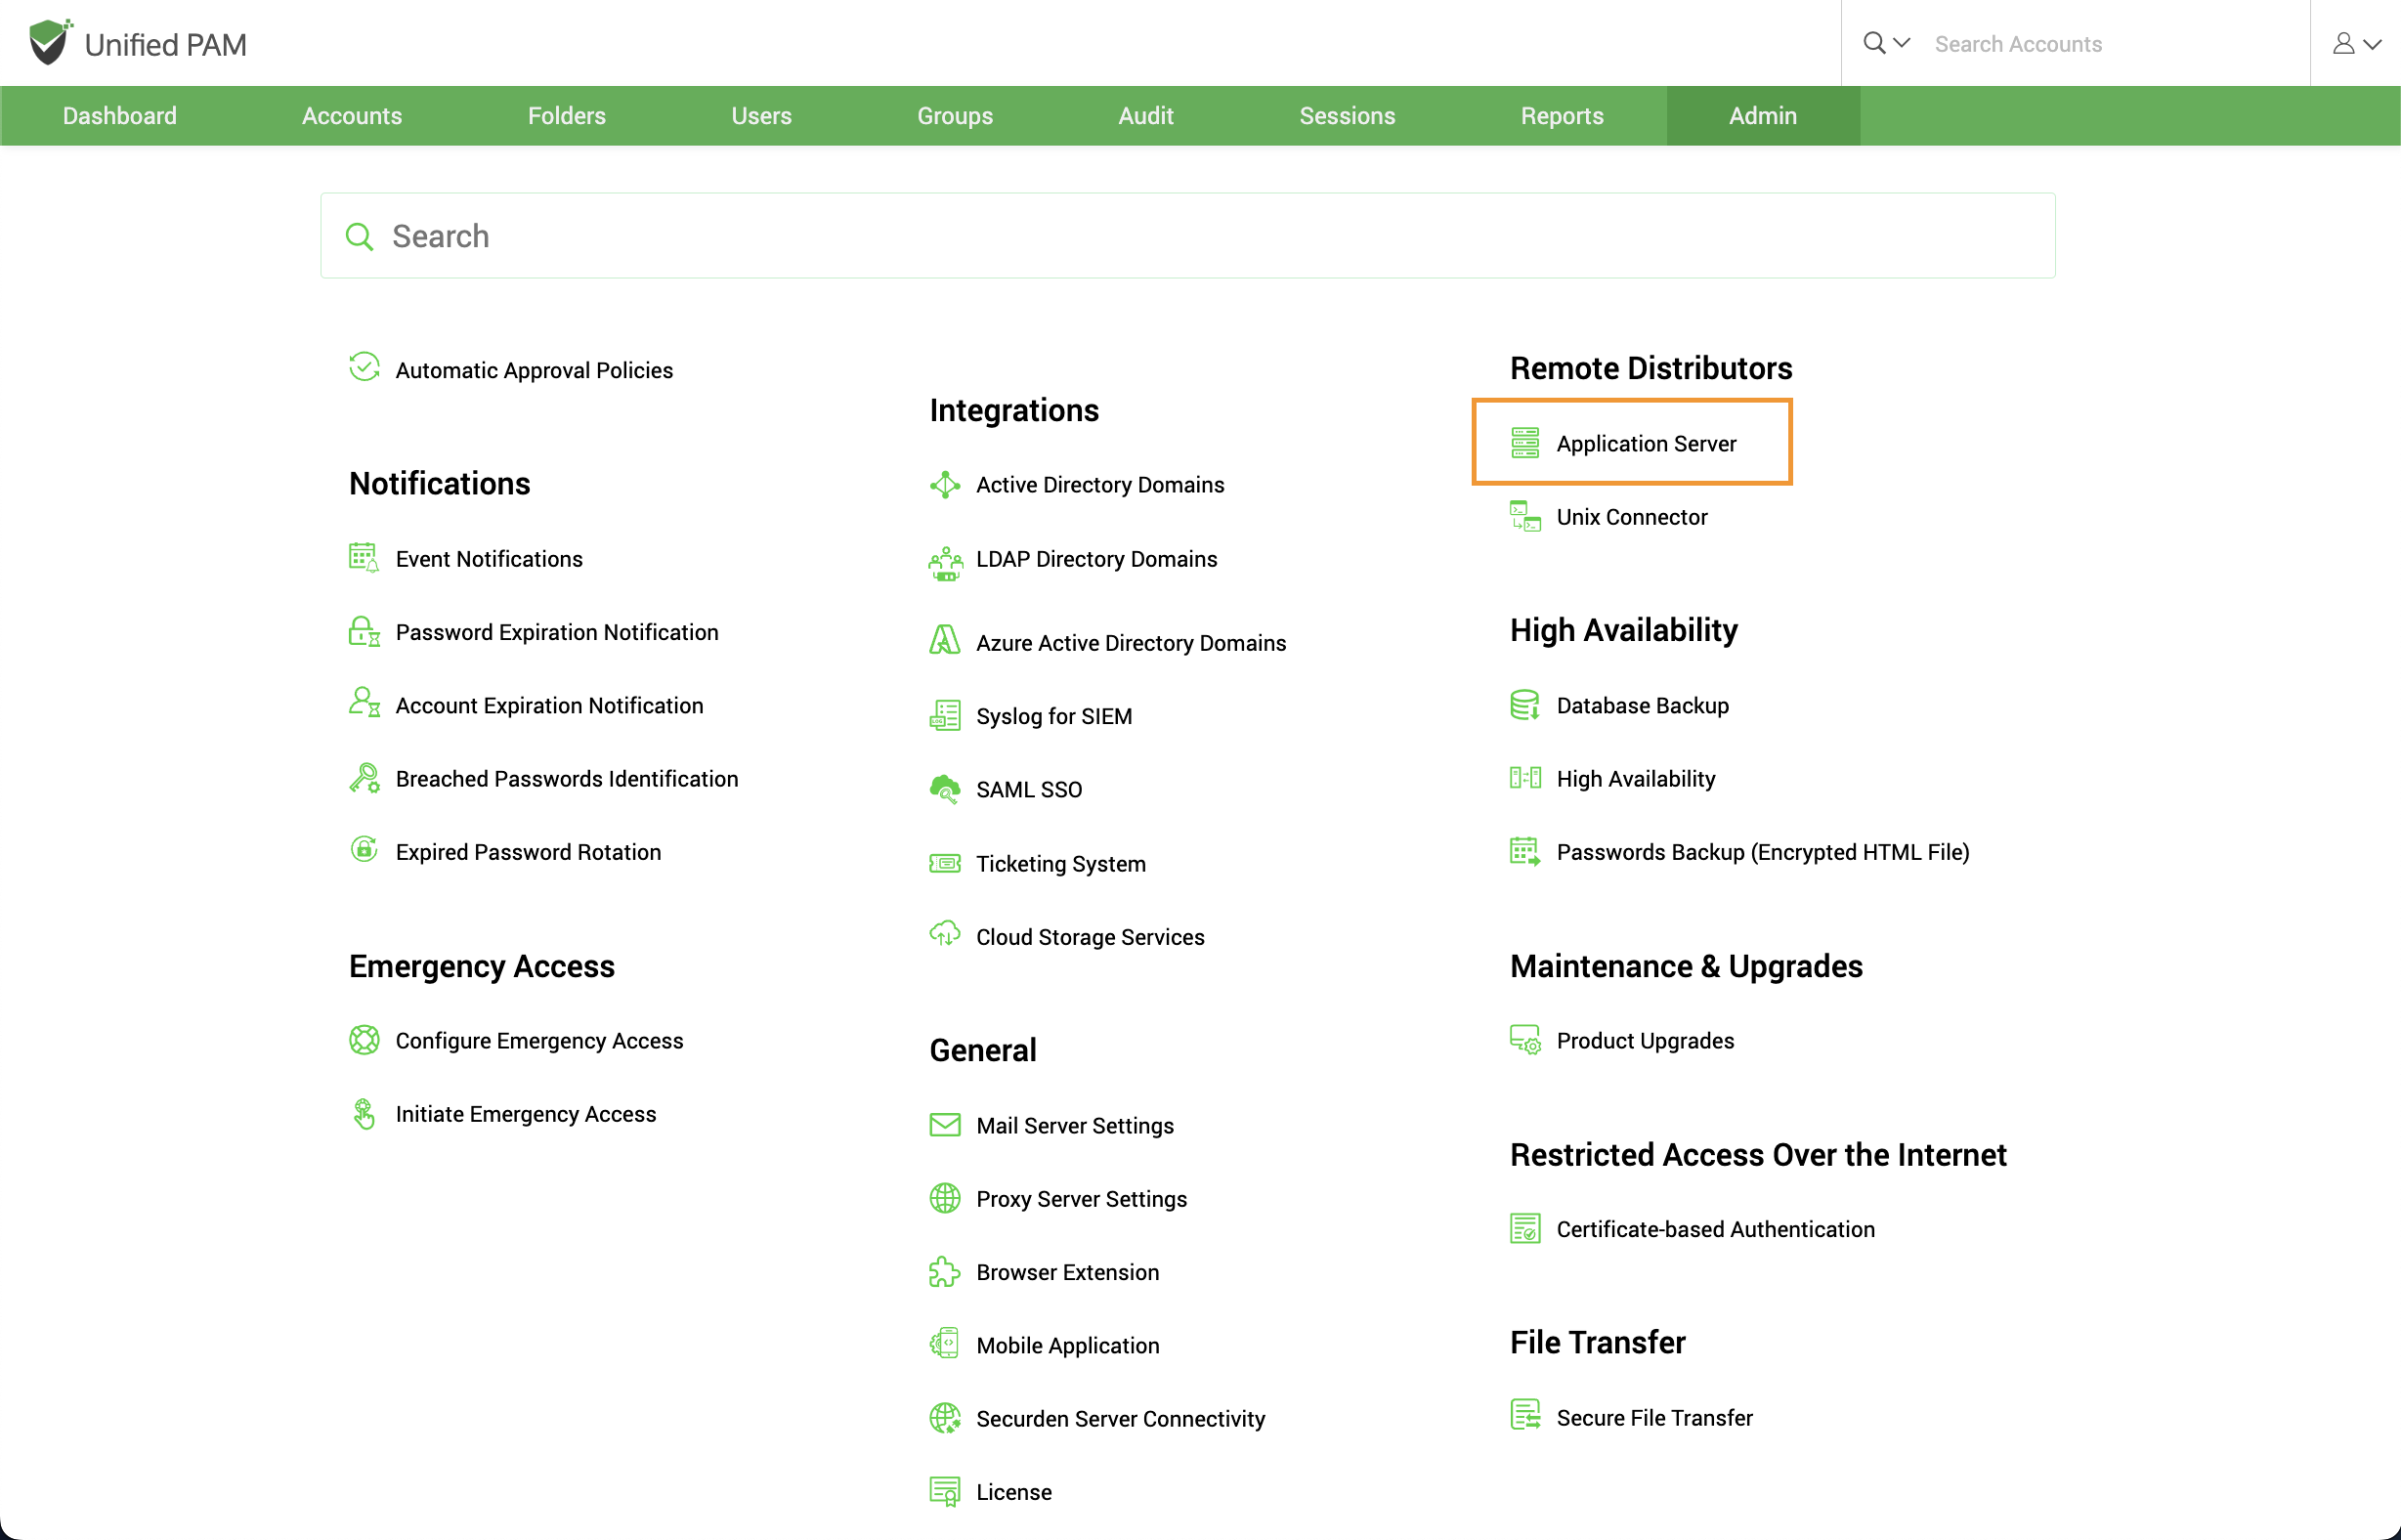
Prerequisite: You should have added at least one Application Server before proceeding further. If you haven’t added any yet, navigate to Admin >> Remote Distributors >> Application Server.
To associate an existing application server with the remote gateway, navigate to Admin >> Remote Sessions and Recordings >> Remote Gateway and select the required gateway.
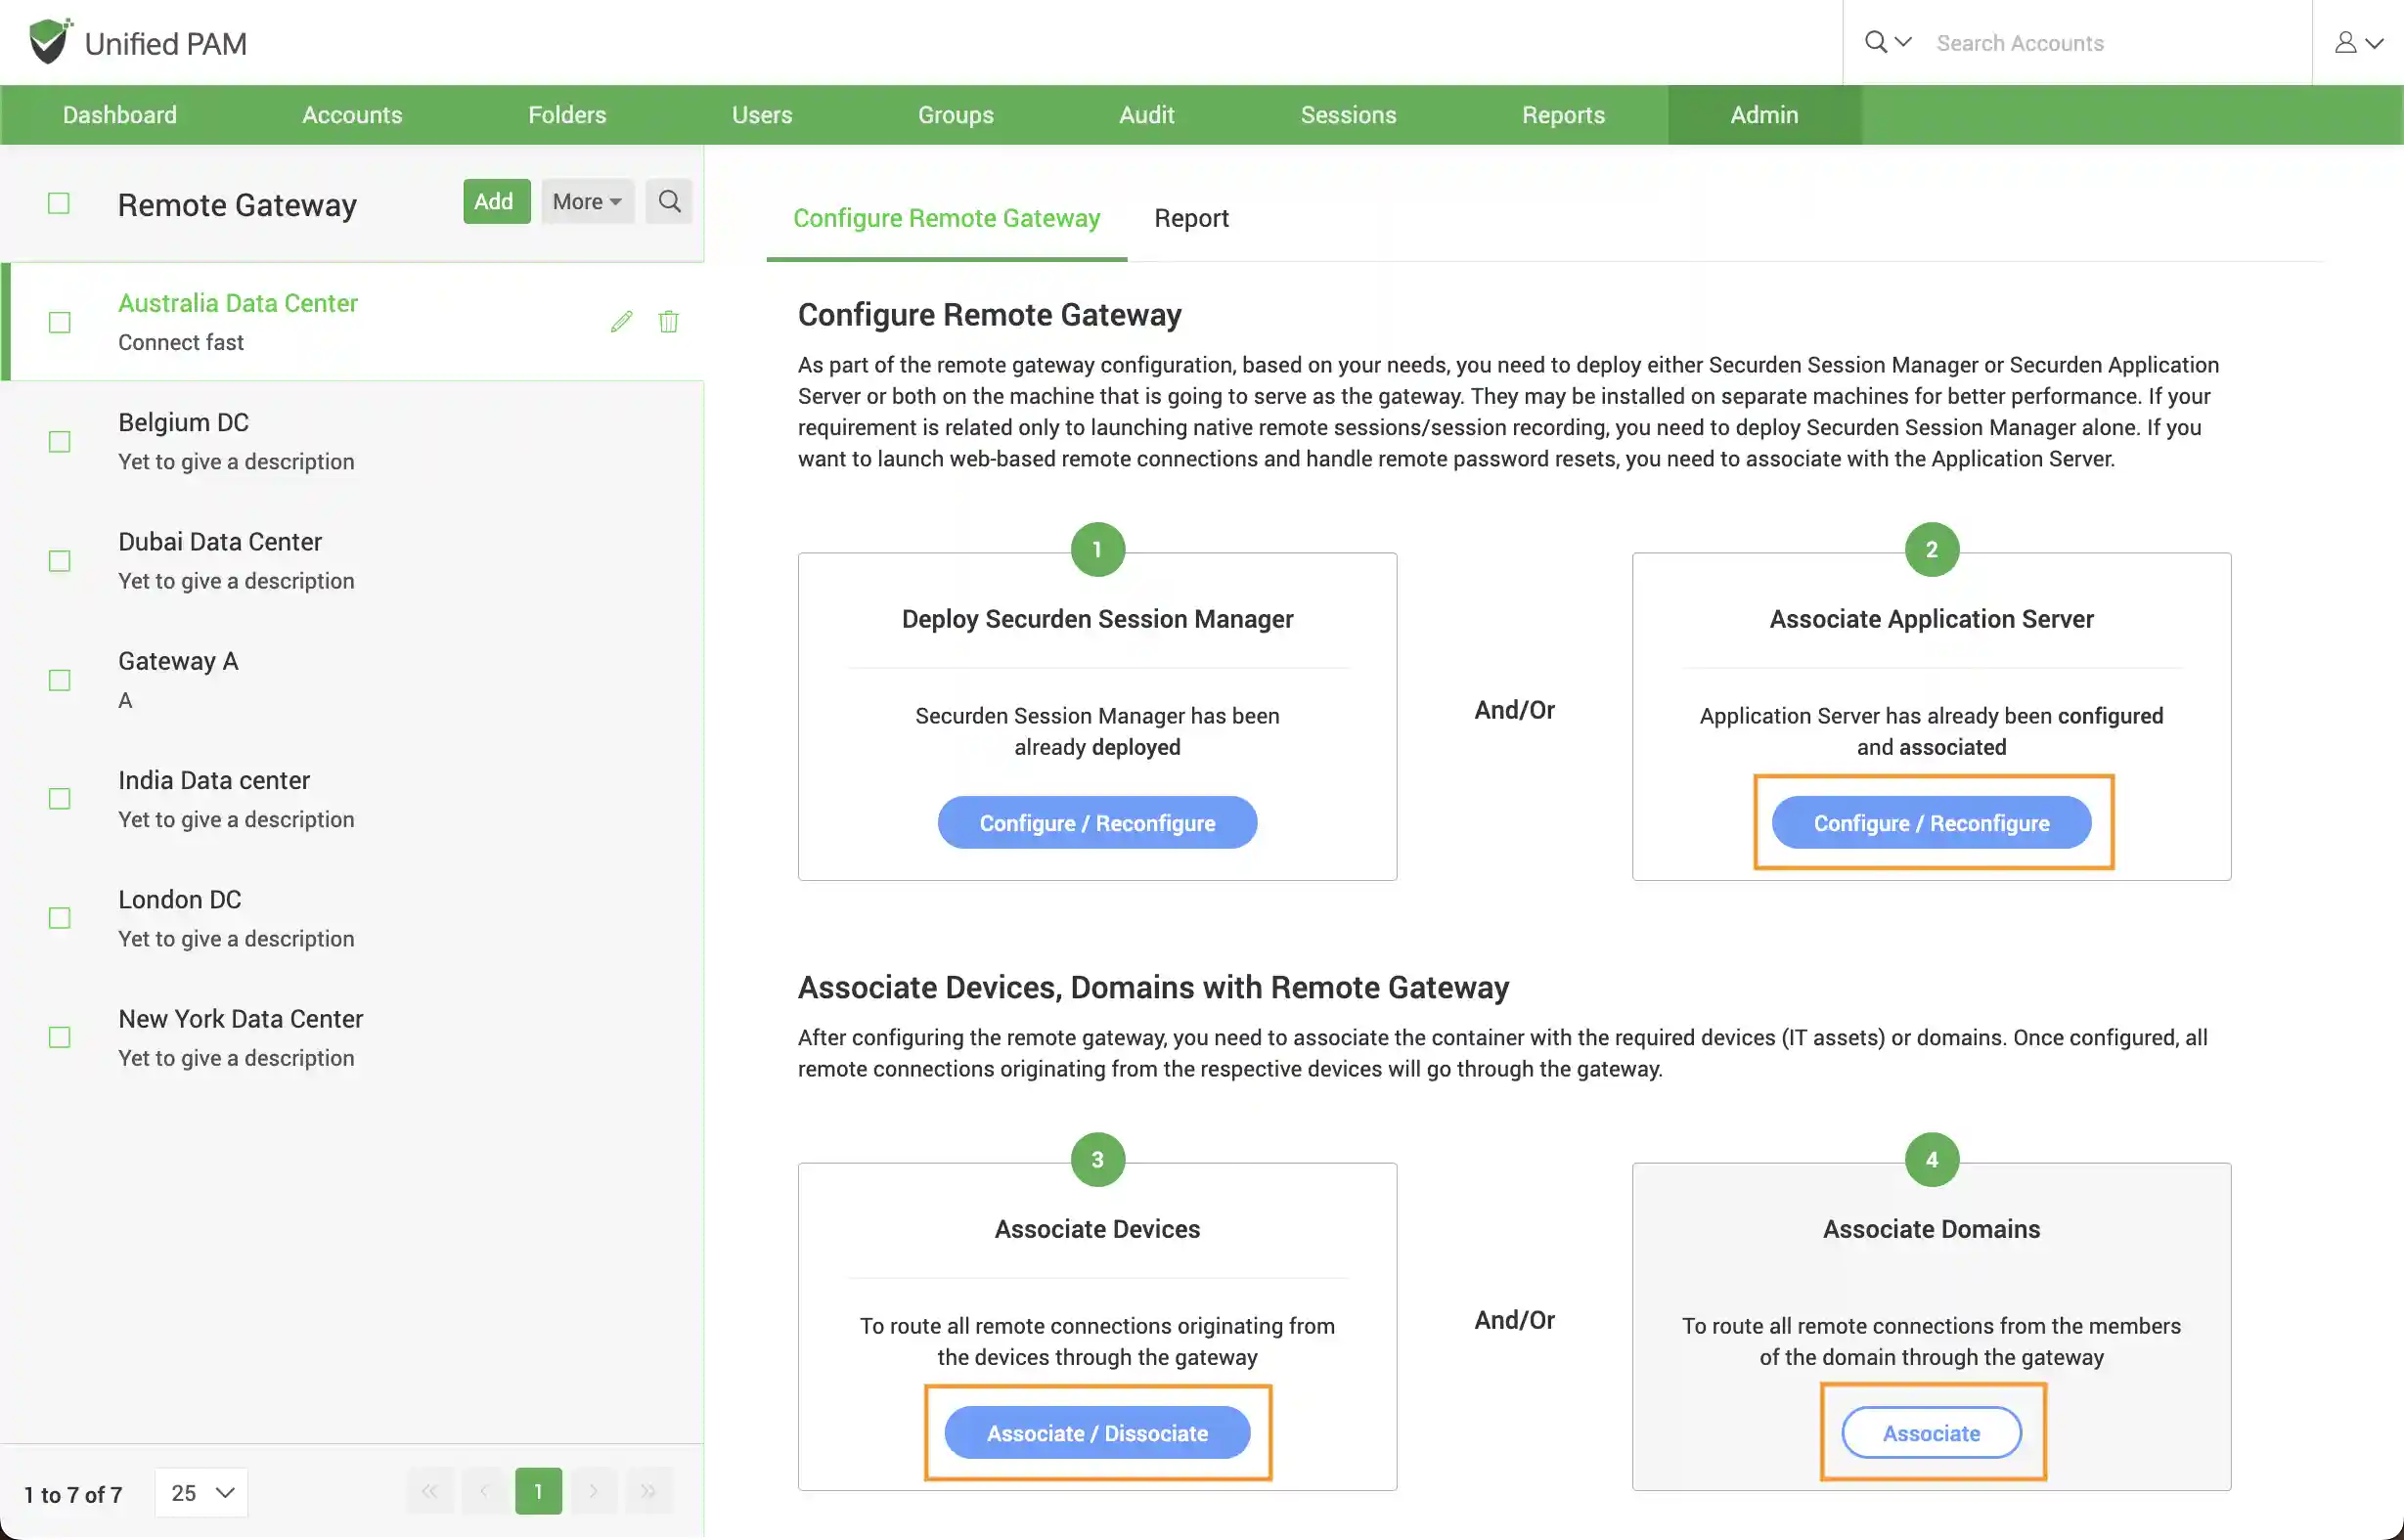
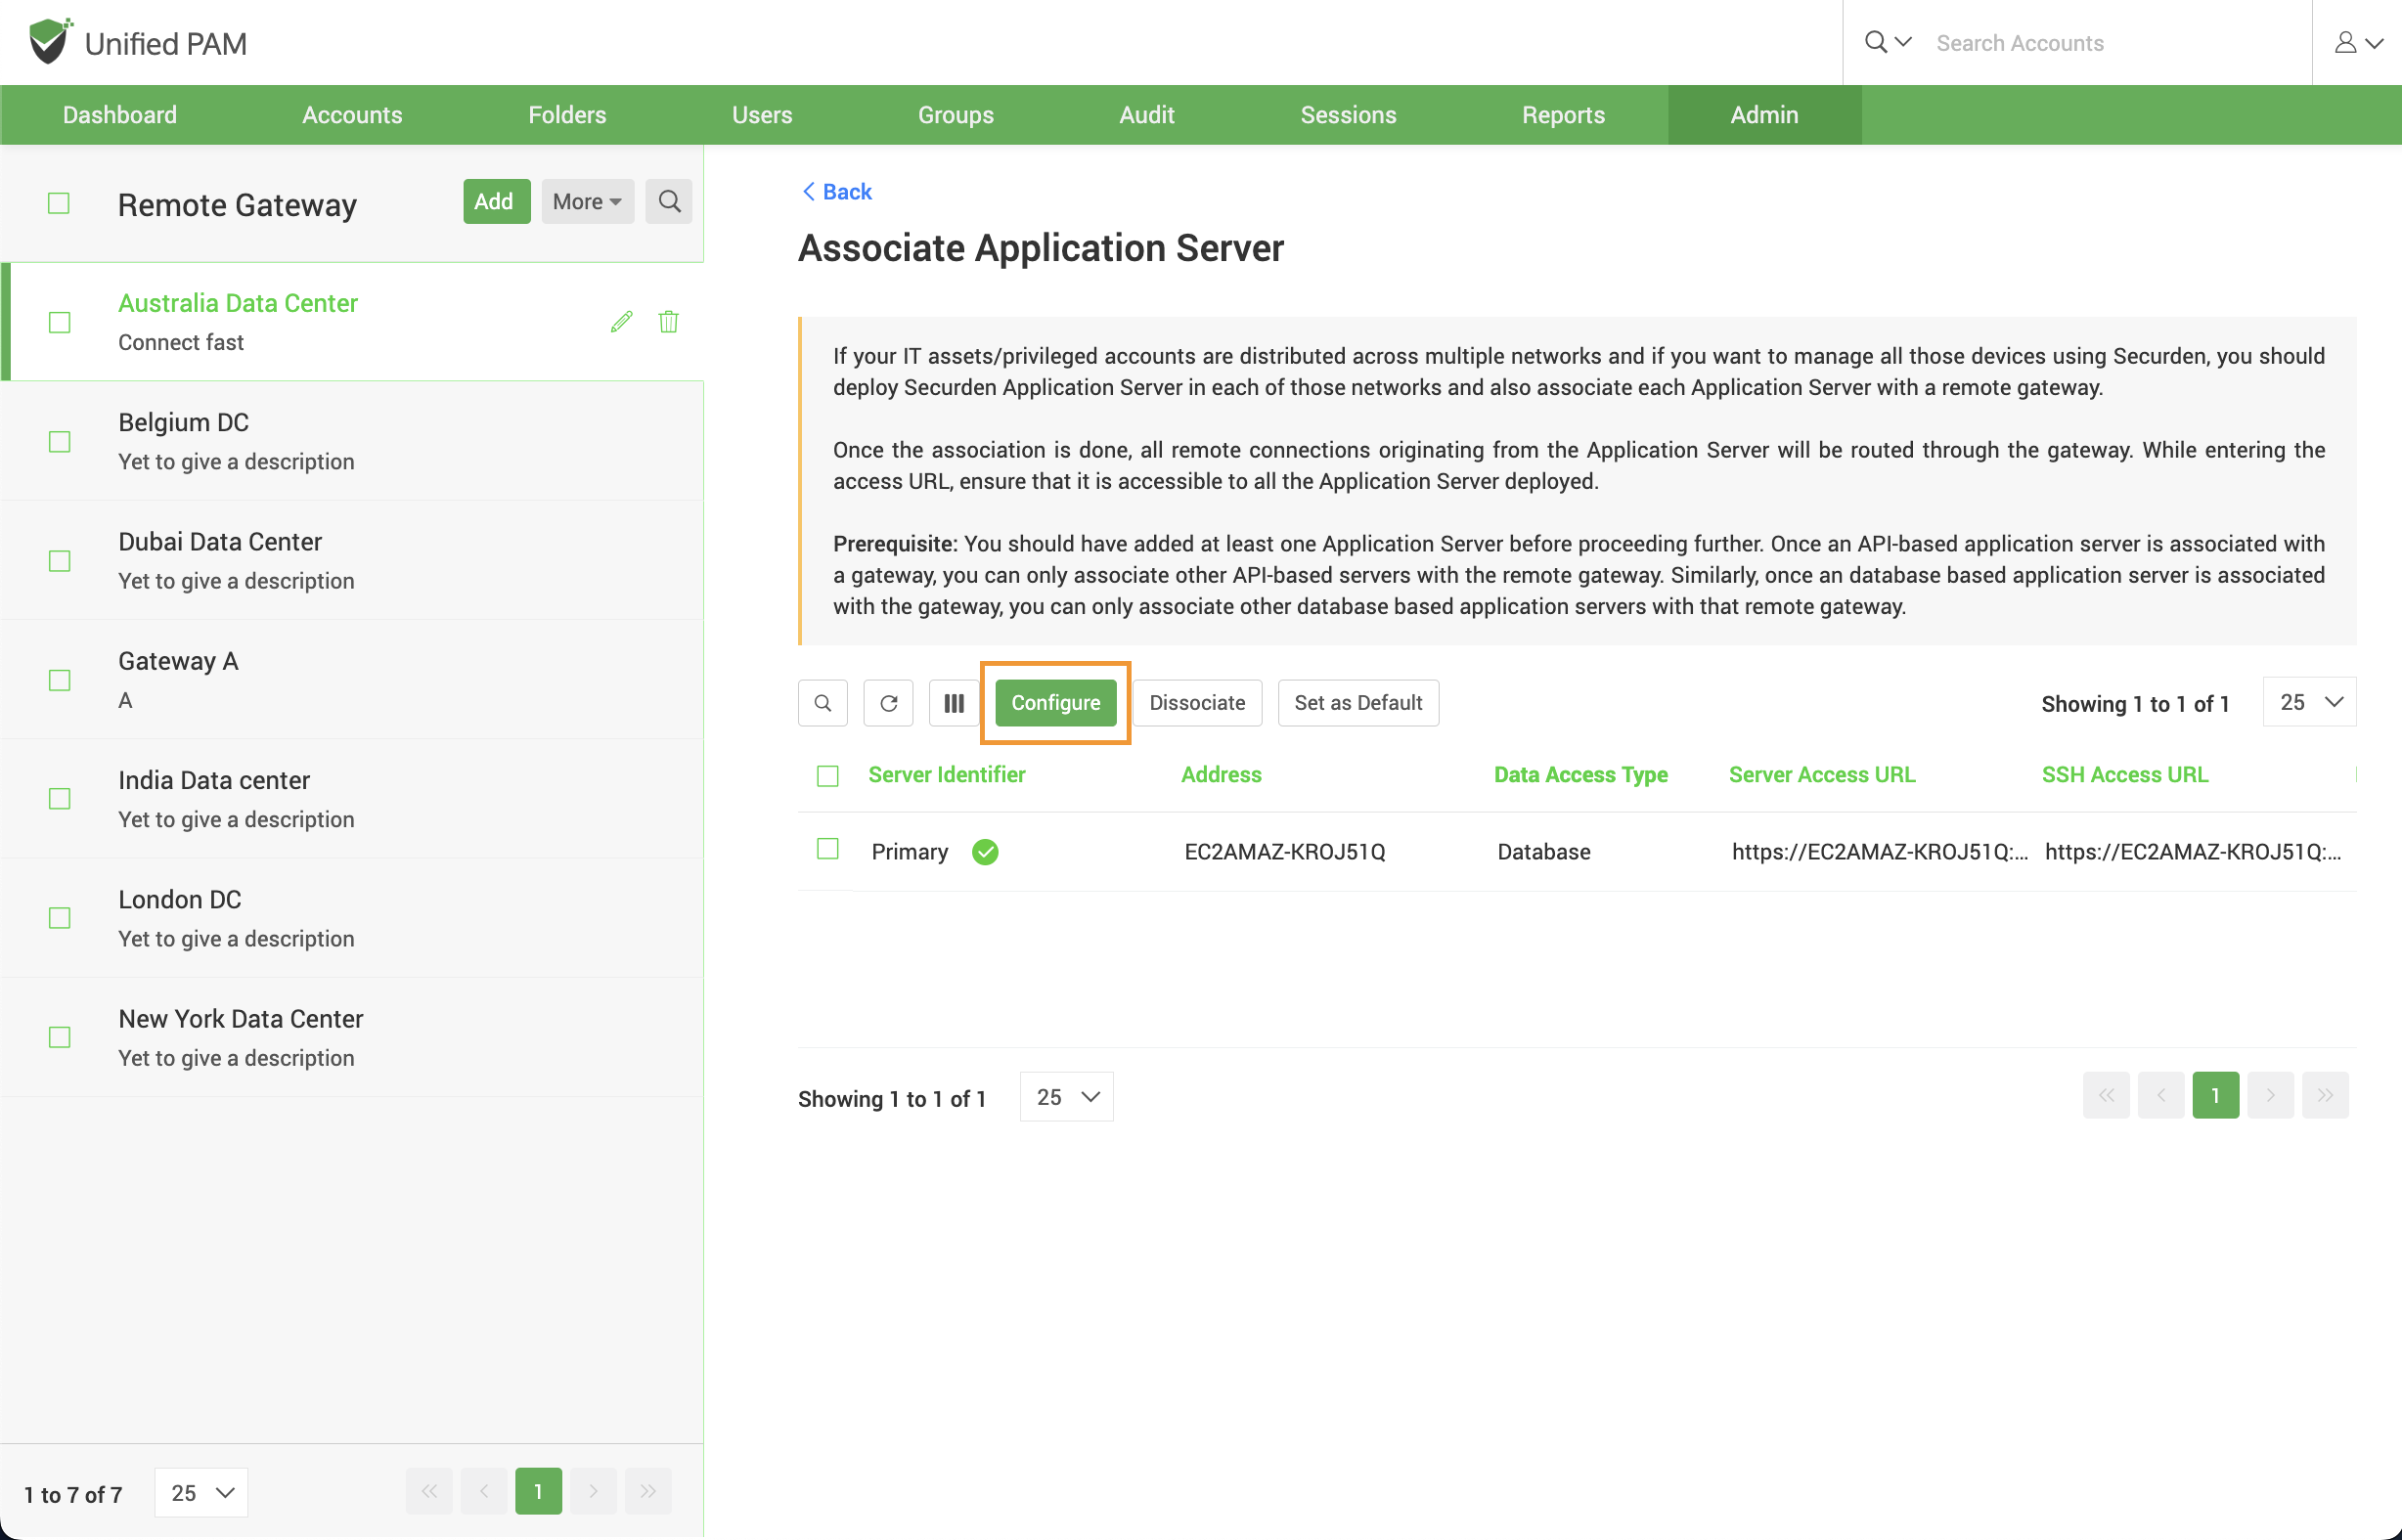
In the RHS, you will see the Configure Remote Gateway section. Within that you will see the option to Associate Application Server. Click the Configure button.

In the GUI that opens, you can see all application servers associated with the selected gateway. If there are no application servers added, you need to select Configure.
Once you select the required application server, you will need to supply the URLs shown below.
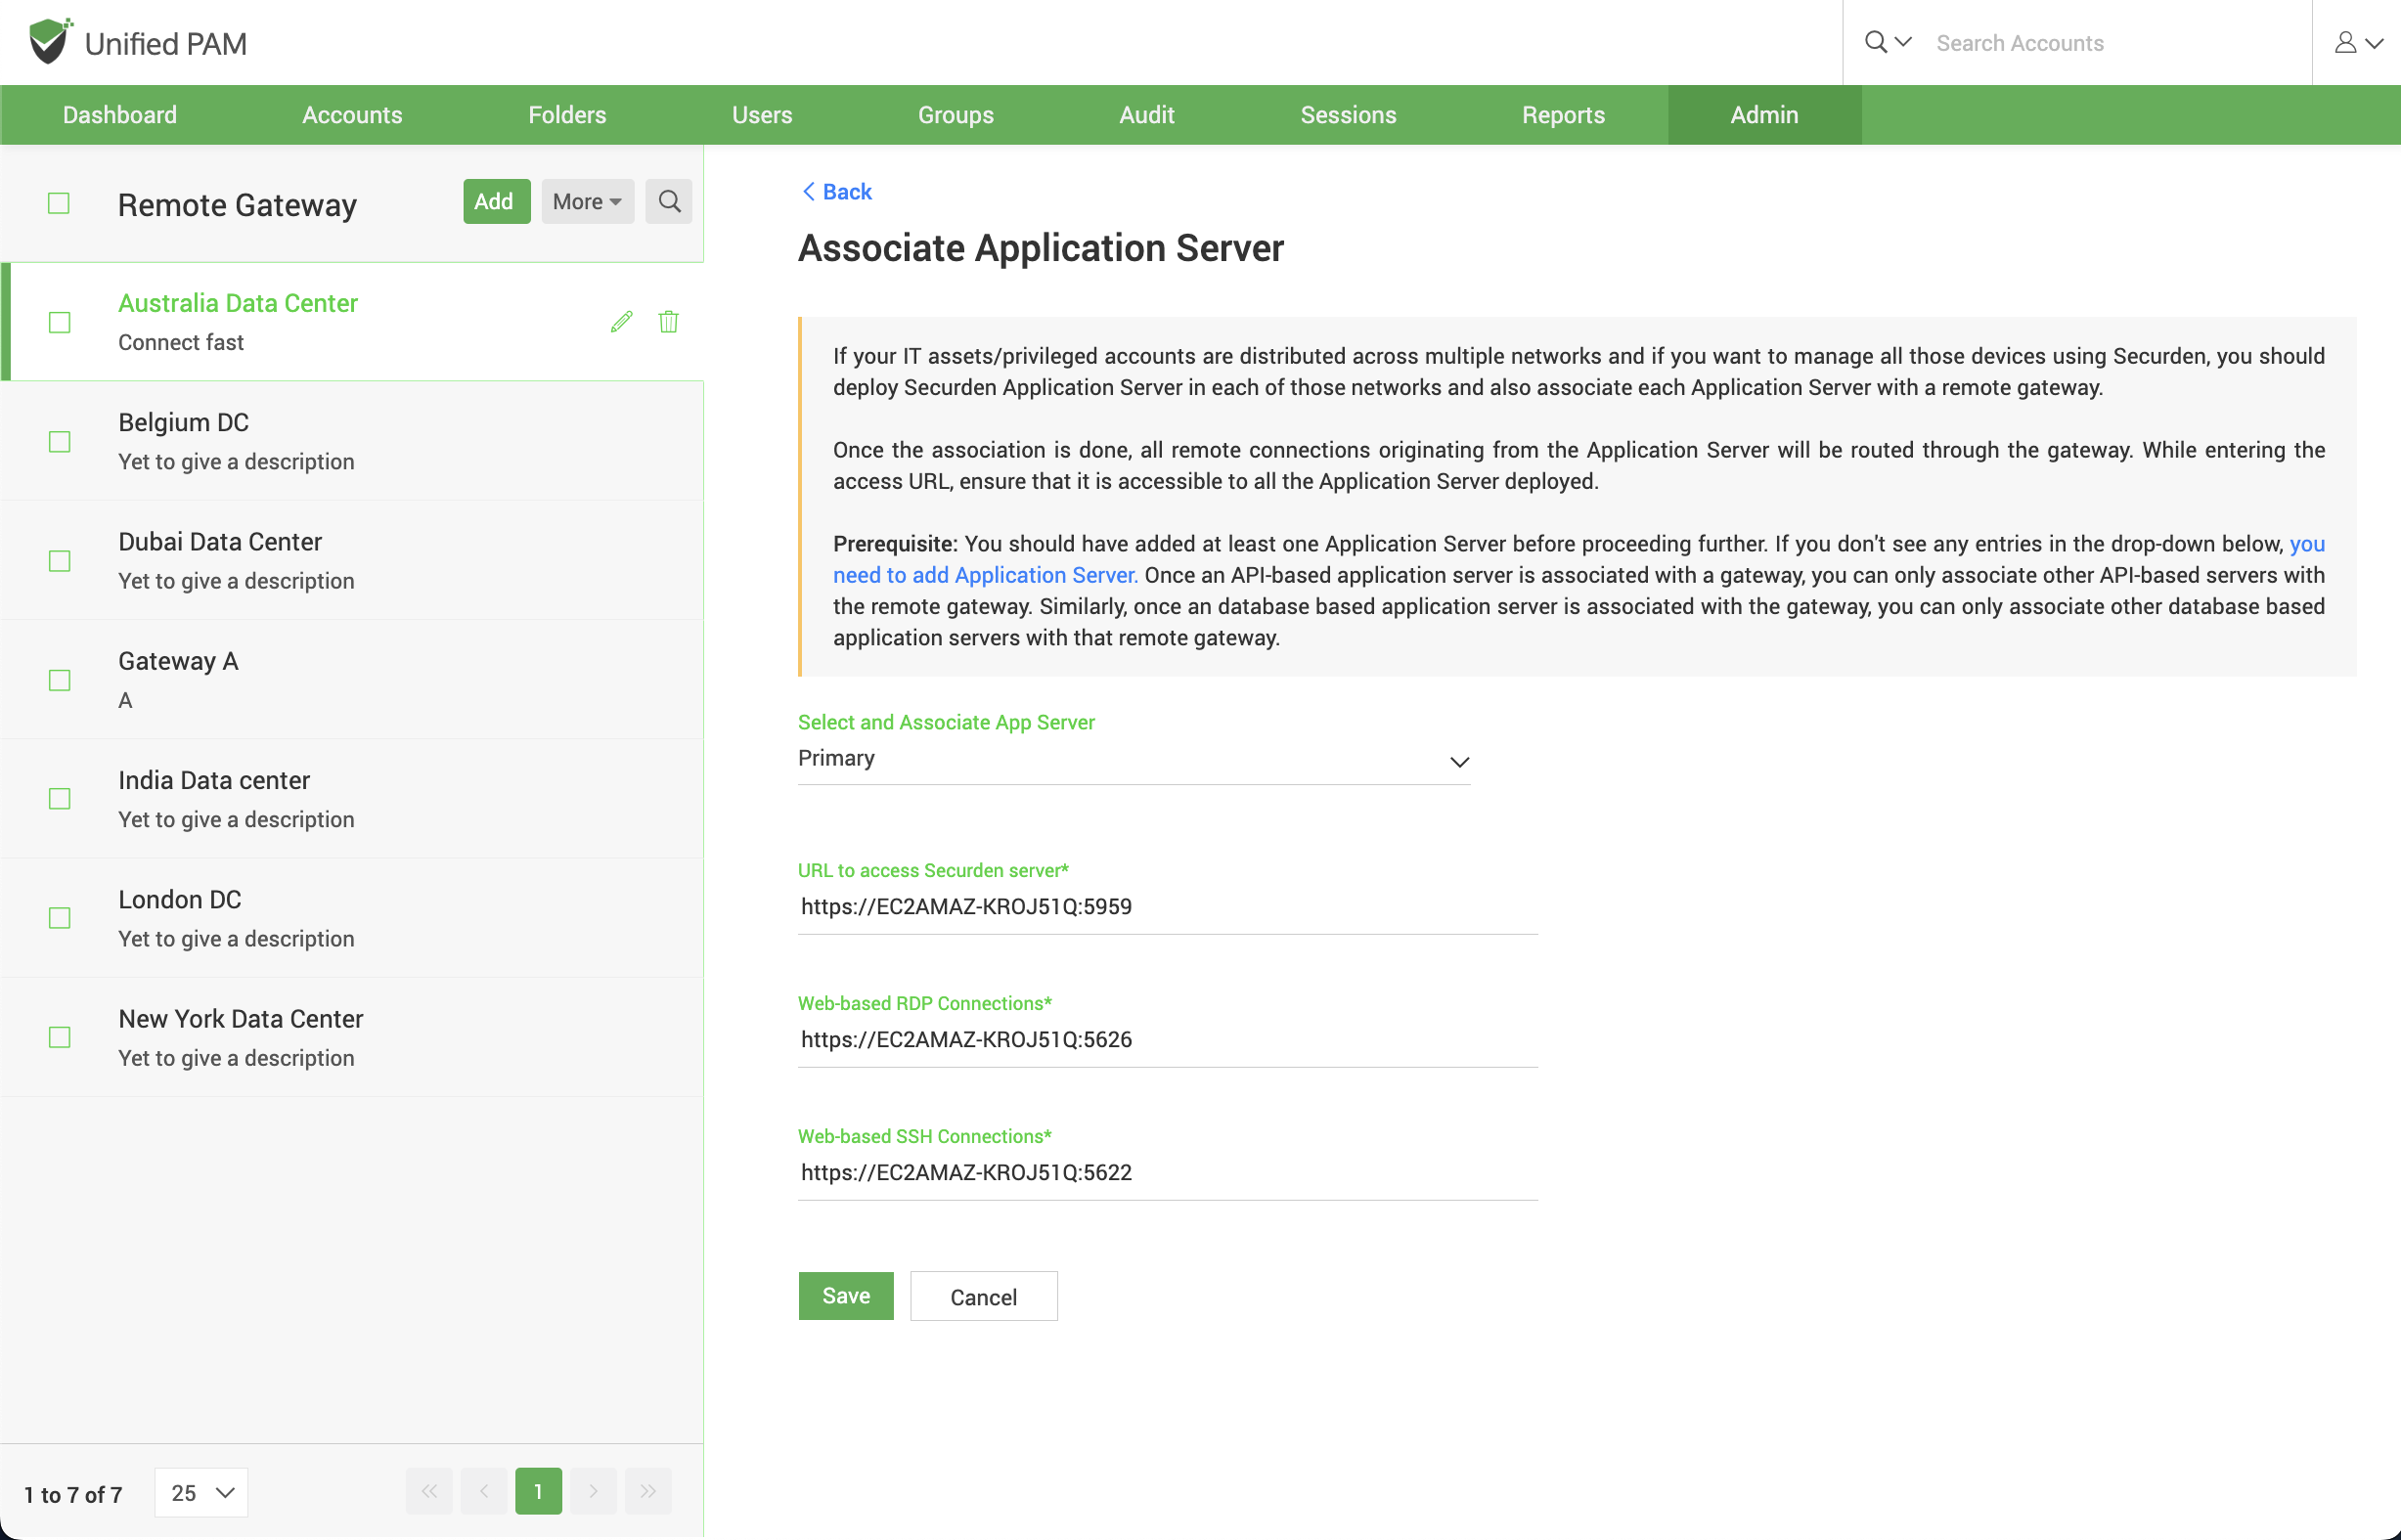
The URL through which the Securden server could be connected, and the URLs for web-based RDP and SSH connections. Ensure that all the URLs supplied are correct.
Click Save. You will now be able to see that the application server has been associated with the selected gateway and listed.
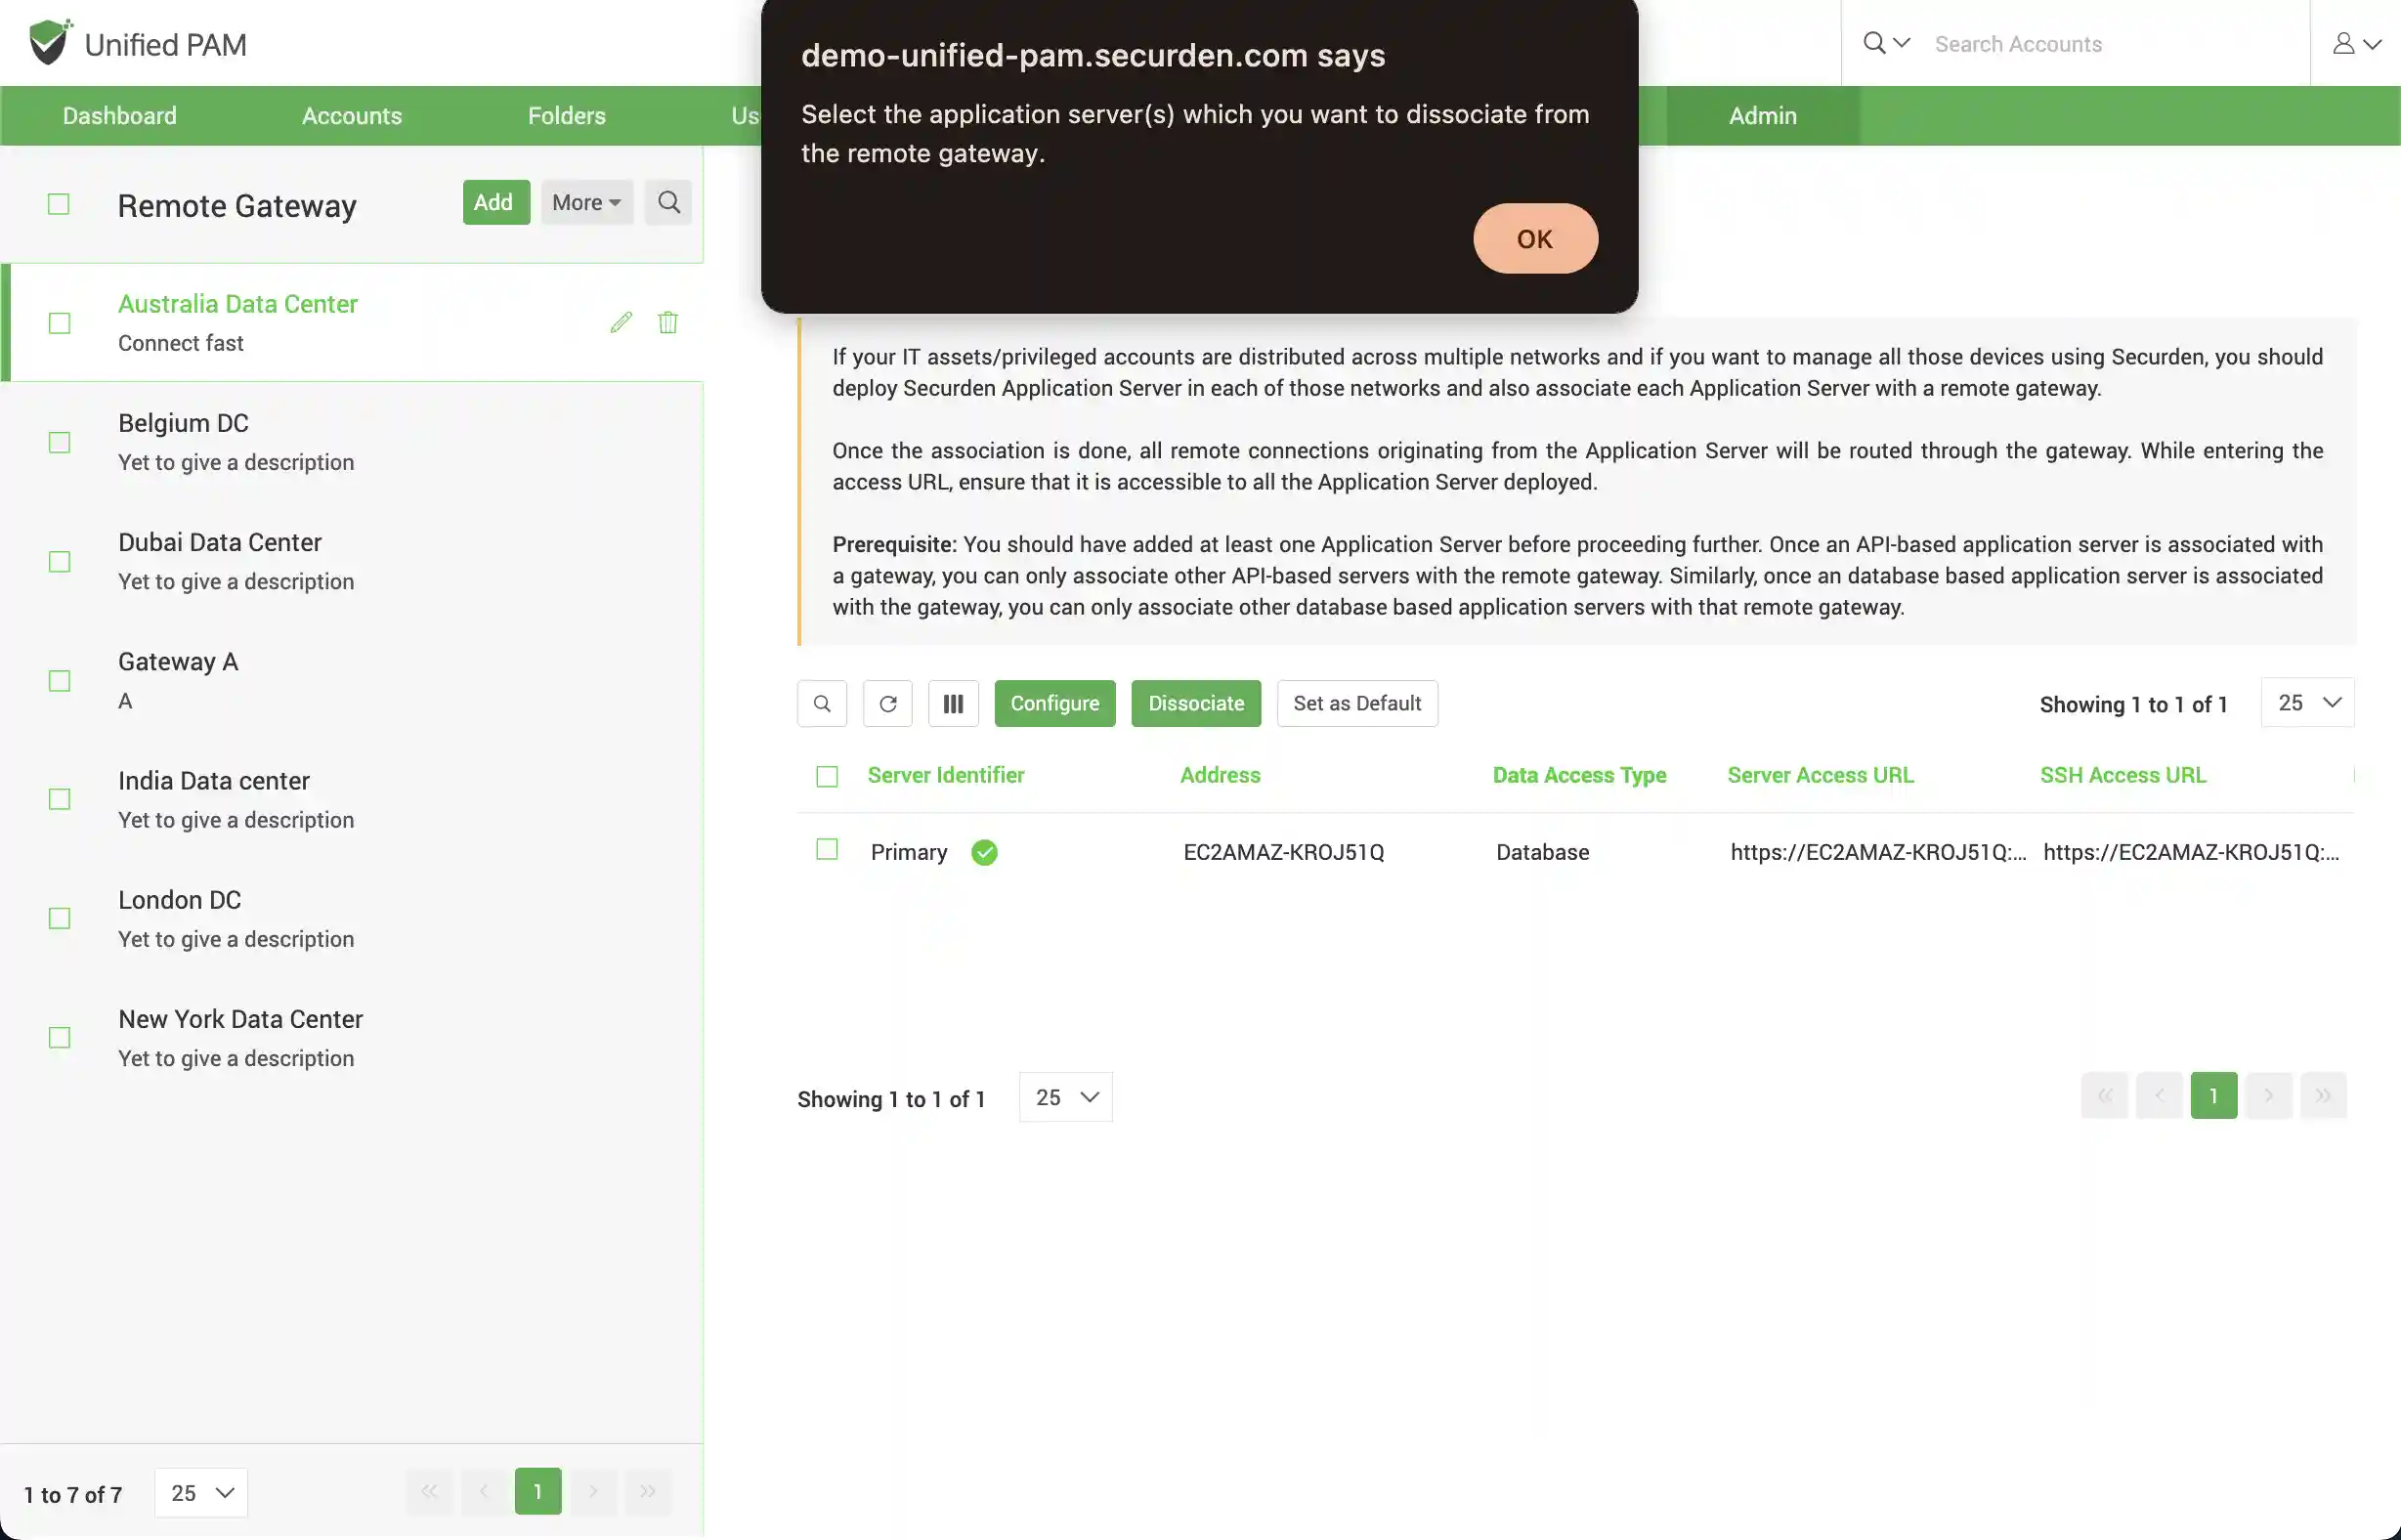
You can choose to select a configured application server and dissociate it if needed. Click on the gateway you need to dissociate and click Dissociate. You can then click OK on the precautionary popup that appears.
Step 3: Associate the required devices
Steps 1 and 2 above mark the creation of the remote gateway, which is like a container.
Once you have created the Container, you need to associate it with the required devices (IT assets) or domains. Once configured, all remote connections originating from the respective devices will go through the gateway associated with them.
Prerequisite: You can only associate the devices and domains that are already added to Securden.
To associate devices and/or domains with the gateway, navigate to Admin >> Remote Sessions and Recordings >> Remote Gateway and select the required gateway.
In the RHS, you will see the Configure Remote Gateway section. Within that you will see the option to Associate Devices. Click the Associate button.
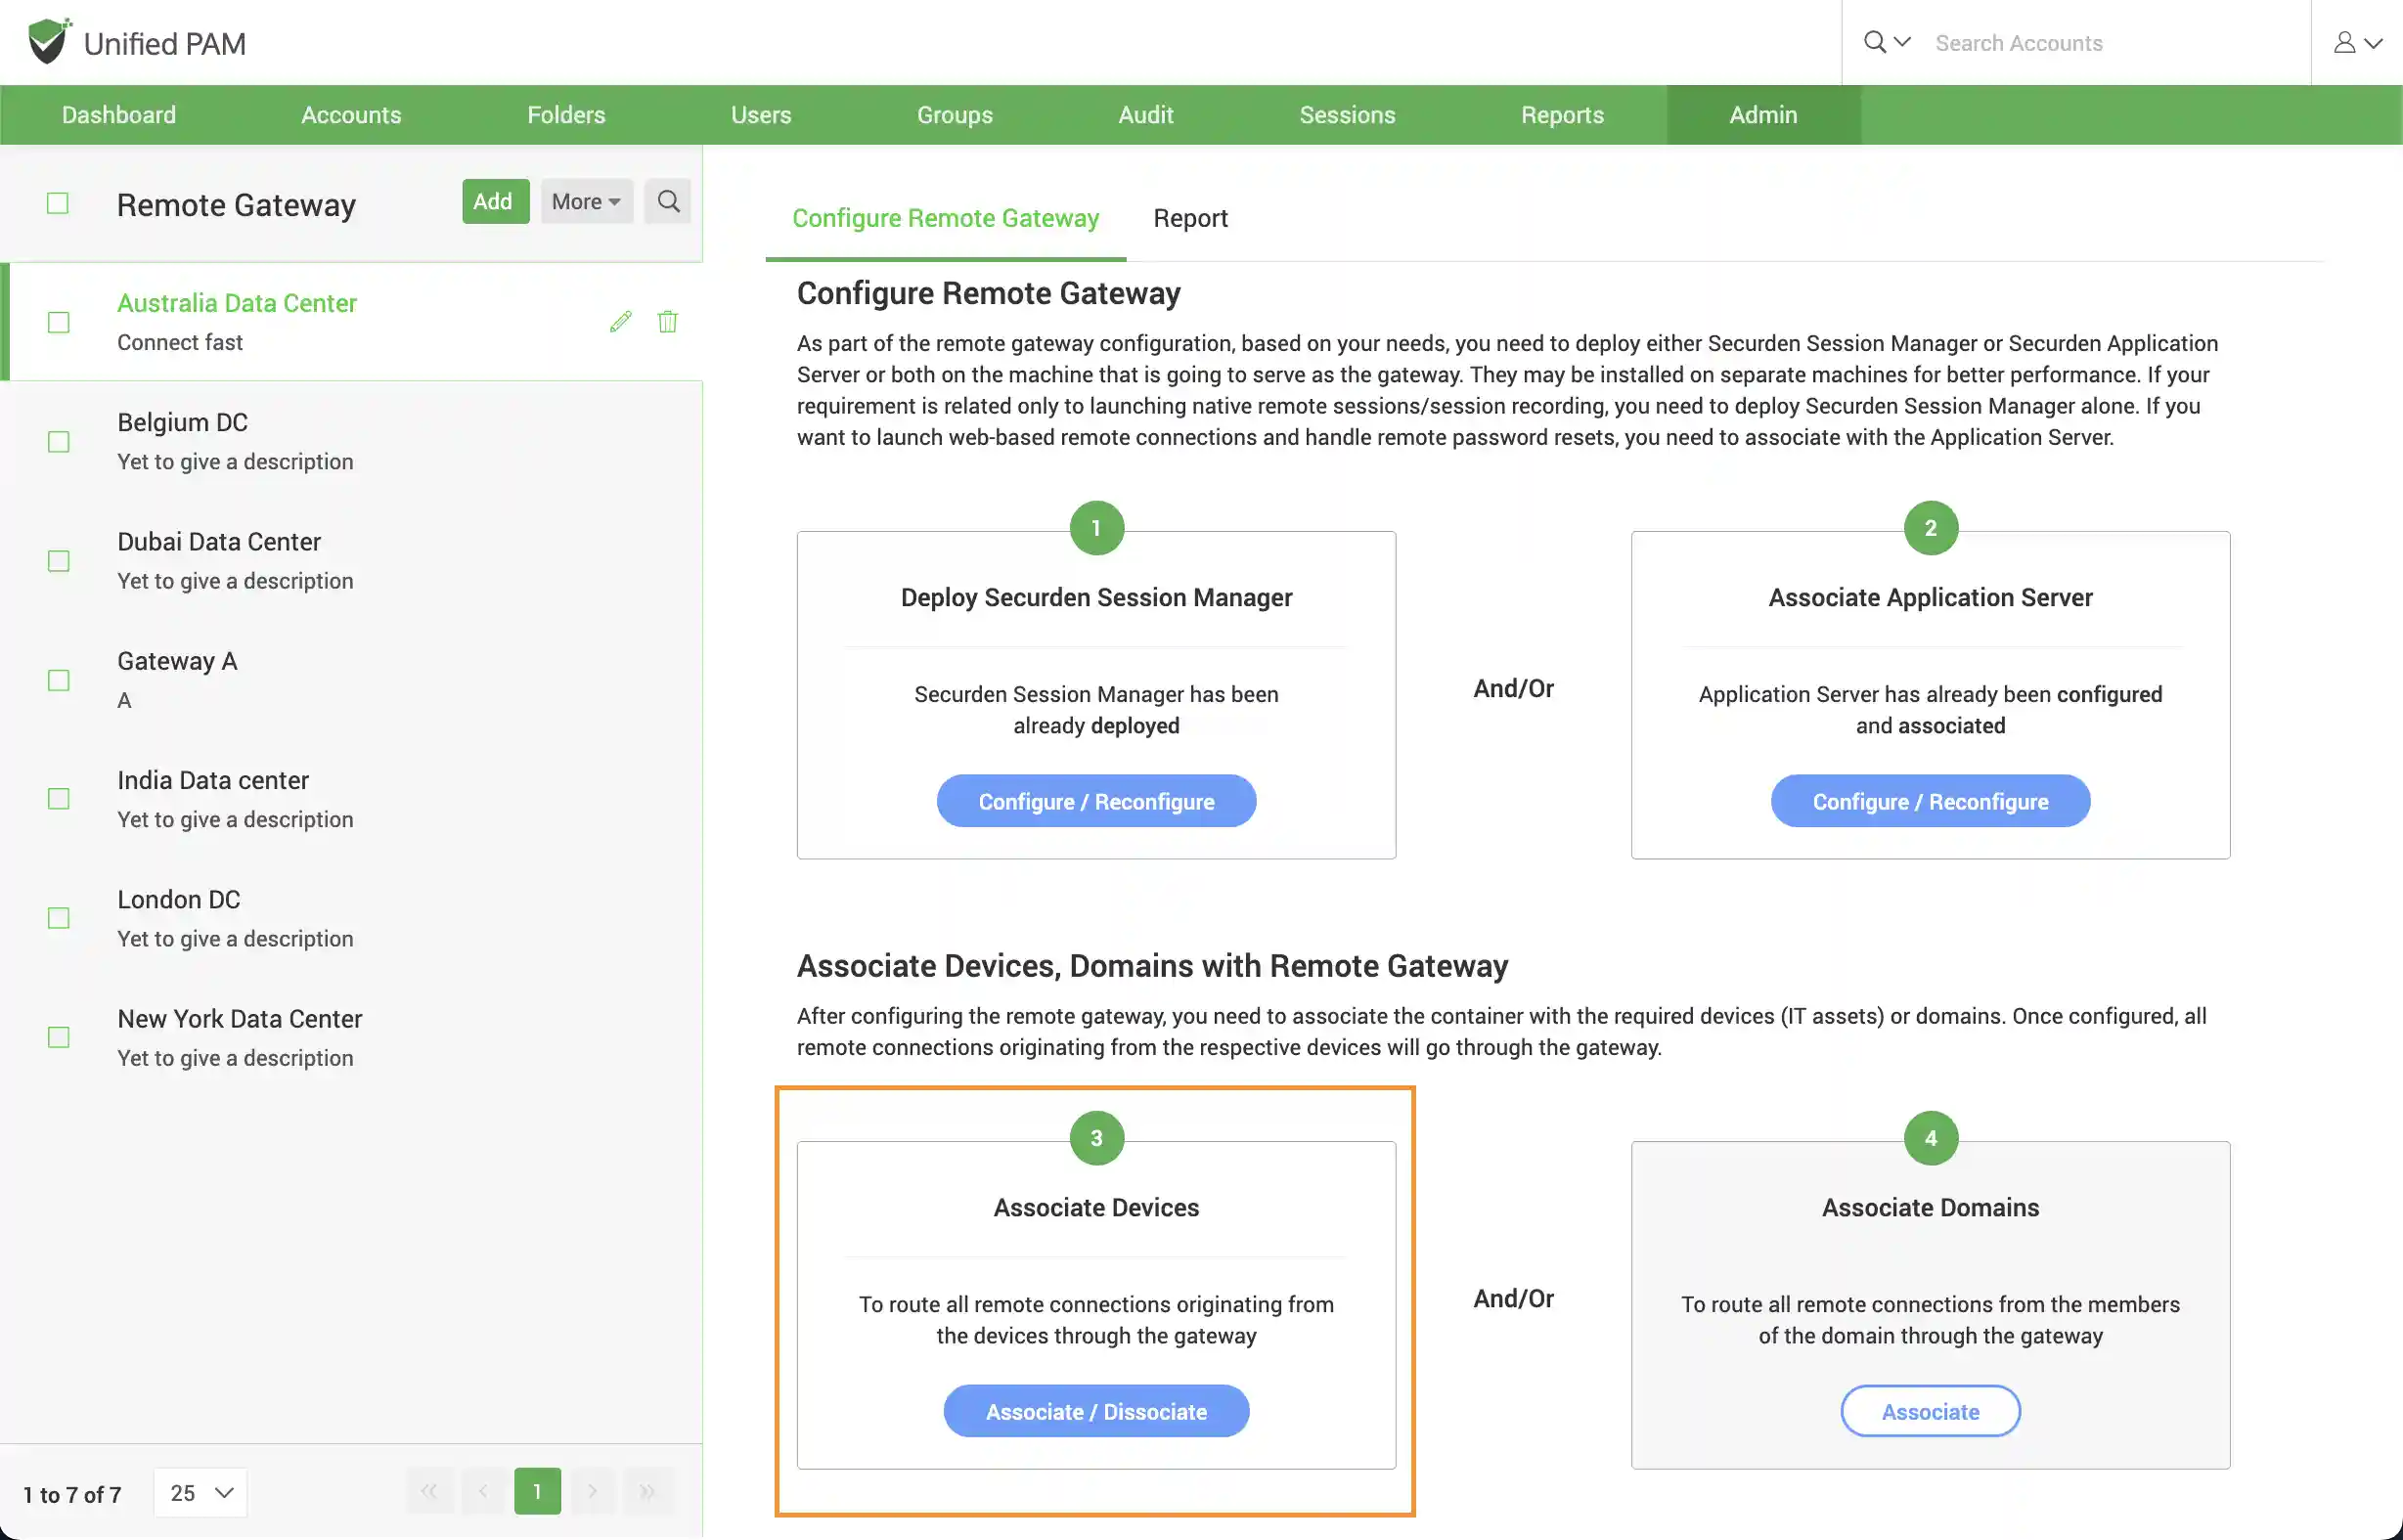
In the GUI that opens, you can see all devices associated with the selected gateway. If there are no devices added, you need to select the button Associate Devices.
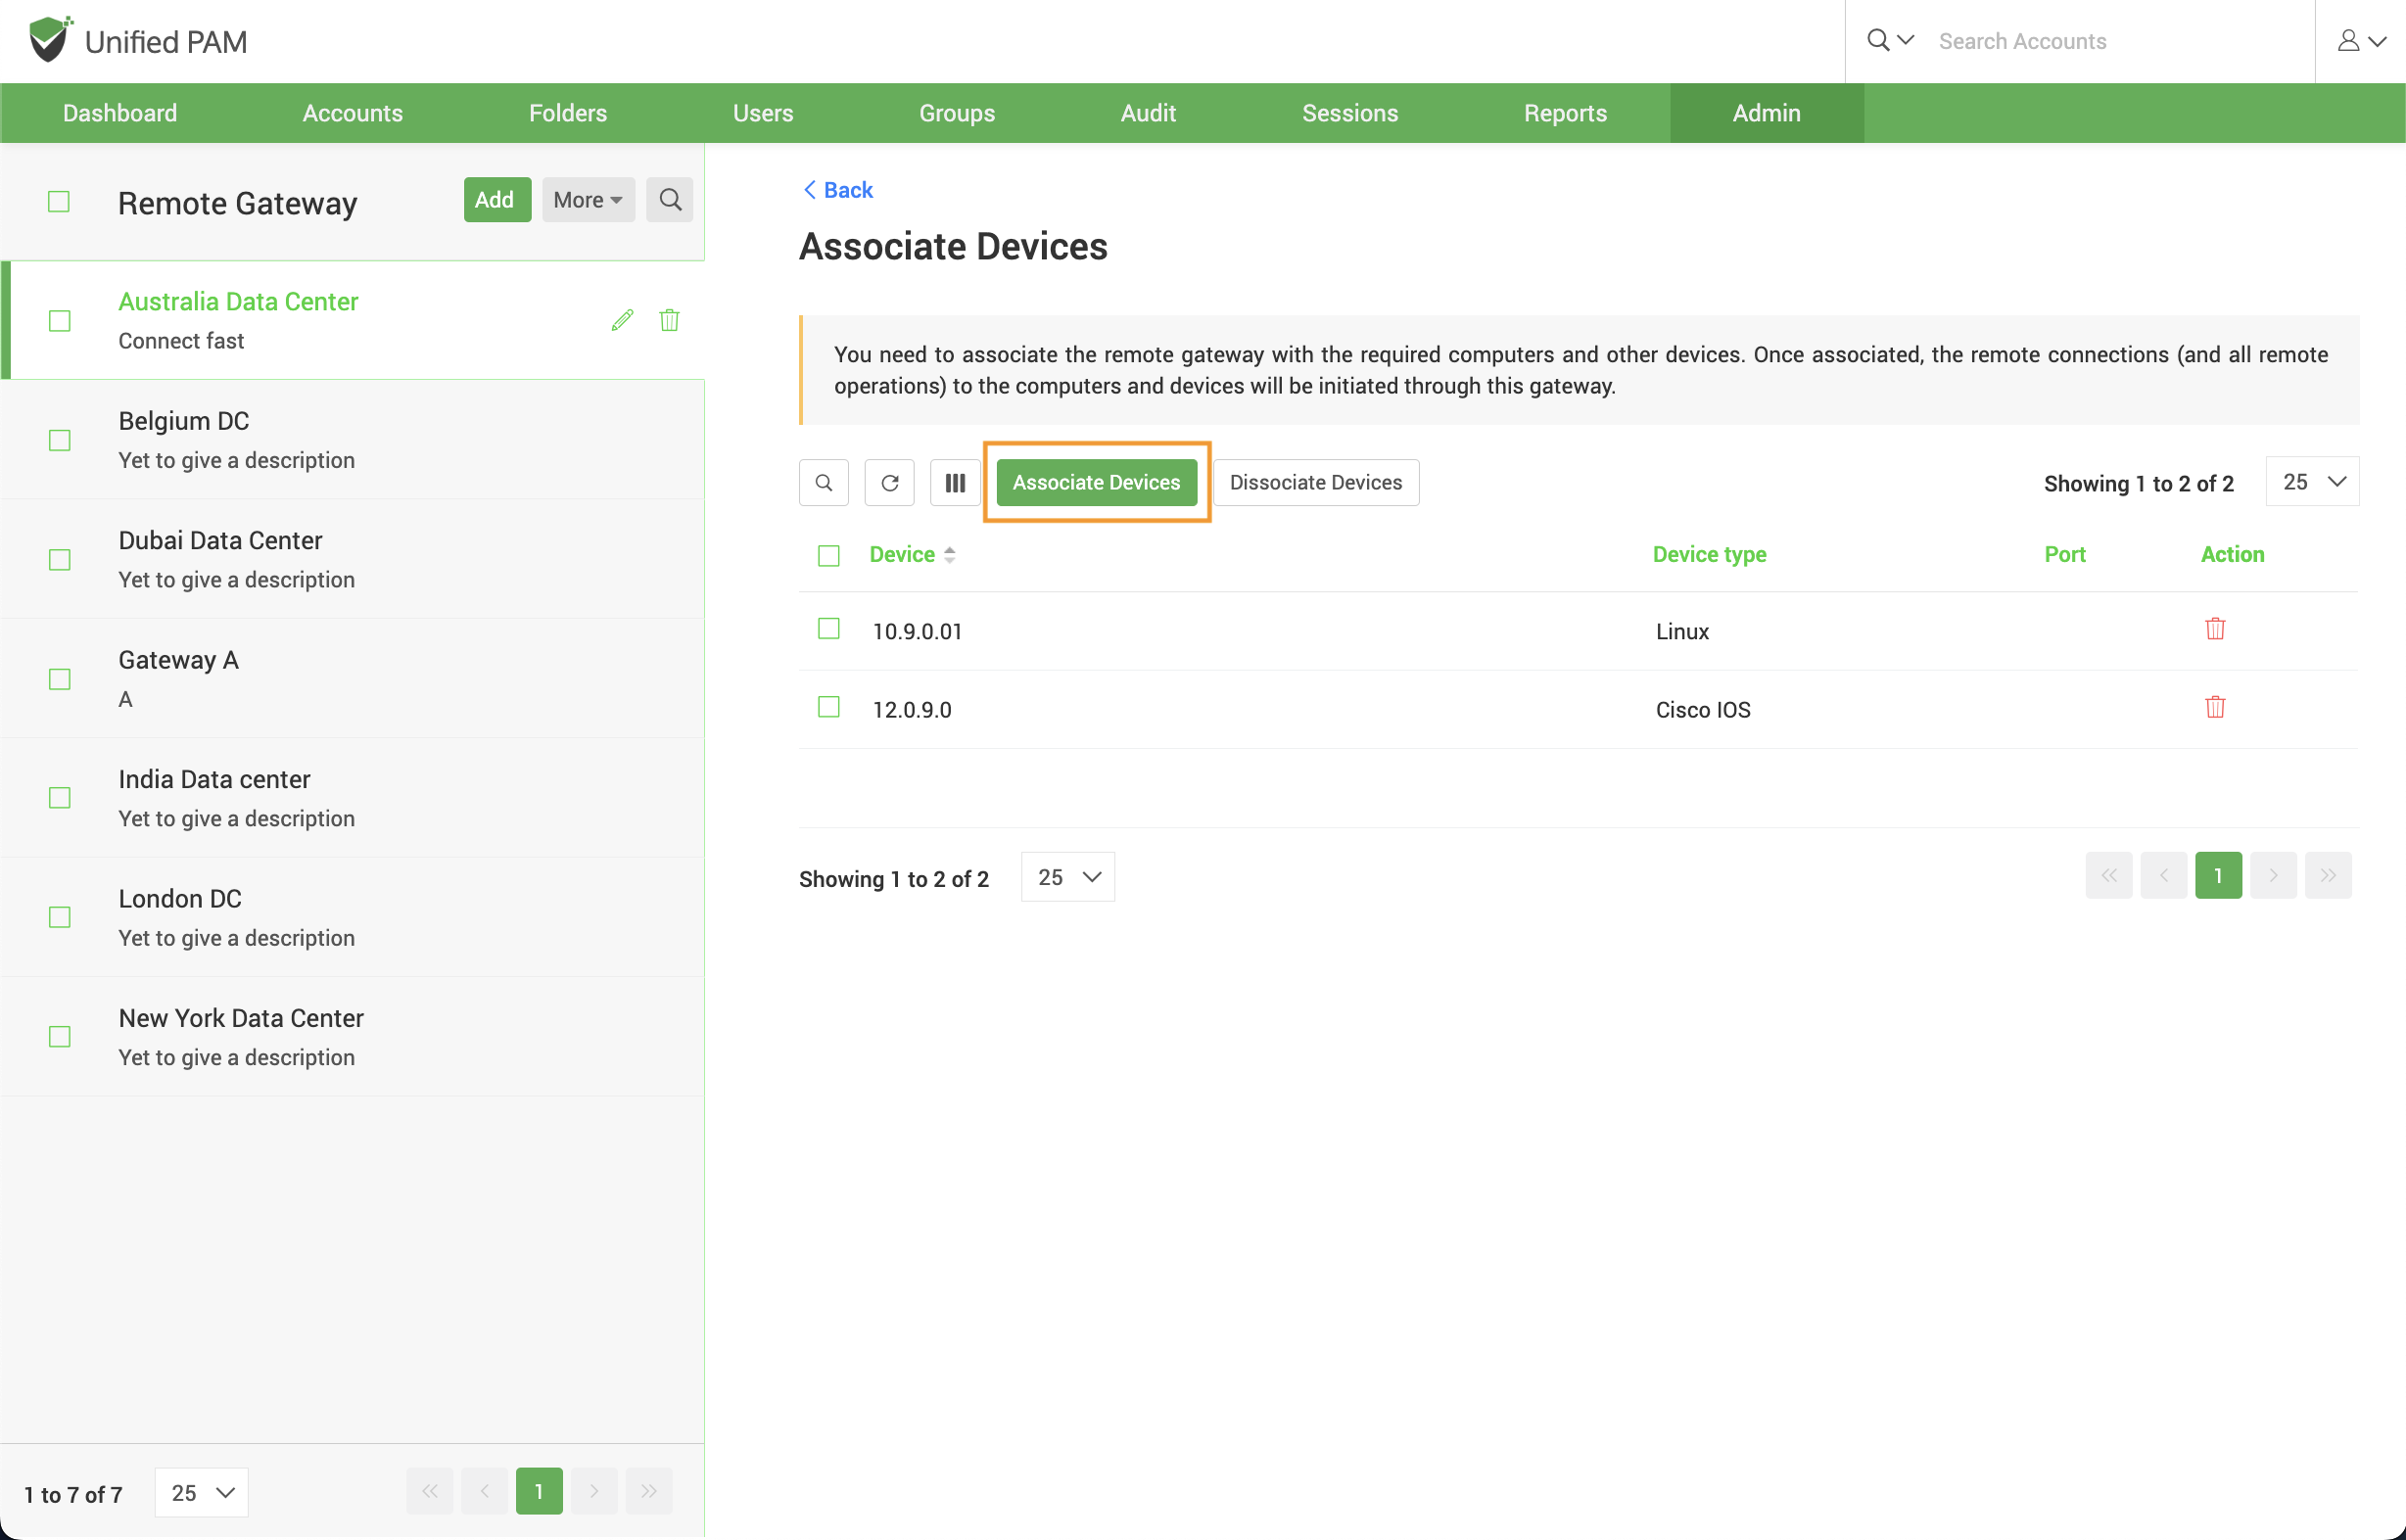
Then do a search for the required devices using the search filters. You can either search for devices based on their IP Address/FQDN or their Account Type.
You may select as many devices as you want. To clear a selected device, click the ‘x’ beside the device, to clear all selected devices use the ‘Clear all’ icon to the right.
On selecting the devices to be associated with the gateway, click Save.
Step 4: Associate the required domains
Once you have created the Container, you need to associate it with the required domains. Once configured, all remote connections originating from the respective domains will go through the gateway associated with them. You have the option to associate specific devices alone and/or an entire domain. When a domain is associated with the gateway, all remote connections originating from the members of the domain will go through the gateway. When adopting a combination approach (associating both devices and domains), in case you have configured a different remote gateway for any of the computers that are part of the domain, the device level configuration will take effect for that computer alone.
Prerequisite: You can only associate the domains that are already added to Securden.
To associate domains with the gateway, navigate to Admin >> Remote Sessions and Recordings >> Remote Gateway and select the required gateway.
In the RHS, you will see the Configure Remote Gateway section. Within that you will see the option to Associate Domains. Click the “Associate button.
In the GUI that opens, you can see all domains associated with the selected gateway. If there are no devices added, you need to select the button Associate Domains.
You may search and select as many domains as you want. To clear a selected domain click the x beside the device, to clear all selected domains use the Clear all icon to the right.
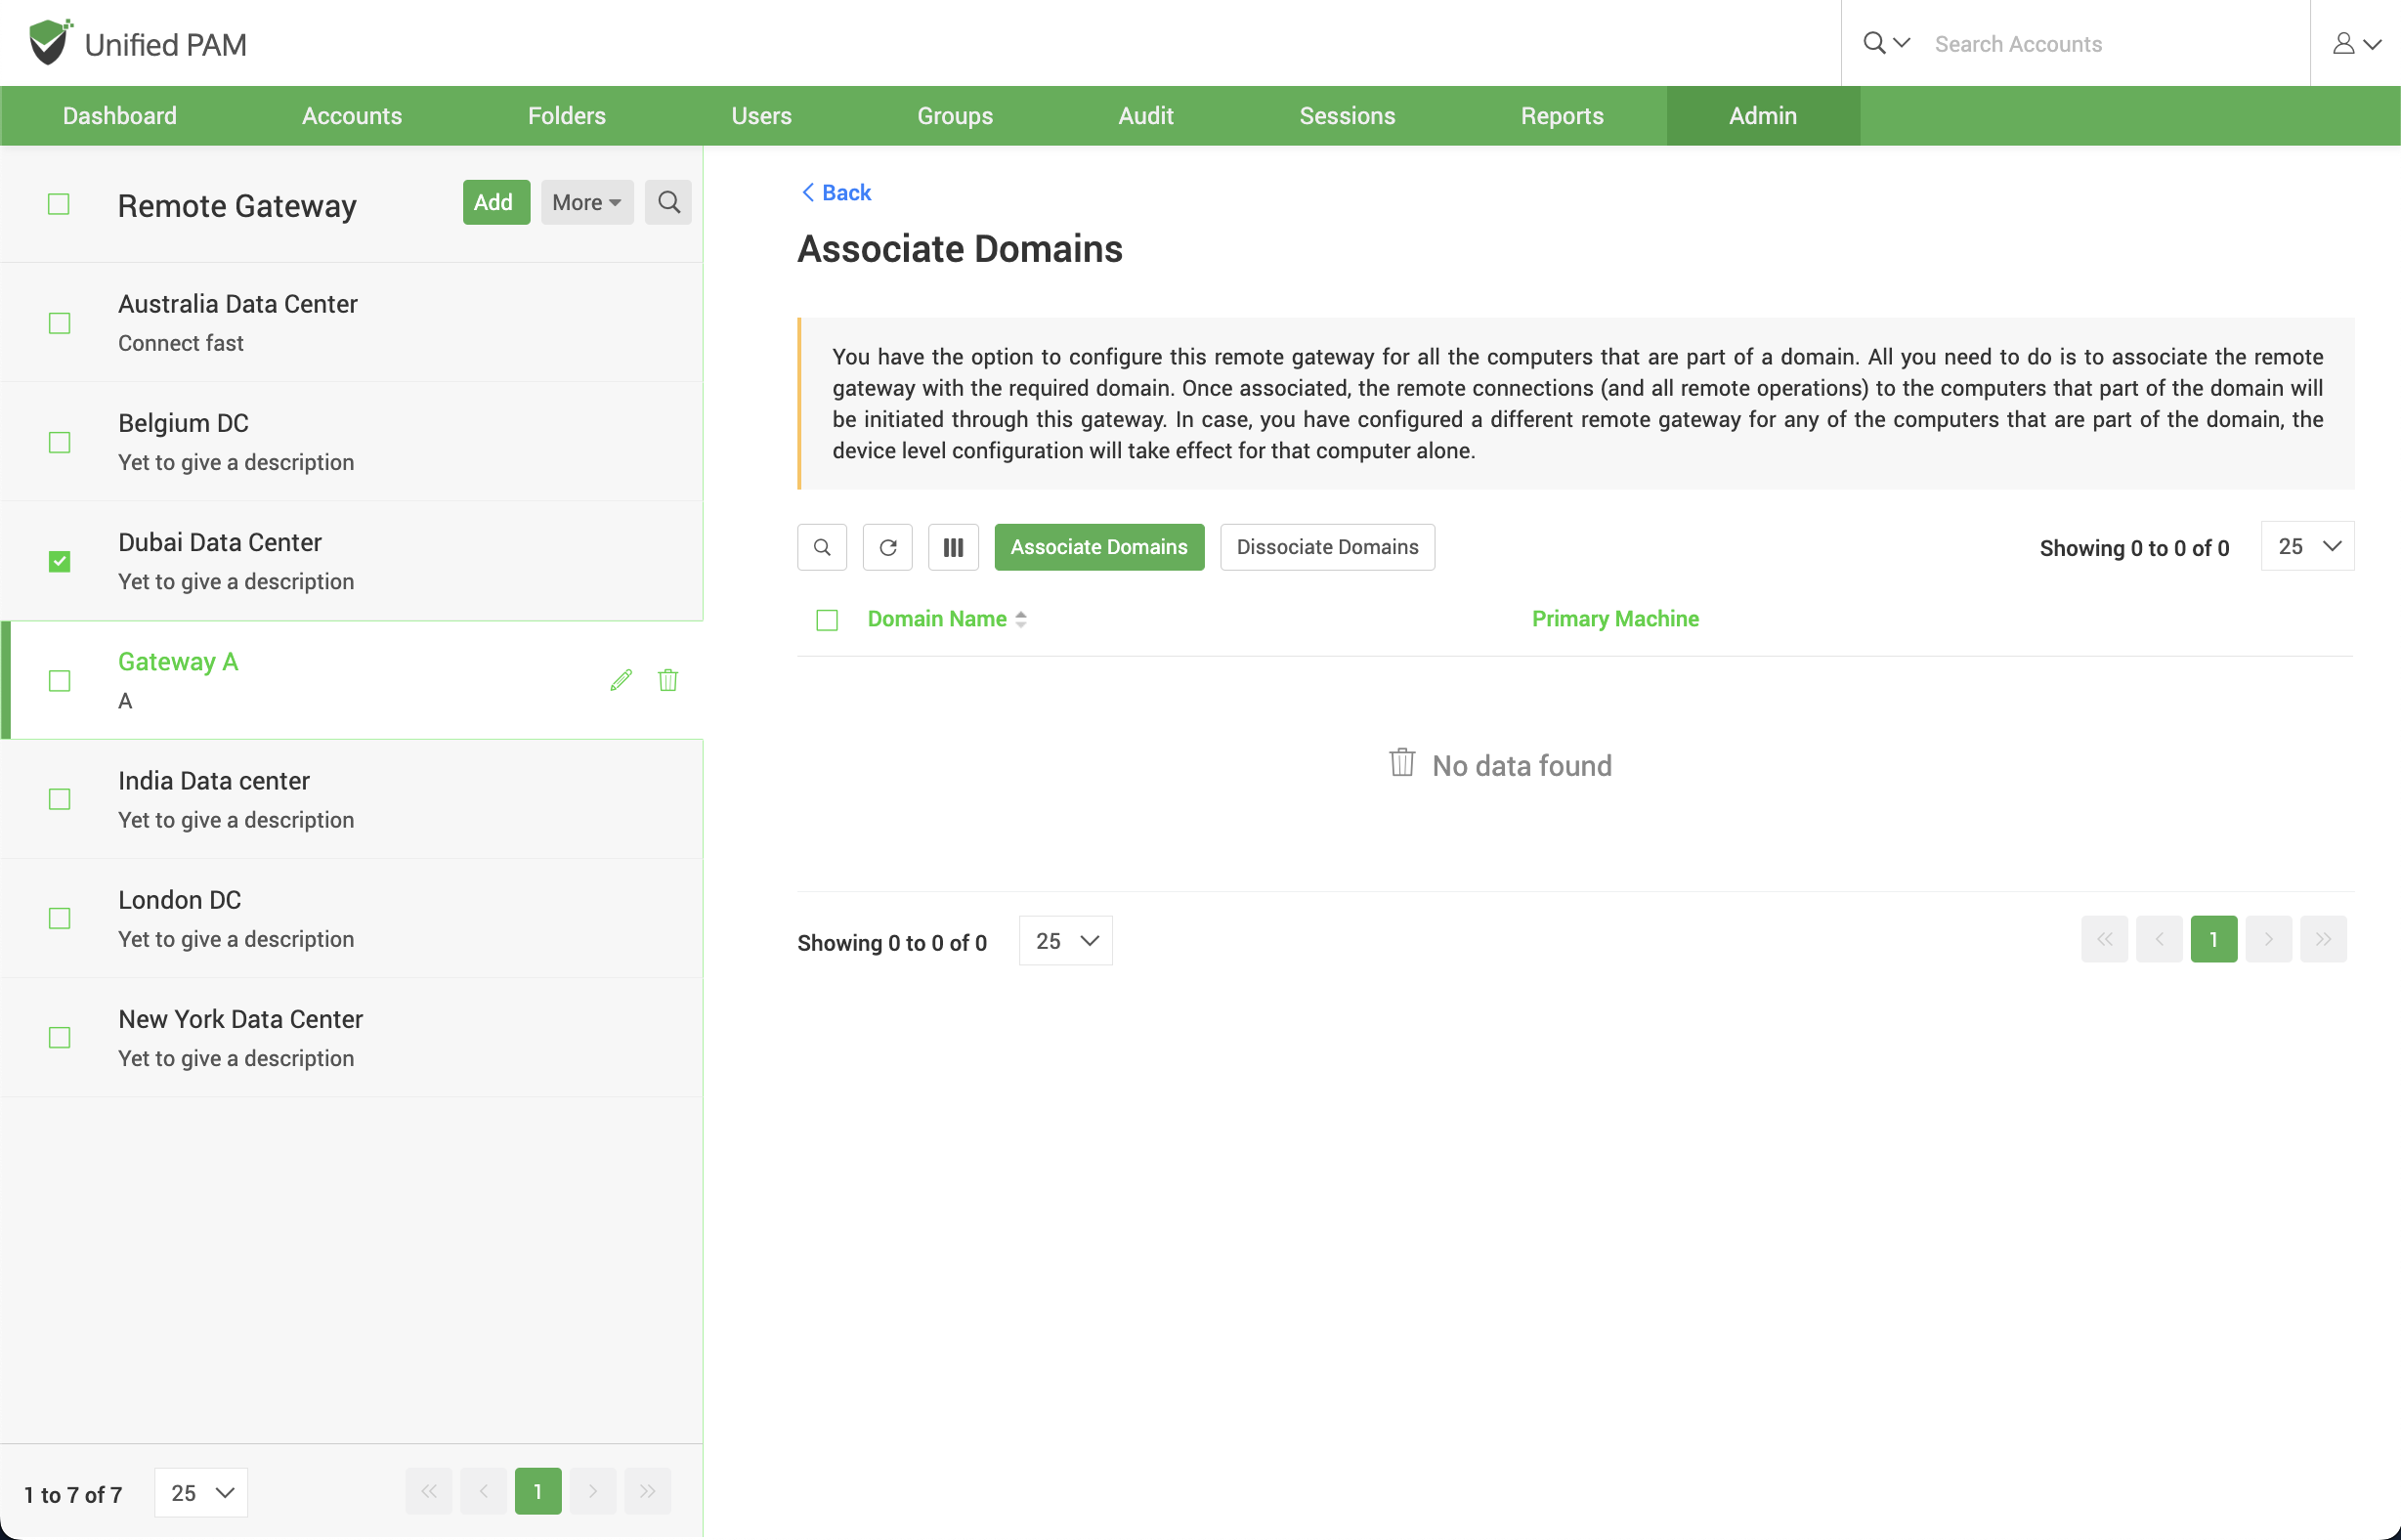
On selecting the domains to be associated with the gateway, click Save.
These steps complete the configuration for a single remote gateway. You may repeat the steps and configure multiple gateways.
Verify remote gateway configuration and associations
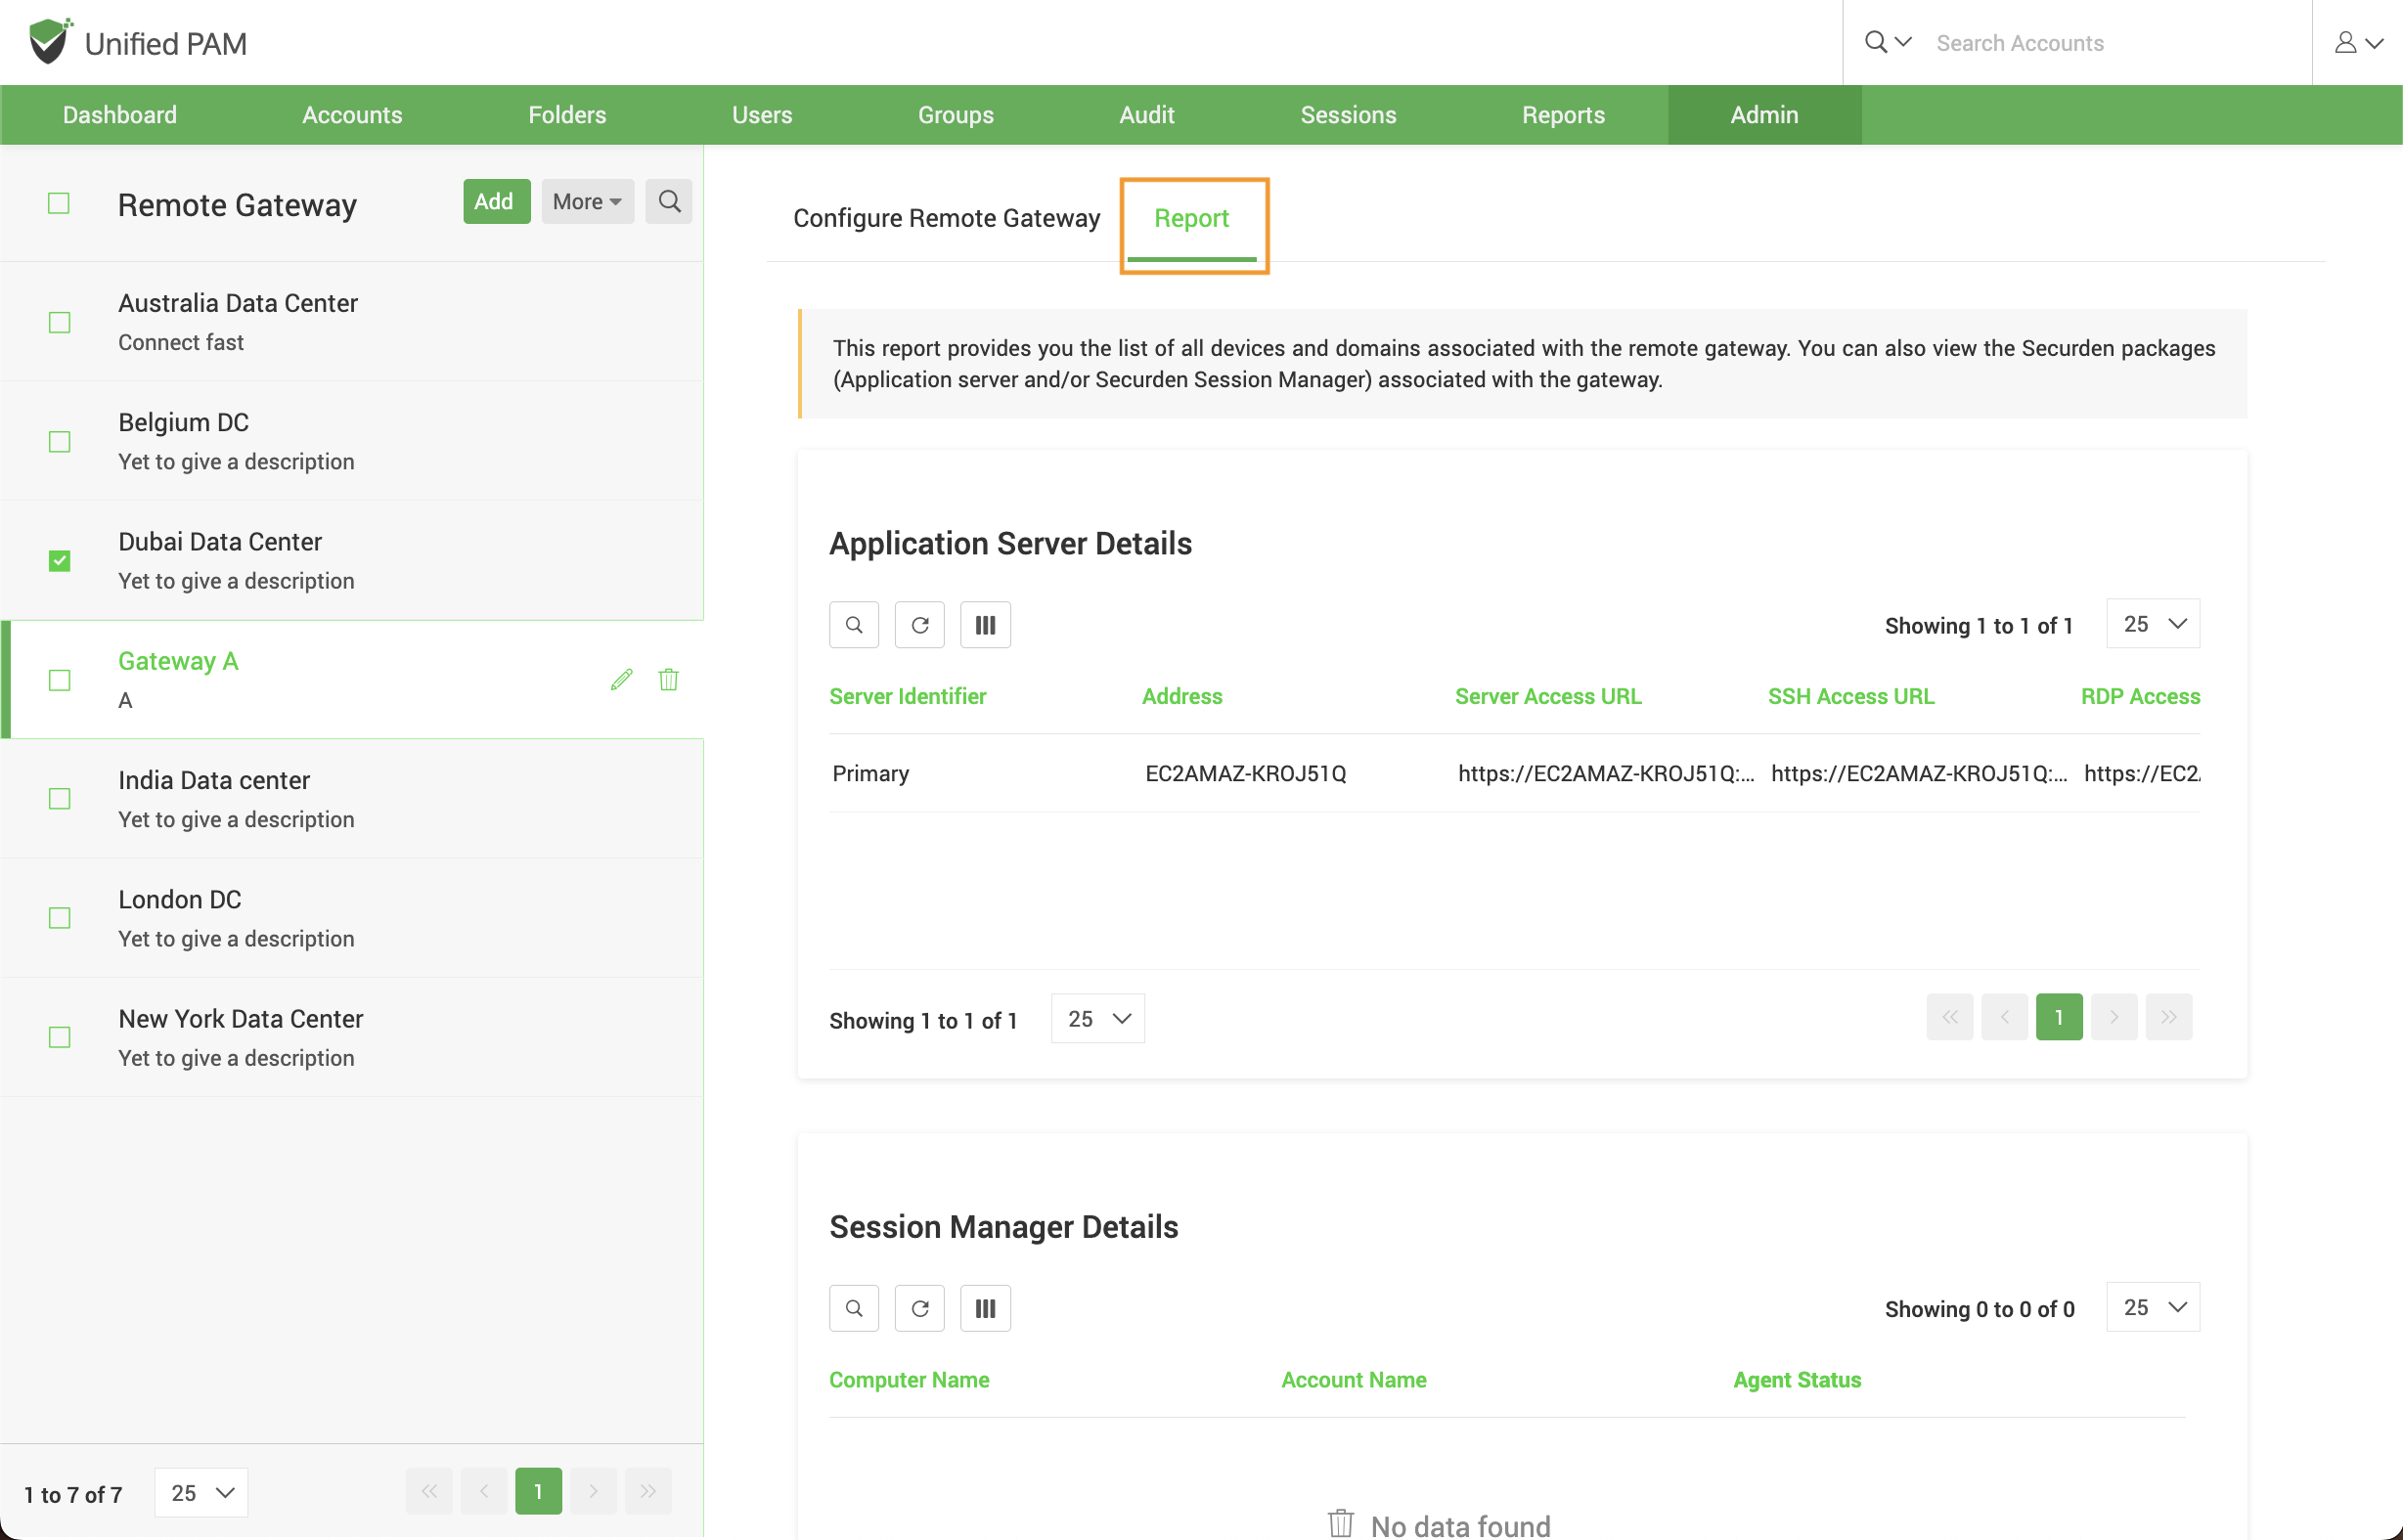
Once you complete all the steps above, you can verify all associations in the form of a report. Securden depicts the list of all devices and domains associated with the remote gateway. You can also view the Securden packages (Application server and/or Securden Session Manager) associated with the gateway.
To view the report, navigate to Admin >> Remote Sessions and Recordings >> Remote Gateway and select the required gateway. In the RHS, you will see the ‘Report’ section.
Editing an existing remote gateway
The existing remote gateways, their configurations, device/domain associations can be edited anytime by visiting the same pages in the same way they were configured.
To configure the remote gateway name and description, Navigate to Admin >> Remote Sessions and Recordings >> Remote Gateway, select the required gateway and click the edit icon.

To configure the associated devices/domains and app servers, re-configure the required attributes the same way they were added.