Managing Access Permissions
Share Accounts with Users/Groups
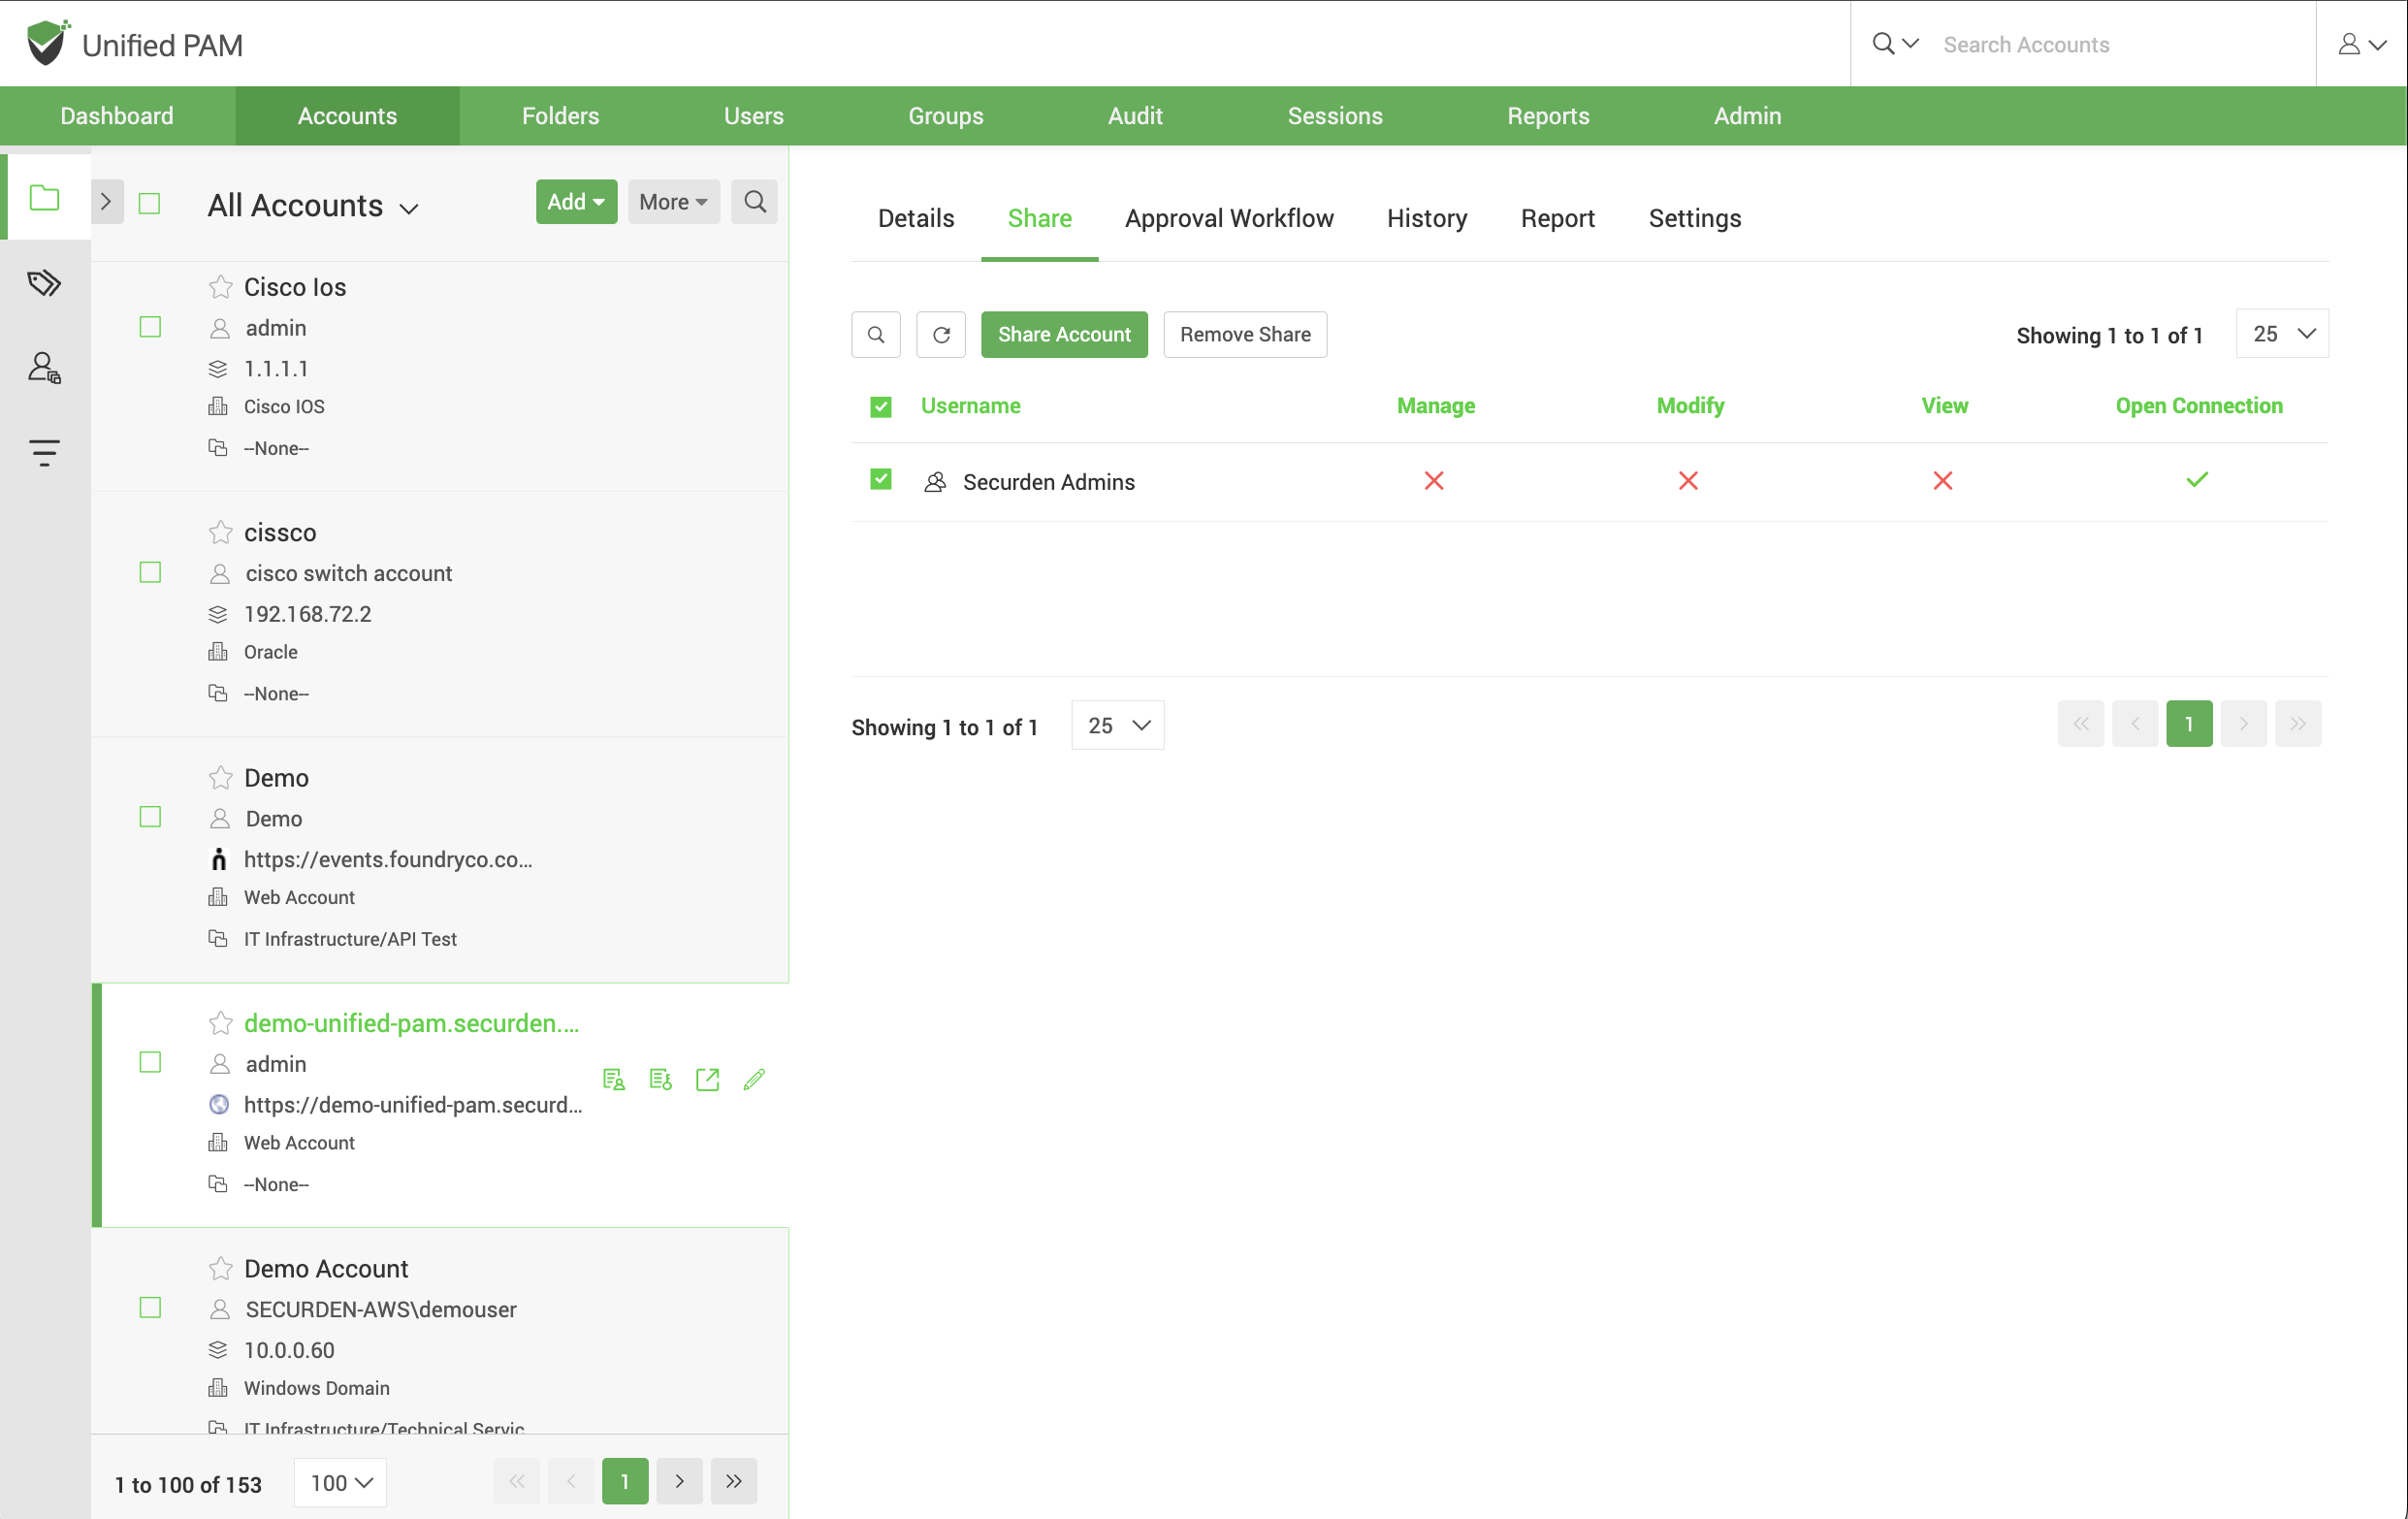
You can share an individual account with any user(s) and/or user group(s). To share a single account, navigate to Accounts section in the GUI, click the required account, click the Share tab.
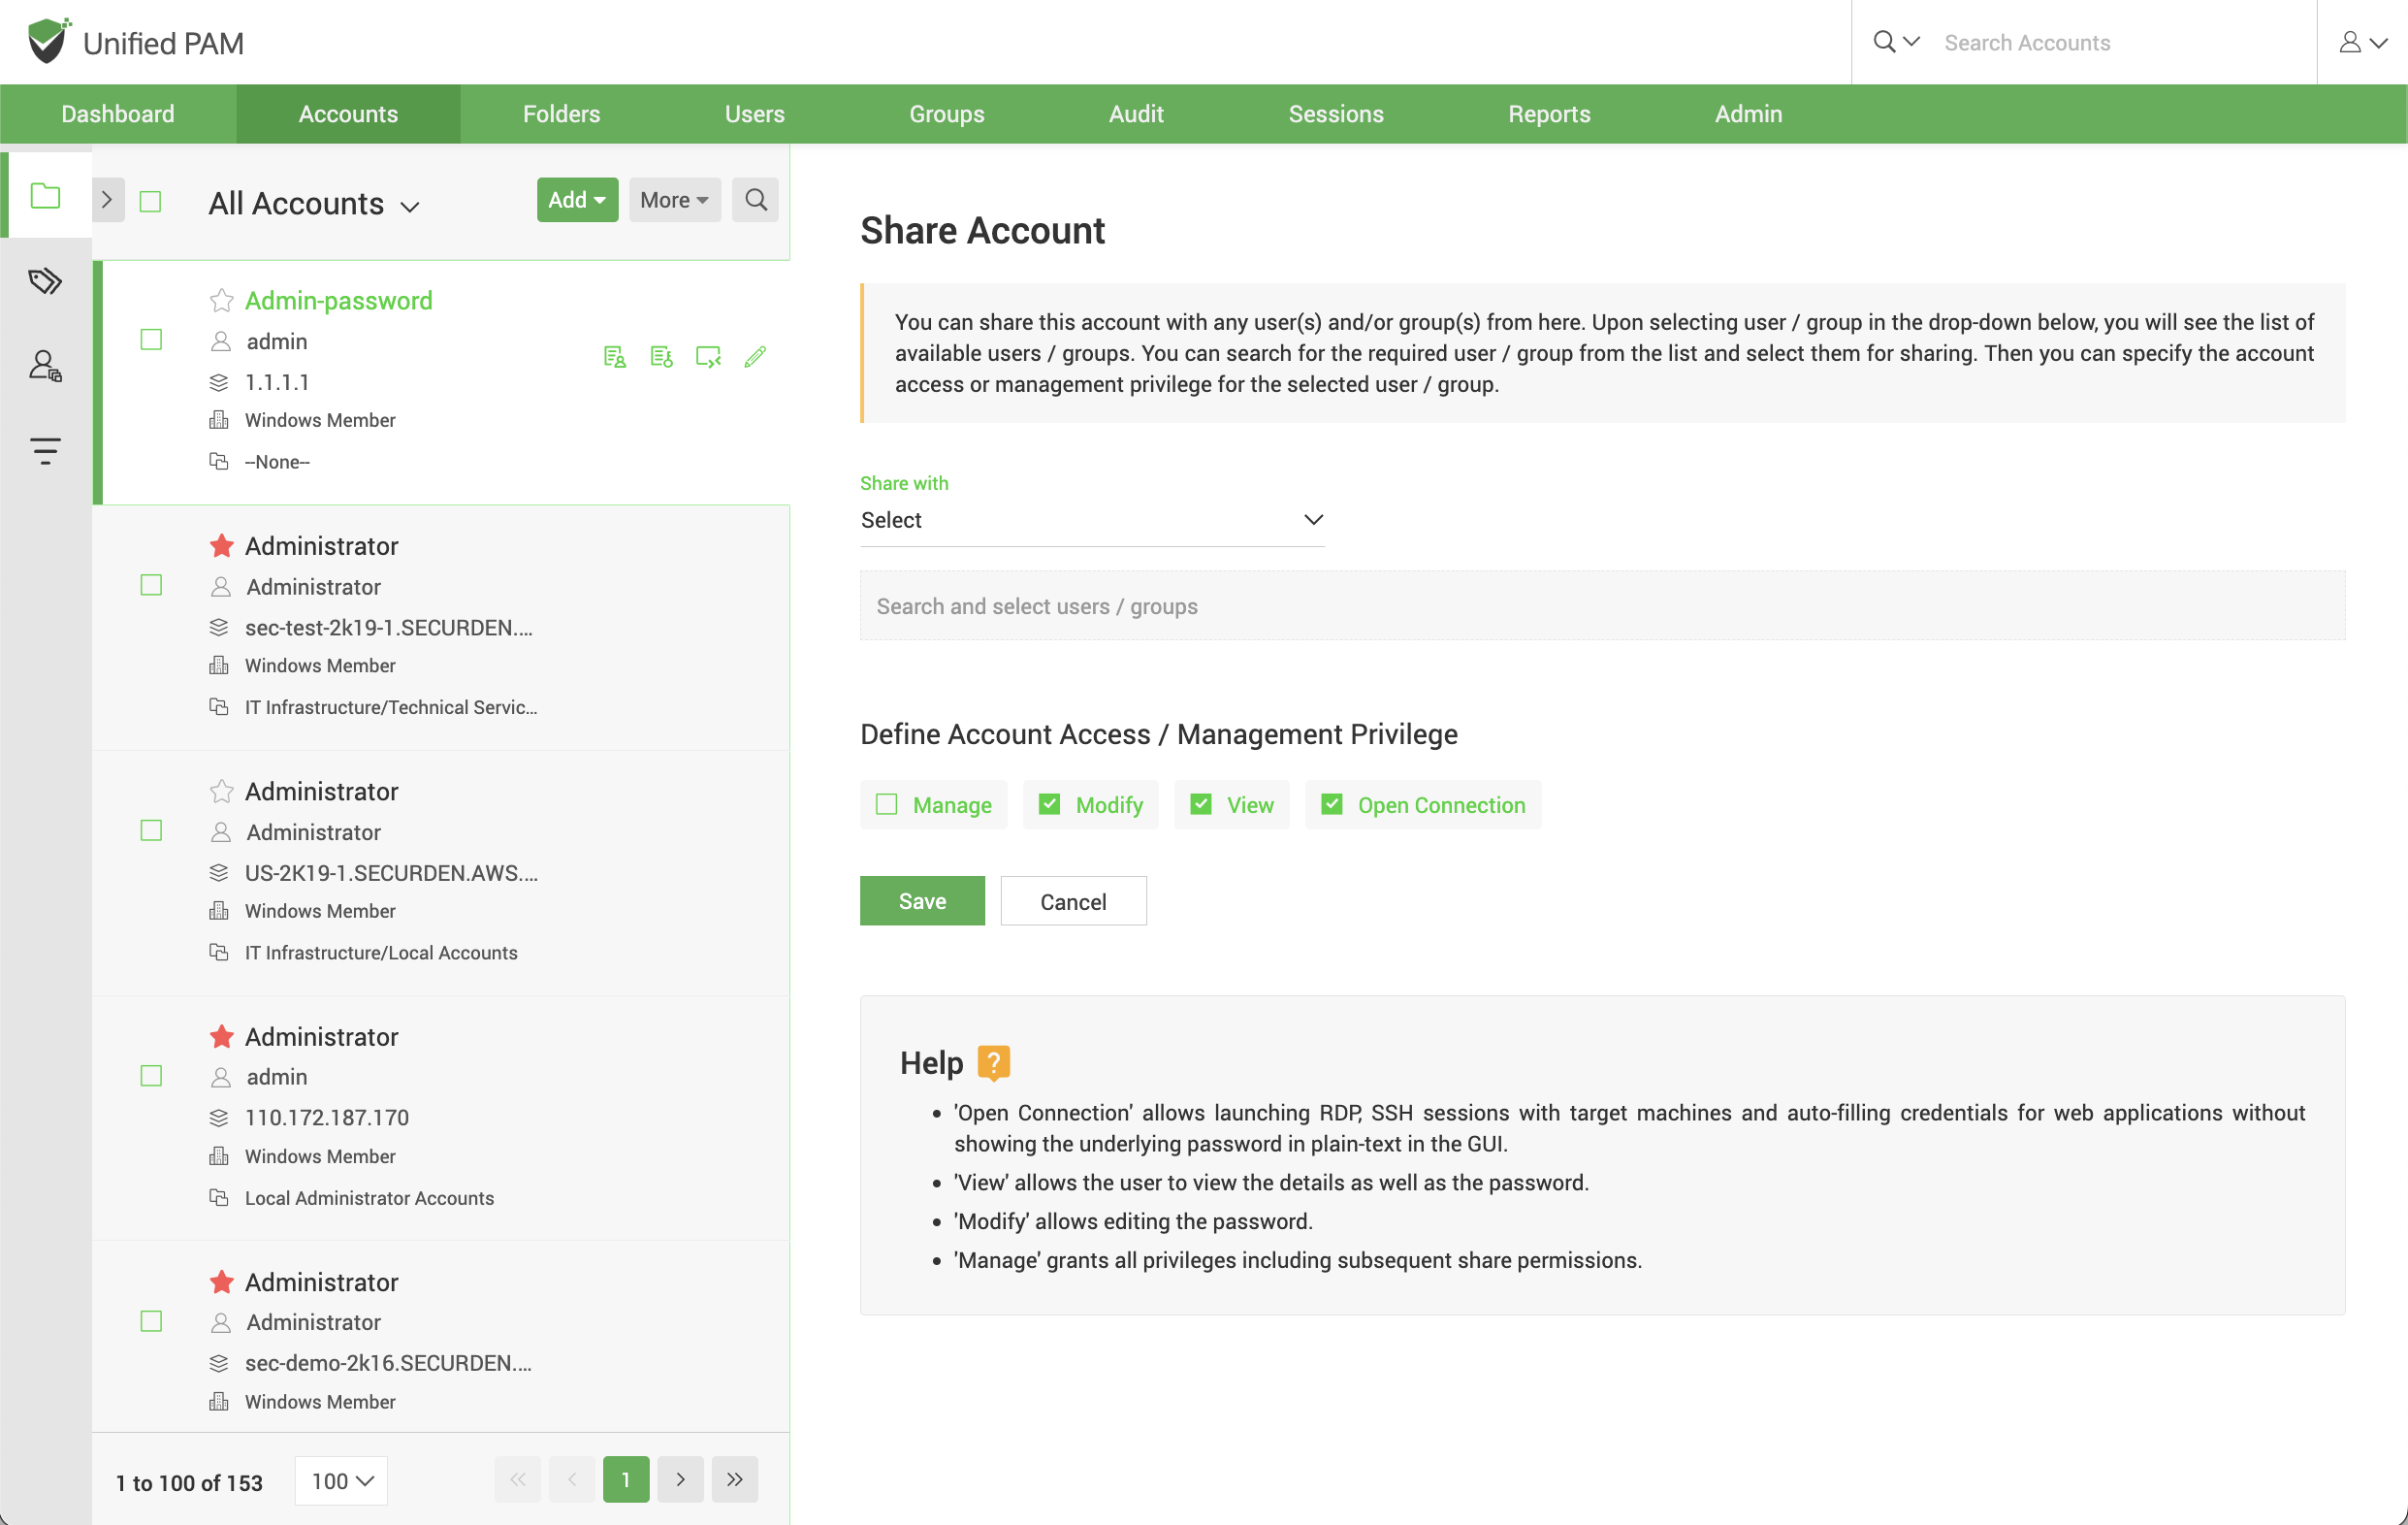
- You can search and add the users and groups with whom the account must be shared.
- You can search for either users or groups by selecting User or Group from the drop-down menu named Share with.
- Then you need to choose the required users and groups from the dropdown list.
- Once you select the users and groups, you need to select the level of access permission they get.
There are four permission levels with which you can share an account:
- Open Connection allows launching RDP, SSH sessions with target machines and auto-filling credentials for web applications without showing the underlying password in plain-text in the GUI.
- View allows the user to view the details as well as the password.
- Modify allows editing the password.
- Manage grants all privileges and is like concurrent ownership.
Launching Connections without revealing the Credentials
Securden provides the option to share accounts without disclosing the underlying passwords. You can grant such a permission by choosing Open Connection permission while sharing the account. In such cases, users will be able to launch direct connections with the computing resources without knowing the password.
How to modify share permissions?
The granular permissions granted to a user, or a group can be recast in the case of changes in work requirements. This step is a one click process to modify the allotted management privileges. Click on the Share tab in the right pane of the Accounts section.
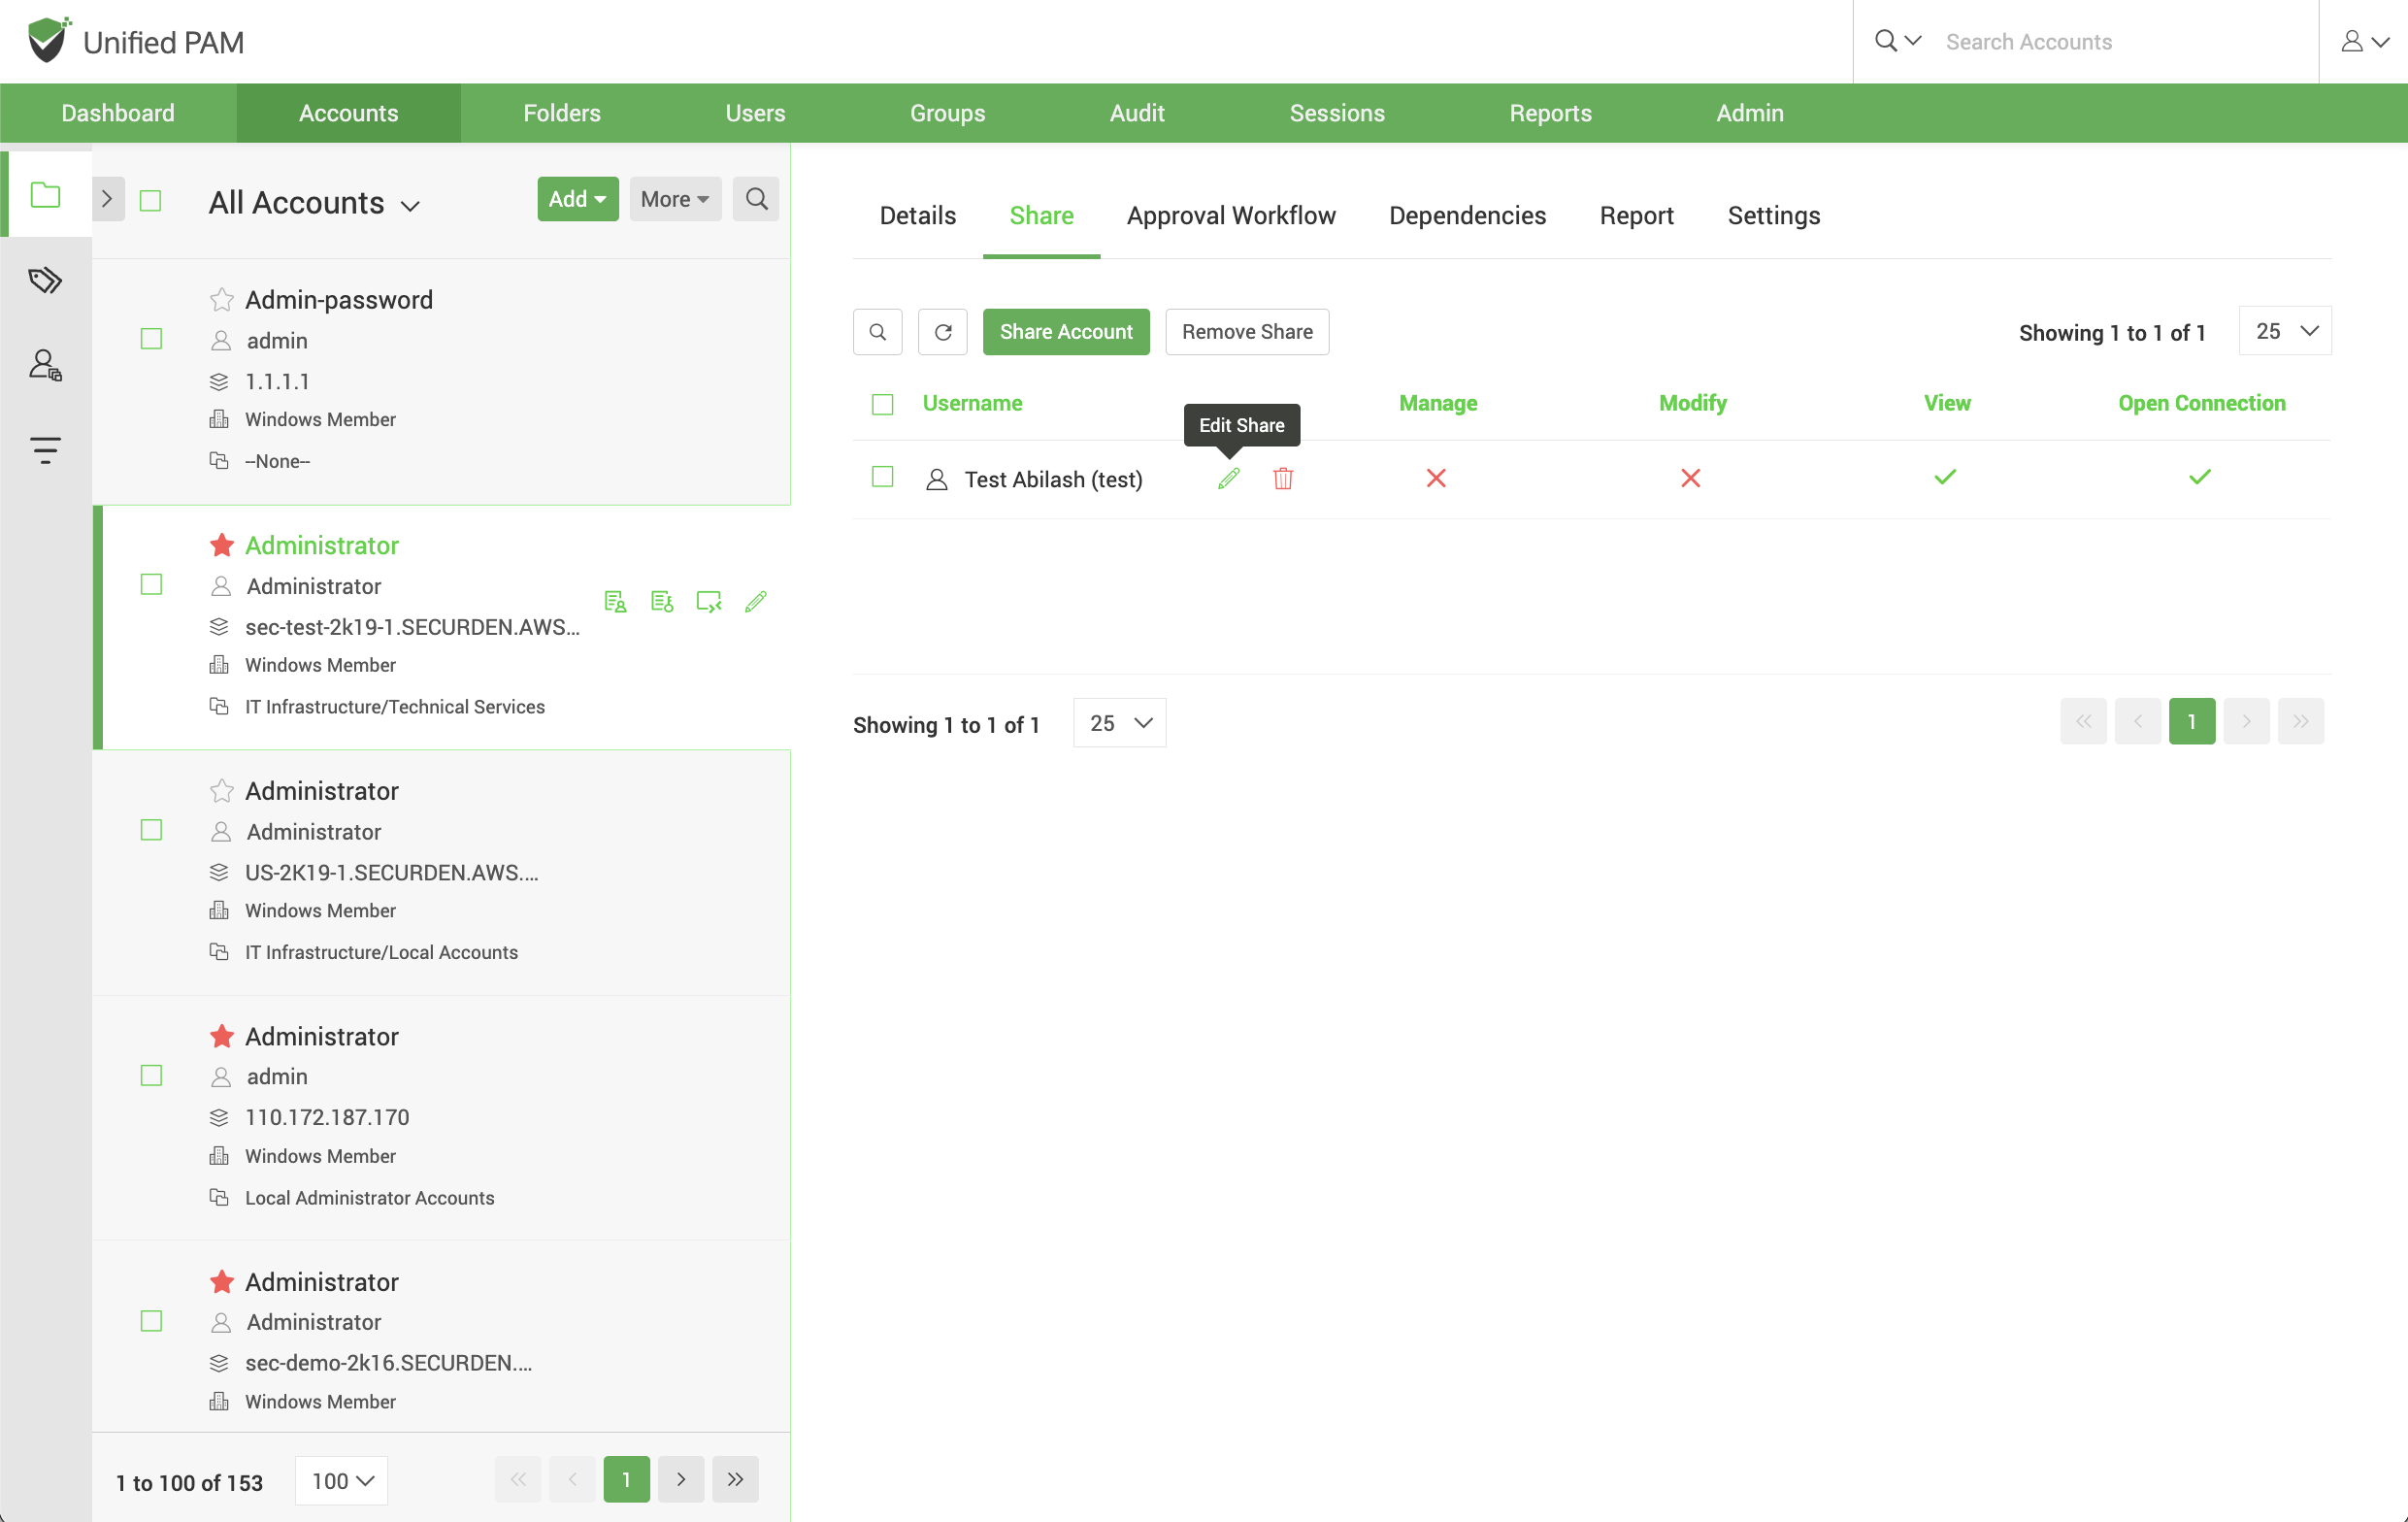
Click on the Username and to the right of the field, click on the Edit Share option. In the window that opens, you can redefine the account access modes by selecting the required permission. Then click on the Save button.
How does Securden trace accounts shared at multiple levels?
In some instances, an account might be shared to the same user at the user level and at the folder level. When an account is shared at multiple levels, Securden follows the principle of least privilege to assign the required account privilege to a user.
When sharing occurs at multiple levels, at times, you might want to check how the sharing has taken effect – what level of access is a user getting to an account.
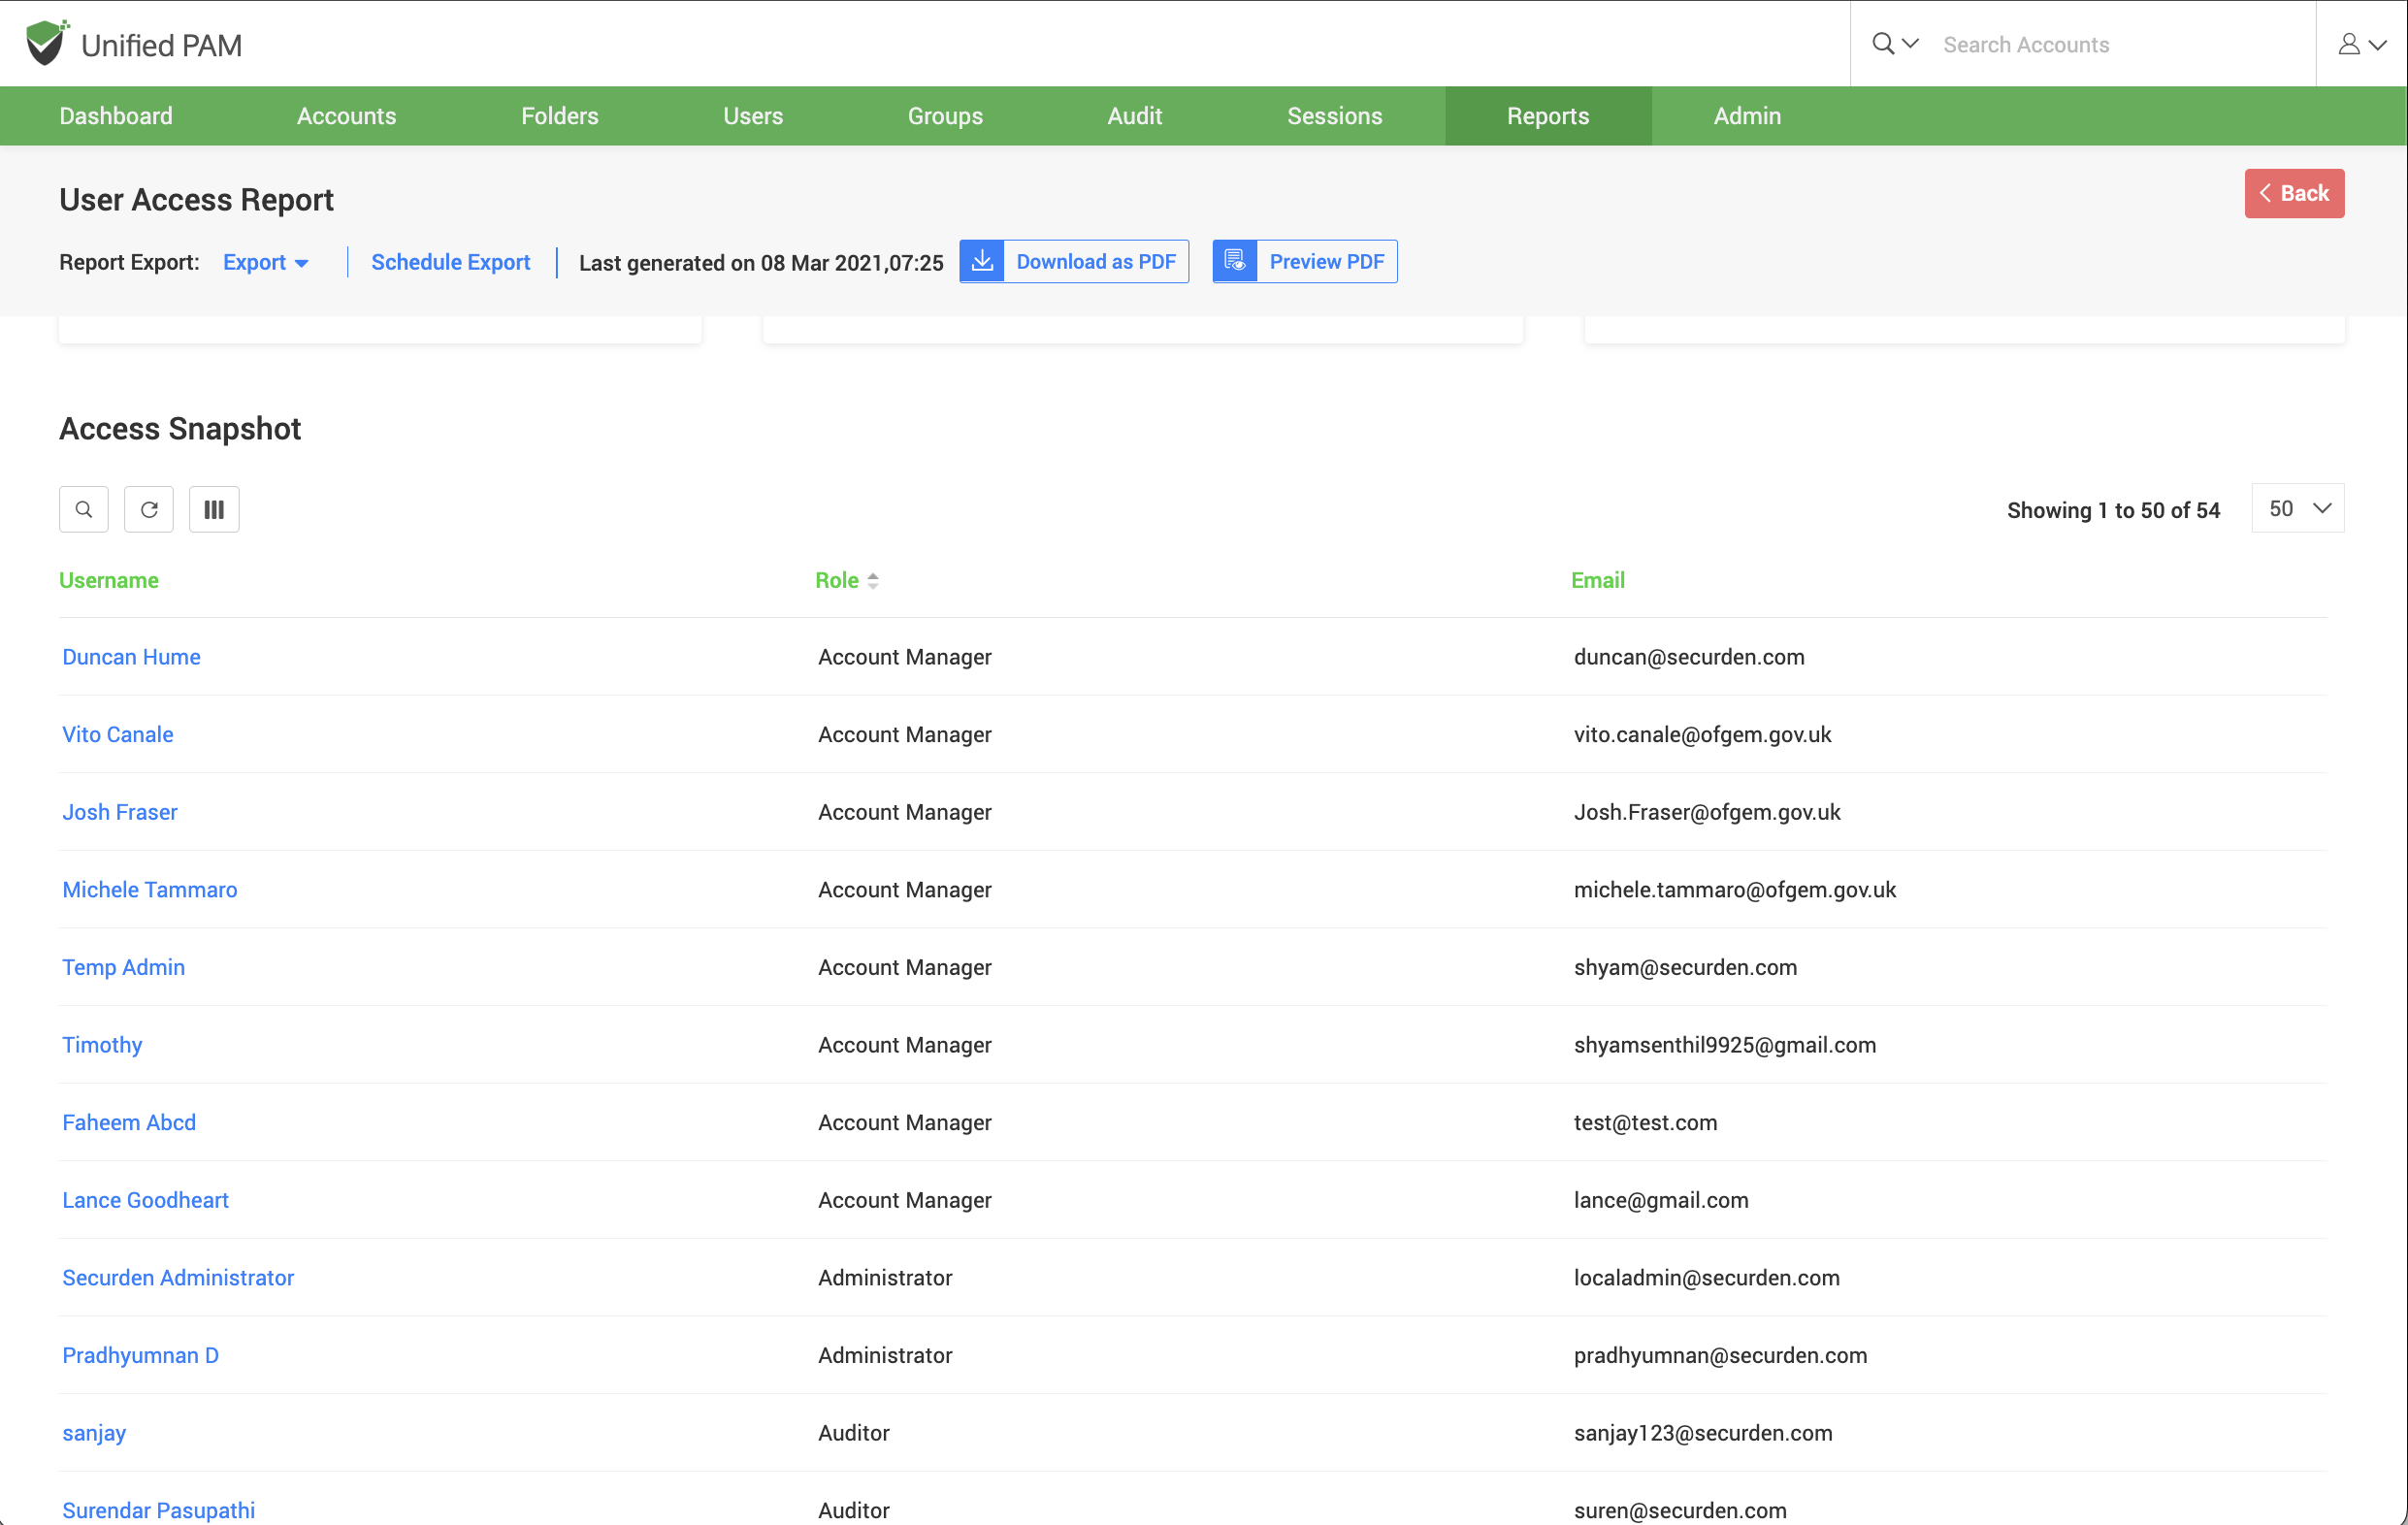
Securden provides a report that helps you trace all the levels in which the account has been shared. It tells you the share permission that is effective at present and shows all the other share permissions disregarded as per the least privilege principle.
You may use Reports >> User Access Report (OR) Reports >> Account Access Report for this purpose. If you are taking a User Access Report, click the name of the user who has access to an account you want to verify.
Then click the required account name. You will see a pop-up that shows Trace the sharing mechanism.
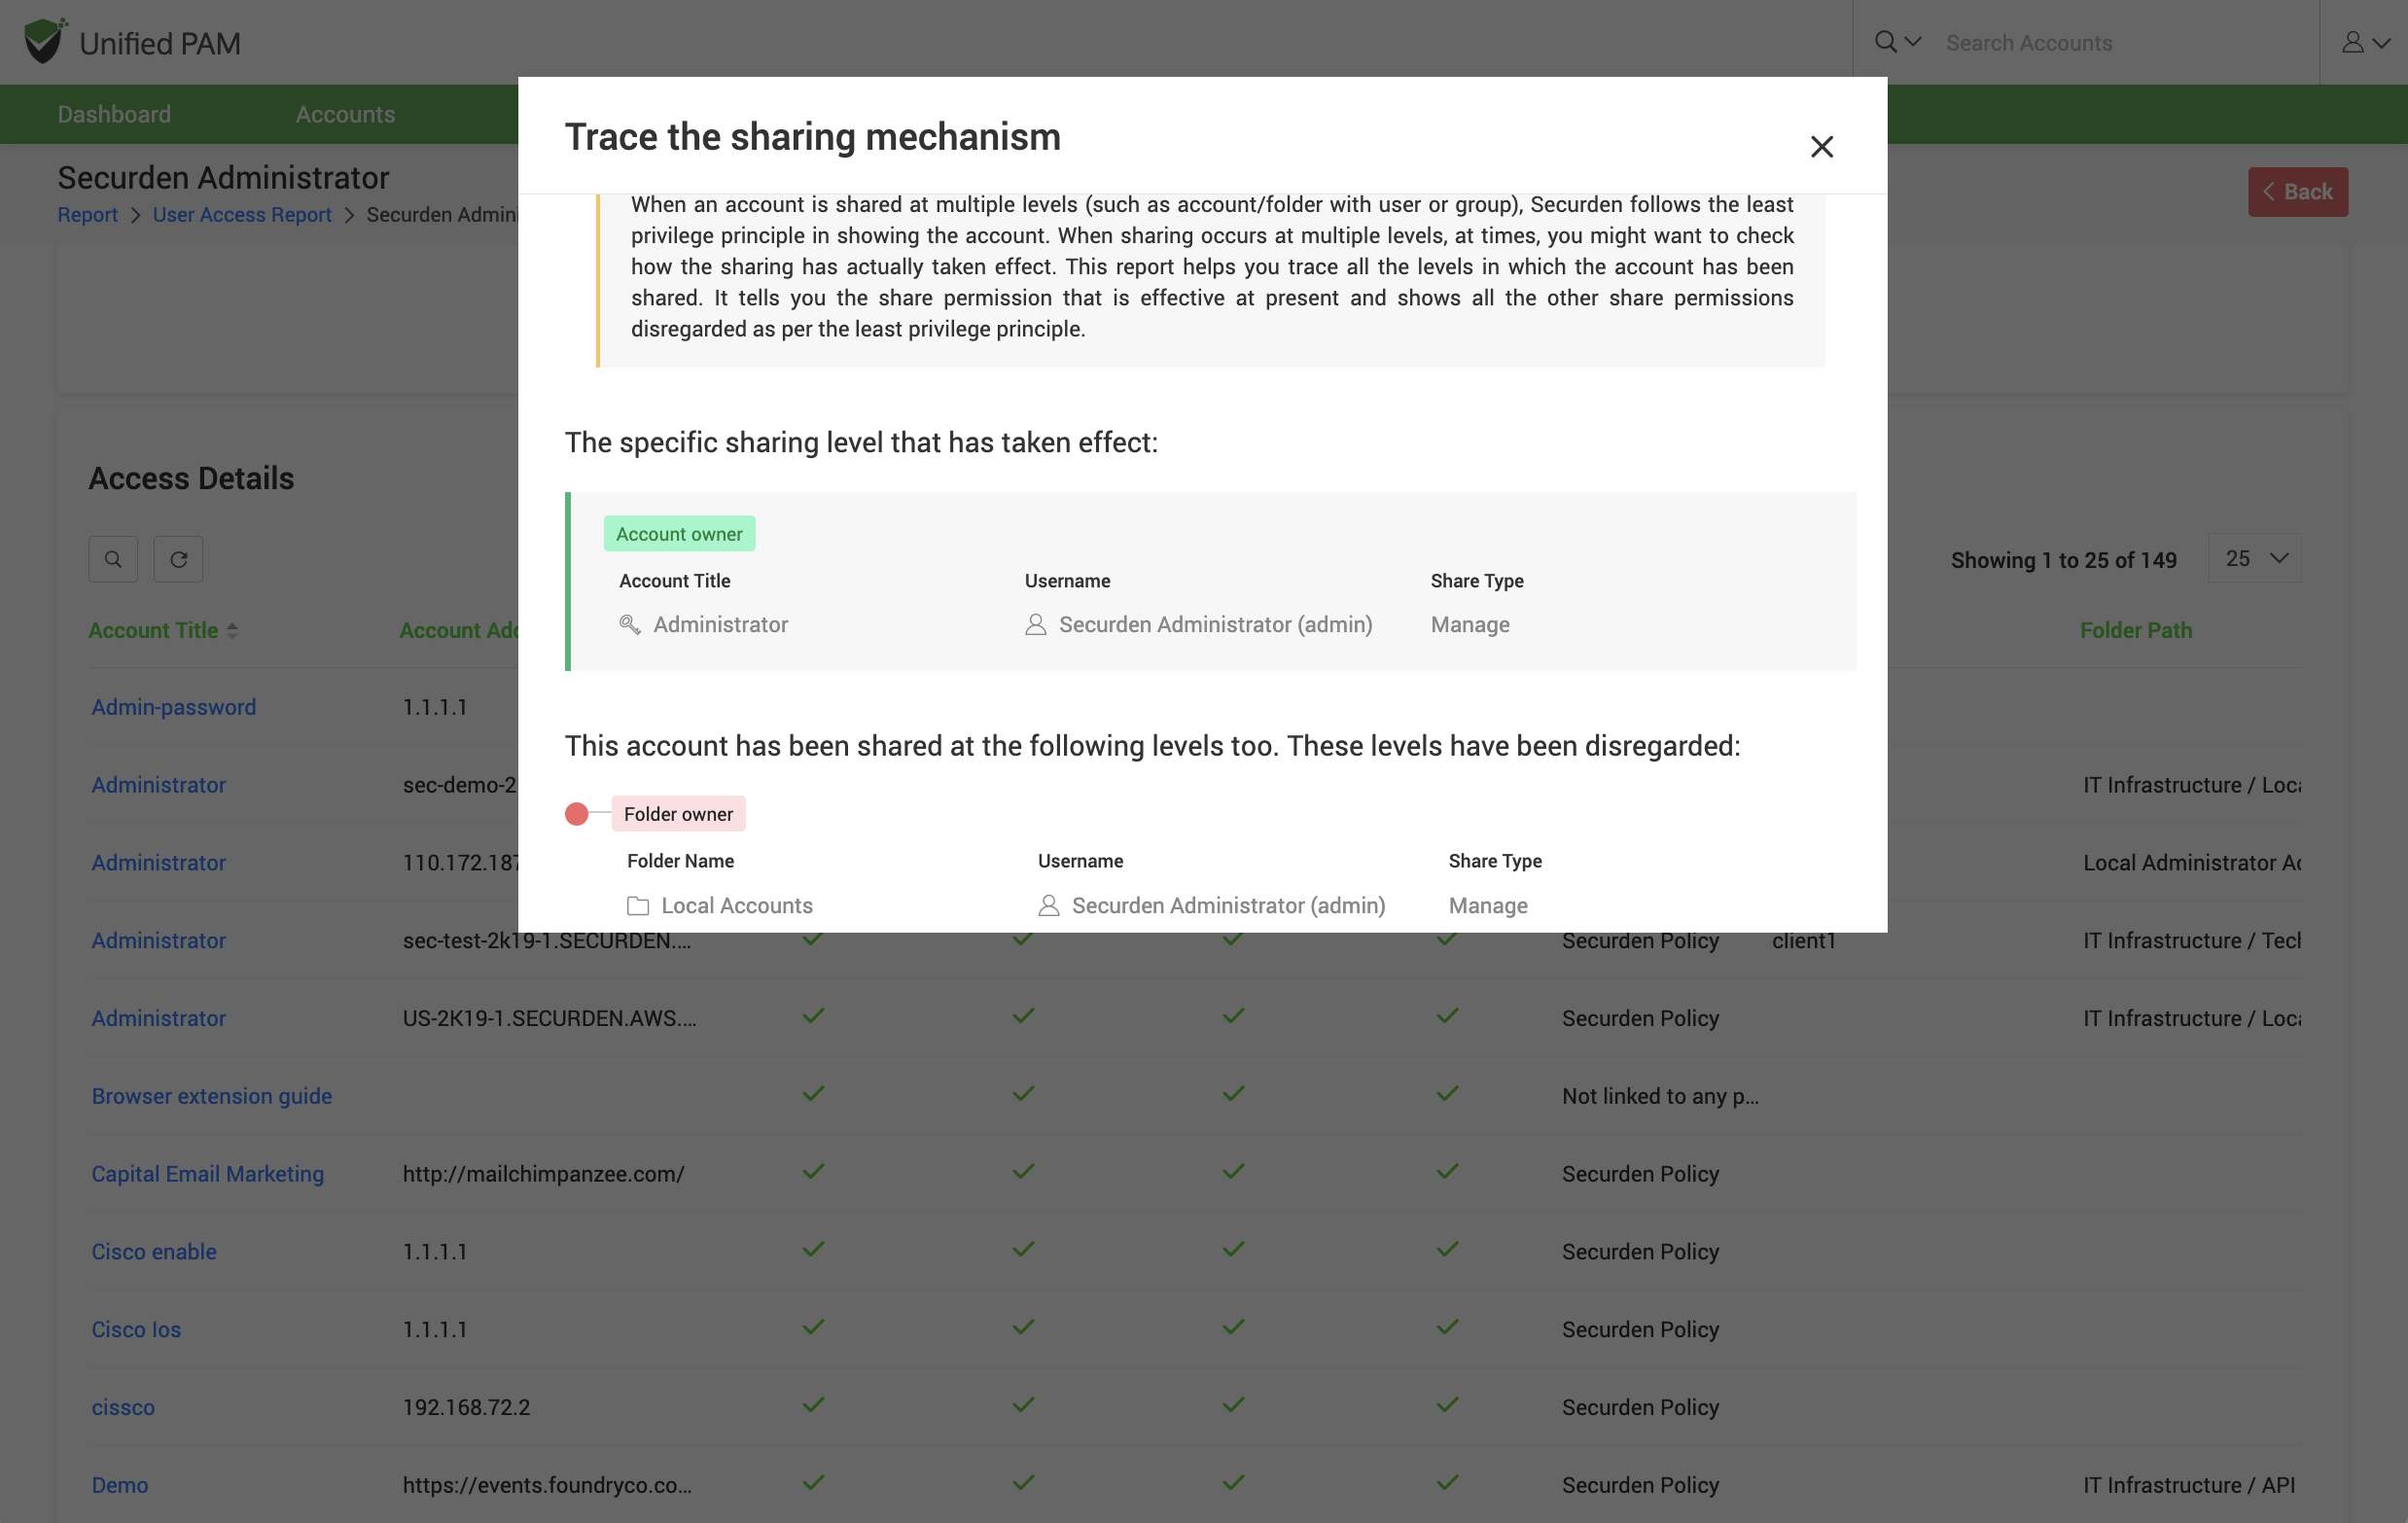
It will tell you how the user is getting the access. Based on this finding, if needed, you would be able to take corrective action.
Synchronization of Groups in AD with Securden
Let us take an example to understand this feature in Securden. Consider the following scenario:
You have shared an account with a group imported from AD. The group originally has only 10 members. A new user is added to the group in AD and now the members total up to 11. Will the 11th member automatically get the access permissions associated with the group?
When a new member is added to a user group in Securden, they automatically gain access to all resources shared with the group. However, when the user is onboarded in AD and not explicitly added to the group, this cannot be achieved. To fix this, you need to configure periodic synchronization of groups with AD.
You can keep the members of this group in synchronization with that of the AD. When new members get added or removed from this group in AD, the changes get reflected in Securden without requiring any manual intervention.
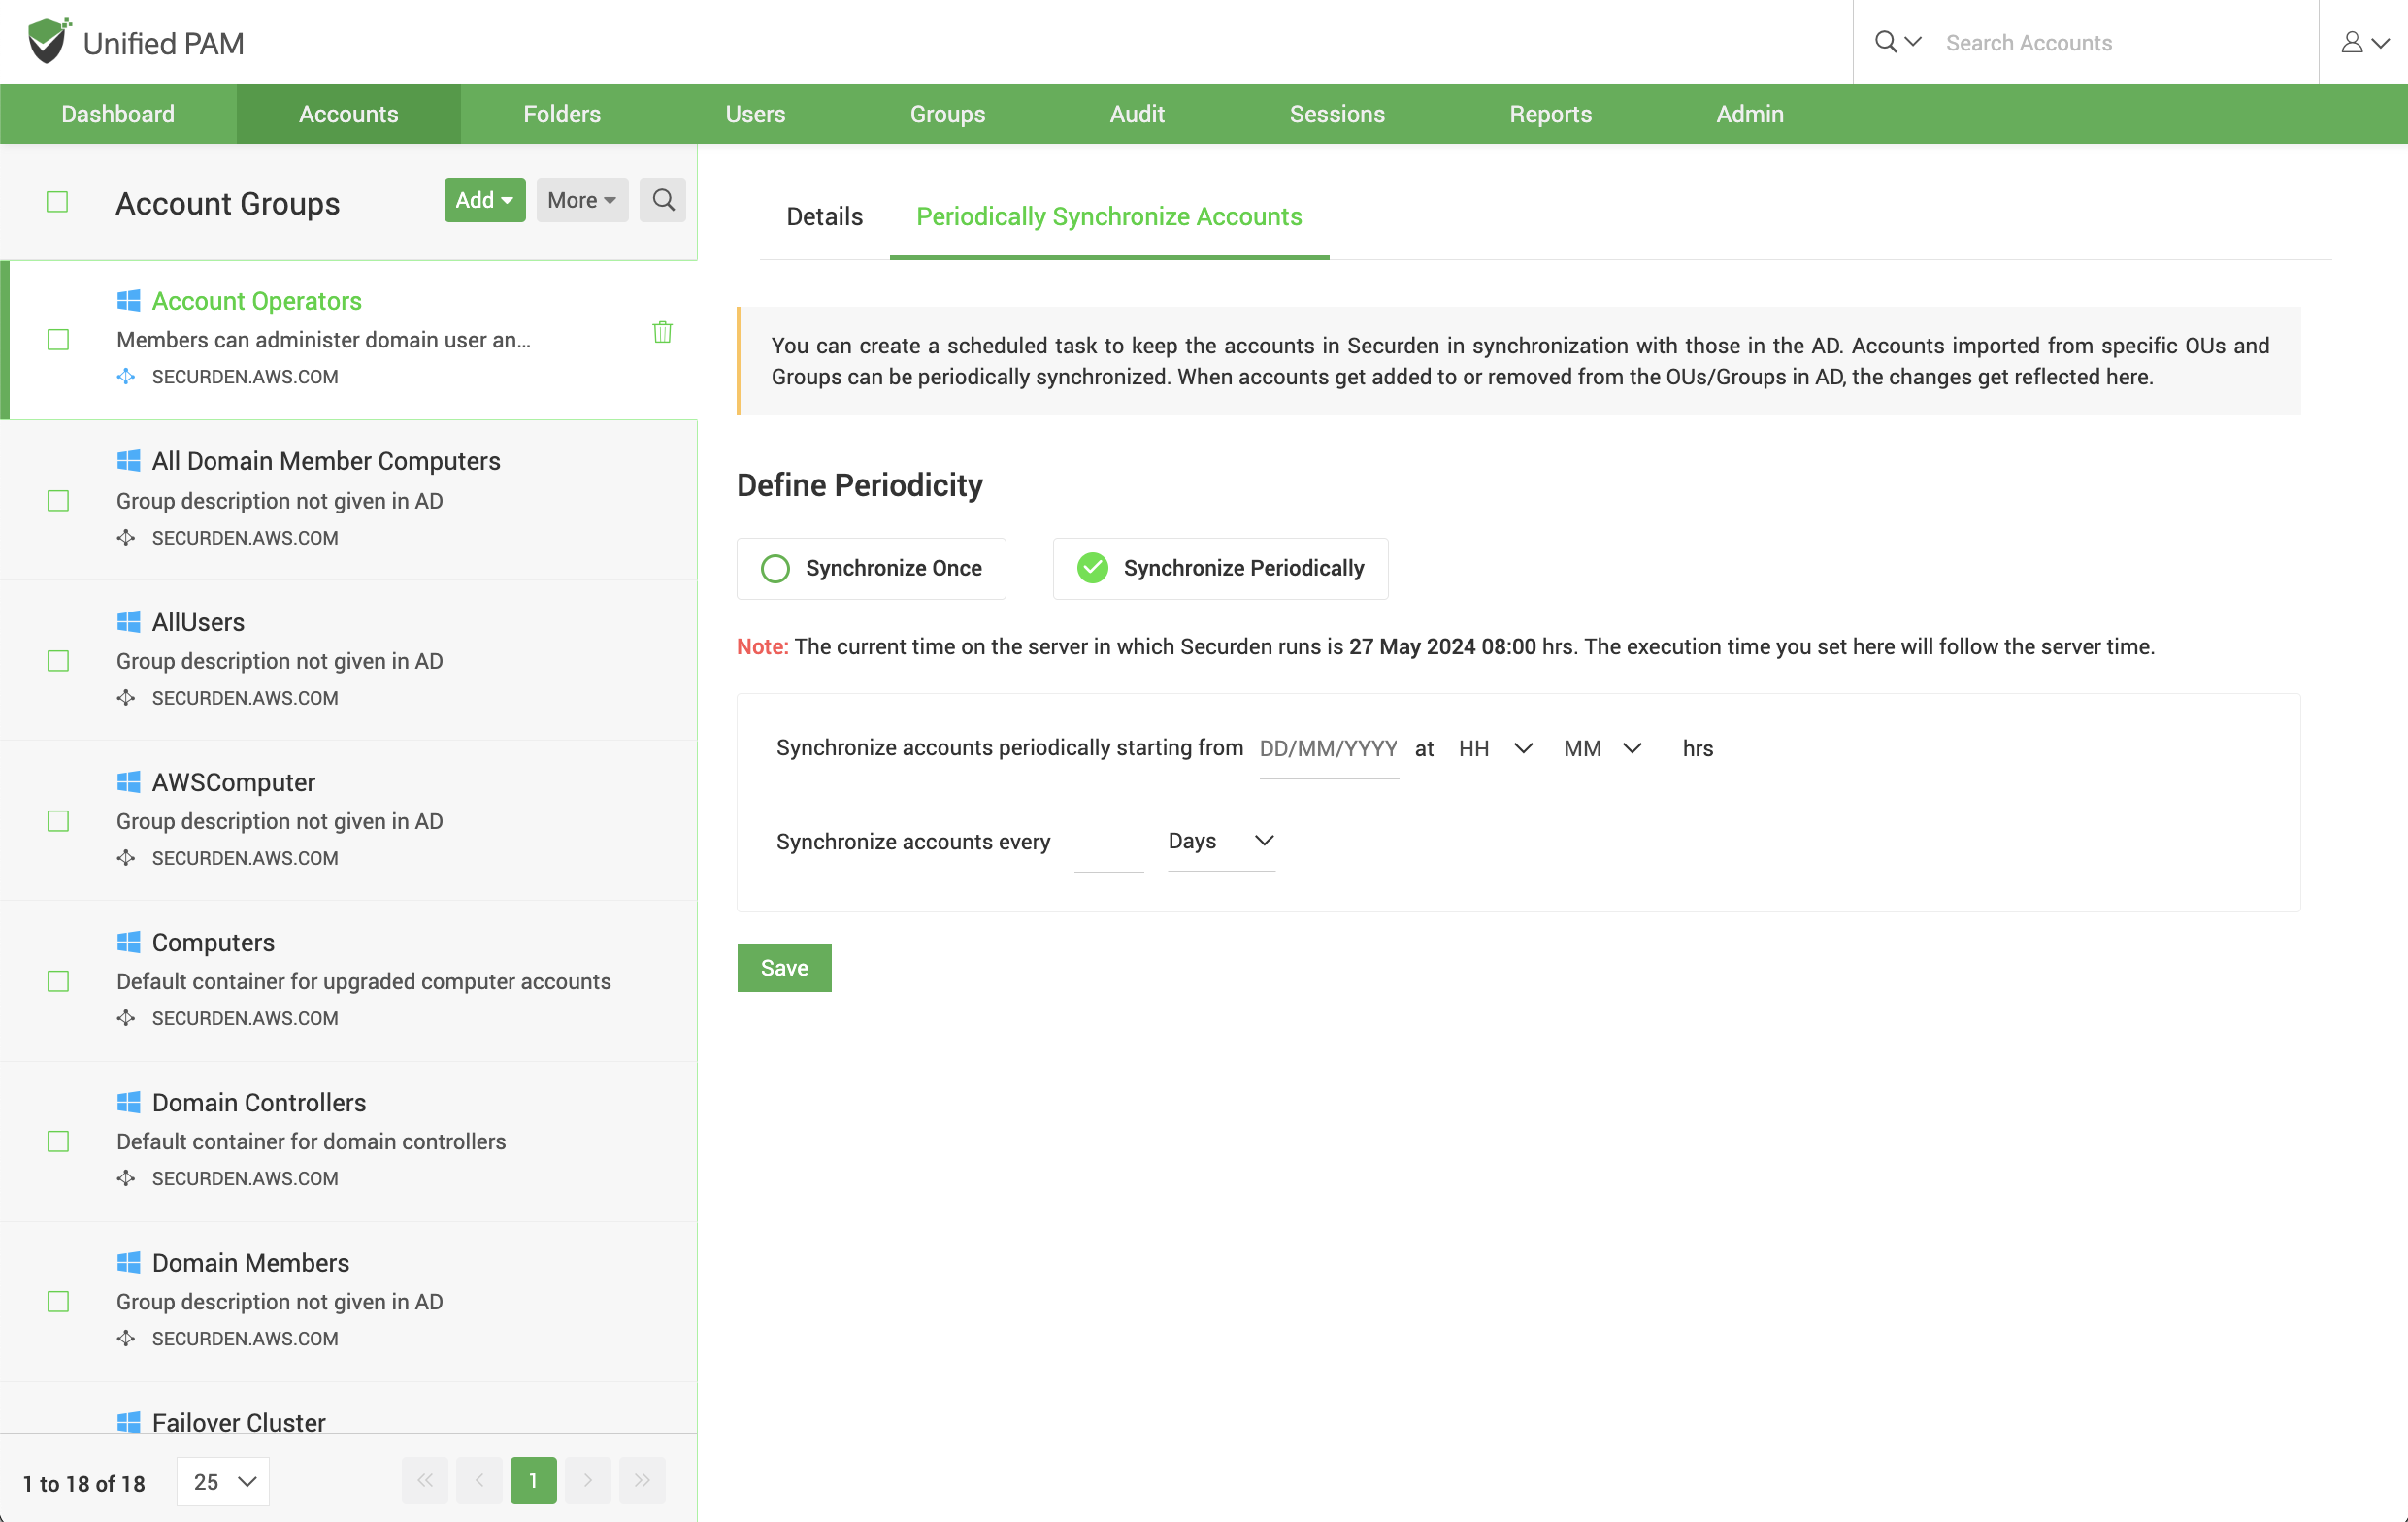
Navigate to Groups >> Select the required group >> Members >> Schedule Sync section in the GUI to perform this step.
You can either schedule the synchronization activity for a one-time run or create scheduled tasks to run periodically and ensure regular synchronization.
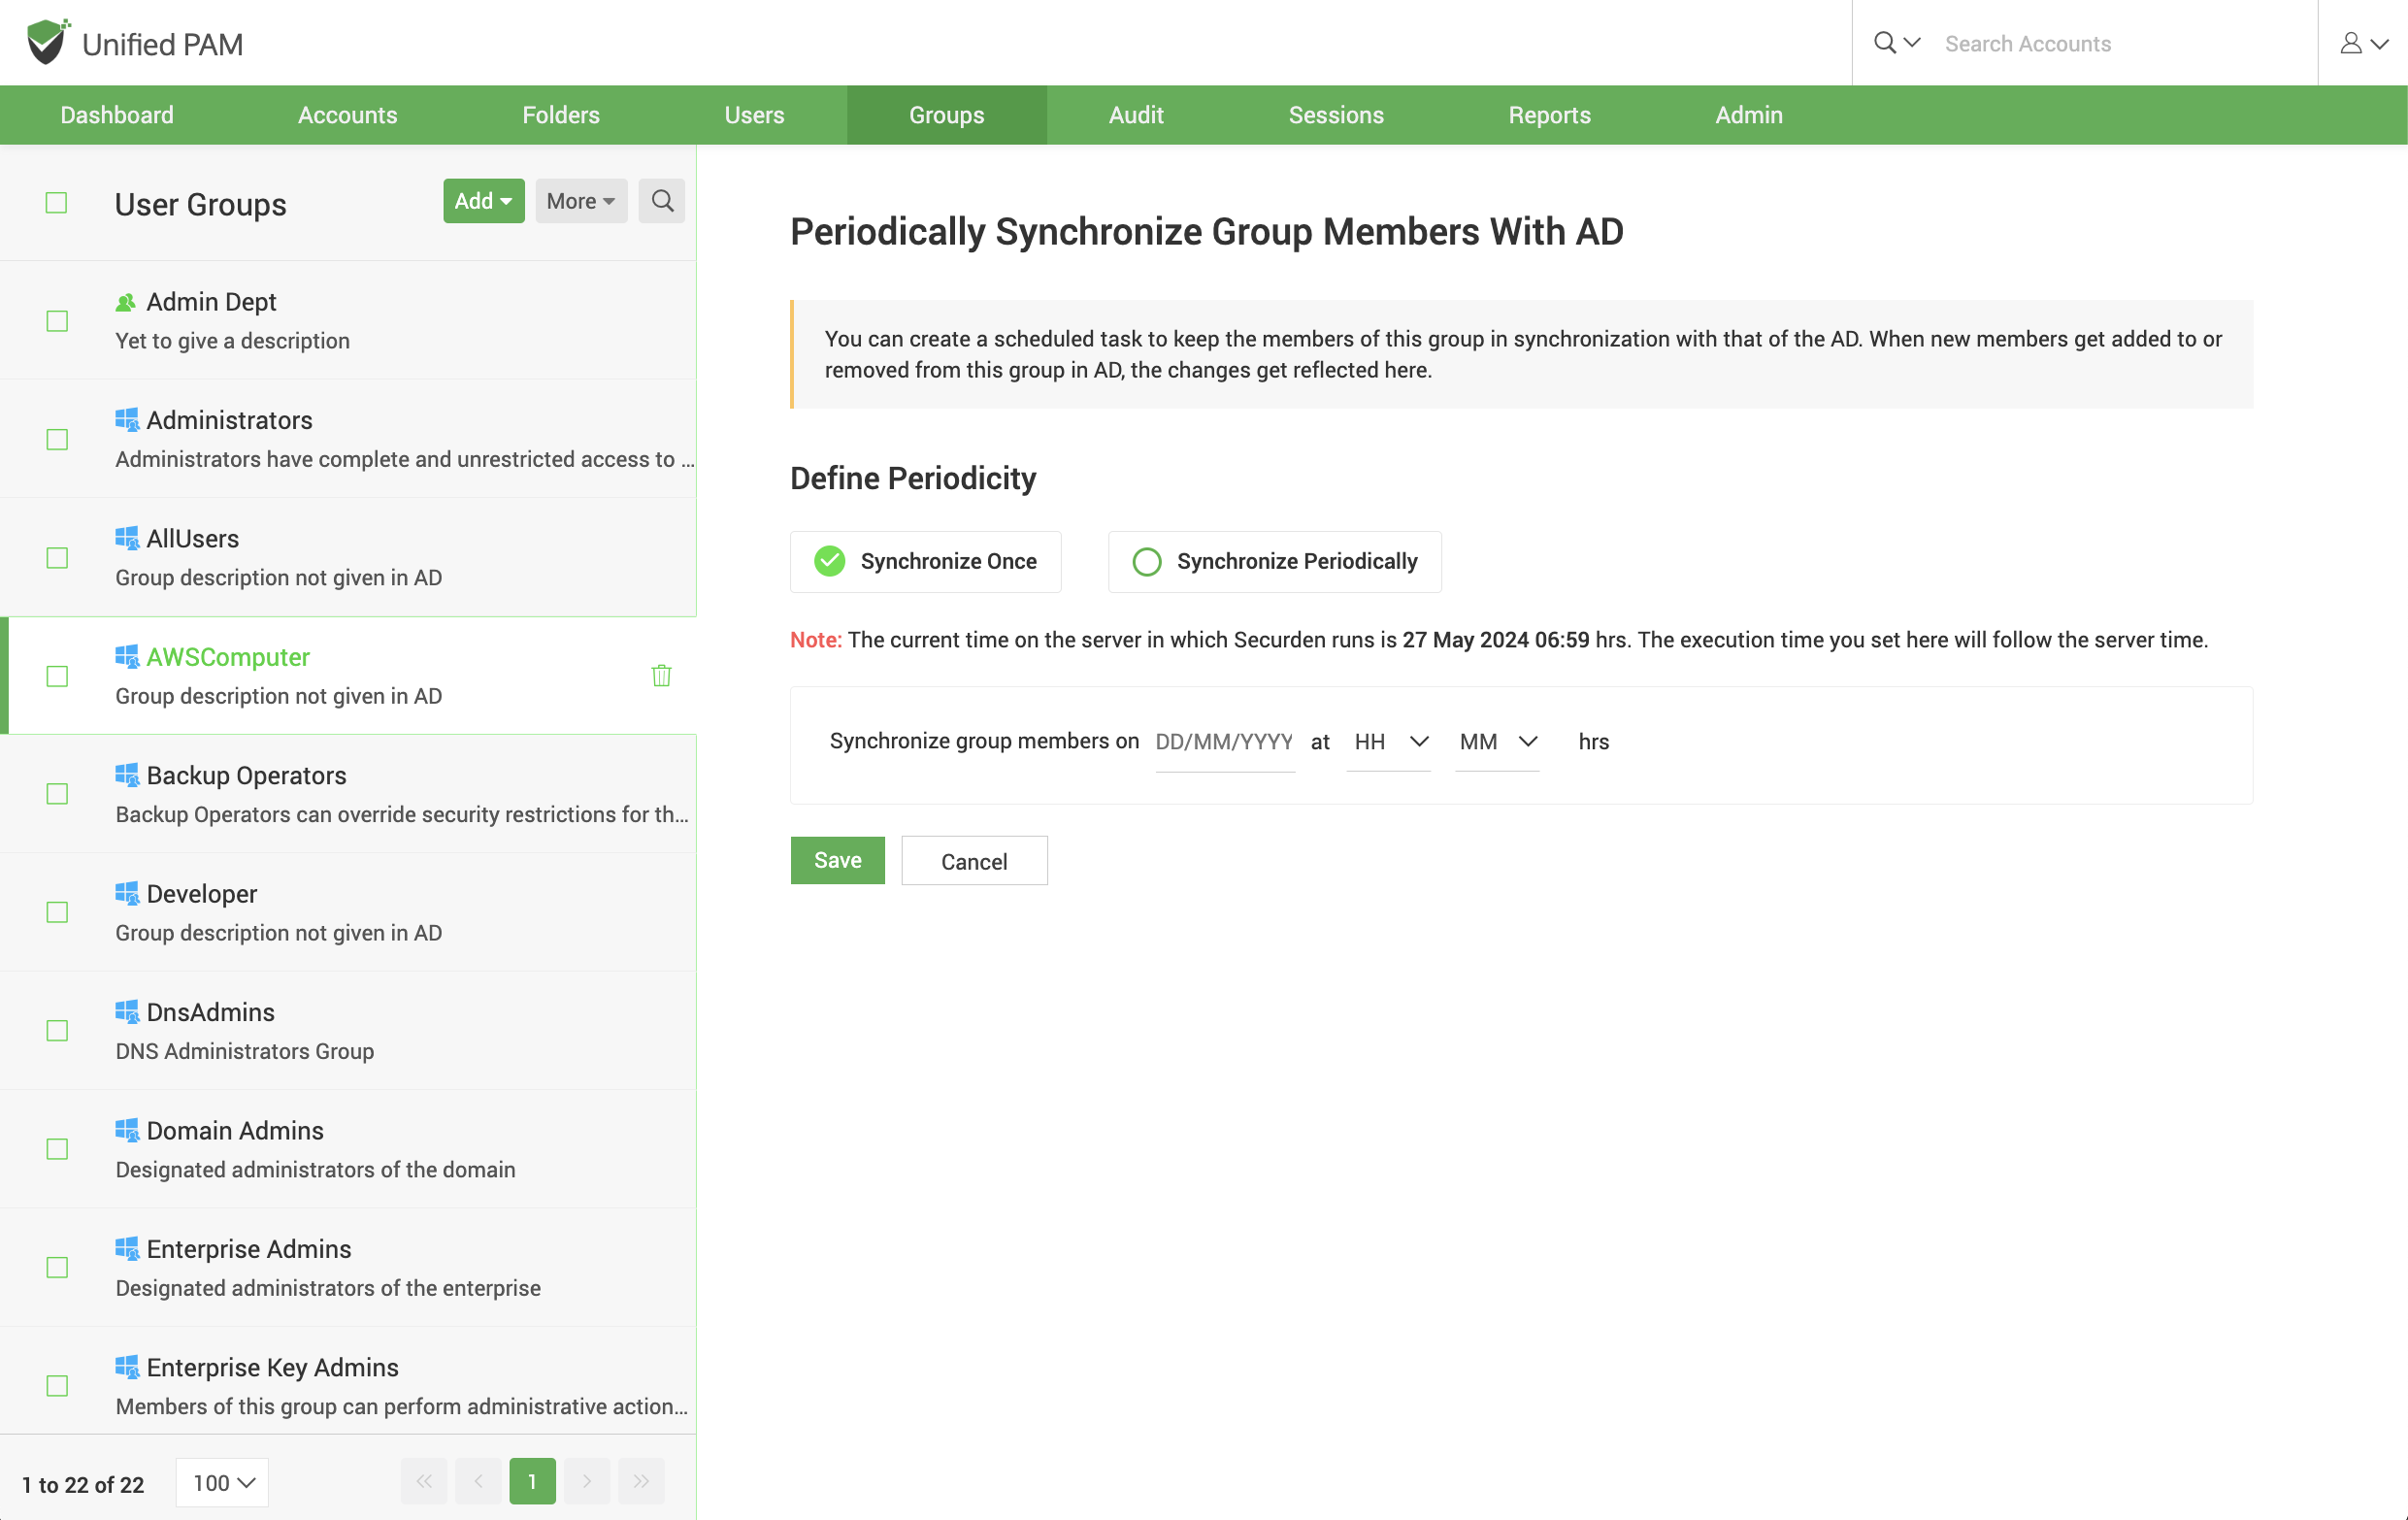
For periodic synchronization, you can choose the start time, and set the synchronization interval.
Once enabled, you can navigate to the Schedule Sync section to view the next planned schedule.
Once synchronization is configured, whenever a new member is added to a group in AD, the change will be automatically reflected in Securden. Subsequently, all access permissions associated with the group will be inherited by the user.
Remove Share Permission
If you want to revoke the share permission from a user or group of users, navigate to the Share panel, select the users or groups for whom you want to terminate the account access, and then, click the Remove Share button.