Creating Windows Domain and Non-domain Control Policies
To create a control policy, Navigate to Admin >> Privilege Elevation and Delegation >> Control Policies
In the GUI that opens, click Add Policy and select domain control policy for domain joined machines and non-domain policy for workgroup/external computers.
Step 1: Enter the following details in the interface
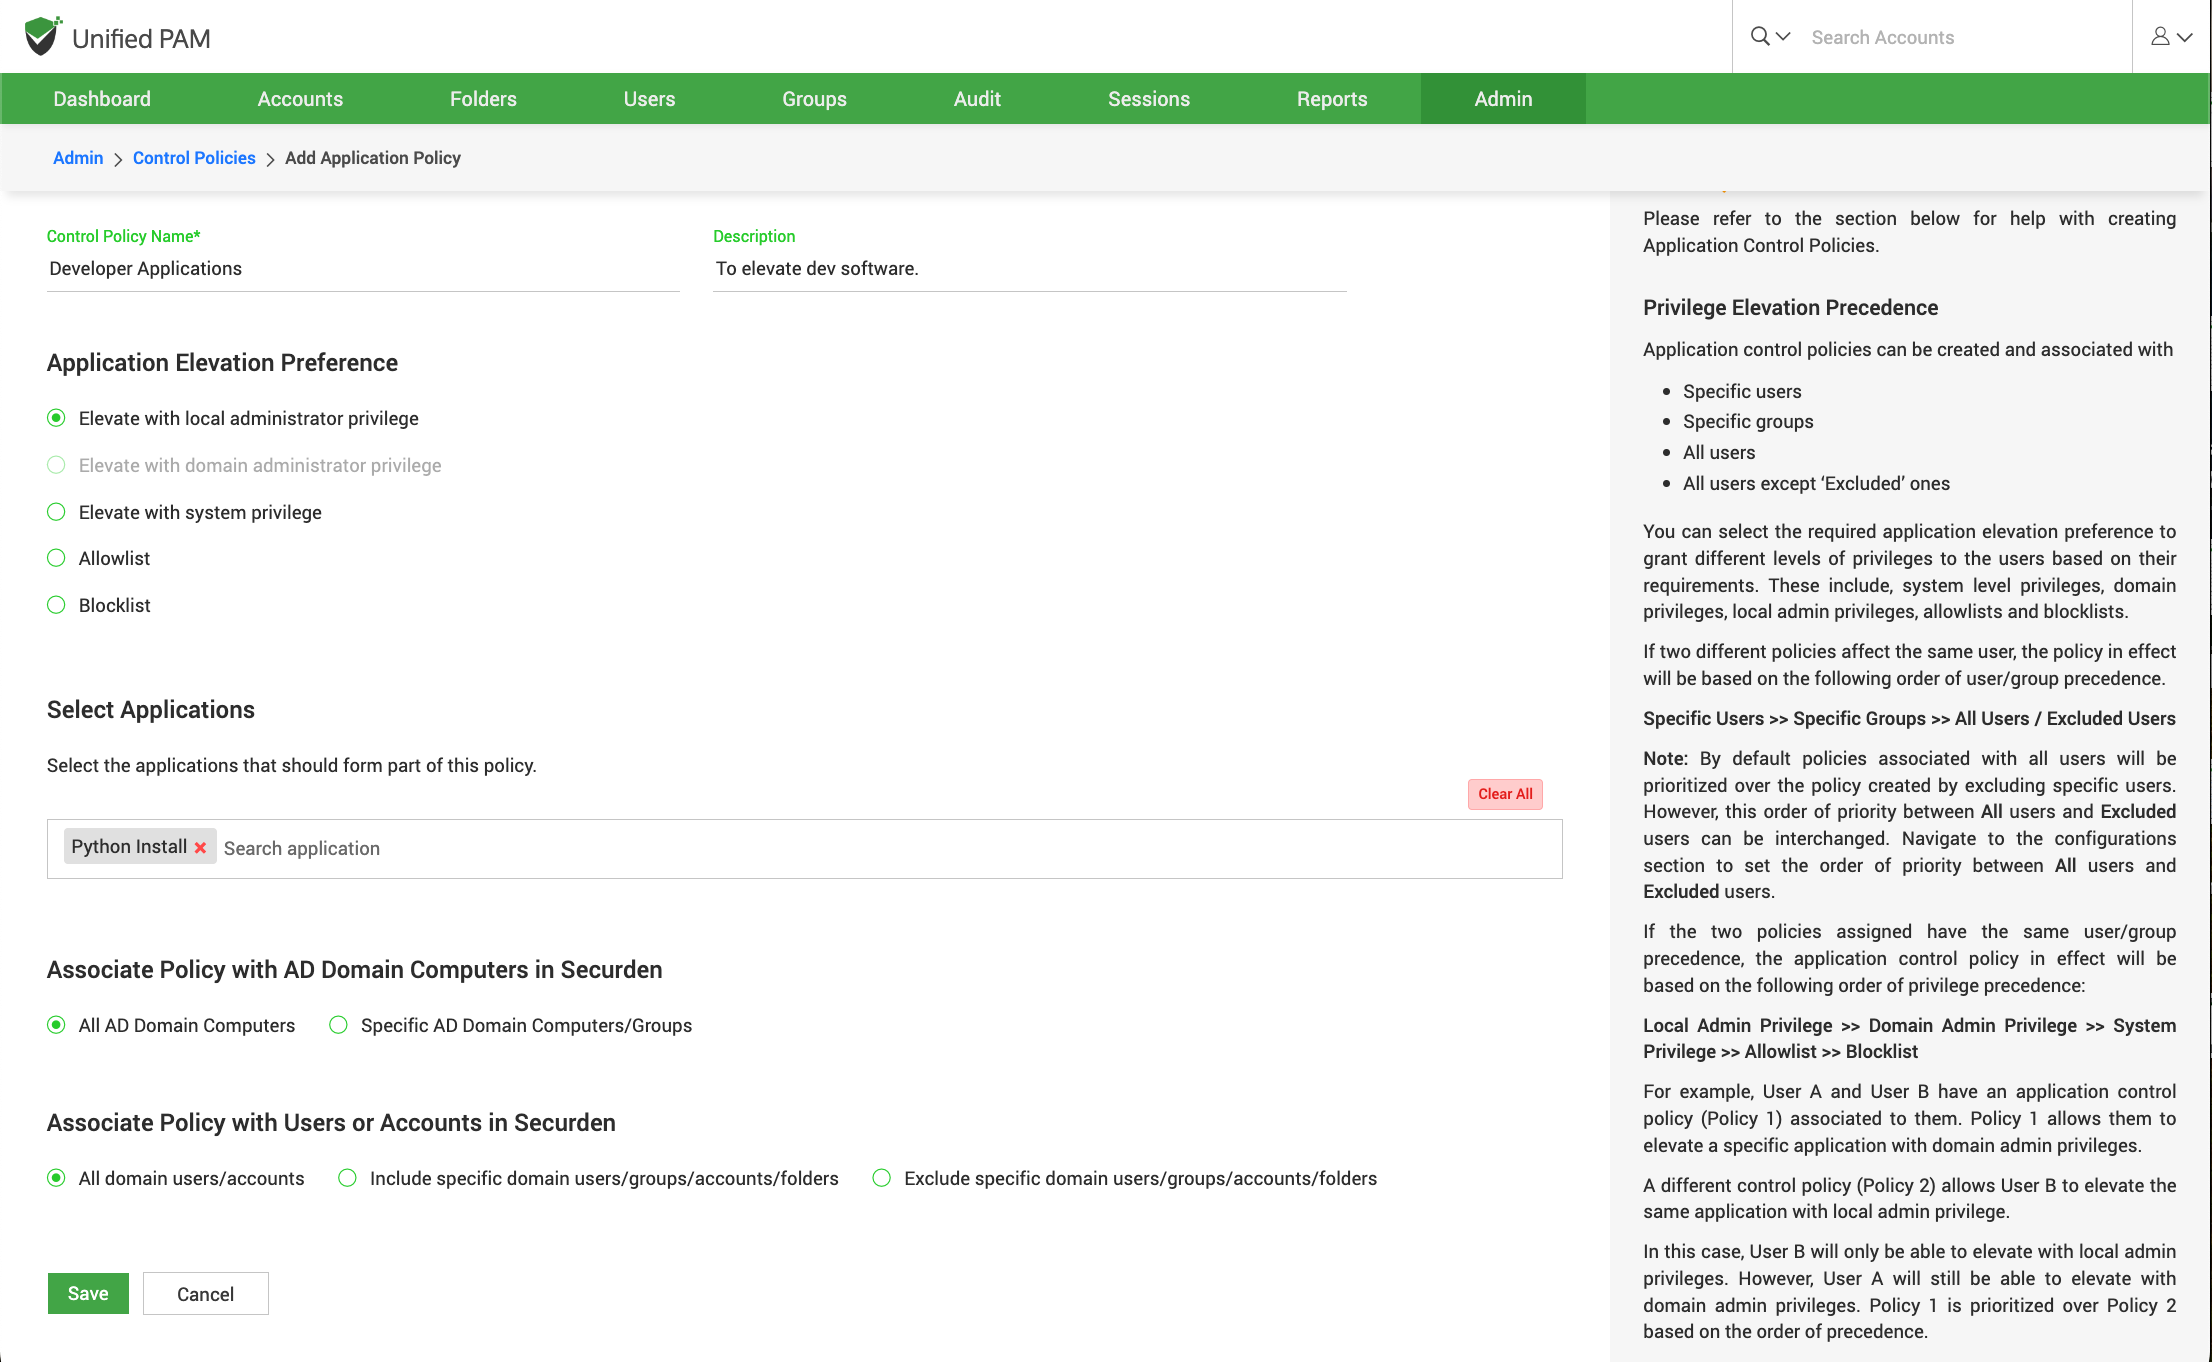
Control Policy Name: The name that you enter here helps you uniquely identify the control policy being created. This name will appear on the control policies list.
Description: An overview of the control policy describing what it does and then why this policy has been created
Step 2: Choose the level of elevation for the application(s)
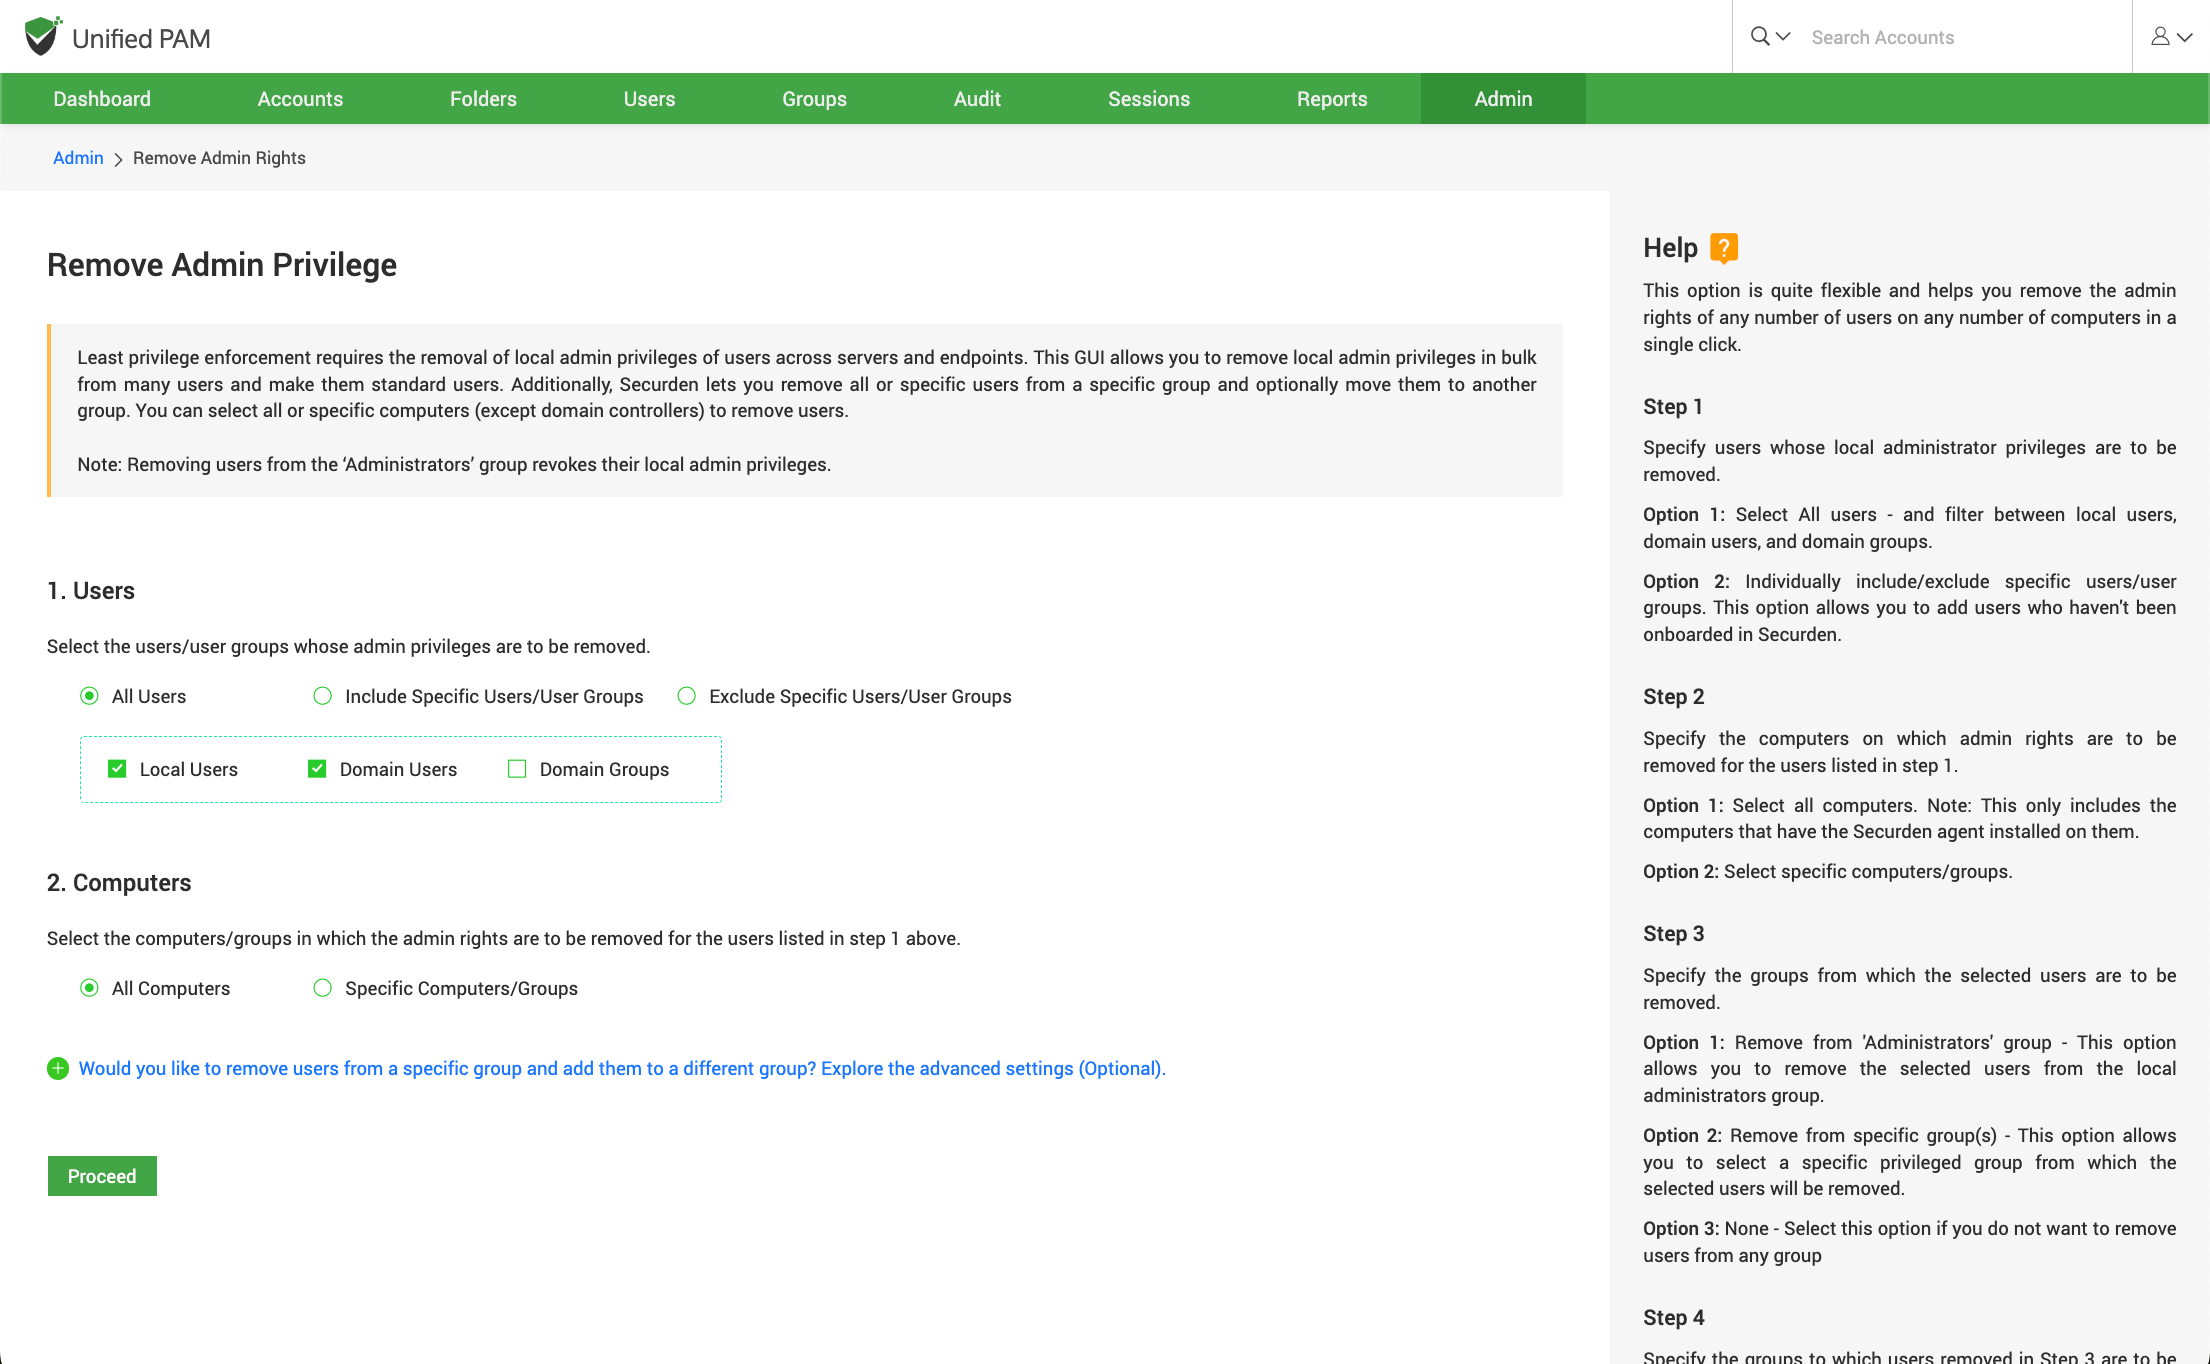
Elevate with local admin privilege: Selecting this lets you run the application with local admin rights.
Elevate with system privilege: If you want to elevate services and processes within Windows that need the capability to log on internally with system privilege, select this option.
Blacklist: This option is to block usage of the application.
Step 3: Select the applications that are to be part of the policy
You can use the Search application field to select the required applications from the list or enter the application name and select it.
Step 4: Associating the policy with domain/non-domain computers
The next step is to specify the list of computers on which this policy should take effect. You can choose to have all domain/non-domain computers follow this policy or choose a specific set of computers to adhere to it.
Step 5: Associate policy with specific users/accounts
The final step is to associate the policy with the required domain users/user groups or domain accounts/folders (in the case of domain policy) and accounts/folders (in the case of non-domain policy). That means the policy will take effect on the users/groups/accounts/folders selected here on the computers chosen in the previous step.
Step 6: Once done with all the steps, proceed to click ‘Save’.
Important
For security reasons, the application control policy created by one administrator will have to be approved by any one of the other available administrators. Securden sends notifications to the approvers, who can review applications and approve/reject the request from the Control Policies page. Until the policy gets approval, it will not take effect.