Launching Native RDP connections
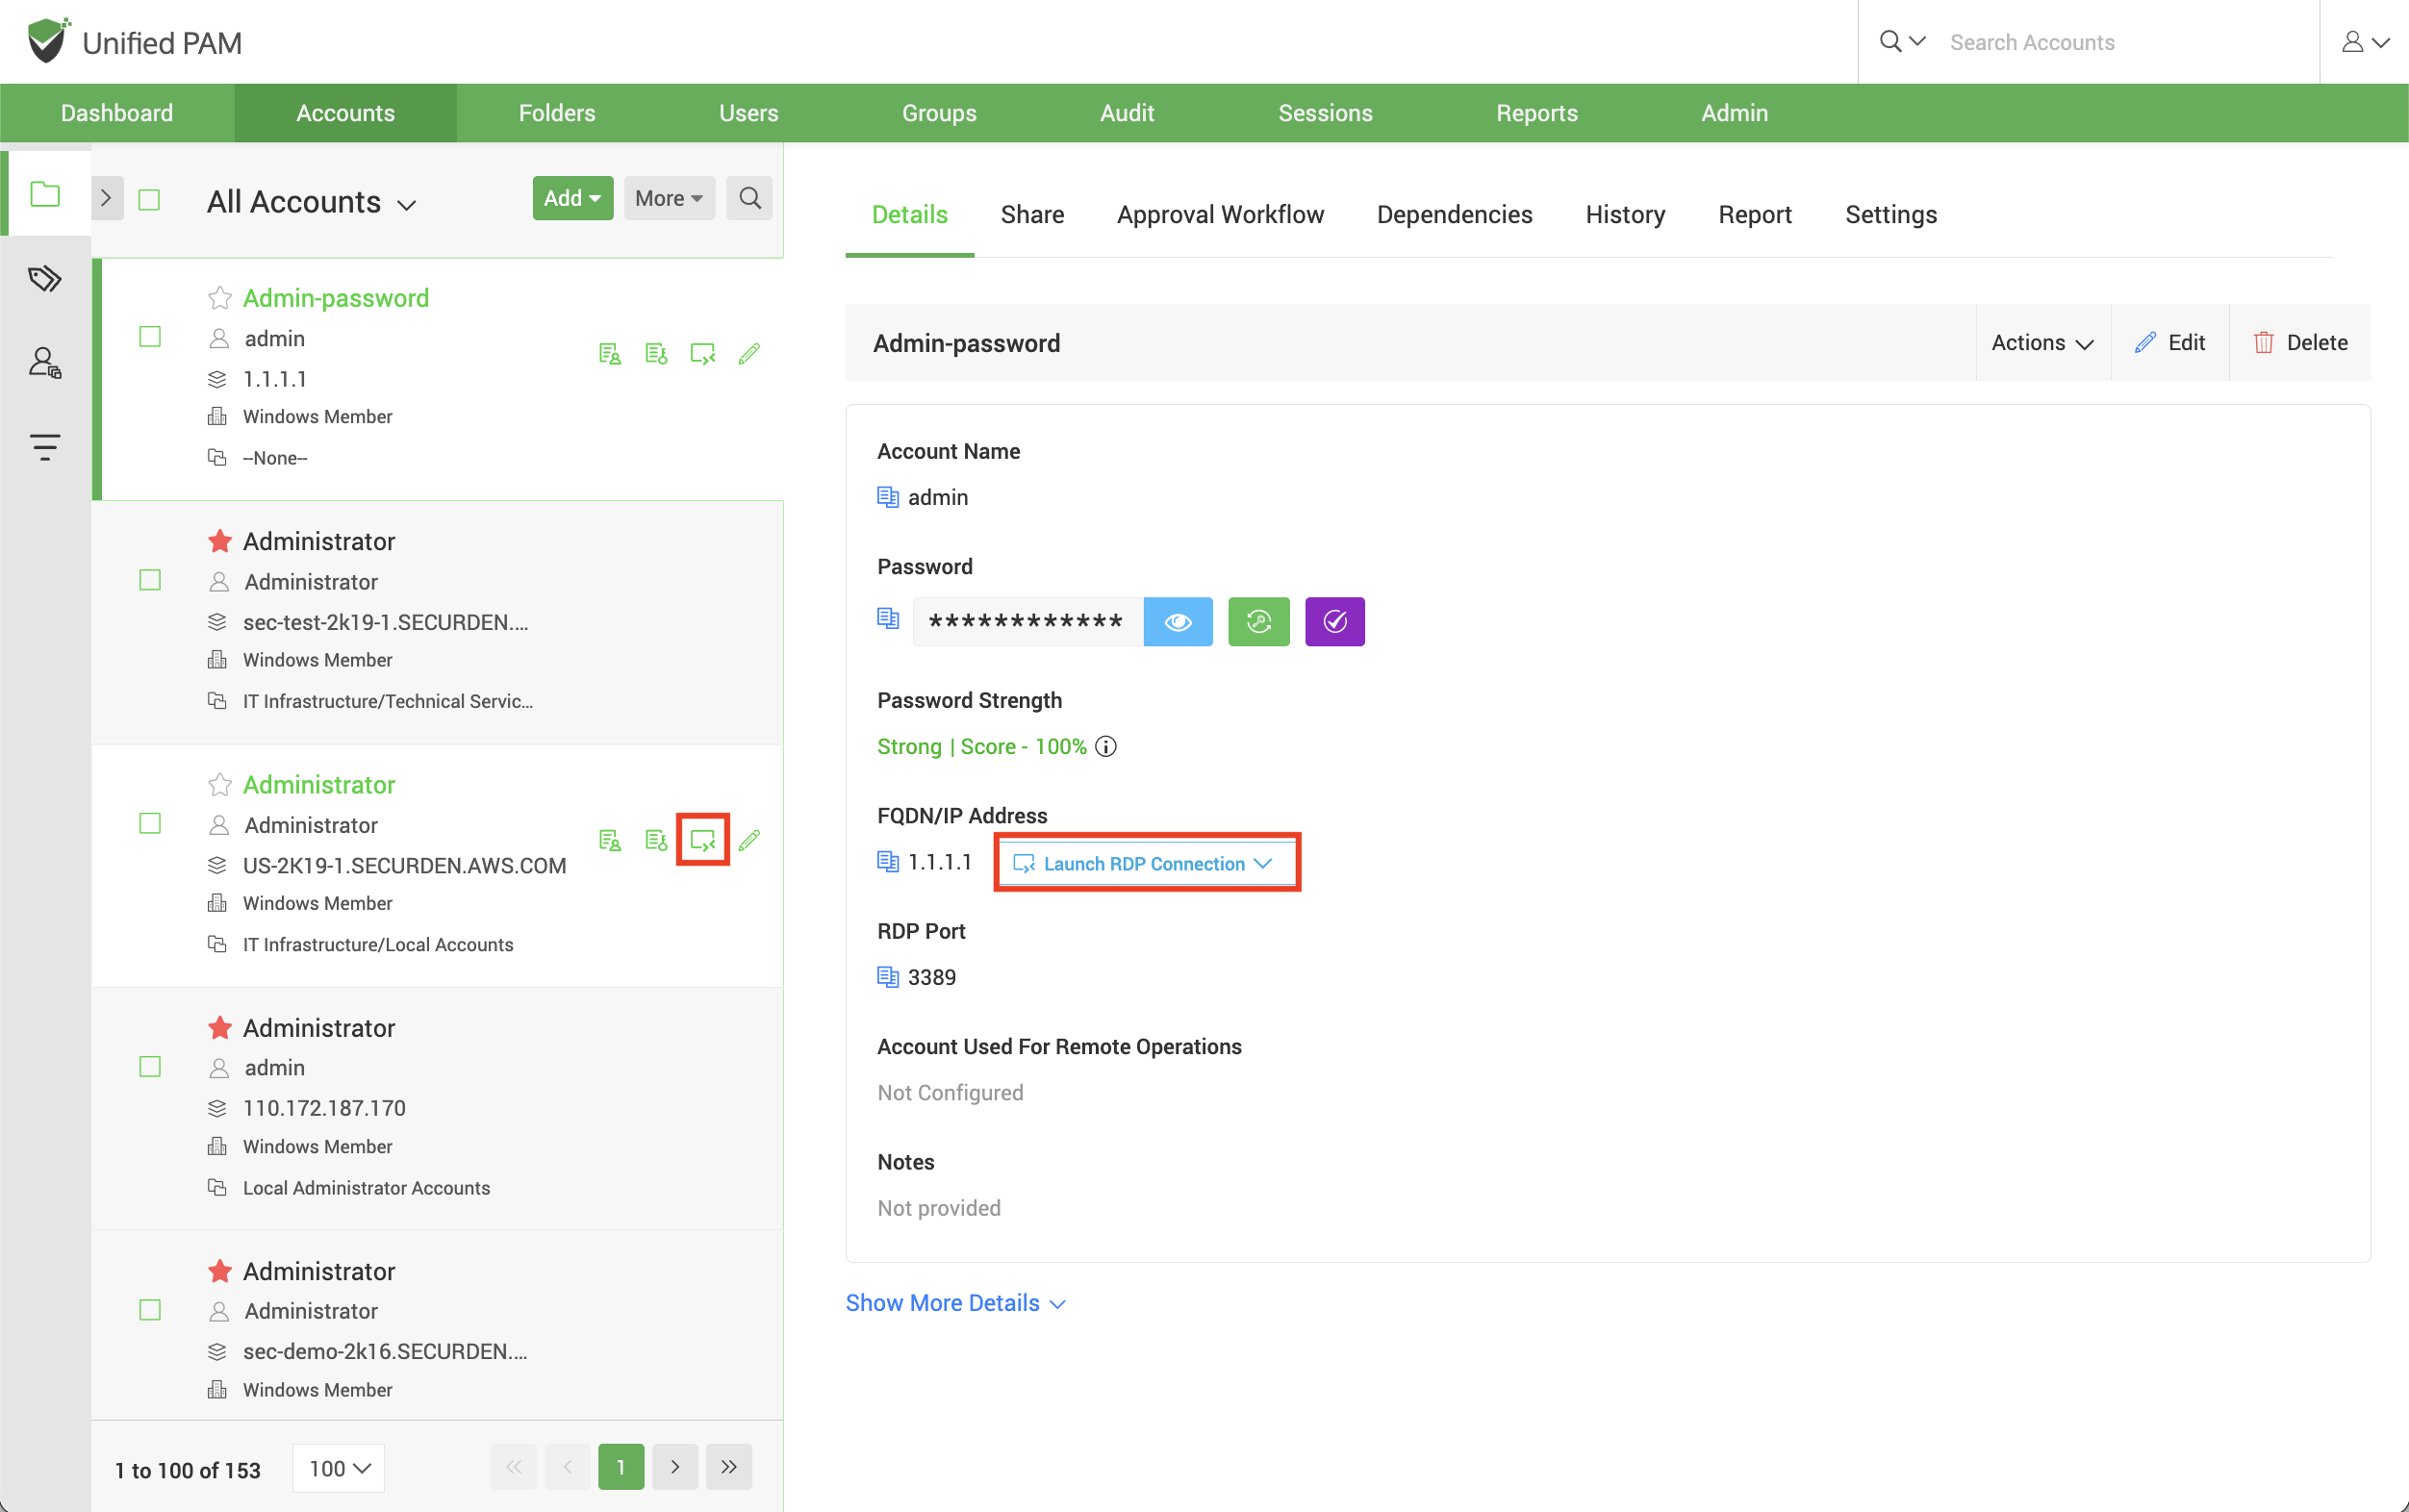
RDP connections are mainly used to access Windows-based machines and network devices. Navigate to the Accounts section in the GUI, click the required account, click the Launch RDP Connection button appearing alongside the account information on the left-hand side. Alternatively, you can click the drop-down menu named Launch RDP Connection from within the Account to launch a connection.
Native RDP Connections: Troubleshooting Checklist
Securden Remote Launcher makes use of MSTSC for invoking remote desktop sessions. The following is a compilation of some of the settings that need to be checked to ensure proper working of RDP sessions. These settings are to be checked on the client machine from which native RDP connections are launched.
Settings to be checked in mstsc app:
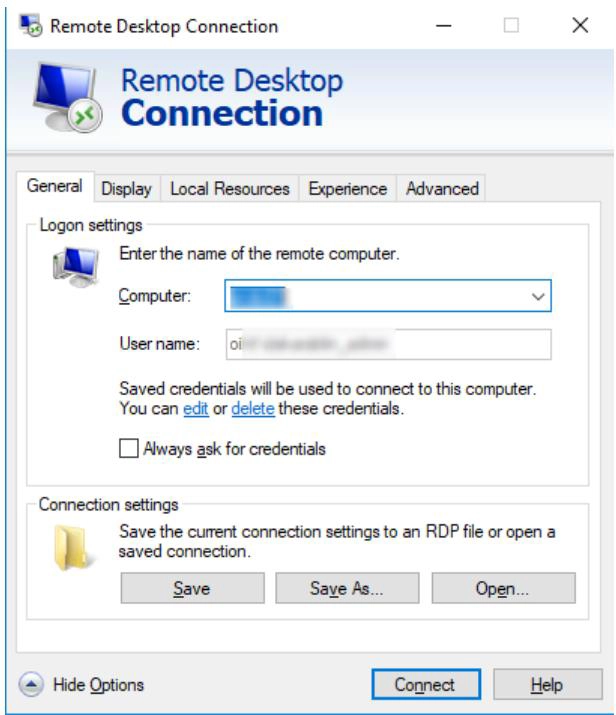
Click Show Options in the RDP connection window and look for the checkbox Always ask for credentials. This option should remain unselected. Ensure this, close the mstsc application and then try launching the connection through Securden.
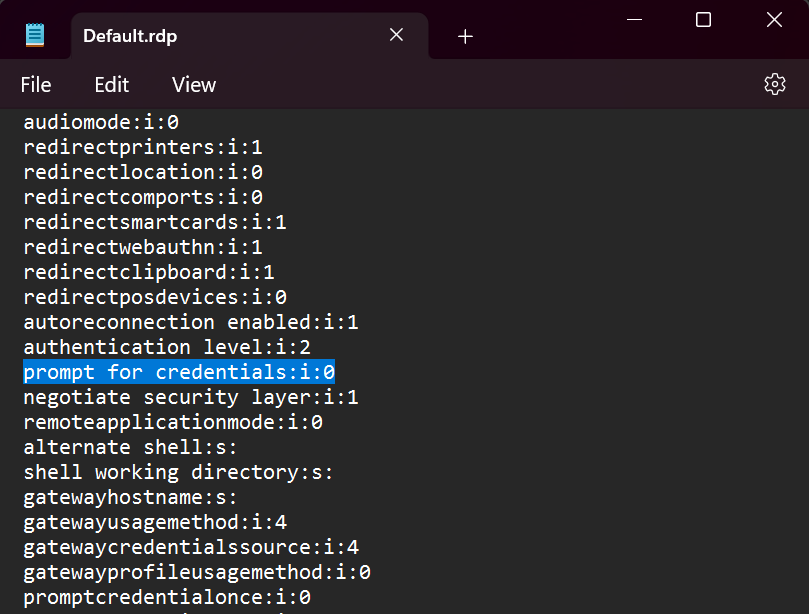
Changes in Default.rdp file - Navigate to the Documents (My Documents) folder and look for the Default.rdp file in that folder. If the file is present, look for prompt for credentials: i:1 and change that to prompt for credentials:i:0. Save the changes and then try launching the RDP session through Securden.
Group Policy
Always prompt for password upon connection.
- Open Run command and open gpedit.msc or gpmc.msc depending on your need.
- Navigate to Computer Configuration >> Administrative Templates >> Windows Components >> Remote Desktop Services >> Remote Desktop Session Host >> Security. Look for the policy named Always prompt for password upon connection.
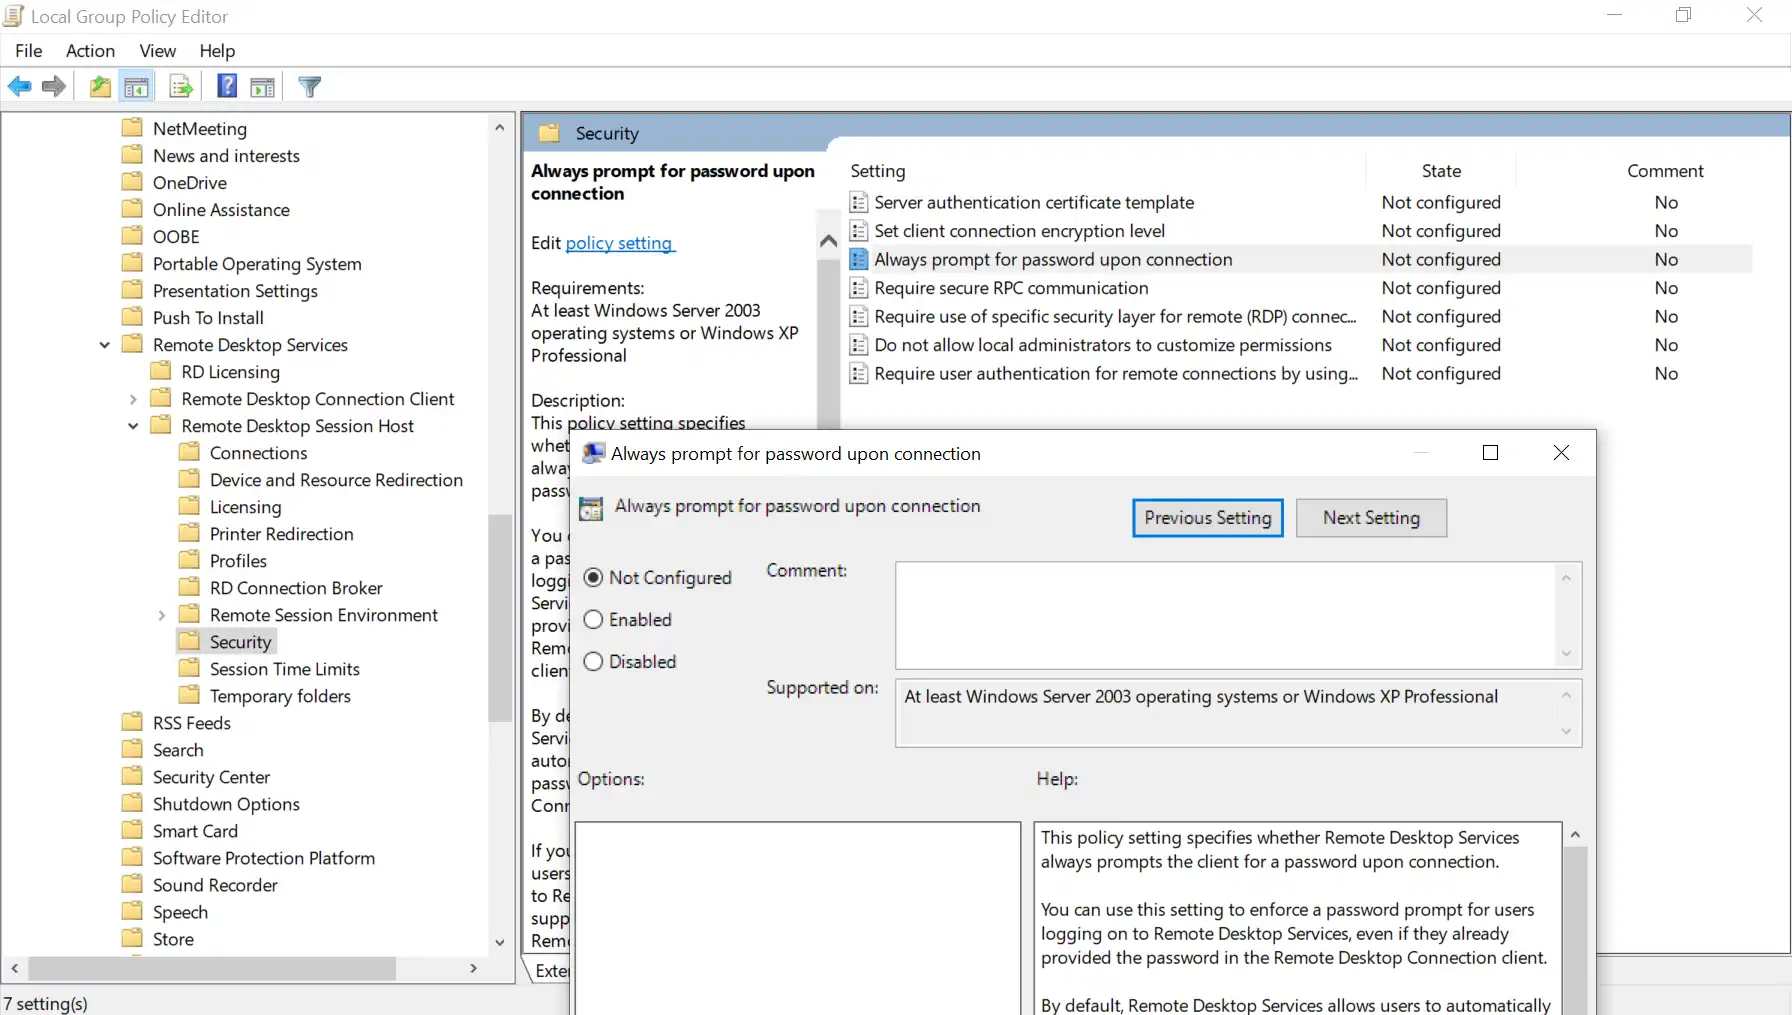
- Double-click the policy and disable it.
- Save the changes.
- If a domain level policy is to be updated, you need to additionally run the command gpupdate/force in the command prompt as an administrator.
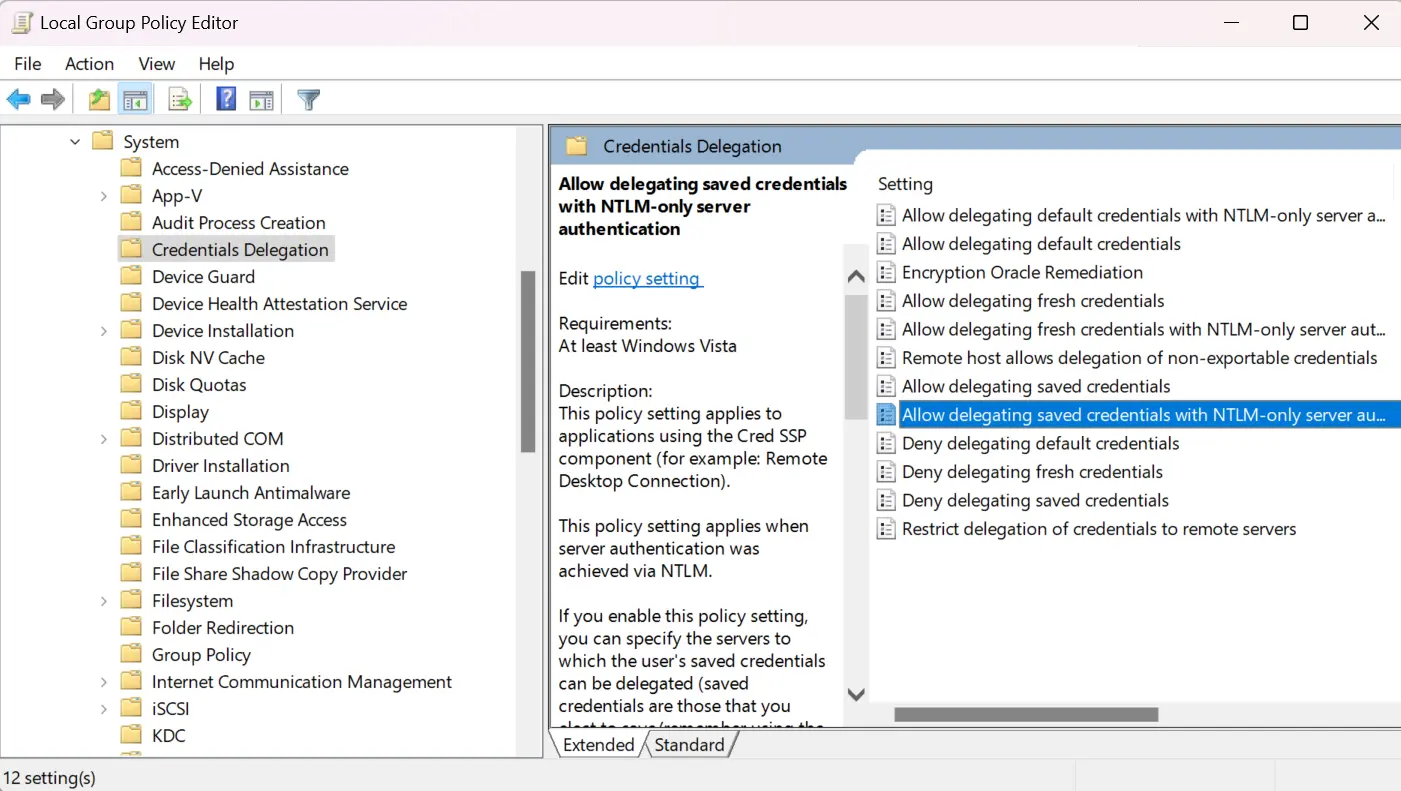
Allow delegating saved credentials with NTLM-only server authentication.
- Open Run command and open gpedit.msc or gpmc.msc depending on your need.
- Go to Computer Configuration >> Administrative Templates >> System >> Credentials Delegation. Look for the policy named Allow delegating saved credentials with NTLM-only server authentication.
- Double-click the policy and enable it.
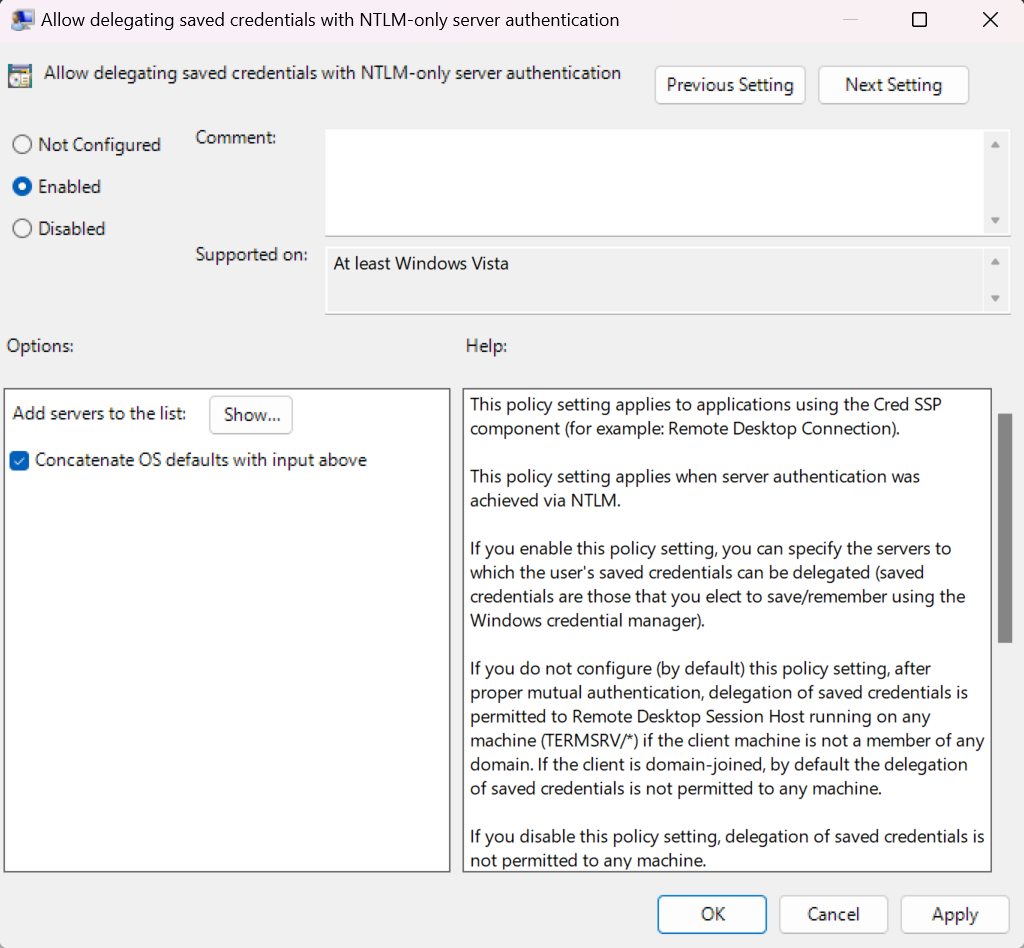
- Click the Show... button and specify the list of remote computers (servers) that are allowed to use saved credentials when accessed over RDP. The list of remote computers must be specified in the following format:
- TERMSRV/server1 — allow to use a saved credentials to access a specific computer/server over RDP;
- TERMSRV/*.securden.com — allow to establish RDP connection with saved credentials to all computers in the securden.com domain;
- TERMSRV/* — allow you to use a saved password to connect to any remote computer.
- Save the changes.
- If domain level policy is to be updated, you need to additionally run the command gpupdate /force in the administrator command prompt.
Deny delegation saved credentials
- Open Run command and type gpedit.msc or gpmc.msc depending on your need.
- Go to Computer Configuration >> Administrative Templates >> System >> Credential Delegation. Look for the policy named Deny delegation saved credentials.
- Double-click the policy and disable it.
- Save the changes.
- If domain level policy is to be updated, you need to additionally run the command gpupdate /force in the administrator command prompt.
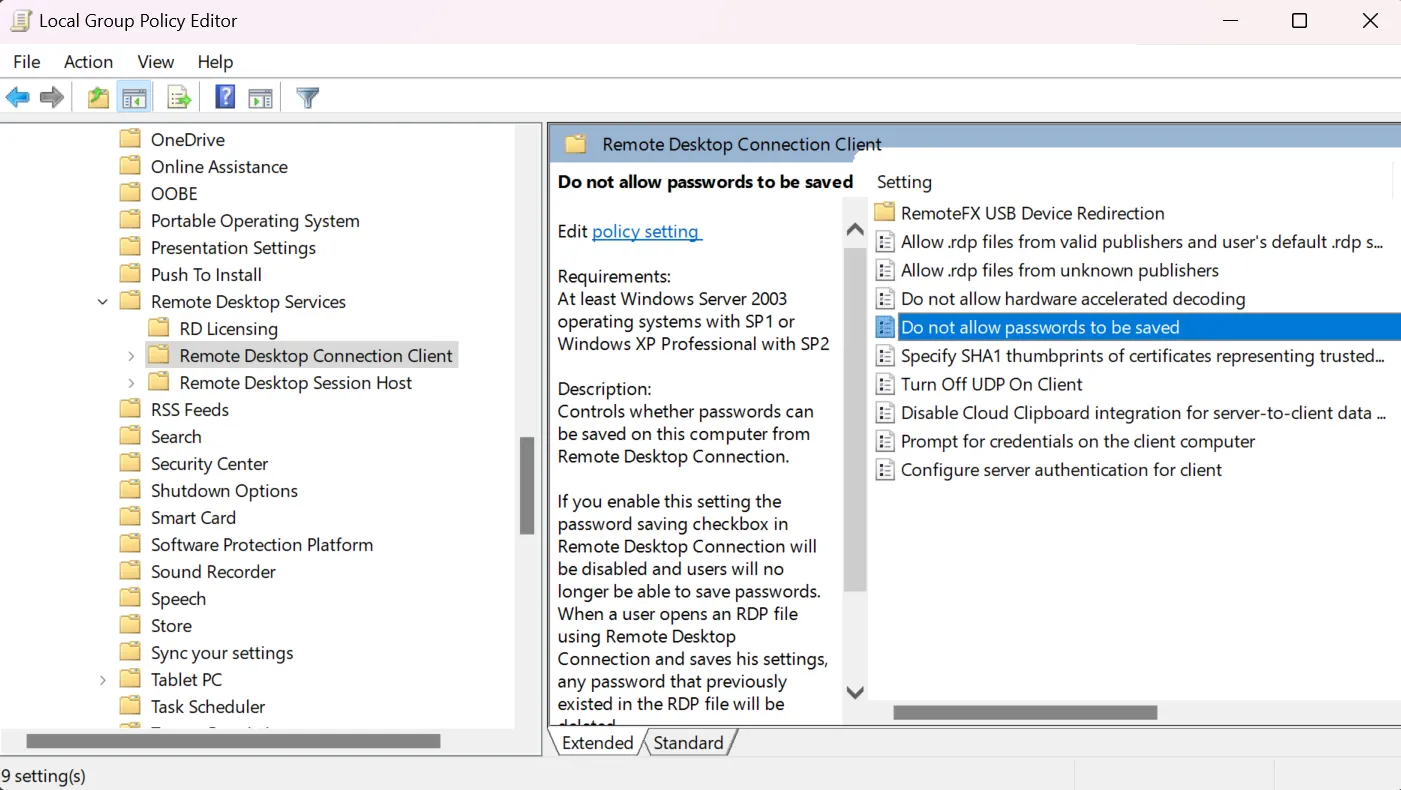
Do not allow passwords to be saved
- Open Run command and type gpedit.msc or gpmc.msc depending on your need.
- Go to Computer Configuration >> Administrative Templates >> Windows Components >> Remote Desktop Services >> Remote Desktop Connection Client. Find the policy named Don’t allow passwords to be saved.
- Double-click the policy. Disable it.
- Save the changes.
- If domain level policy is updated, you need to additionally run the command gpupdate /force in the administrator command prompt.
Network Access: Do not allow storage of passwords and credentials for network authentication
- Open Run command and type gpedit.msc or gpmc.msc depending on your need.
- Go to Computer Configuration >> Windows Settings >> Security Settings >> Local Policies >> Security Options. Look for the policy named Network Access: Do not allow storage of passwords and credentials for network authentication.
- Double-click the policy and disable it.
- Save the changes.
- If domain level policy is to be updated, you need to additionally run the command gpupdate /force in the administrator command prompt.